More '73 Buick Century "Blue Collar Buick" Episodes
MuscleCar Builds
Want more content like this?
Join the PowerNation Email NewsletterParts Used In This Episode
[none]
225/35R20 General Exclaim UHP
[none]
245/40R20 General Exclaim UHP
[none]
KMC Series 701 Nova 20 x 8.5
Auto Body Color & Supply Co.
Paint and prep supplies.
Video Transcript
Today on muscle car, blue collar buick turns outrageous orange. Pick up some insider tips on blocking and paint prep and learn how to lay out a unique two tone plus, we'll crack open the six pack on the street version of Dodges trans
AM racer.
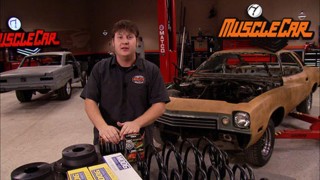
Hey guys, welcome to muscle car. The blue collar buick here is going to be going through a major transformation today and by the end of the show, you might not even recognize it. Yeah, you guessed it. It's finally time to lay down some color.
It's amazing how a paint job can change the look of an entire car. Even with all the improvements we made, the attitude adjustment isn't gonna take true effect until we get a fresh coat of cool.
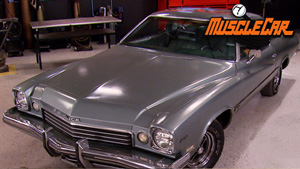
There wasn't much cool to speak of when it arrived in its coat of pea green,
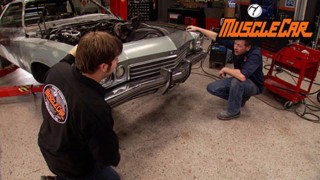
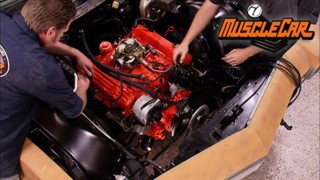
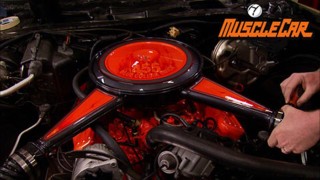
but a big block 455 and new suspension has started to change all that. Some low buck touches like modern door handles, custom tail lights and engine compartment makeover and an awesome air cleaner notched up the cool but kept us on budget.
Speaking of budget now is a good time to see how much of ours we've already chewed through. I remember the original concept for this build was to do the whole thing for under 10 grand. Now, you and I both know how quick that can go away. So let's break it down. See how much we've used and how many fun tickets we still have left.
Ok. We spent 1500 on the car, 100 and 50 for the roof and a total of 2418 for the engine rebuild, trans adapter and shift kit
at 1436 for suspension and brakes, cosmetic items like door handles,
taillights, air cleaner and spray paints came to 356 and miscellaneous parts were 265. That's a grand total of only 6125 and leaves us with 3875 for paint and body wheels and tires and interior. So we're right on track.
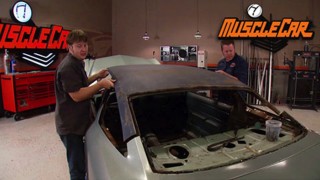
A good way to keep cost down is to do as much of the work as possible yourself. Like blocking. If you had to pay someone to do this, it would cost you an arm and a leg, but do it yourself all it cost you some sandpaper and some time
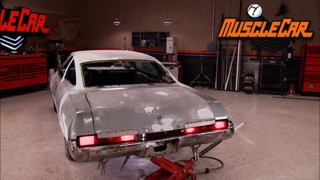
blocking out a car is one of the most critical steps in a quality paint job. Concave surfaces like this can really mess with you. So make sure that you use a block that matches the contour of your surface that you're sanding on.
Otherwise you're just going to start sanding a bunch of lines into it.
Also, make sure when you're standing,
don't stand straight up and down like this because you'll do the same thing just like it's starting to do there that quick. You start cutting grooves into your surface. They're a pain in the butt to sand, back out, move it across and keep your block at an angle.
Give you a nice clean surface to paint on it.
And if you're standing like this, don't forget, you also need to cross your pattern.
That way you can blend it all together.
One last thing
don't run over the top of your body lines because by leaving that guide coat right along that edge, it's gonna tell you if your body lines are still straight. Save that for the very last thing
while blocking, it's almost guaranteed that you're gonna run across some nicks of chips kinda like these.
Now, you could send this thing out, but you're running a risk of actually digging the panel out, creating a dip or wave which you'll see once you throw on a bunch of shining
me, I usually choose to go ahead and fix it with a razor blade.
I like using a razor blade because it applies the perfect amount.
Now, once this dries, it takes almost no effort to sand off the excess, then you can move on which makes you a whole lot more efficient.
Now, here's a perfect example of why you use guide code. It shows you where all your low spots are. Apparently, we have a little bit of an unwanted body line there.
The other thing is when you're standing,
always bring it down to the body line, especially in an area like this because we basically reshaped the whole bottom lip of this trunk lid. So that means we had to build a new body line. So just keep blocking it,
but leave that edge. And that'll tell you when your body lines are straight.
When block sanding, I like to do it in two steps. First would be the course cut which is 80 to 120
then follow that with a finer grid at 180 to 220. What this does is cuts down your sanding scratches to help prevent shrinkage. What is shrinkage? Shrinkage is whenever your primer starts to dry out. Now, if this starts to happen, whenever you've got paint on it, man, it just looks horrible. Now, I put some guide code on it to help it show up better. So spend some time and stand it finer. Trust me, it's worth it. It's just cheap insurance.
Another really important aspect of blocking out a car is knowing when to stop. And here's a perfect example of that.
We've got metal showing here, filler guide coat and we still have a low spot running across the body line
that indicates we may have gotten a little bit fast in finishing out our body work and getting ready for prime. But at this point, continuing, blocking on this, all it's going to do is make it worse and waste your time because you're gonna have to go back over it. So at this point, stop, finish the body work and get it ready for a reprime.
Another tip on sanding is use the longest block you can on the panel for a couple of reasons. The longer the block, the easier it is to sand that panel flat. Second, that's more surface area allowing you to sand it faster. We've still got a lot of sanding to do. Hand. Got hold on some final primer. So y'all stick around after the break and we'll give you some tips on final sanding
coming up. Rick reveals his secrets to laying out the perfect.
Hey guys, welcome back. We got a final coat of primer and blue collar buick here and got all the guide coat laid down. I've heard a lot of guys ask, why can't you just use black spray paint as guide coat? Well, there's a good reason for that
true guide coat is actually a sprayable form of carbon where a spray paint, what's gonna jam up your paper is your sanding and cause you more problems. Now, it's no denying that sending a car is hard work. So you're probably gonna end up breaking a sweat.
So you don't wanna be dripping all your goo all over the car because this can cause contamination which leads to fish ice and can be a bear in the booth when you try to fix it. So just be cautious of this while you're standing in the car to keep all that from happening.
That's two basic techniques. When you're blocking out a car, there's either wet sanding or dry sanding. There's advantages and disadvantages to both. One of the big disadvantages of wet sanding is the fact that by the time you're done,
you are gonna have a whole bunch of sludge. You're gonna have to go back and clean up. But on the bright side,
kind of cleans the surface as you go, you can squeegee it off
and see where you're at.
A
dry sandy. I don't think it gives you quite a smooth of a surface, but on the bright side, it's a lot easier to simply go over it and blow it off and clean it back up.
But my preferred method obviously is wet in it. So I'm gonna get this dude cleaned up. We'll see you guys in the booth.
A clean surface is critical to a good paint job. So after all that sanding, we blew it out real well. Mask it off and then wiped it down with some paint prep. Now she's ready for some color.
Now, if you don't remember our plans for the paint scheme, let me refresh your memory. Now, we have made a few changes since this rendering was done, namely, we're going to add a silver stripe inside of this red that breaks the charcoal from the orange.
Now, when you're dealing with multiple colors like this, you need to plan ahead. So I'm gonna be laying down the red first because that color is gonna dictate where all the other colors end up,
even though the red stripes are only going to be an eighth of an inch wide. I'm laying down a pretty wide stripe to give myself plenty of wiggle room. When I lay out the design,
the quickest and most accurate way to lay out long stripes is to pull the longest lines that you can.
This helps keep your stripes from looking wavy.
This half inch tape is going down as a guide to keep the graphics straight and consistent.
Once the upper red stripe is laid out, the guide tape can go
next. I can lay down silver in the center of the strike.
After about 20 minutes of flash time, it's time to cover it all up to prevent the orange from bleeding into the graphic. I'm covering the entire strike then coming back and trimming it to expose the outside edge of where the final colors will meet
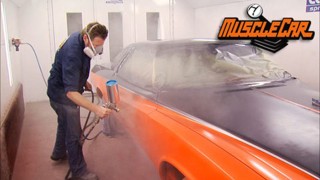
this in your face. Orange is far from custom. It's just straight PPGD MD 617 toner.
But to make this basic toner look custom, I'm topping it off with a mixture of orange and gold pearl.
I'm fogging in some candy tangerine on the Rockers. This will give a subtle fade to the lower half of the car
a once it's dry, I can mask off for the final color.
And when you're doing any kind of two tone, it's really important to seal up all the gaps between panels where color is going to travel inside the car and come out where you really don't expect it.
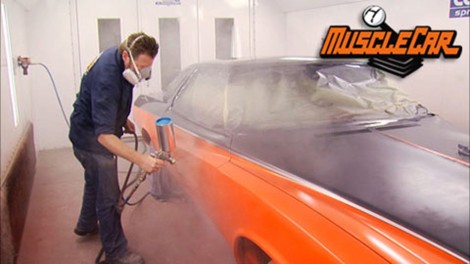
The last color is a metallic charcoal called dark smoke poly, also known as GM code number 14. It'll take three coats to cover and a dust coat to even out the metallic
blooding square
after the break. A one year wonder that had all the goodies dodge had to offer.
Today's flashback. A 1970 Challenger T A.
You guys ready for a little TN A
that T
as in the 1970 Challenger T
those letters stand for Trans Am. The road course series dominated by Z 28 S and Boss 302
dodged through its white hat in the ring with this fierce new pony car and a muscle car legend was born.
Trans Am. Rules stated you had to sell what you raised. So the street version was every bit as powerful. It all started with the vicious 346 pack.
That was your only engine choice and no other dots had it
horsepower was underrated at 290. Yeah. Try closer to 350. Part of its power came from the innovative snorkel scoop which was raised an inch above the hood.
This helped it avoid the slower choppier air on the hood surface. The oval air cleaner sealed directly to the fiberglass hood for maximum airflow crack open a six pack and you'll find 32 barrel carbs sitting on top of the Edelbrock aluminum IND de keeping with the race image, the exhaust exited in front of the rear tires to achieve this. The pipes had to do a U turn inside the mufflers.
The T A was also the first muscle car to come stocked with two different size tires
up front. You had E 6015 S
and in the back, the fatter G 6015 s
front and rear spoilers and a race style gas cap completed the look. The rear leaf springs got an increased camber and load rating to make room for the B tires and side exhaust,
front and rear sway bars were stiffer shocks were heavy duty and power, front disc brakes were mandatory inside a Hearst pistol grip, put all that firepower in the palm of your hand bucket seats and Riley gauges were included but AC was in a on the T A.
The Challenger line debuted in 70
was built on the all new Ebo
platform.
It shared some styling with its sister car,
the
coda
but challengers rode on a two inch longer wheelbase,
the body line crease
headlights and venturi grill helped set it apart.
You can tell a true T A by the fender tag. It's got to have trans AM stamped on it. This all original numbers matching Beauty was bought by John Grant back in 1975 and restored to stock just a few years ago by George Steel restorations.
Being a kid. It was a fun car to drive.
It was fast and it got a lot of attention. You don't need a radio. It's, it's loud and the exhaust note is kind of what you're listening for. Anyway. Tas didn't do it well on the race circuit as hoped though, it did make a few top three finishes.
Dodge only managed to sell about 2400 partly because the Trans
Am package, it cost over 1000 bucks.
There were plans to offer it again in 71.
It even showed up in the scat pack brochure.
But Dodge, they were pulling out of racing and the muscle car market was starting to fade.
The 70 T A ended up a one year only model making it highly sought after the day. Good luck catching up with this one
did paint wheels and tires blow our budgets. Find out after the break. I think we can still do it.
You're watching muscle car for a DVD copy of this episode, just go to Power Block tv.com and order your copy for just 595 plus shipping and handling. Start your own muscle car collection delivered right to your door. From the power block.
Hey guys, welcome back. We're down to my favorite part of a paint job and that's where you get to unmask it. See how it's gonna look.
You got to resist the urge to jump in there and just start really ripping and tearing. You gotta be careful with this.
What you been up to
c
there you are.
Where the heck you've been taking a nap playing on the inf internet. No,
no, I'm not supposed to be looking on that while I'm at work
here. I'll get this. Don't worry about it.
All right guys. Now, normally, the next thing that we show you here is the clear coat going on, but I'm gonna let you in on a little secret, kind of a behind the scenes sort of a thing. I know a lot of you guys think that we somehow work out of some swirling vortex of perfection here, but it's just not true. We get problems just like everybody else and I'm gonna show you a little secret here before you put down the clear coat.
It's a good idea to go over the whole thing with some DX 330
look for spots just like this. Now, these are actually marks that are left by the tape and the base coat. Now, they look pretty bad without the clear coat on them. But the 330 will show you that with the clear on it,
they'll turn invisible. So it's nothing to worry about
this right here though. That's a whole another story because paint will bleed underneath your tape. That's gotta be fixed
and spots in the pinstripe like that red.
I usually use good old fashioned striping brush. But if you don't have one of these, you can always go back re mask it
and spot it in with a gun.
But I've just found this is a whole lot faster and for me, a lot easier
as that dries, it'll darken up and you won't even see it.
That's about all there is to it. I'm gonna go around this car here, clean up a few wedges and then be ready to clear it.
You got,
I'm using PPG 2021 clear that we could have used cheaper materials. But I've sprayed a lot of this 2021 and trust me, it's worth the extra few dollars. It has excellent UV protection and polishes out like glass
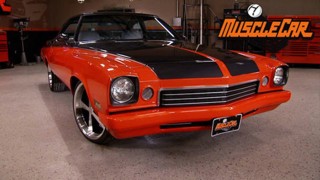
and for all you haters out there that swore that the buick would never be cool. Check this out and all the materials for the paint. Around 1150 bucks, tire rack, hooked us up with a set of 20 inch wheels with tires for only 1500.
That may seem like a big chunk of our tiny budget. But hey,
it's gonna make up a big chunk of the overall look and that leaves us over 1200 bucks to do the interior and still keep our budget under 10 grand. I think we can still do it because I've got some money saving plans for the interior. Yeah, I got some ideas too, but that's gonna have to wait till next week because for this week we're out of time. So, until next time we're out of here.
Show Full Transcript
AM racer.
Hey guys, welcome to muscle car. The blue collar buick here is going to be going through a major transformation today and by the end of the show, you might not even recognize it. Yeah, you guessed it. It's finally time to lay down some color.
It's amazing how a paint job can change the look of an entire car. Even with all the improvements we made, the attitude adjustment isn't gonna take true effect until we get a fresh coat of cool.
There wasn't much cool to speak of when it arrived in its coat of pea green,
but a big block 455 and new suspension has started to change all that. Some low buck touches like modern door handles, custom tail lights and engine compartment makeover and an awesome air cleaner notched up the cool but kept us on budget.
Speaking of budget now is a good time to see how much of ours we've already chewed through. I remember the original concept for this build was to do the whole thing for under 10 grand. Now, you and I both know how quick that can go away. So let's break it down. See how much we've used and how many fun tickets we still have left.
Ok. We spent 1500 on the car, 100 and 50 for the roof and a total of 2418 for the engine rebuild, trans adapter and shift kit
at 1436 for suspension and brakes, cosmetic items like door handles,
taillights, air cleaner and spray paints came to 356 and miscellaneous parts were 265. That's a grand total of only 6125 and leaves us with 3875 for paint and body wheels and tires and interior. So we're right on track.
A good way to keep cost down is to do as much of the work as possible yourself. Like blocking. If you had to pay someone to do this, it would cost you an arm and a leg, but do it yourself all it cost you some sandpaper and some time
blocking out a car is one of the most critical steps in a quality paint job. Concave surfaces like this can really mess with you. So make sure that you use a block that matches the contour of your surface that you're sanding on.
Otherwise you're just going to start sanding a bunch of lines into it.
Also, make sure when you're standing,
don't stand straight up and down like this because you'll do the same thing just like it's starting to do there that quick. You start cutting grooves into your surface. They're a pain in the butt to sand, back out, move it across and keep your block at an angle.
Give you a nice clean surface to paint on it.
And if you're standing like this, don't forget, you also need to cross your pattern.
That way you can blend it all together.
One last thing
don't run over the top of your body lines because by leaving that guide coat right along that edge, it's gonna tell you if your body lines are still straight. Save that for the very last thing
while blocking, it's almost guaranteed that you're gonna run across some nicks of chips kinda like these.
Now, you could send this thing out, but you're running a risk of actually digging the panel out, creating a dip or wave which you'll see once you throw on a bunch of shining
me, I usually choose to go ahead and fix it with a razor blade.
I like using a razor blade because it applies the perfect amount.
Now, once this dries, it takes almost no effort to sand off the excess, then you can move on which makes you a whole lot more efficient.
Now, here's a perfect example of why you use guide code. It shows you where all your low spots are. Apparently, we have a little bit of an unwanted body line there.
The other thing is when you're standing,
always bring it down to the body line, especially in an area like this because we basically reshaped the whole bottom lip of this trunk lid. So that means we had to build a new body line. So just keep blocking it,
but leave that edge. And that'll tell you when your body lines are straight.
When block sanding, I like to do it in two steps. First would be the course cut which is 80 to 120
then follow that with a finer grid at 180 to 220. What this does is cuts down your sanding scratches to help prevent shrinkage. What is shrinkage? Shrinkage is whenever your primer starts to dry out. Now, if this starts to happen, whenever you've got paint on it, man, it just looks horrible. Now, I put some guide code on it to help it show up better. So spend some time and stand it finer. Trust me, it's worth it. It's just cheap insurance.
Another really important aspect of blocking out a car is knowing when to stop. And here's a perfect example of that.
We've got metal showing here, filler guide coat and we still have a low spot running across the body line
that indicates we may have gotten a little bit fast in finishing out our body work and getting ready for prime. But at this point, continuing, blocking on this, all it's going to do is make it worse and waste your time because you're gonna have to go back over it. So at this point, stop, finish the body work and get it ready for a reprime.
Another tip on sanding is use the longest block you can on the panel for a couple of reasons. The longer the block, the easier it is to sand that panel flat. Second, that's more surface area allowing you to sand it faster. We've still got a lot of sanding to do. Hand. Got hold on some final primer. So y'all stick around after the break and we'll give you some tips on final sanding
coming up. Rick reveals his secrets to laying out the perfect.
Hey guys, welcome back. We got a final coat of primer and blue collar buick here and got all the guide coat laid down. I've heard a lot of guys ask, why can't you just use black spray paint as guide coat? Well, there's a good reason for that
true guide coat is actually a sprayable form of carbon where a spray paint, what's gonna jam up your paper is your sanding and cause you more problems. Now, it's no denying that sending a car is hard work. So you're probably gonna end up breaking a sweat.
So you don't wanna be dripping all your goo all over the car because this can cause contamination which leads to fish ice and can be a bear in the booth when you try to fix it. So just be cautious of this while you're standing in the car to keep all that from happening.
That's two basic techniques. When you're blocking out a car, there's either wet sanding or dry sanding. There's advantages and disadvantages to both. One of the big disadvantages of wet sanding is the fact that by the time you're done,
you are gonna have a whole bunch of sludge. You're gonna have to go back and clean up. But on the bright side,
kind of cleans the surface as you go, you can squeegee it off
and see where you're at.
A
dry sandy. I don't think it gives you quite a smooth of a surface, but on the bright side, it's a lot easier to simply go over it and blow it off and clean it back up.
But my preferred method obviously is wet in it. So I'm gonna get this dude cleaned up. We'll see you guys in the booth.
A clean surface is critical to a good paint job. So after all that sanding, we blew it out real well. Mask it off and then wiped it down with some paint prep. Now she's ready for some color.
Now, if you don't remember our plans for the paint scheme, let me refresh your memory. Now, we have made a few changes since this rendering was done, namely, we're going to add a silver stripe inside of this red that breaks the charcoal from the orange.
Now, when you're dealing with multiple colors like this, you need to plan ahead. So I'm gonna be laying down the red first because that color is gonna dictate where all the other colors end up,
even though the red stripes are only going to be an eighth of an inch wide. I'm laying down a pretty wide stripe to give myself plenty of wiggle room. When I lay out the design,
the quickest and most accurate way to lay out long stripes is to pull the longest lines that you can.
This helps keep your stripes from looking wavy.
This half inch tape is going down as a guide to keep the graphics straight and consistent.
Once the upper red stripe is laid out, the guide tape can go
next. I can lay down silver in the center of the strike.
After about 20 minutes of flash time, it's time to cover it all up to prevent the orange from bleeding into the graphic. I'm covering the entire strike then coming back and trimming it to expose the outside edge of where the final colors will meet
this in your face. Orange is far from custom. It's just straight PPGD MD 617 toner.
But to make this basic toner look custom, I'm topping it off with a mixture of orange and gold pearl.
I'm fogging in some candy tangerine on the Rockers. This will give a subtle fade to the lower half of the car
a once it's dry, I can mask off for the final color.
And when you're doing any kind of two tone, it's really important to seal up all the gaps between panels where color is going to travel inside the car and come out where you really don't expect it.
The last color is a metallic charcoal called dark smoke poly, also known as GM code number 14. It'll take three coats to cover and a dust coat to even out the metallic
blooding square
after the break. A one year wonder that had all the goodies dodge had to offer.
Today's flashback. A 1970 Challenger T A.
You guys ready for a little TN A
that T
as in the 1970 Challenger T
those letters stand for Trans Am. The road course series dominated by Z 28 S and Boss 302
dodged through its white hat in the ring with this fierce new pony car and a muscle car legend was born.
Trans Am. Rules stated you had to sell what you raised. So the street version was every bit as powerful. It all started with the vicious 346 pack.
That was your only engine choice and no other dots had it
horsepower was underrated at 290. Yeah. Try closer to 350. Part of its power came from the innovative snorkel scoop which was raised an inch above the hood.
This helped it avoid the slower choppier air on the hood surface. The oval air cleaner sealed directly to the fiberglass hood for maximum airflow crack open a six pack and you'll find 32 barrel carbs sitting on top of the Edelbrock aluminum IND de keeping with the race image, the exhaust exited in front of the rear tires to achieve this. The pipes had to do a U turn inside the mufflers.
The T A was also the first muscle car to come stocked with two different size tires
up front. You had E 6015 S
and in the back, the fatter G 6015 s
front and rear spoilers and a race style gas cap completed the look. The rear leaf springs got an increased camber and load rating to make room for the B tires and side exhaust,
front and rear sway bars were stiffer shocks were heavy duty and power, front disc brakes were mandatory inside a Hearst pistol grip, put all that firepower in the palm of your hand bucket seats and Riley gauges were included but AC was in a on the T A.
The Challenger line debuted in 70
was built on the all new Ebo
platform.
It shared some styling with its sister car,
the
coda
but challengers rode on a two inch longer wheelbase,
the body line crease
headlights and venturi grill helped set it apart.
You can tell a true T A by the fender tag. It's got to have trans AM stamped on it. This all original numbers matching Beauty was bought by John Grant back in 1975 and restored to stock just a few years ago by George Steel restorations.
Being a kid. It was a fun car to drive.
It was fast and it got a lot of attention. You don't need a radio. It's, it's loud and the exhaust note is kind of what you're listening for. Anyway. Tas didn't do it well on the race circuit as hoped though, it did make a few top three finishes.
Dodge only managed to sell about 2400 partly because the Trans
Am package, it cost over 1000 bucks.
There were plans to offer it again in 71.
It even showed up in the scat pack brochure.
But Dodge, they were pulling out of racing and the muscle car market was starting to fade.
The 70 T A ended up a one year only model making it highly sought after the day. Good luck catching up with this one
did paint wheels and tires blow our budgets. Find out after the break. I think we can still do it.
You're watching muscle car for a DVD copy of this episode, just go to Power Block tv.com and order your copy for just 595 plus shipping and handling. Start your own muscle car collection delivered right to your door. From the power block.
Hey guys, welcome back. We're down to my favorite part of a paint job and that's where you get to unmask it. See how it's gonna look.
You got to resist the urge to jump in there and just start really ripping and tearing. You gotta be careful with this.
What you been up to
c
there you are.
Where the heck you've been taking a nap playing on the inf internet. No,
no, I'm not supposed to be looking on that while I'm at work
here. I'll get this. Don't worry about it.
All right guys. Now, normally, the next thing that we show you here is the clear coat going on, but I'm gonna let you in on a little secret, kind of a behind the scenes sort of a thing. I know a lot of you guys think that we somehow work out of some swirling vortex of perfection here, but it's just not true. We get problems just like everybody else and I'm gonna show you a little secret here before you put down the clear coat.
It's a good idea to go over the whole thing with some DX 330
look for spots just like this. Now, these are actually marks that are left by the tape and the base coat. Now, they look pretty bad without the clear coat on them. But the 330 will show you that with the clear on it,
they'll turn invisible. So it's nothing to worry about
this right here though. That's a whole another story because paint will bleed underneath your tape. That's gotta be fixed
and spots in the pinstripe like that red.
I usually use good old fashioned striping brush. But if you don't have one of these, you can always go back re mask it
and spot it in with a gun.
But I've just found this is a whole lot faster and for me, a lot easier
as that dries, it'll darken up and you won't even see it.
That's about all there is to it. I'm gonna go around this car here, clean up a few wedges and then be ready to clear it.
You got,
I'm using PPG 2021 clear that we could have used cheaper materials. But I've sprayed a lot of this 2021 and trust me, it's worth the extra few dollars. It has excellent UV protection and polishes out like glass
and for all you haters out there that swore that the buick would never be cool. Check this out and all the materials for the paint. Around 1150 bucks, tire rack, hooked us up with a set of 20 inch wheels with tires for only 1500.
That may seem like a big chunk of our tiny budget. But hey,
it's gonna make up a big chunk of the overall look and that leaves us over 1200 bucks to do the interior and still keep our budget under 10 grand. I think we can still do it because I've got some money saving plans for the interior. Yeah, I got some ideas too, but that's gonna have to wait till next week because for this week we're out of time. So, until next time we're out of here.