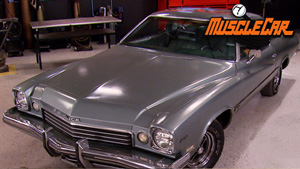
More '73 Buick Century "Blue Collar Buick" Episodes
MuscleCar Builds
Want more content like this?
Join the PowerNation Email NewsletterVideo Transcript
Today on muscle car, Tommy flexes his fab skills and Rick gets artistic with his airbrush to create a one off piece for the Buick. Check out a super rare Ford prototype that never made it to the NASCAR circuit and clean your tank without breaking the bank.
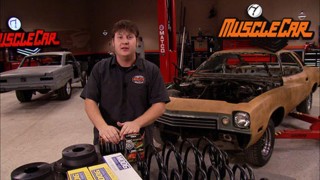
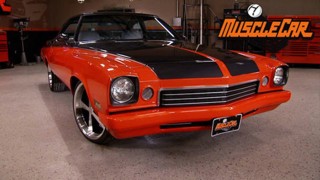
Hey guys, welcome to muscle car. A lot of you Buick fans out there have written in to let us know how much you dig on watching blue collar buick here. Come together.
Let me let you in on a little secret before we picked up our 73 century. We thought about building a whole different kind of buick and numbers matching GS. But considering how tight cash is these days, we thought a low B build would be the way to go and a GS just doesn't really fall into that kind of category
with a build budget of 10 grand
1500. We paid for this gas was right on target.
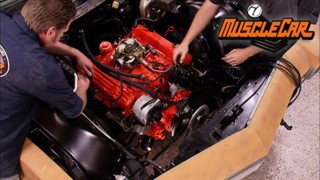
We put a big chunk of cash into the buick 455. Then gave the century some inexpensive upgrades and used old fashioned ingenuity to come up with some money saving ideas that'll set our buick apart from the crowd.
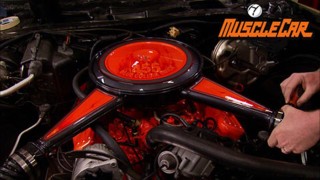
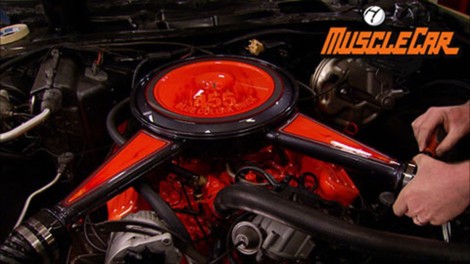
And even though our budget didn't allow for a true GS, we can incorporate one of the features that they use a dual snorkel air cleaner. Yeah, those things were cool. They came on the
86
and early seventies model GSS.
They even offered it in 73 although it wasn't fresh air and they may be cool. But man, they are not cheap. So what's our solution?
You got it? We're gonna build our own and it's even gonna be functional. No, we're not gonna be knocking a couple of holes in the hood, but we are gonna be getting rid of something on the nose of this car that I have hated from day one. These fish bowl parking lights. Now to keep those snorkels breathing, we're gonna run ducks all the way up to the
openings. Now. True. That means we're gonna have to find a different place for the lights, but no worries. We'll show you plans for that another time.
We're gonna use a stock air cleaner base and graft in the intake tubes from these two. We picked up at the junk yard. They were only about 10 bucks and they got the round ends. We need to hook up to the air ducts. First up is to separate all the good stuff from the junk. The only part of the salvage yard air cleaners we're going to use is the snorkel. So the rest is going into the recycle bin,
we won't be using the cold start actuator so they can go too.
I'm grinding the spot wheels out from the inside so I can remove the extra metal. Being careful not to damage the part. We need
the snorkel on the stock air cleaner won't be used. So I'll add it to the cast off file
since the new snorkels will be in different spots. I'll be feeling the whole, the old one left behind.
I'll get it ground down flush so I can weld a patch in later
with the base in place. I can clock and mark the new parts, making sure they're even and not causing any clearance problems
before I attach the new inlets. I'll get this old hole plugged up.
I'm using a whole so
to radius the ends of the nude ports. This will duplicate the look of the stock air cleaner.
The metal on these is pretty thin. So it's a good idea to dial your welder back some. Keep them burning through.
Mhm.
Hey, man. Check out my air cleaner.
That's looking smooth. That's what I thought. I dig it. You got something figured out for our air inlet. Yeah, I kind of use a marker light here as a guide.
I built a ring that'll set in there and from there, I'm gonna use a chunk of three inch exhaust tubing,
cut it off, kind of short and weld it onto there. Come off with a couple of tabs and that'll actually give us the same size to go right into it. Inlets on your new air cleaner. Sounds like you got that C throat. So I'm gonna go find me a cupcake.
Since I premade my template, I just need to transfer it to some 16 gauge steel and get it chopped out.
If you don't have a banda,
don't sweat. It just grab an AA
or tin snips for this
with a piece. This simple, a little hand foreman will get the job done.
Now, once I got it pretty close, I'll throw a tack weld on it to keep its shape.
Now, here is where the three inch exhaust tubing comes in a few more tacks
and some shaping and I can burn it all together.
Air intakes are just about done and they're looking pretty cool, but I still have to get them mounted. I snuck over to extreme, swiped a couple of these little taps and I'm thinking they should be able to weld on there, get this thing mounted. We'll call it good.
Uh Those will work perfect.
I still need to connect my air inlets to the snorkels to do that. I just use a basic piece of flexible hose. Now, the air cleaner may be the last thing to go on the engine before you shut the hood, but it's the first thing you see when you pop it open.
So I'm gonna take this dude off, clean it up. Give him my personal touch
coming up, find out how Rick turns this air cleaner into one hot item. That looks pretty doggone good right there.
Hey, guys, I know you might think the body work in an air cleaner is a little bit overkill, but don't forget this stuff is 35 plus years old and it's been ground on welded up, modified and I sure as heck ain't gonna put all my nice paint work on right over the top of it. So I'm gonna treat these parts just like I would any other body panel
and that means smoothing out all the imperfections with body filler, sanding it down,
getting some primer on it,
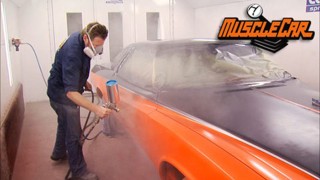
giving it yet another sanding and then spraying on the base coat
and this thing is looking pretty smooth here and just a solid color gray. And I wouldn't be embarrassed a bit to clear it and run it as is. But we got other plans.
Masking is a critical part of painting graphics. The air cleaner will match the color skin we have planned for the car charcoal and orange two tone with the silver and red accent stripe
with the charcoal down as a base. The red stripe goes on next. So I'm masking off everything else.
I mix up a dark red to complement the gray and orange and laid it down on the lid base
and once it dries, I'll cover the parts that'll stay red.
The rest of this area will remain exposed and be shot with the silver.
Next, I can remove the masking and cover up everything that won't be orange.
You got a little sneak peek of this orange on the engine and in keeping with our budget theme, it's nothing fancy. Just ad MD 617 toner straight out of the can
topping it off with a mixture of two pearls will give this budget color a high dollar look
to save some time. I printed my graphics onto some transfer paper instead of hand drying. It.
Next comes a time consuming process of cutting it out.
Unless you got a plotter man, there's just no way around it.
Now, once it's all cut out carefully, peel off the stencil, then it's finally time to play with some paint.
The colors I'm using here are all custom mixes. I've got several different variations of red, orange and yellow with some white highlights thrown in.
Since these are the only flames on the car. I don't really want them to stand out too much so to make them a little more subtle. I'm gonna darken them up as I go with some candy
with the majority of the design down, I can peel off the mask, then come back and free hand some highlights.
A little bit of yellow candy tones down the white. Then I can unmask the whole thing and seal it all in with some clear.
All right time to see if all this hard work here
is paid off
and that looks pretty doggone good right there. Hard to believe we've only got like 60 bucks wrapped up in this whole setup. That's what a budget build is all about using your skills, not your wallet to build something that you can really be proud of. The last piece of this puzzle is the duct work. I'm hooking them up using a pair of couplers from specter.
I can't wait for someone to ask me to pop the hood on this thing
after the break, Ford's failed attempt at fighting the Aero
Wars.
Today's flashback, a 1970 King Cobra prototype
as the 60 s rolled to a close Ford and Mo
part duped it out on the NASCAR circuit in a battle known as the Arrow
Wars.
Sleek sophisticated designs used aerodynamics to crush the competition.
The blue oval cleaned up in 69 with its slippery fast back Talladega,
but Dodge was closing in with its winged warrior, the Daytona
and Plymouth was about to unleash the superb bird.
Ford had to come up with something fast to stay ahead of the curve.
Enter
the King Cobra.
It started off life on the newly designed Torino body which wasn't as aerodynamic as its predecessors. Ford's special design team led by Larry
Sonoda made a few mods to get it ready for racing.
Inspired by the GT 40. The team crafted a long sloping front end,
but unlike the Mo part
cars. It wasn't just tacked on to the bumper.
The fenders and hood were all original while everything behind the firewall there was stock to Reno
air was sucked through a hood scoop and a grill under the front bumper. The power plant would be a boss 429 race motor capable of 600 plus horsepower.
Sonoda also went with a wingless design mainly for aesthetics and straight ability.
NASCAR still ran stock cars back then and you had to sell 500 units to compete.
Skyscraper wings weren't exactly consumer friendly
testing of the car began in the summer of 69 with K Yarborough in the driver's seat
but the results, well, they were less than stellar.
There was too much for an airlift and not enough down force on the back end causing it to be super squirrelly on the track.
It would have to go back to the drawing board.
They might have solved the problem if France hadn't dropped the bomb.
That's big Bill France, NASCAR president at the time,
he wasn't happy with the craze of new designs coming out of Detroit that ran fast and loose with the term stock. So he changed the homolog
rules from 500 units to 3000
Ford brass balked at that number. So the design fell on the back burner
in October of 69. Internal disputes led to
Sonoda getting canned
the King co
project was dead.
Super Birds dominated in 1970 while most Ford racers ran year old Talladega Ford withdrew factory support the next year and NASCAR engine restrictions brought the Arrow Wars to an end with no clear Victor.
It's estimated that only five prototypes were ever built and just three survived today.
The car handles like a dream.
The only thing you have to watch out for is people passing by running up on the sidewalk looking at it
up next. Don't throw out that old gas tank. We'll show you how to save it from the scrap heap.
You're watching muscle car for a DVD copy of this episode, just go to Power Block tv.com and order your copy for just 595 plus shipping and handling. Start your own muscle car collection delivered right to your door from the power block.
Hey, welcome back to the shop. You've seen a swap out stock gas tanks for new replacements or fancy fuel sales plenty of times.
But we project blue collar. There's really no reason why we can't use the original one. All we need to do is clean it up a bit with the right product and a little bit of time and effort. You can restore your old gas tank and get decades more use out of it. We ordered this kit online but your local part store should be able to help you out too.
This kit includes two types of cleaners and a sealer. All meant to work together for best results.
We drained and dry the tank before we started. So, the first thing to do is to remove the sanding unit. I'm using a brass drift to prevent spat.
I'm covering the hole up with duct tape to keep the chemical from sloshing out during the cleaning process.
Prop the tank up and we're all ready to get the cleaning
now for the chemical, make sure to wear protection because you don't want this stuff on your skin or in your eyes.
Both of the first two chemicals are cleaners and the process for using them is about to sink, start by pouring the solution into the tank.
Once it's in the tank, tape up the filler neck to prevent sloshing,
shake the tank around enough that the insides are totally coated and let it sit for 20 minutes.
Dumping it out can be a challenge. There's a baffle in the filler neck so it's gotta come out the sending unit hole, get a helper and just shake until it's empty.
We've got the tank cleaned and flushed and we're ready to apply the sealer, but we've got to get the tank dry first.
You could use compressed air, but you're running a risk of burning up your compressor because you're gonna use a whole lot of air.
We're gonna use a heat gun. Now, you don't have to have one of these, you could use a hair dryer, but it just take a little longer.
This does take a while. So just keep checking and don't stop until his phone dries.
Now, with the tank all dry, we can move on to the last step. Sealer. This stuff bonds to the inside of the tank forming a liner that stops rust and seals up any pinholes and seams,
pour the sealer in straight from the can, then turn the tank to get an even layer on the inside. Let it set for a few minutes then dump out the excess.
The tank's all good to go on the inside. But what about the outside? We're not gonna install it looking like this. So for that brand new OEM look,
we're using Eastwood's tank tone.
Our tank is completely dry but if your tank even has a little bit of gas in it don't use a steel brush. It could cause a spark and we all know sparks and gas don't mix.
Use a brass or non metallic brush to be safe.
Break cleaner and a scotch bright will get the last of the grease off and a wipe down with Acetone will ensure a well prepped surface.
I'm taping up the ground strap and the sending unit post for a professional look. All that's left now is to work the spray can.
Well, that's one more piece of the buick that we were able to save. It took some time and effort. But now we've got a tank that would look and perform like new for half the cash once this thing dries, I'm gonna throw it up under the car, but we're all out of time for this week. So, until next week y'all keep between the ditches.
Show Full Transcript
Hey guys, welcome to muscle car. A lot of you Buick fans out there have written in to let us know how much you dig on watching blue collar buick here. Come together.
Let me let you in on a little secret before we picked up our 73 century. We thought about building a whole different kind of buick and numbers matching GS. But considering how tight cash is these days, we thought a low B build would be the way to go and a GS just doesn't really fall into that kind of category
with a build budget of 10 grand
1500. We paid for this gas was right on target.
We put a big chunk of cash into the buick 455. Then gave the century some inexpensive upgrades and used old fashioned ingenuity to come up with some money saving ideas that'll set our buick apart from the crowd.
And even though our budget didn't allow for a true GS, we can incorporate one of the features that they use a dual snorkel air cleaner. Yeah, those things were cool. They came on the
86
and early seventies model GSS.
They even offered it in 73 although it wasn't fresh air and they may be cool. But man, they are not cheap. So what's our solution?
You got it? We're gonna build our own and it's even gonna be functional. No, we're not gonna be knocking a couple of holes in the hood, but we are gonna be getting rid of something on the nose of this car that I have hated from day one. These fish bowl parking lights. Now to keep those snorkels breathing, we're gonna run ducks all the way up to the
openings. Now. True. That means we're gonna have to find a different place for the lights, but no worries. We'll show you plans for that another time.
We're gonna use a stock air cleaner base and graft in the intake tubes from these two. We picked up at the junk yard. They were only about 10 bucks and they got the round ends. We need to hook up to the air ducts. First up is to separate all the good stuff from the junk. The only part of the salvage yard air cleaners we're going to use is the snorkel. So the rest is going into the recycle bin,
we won't be using the cold start actuator so they can go too.
I'm grinding the spot wheels out from the inside so I can remove the extra metal. Being careful not to damage the part. We need
the snorkel on the stock air cleaner won't be used. So I'll add it to the cast off file
since the new snorkels will be in different spots. I'll be feeling the whole, the old one left behind.
I'll get it ground down flush so I can weld a patch in later
with the base in place. I can clock and mark the new parts, making sure they're even and not causing any clearance problems
before I attach the new inlets. I'll get this old hole plugged up.
I'm using a whole so
to radius the ends of the nude ports. This will duplicate the look of the stock air cleaner.
The metal on these is pretty thin. So it's a good idea to dial your welder back some. Keep them burning through.
Mhm.
Hey, man. Check out my air cleaner.
That's looking smooth. That's what I thought. I dig it. You got something figured out for our air inlet. Yeah, I kind of use a marker light here as a guide.
I built a ring that'll set in there and from there, I'm gonna use a chunk of three inch exhaust tubing,
cut it off, kind of short and weld it onto there. Come off with a couple of tabs and that'll actually give us the same size to go right into it. Inlets on your new air cleaner. Sounds like you got that C throat. So I'm gonna go find me a cupcake.
Since I premade my template, I just need to transfer it to some 16 gauge steel and get it chopped out.
If you don't have a banda,
don't sweat. It just grab an AA
or tin snips for this
with a piece. This simple, a little hand foreman will get the job done.
Now, once I got it pretty close, I'll throw a tack weld on it to keep its shape.
Now, here is where the three inch exhaust tubing comes in a few more tacks
and some shaping and I can burn it all together.
Air intakes are just about done and they're looking pretty cool, but I still have to get them mounted. I snuck over to extreme, swiped a couple of these little taps and I'm thinking they should be able to weld on there, get this thing mounted. We'll call it good.
Uh Those will work perfect.
I still need to connect my air inlets to the snorkels to do that. I just use a basic piece of flexible hose. Now, the air cleaner may be the last thing to go on the engine before you shut the hood, but it's the first thing you see when you pop it open.
So I'm gonna take this dude off, clean it up. Give him my personal touch
coming up, find out how Rick turns this air cleaner into one hot item. That looks pretty doggone good right there.
Hey, guys, I know you might think the body work in an air cleaner is a little bit overkill, but don't forget this stuff is 35 plus years old and it's been ground on welded up, modified and I sure as heck ain't gonna put all my nice paint work on right over the top of it. So I'm gonna treat these parts just like I would any other body panel
and that means smoothing out all the imperfections with body filler, sanding it down,
getting some primer on it,
giving it yet another sanding and then spraying on the base coat
and this thing is looking pretty smooth here and just a solid color gray. And I wouldn't be embarrassed a bit to clear it and run it as is. But we got other plans.
Masking is a critical part of painting graphics. The air cleaner will match the color skin we have planned for the car charcoal and orange two tone with the silver and red accent stripe
with the charcoal down as a base. The red stripe goes on next. So I'm masking off everything else.
I mix up a dark red to complement the gray and orange and laid it down on the lid base
and once it dries, I'll cover the parts that'll stay red.
The rest of this area will remain exposed and be shot with the silver.
Next, I can remove the masking and cover up everything that won't be orange.
You got a little sneak peek of this orange on the engine and in keeping with our budget theme, it's nothing fancy. Just ad MD 617 toner straight out of the can
topping it off with a mixture of two pearls will give this budget color a high dollar look
to save some time. I printed my graphics onto some transfer paper instead of hand drying. It.
Next comes a time consuming process of cutting it out.
Unless you got a plotter man, there's just no way around it.
Now, once it's all cut out carefully, peel off the stencil, then it's finally time to play with some paint.
The colors I'm using here are all custom mixes. I've got several different variations of red, orange and yellow with some white highlights thrown in.
Since these are the only flames on the car. I don't really want them to stand out too much so to make them a little more subtle. I'm gonna darken them up as I go with some candy
with the majority of the design down, I can peel off the mask, then come back and free hand some highlights.
A little bit of yellow candy tones down the white. Then I can unmask the whole thing and seal it all in with some clear.
All right time to see if all this hard work here
is paid off
and that looks pretty doggone good right there. Hard to believe we've only got like 60 bucks wrapped up in this whole setup. That's what a budget build is all about using your skills, not your wallet to build something that you can really be proud of. The last piece of this puzzle is the duct work. I'm hooking them up using a pair of couplers from specter.
I can't wait for someone to ask me to pop the hood on this thing
after the break, Ford's failed attempt at fighting the Aero
Wars.
Today's flashback, a 1970 King Cobra prototype
as the 60 s rolled to a close Ford and Mo
part duped it out on the NASCAR circuit in a battle known as the Arrow
Wars.
Sleek sophisticated designs used aerodynamics to crush the competition.
The blue oval cleaned up in 69 with its slippery fast back Talladega,
but Dodge was closing in with its winged warrior, the Daytona
and Plymouth was about to unleash the superb bird.
Ford had to come up with something fast to stay ahead of the curve.
Enter
the King Cobra.
It started off life on the newly designed Torino body which wasn't as aerodynamic as its predecessors. Ford's special design team led by Larry
Sonoda made a few mods to get it ready for racing.
Inspired by the GT 40. The team crafted a long sloping front end,
but unlike the Mo part
cars. It wasn't just tacked on to the bumper.
The fenders and hood were all original while everything behind the firewall there was stock to Reno
air was sucked through a hood scoop and a grill under the front bumper. The power plant would be a boss 429 race motor capable of 600 plus horsepower.
Sonoda also went with a wingless design mainly for aesthetics and straight ability.
NASCAR still ran stock cars back then and you had to sell 500 units to compete.
Skyscraper wings weren't exactly consumer friendly
testing of the car began in the summer of 69 with K Yarborough in the driver's seat
but the results, well, they were less than stellar.
There was too much for an airlift and not enough down force on the back end causing it to be super squirrelly on the track.
It would have to go back to the drawing board.
They might have solved the problem if France hadn't dropped the bomb.
That's big Bill France, NASCAR president at the time,
he wasn't happy with the craze of new designs coming out of Detroit that ran fast and loose with the term stock. So he changed the homolog
rules from 500 units to 3000
Ford brass balked at that number. So the design fell on the back burner
in October of 69. Internal disputes led to
Sonoda getting canned
the King co
project was dead.
Super Birds dominated in 1970 while most Ford racers ran year old Talladega Ford withdrew factory support the next year and NASCAR engine restrictions brought the Arrow Wars to an end with no clear Victor.
It's estimated that only five prototypes were ever built and just three survived today.
The car handles like a dream.
The only thing you have to watch out for is people passing by running up on the sidewalk looking at it
up next. Don't throw out that old gas tank. We'll show you how to save it from the scrap heap.
You're watching muscle car for a DVD copy of this episode, just go to Power Block tv.com and order your copy for just 595 plus shipping and handling. Start your own muscle car collection delivered right to your door from the power block.
Hey, welcome back to the shop. You've seen a swap out stock gas tanks for new replacements or fancy fuel sales plenty of times.
But we project blue collar. There's really no reason why we can't use the original one. All we need to do is clean it up a bit with the right product and a little bit of time and effort. You can restore your old gas tank and get decades more use out of it. We ordered this kit online but your local part store should be able to help you out too.
This kit includes two types of cleaners and a sealer. All meant to work together for best results.
We drained and dry the tank before we started. So, the first thing to do is to remove the sanding unit. I'm using a brass drift to prevent spat.
I'm covering the hole up with duct tape to keep the chemical from sloshing out during the cleaning process.
Prop the tank up and we're all ready to get the cleaning
now for the chemical, make sure to wear protection because you don't want this stuff on your skin or in your eyes.
Both of the first two chemicals are cleaners and the process for using them is about to sink, start by pouring the solution into the tank.
Once it's in the tank, tape up the filler neck to prevent sloshing,
shake the tank around enough that the insides are totally coated and let it sit for 20 minutes.
Dumping it out can be a challenge. There's a baffle in the filler neck so it's gotta come out the sending unit hole, get a helper and just shake until it's empty.
We've got the tank cleaned and flushed and we're ready to apply the sealer, but we've got to get the tank dry first.
You could use compressed air, but you're running a risk of burning up your compressor because you're gonna use a whole lot of air.
We're gonna use a heat gun. Now, you don't have to have one of these, you could use a hair dryer, but it just take a little longer.
This does take a while. So just keep checking and don't stop until his phone dries.
Now, with the tank all dry, we can move on to the last step. Sealer. This stuff bonds to the inside of the tank forming a liner that stops rust and seals up any pinholes and seams,
pour the sealer in straight from the can, then turn the tank to get an even layer on the inside. Let it set for a few minutes then dump out the excess.
The tank's all good to go on the inside. But what about the outside? We're not gonna install it looking like this. So for that brand new OEM look,
we're using Eastwood's tank tone.
Our tank is completely dry but if your tank even has a little bit of gas in it don't use a steel brush. It could cause a spark and we all know sparks and gas don't mix.
Use a brass or non metallic brush to be safe.
Break cleaner and a scotch bright will get the last of the grease off and a wipe down with Acetone will ensure a well prepped surface.
I'm taping up the ground strap and the sending unit post for a professional look. All that's left now is to work the spray can.
Well, that's one more piece of the buick that we were able to save. It took some time and effort. But now we've got a tank that would look and perform like new for half the cash once this thing dries, I'm gonna throw it up under the car, but we're all out of time for this week. So, until next week y'all keep between the ditches.