Parts Used In This Episode
BF Goodrich
215/45 ZR 17-G Force T/A Tires.
BF Goodrich
295/35 18G-Force Drag Radial Tire.
Chevrolet Performance
4L60-E, Four Speed, Computer Controlled Automatic Overdrive Transmission.
Chevrolet Performance
ZZ-4 350 Crate Motor.
Edelbrock
Endruashine Thunder Series AVS 650 CFM.
Hushmat
Sound Deadening Matting.
Mallory Performance
Distributor.
Vintage Air
Front Runner Sperpentine Drive.
YearOne
1969 Camaro Body.
Video Transcript
Today on Muscle car, it's clear code
tech and quarter panel repair you can do on the cheap. Plus a look back at the Rare and Radical Plymouth Super
Bird.
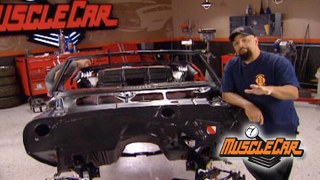
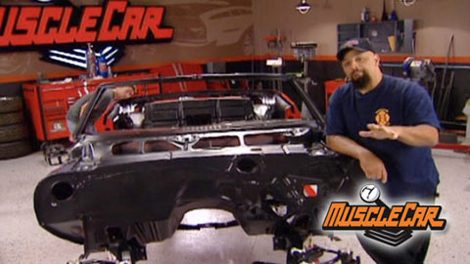
Welcome to Muscle Car. Last time you saw the crate Camaro, it was in the spray booth getting some pretty red paint on it. Since then, we've blown it back apart. Sent the front end out to get powder coated. Yeah, painted the under side of this thing and turn every area that's not gonna be red black. That'll keep this thing looking real detailed as it goes together.
And speaking of details, I wanna show you some tricks that will really help your paint job out after your car leaves a paint booth.
You remember when a rate Camaro looked like this,
that reproduction body from year one was all primal. When it came in our door,
we did a lot of filling and grinding and sanding and it seemed like wheat
and that was just getting ready for paint.
We and in the new front, Subra
we put the motor in and out of this baby two or three times just to make sure everything fits just right
but there's always a little adjustment along the way.
Jared's about to deal with something that might show up on your own paint job.
All right. So you're ambitious enough to paint your own car. And then afterwards you notice a couple of problems in the clear coat, like runs orange peel or dirt. I mean, check out this gravity indicator I got in here but it's not the end of the world. Now, I'm gonna show you to take care of these little things with something called wet sanding.
All right, this job's gonna start with wet or dry sandpaper. Usually a grit like 600
then you can work your way all the way up to 3000. But you don't want to start with a grit rougher than 600.
The clear coat is the hardest one to get right because the paint is so much thinner than the colored coats.
We're wet sanding to keep the sandpaper from clogging up.
The water helps the dust flow away rather than sticking to the sandpaper or the paint.
You wanna switch from the rougher grits like six and 800 as soon as you knock down most of the run and then come back with like 1000 and 15 and work your way up pretty rapidly. This is gonna help keep you from breaking through.
You also want to be careful to take your time. So you're not saying through the clear coat because then you got big problems.
Jarrett's focusing on the run right now and leaving the rest of the defender alone
because the run is the only part of defender that needs 600 grip paper. If you're not paying attention, you'll go right through that clear coat and then it's too late.
If you don't have any runs and you just have to go after dirt or orange peel, you're gonna wanna start with 1500 grit and work your way up from there.
You can do this with a machine, but it's dangerous. Jared will use a machine when it gets to around 3000 grit,
but it's like send it with a piece of notebook paper
and here's the last step. 3000 grid on AD A is gonna get rid of all those other scratches before we polish.
Oh And one more thing. Never ever san an edge you don't need to and you're guaranteed to break through and you don't want that.
Once you work over the whole panel, then you have all the scratches out on,
wipe it down with a clean paper towel to make sure you didn't break through
because it's wet. Sometimes it's hard to tell if you cut through your clear coat into your base. A good indicator would be if the base color was on your paper towel and you get done wiping it off,
then it's time to go home and cry about it.
But as you would expect our fender perfect.
So Jarrett's gonna polish it out for that final shine.
Be careful when you're polishing too to stay away from edges because the buffer will always cut through and also don't stay in one place for too long because you'll get the paint hot and mess it up.
See the runs gone told you I can get,
I
can see
myself
runs gone. Dirt's gone. Orange
field.
What have you been working on? Nothing.
Yeah, let's go see about that. I've been lollygagging. I believe it.
Here we go. Dual rapids.
We've been in this situation before the big progress this week on the crate. Camara, we've had the engine in it before this time. It's going to stay and that crate 350 is gonna sit in front of a GM performance transmission.
Um We're going with this ZZ four crate mode. We
and the four L 60 E four C computer controlled automatic over drop.
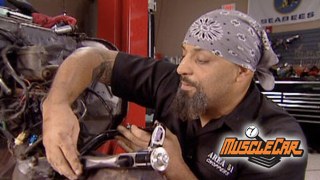
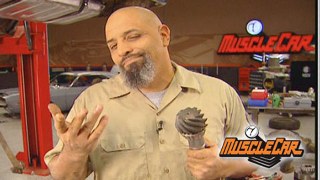
All right. Last time we had the engine in here, we noticed there wasn't much firewall clearance for the distributor that came with the engine. So we're gonna trade it out for a small cap distributor.
Lou is gonna show you how to do that and get your engine on top dead center and get all that stuff done. Right.
Uh
Let's push it on back to see where we're at. The engine goes in before the accessories go on.
We're less likely to break something and it's just easier to work. This way.
Limbo champion 2002.
All right. Hold on. Go with the yellow hammer.
Get everything lined up inside the engine so we can put in the distributor. Yellow hammer work yellow hammers. Never let you know.
Y
Hammer
pull out all the spark plugs so you won't be fighting the compression when you're turning over the engine.
Now when you b
the engine over, you're gonna turn the crank shaft by hand till the number one piston comes to top. Dead center to fresh and stroke. Crashing starts. Now
we put the engine at top, dead center. Number one. So the distributor can tell the spark plug when to fire. So it's on the compression stroke really important. But we realized that this, he, I would hit the firewall. So we decided
to get a mallory with a smaller cap.
Nice piece. Don't have to modify the firewall.
Ah
You need a hand with that.
Hey, say you guys wanna start a project, but you don't wanna take on anything of this size. We'll show you what to look for. Coming up,
coming up. Backyard body repair. You can do all metal. No mud.
Hey, guys, welcome back to muscle car. You are not gonna believe what Lou and I found this is a 1970 Nova with only like 30,000 original miles on it that comes out to something around 17 miles a week on this fashionable in line 236 cylinder. This is the ultimate old lady car and you're probably never gonna find one like it. But if you wanna try, we'll show you what to look for.
Hey, can we call this thing? Project Blue hair, whatever you want, man,
whatever you want. Sandy. I
now this is a fine but a lot of potential.
It really did belong to a little old lady who drove it 17 miles a week.
This was about a $2200 car back in 1970
we paid her great granddaughter 7500 for it.
That's more than three times the original price,
but it's still some kind of deal.
The most obvious area on this car is this little spot of rust, but this is in no way a deal killer. We can fix that pretty easily. And as I looked on, I noticed body work in the quarter panel here
because I could see the sand scratches under the paint.
The next thing that really gave it away was the fact that this edge is really inconsistent. It's bulbous and there's a lot of hips and dips and valleys and things in it.
And then when I ran my hand behind the quarter, I could feel the dents, the body filler hiding. Now, these are things to search for when you're looking for that perfect project car
and check out this interior. It's like 36 years old and pretty much perfect since we're gonna leave this thing as sleeper,
this is gonna save us a lot of work. We're just gonna leave it alone.
So I'm gonna turn over to Lou who's gonna show you what to look for underneath and on the mechanical side of things,
blue hair,
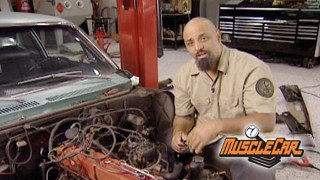
you never wanna look at a car at night because you can't see nothing. The other thing during the day, bring a flashlight with you. You might have to look underneath the dashboard. This way you can see what you're looking at your potential car. Let's get this thing in the air.
You look for structural damage. All this up here looks really good. This car obviously has not been punched in the nose at any time and if it was, they did a really good repair, but it wasn't
look for leaks. I mean, there's oil on the oil pants is more than likely gonna be oil on the ground, but, I mean,
it's probably from the valve cover gas. It's all minor stuff depending on what direction you wanna go with the car. There's a really sound car
and only a teeny spot of rust on the tow board. That's an easy fix. Obviously, this is some professional exhaust repair work that's been done here. They use the drive shaft, the whole the exhaust pipe in place. I kinda like that. It's high tech.
This car overall is in great shape. If the only thing you got is some rust in the tow boards you're doing good for a car. That's 30 something years old. Notice how I said, 30 something women don't like to divulge their age.
Get out of there. So on crushes. No,
this car may be in good shape, but it is 30 some odd years old and we got a couple of things that we need to take care of
like this. Now, there is no need to replace the whole quarter panel for something like that.
You can just go to your local hardware store and get some steel the same thickness and go to town.
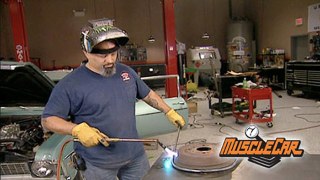
All right, the first step is just going to be to cut the old area out with straight cuts
and get rid of the rust.
One of the most important steps is to get rid of what caused the rust in the first place and in this case, it was definitely his foam
i the house,
the foam's there for sound dead,
but it can also collect moisture.
Oh,
we'll see you later
a present for you.
The
main goal in grinding like this is to get rid of all the rust.
All right. Now we got the area free of paint and rust. So we got a good clean starting and stopping point for our new metal.
This is regular old 18 gauge mild steel.
The first line of defense in keeping those new pieces from rusting is to spray all the bare metal areas with some wel through primer. Then you're ready to rock.
You go,
I'm gonna go ahead and make our patch piece out of three pieces total because there's a lot of complex shape here and that's gonna help me to do it a little easier.
Ok. See where I still have this tail sticking up. That's where I need that shape to be put in. I'm gonna show you how I'm gonna do that.
There you go. Good as new.
All it took was a couple hours, some hand tools and a welder. And if you have a weekend, you can attack several areas like this on your car and really turn it around
next on. Muscle car. Plymouth only made it for one year but the Potent Superb Bird is still flying.
1970 was a classic year for American muscle cars. This one here though wasn't too muscular when you got it new,
but that's all gonna change when we get done with it.
Yeah. And for this week's muscle car flashback. Lou and I got to drive another 70 now. It was a Mopar and this thing was a muscle car right off the lot.
Muscle car flashback this week. The Super bird.
That was awesome. Oh my God. We're driving a Super Bird. They were too fast on the track and just too weird for the showroom. The Super Birds long Beacon tail were designed for NASCAR
Super Speedways and the birds won so many races. They were outlawed after one season.
You could buy them for the street with a monster. 426
hemi, the Super Commando 444 barrel or the legendary 446 pack Chrysler made two wings cars in 69 and 70. The Super Bird and the Dodge Daytona, the Super bird's final roof is the easy way to tell them apart. It's there to cover up the rough body work around the special aerodynamic rear window,
but that slippery shape and at least 375 horsepower totally stopped meant the racing Super Bird would run well over 200 miles an hour.
And the birds at your local Plymouth dealership, they weren't that far behind.
Let's go find some cops and get them chase through the woods
every time I drove one of these, I stole it.
Super Birds looked like some kind of crazy spaceship sitting there next to all the other new cars,
but they were really standard Plymouth road runners with an extra 19 inches in the nose.
What looked like a streamlined park bench
was a 2 ft spoiler that ran across the rear deck and it had a cartoon roadrunner horn. Chrysler made these because they had to,
they needed an
package to keep up on the track, but NASCAR
wouldn't let the Super Birds run until they actually went on sale at the Plymouth dealership.
They were in big demand on the race track but not on the streets. Some of them sat on the dealership lot for as long as two years, brand new,
quarter mile times, but usually pretty close to the standard road run,
but longer runs with something entirely different.
Once you get that bird up to speed,
you know, all that arrow stuff is there for one good reason.
Going fast. You get, you get up around 90 100 mile an hour.
Um, you can, you can still start the down force starting to starting to push the car into the ground.
Plymouth made just under 2000 super
birds and maybe half of those are still around.
Most of them had 440 under the hood.
Only 100 and 35 were hem
and the price of those is through the roof.
The highest tag we know of was 100 and 94,000. That's nearly 50 times the original price.
The deck a
beat up herd that barely runs. It'll cost you at least 30 grand.
But that
racing history,
a classic example of American muscle,
the engine's in and it's going together more Craig Camaro coming up.
Hey, welcome back to the shop. We decided for the accessory system to go with a vintage air front runner kit and the reason why we decided to do that because we're giving this car away. So we figured, you know what, let's just put as many cool parts on this thing as we can.
We're using a serpentine belt setup because it's more compact and it gives us a cleaner looking set up. This way, there's more room for your accessories.
Not to mention, it's a real simple install
one step out. Never leave out at this stage in your build is using a sound ending product like this stuff from Hush Mat. It's got an adhesive back on it that allows you to stick it to an open panel. And the goal is to cover about 75% of the car with this stuff. And it really makes it sound more like a luxury car than
old clunker from the sixties.
This stuff works by killing the vibrations in the body panels.
So you wanna stick it just about anywhere. There's a flat panel that can transmit some kind of noise, say you've got an old muscle car that suckers rattling and making noises that would wake the dead.
Mr Santiago, how would you take care of something? Like what we've done is we've covered 75% of this quarter panel of this 1969 Camaro with hush mat. And what it does is it makes it as quiet as a church mouse. That's right. Listen right here
and for a limited time, what's that? You say a limited time? Yes, a limited time only you can get. This product, operators are standing by
seriously.
This is good stuff. It does make your car a lot more comfortable.
And when you're doing your wiring,
stick your wires down with little pieces of sound deader. So they don't rub on the body. We got word that some of you guys want us to put ef I on the crate Camaro. We decided not to go that route. Why?
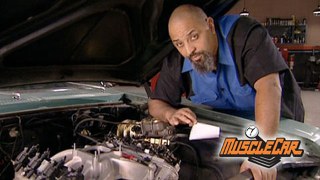
Because ef I just wouldn't be cool on a vintage 69 Camaro. That's what we think. So we decided to go with the enduro
Shine carburetor. Now, Eden
Rock made this baby to match their manifold and the thing that's cool about it. You don't have to polish it.
Let's work.
It doesn't just look better than the original. It works better too.
It uses metering rods between the circuits. This way you get smooth throttle response and its simple, straightforward design is easy to adjust and it holds up a tune. We decided to hold off on putting on body panels on for one simple reason. You're not scratching them up, you're not leaning over the car. That's actually two reasons, but that's ok. It makes it easier to access everything as we go along. So I'm gonna put on this fuel pump. You guys go get a cold beverage
and do whatever it is you do. I'll see you next week.
Show Full Transcript
tech and quarter panel repair you can do on the cheap. Plus a look back at the Rare and Radical Plymouth Super
Bird.
Welcome to Muscle Car. Last time you saw the crate Camaro, it was in the spray booth getting some pretty red paint on it. Since then, we've blown it back apart. Sent the front end out to get powder coated. Yeah, painted the under side of this thing and turn every area that's not gonna be red black. That'll keep this thing looking real detailed as it goes together.
And speaking of details, I wanna show you some tricks that will really help your paint job out after your car leaves a paint booth.
You remember when a rate Camaro looked like this,
that reproduction body from year one was all primal. When it came in our door,
we did a lot of filling and grinding and sanding and it seemed like wheat
and that was just getting ready for paint.
We and in the new front, Subra
we put the motor in and out of this baby two or three times just to make sure everything fits just right
but there's always a little adjustment along the way.
Jared's about to deal with something that might show up on your own paint job.
All right. So you're ambitious enough to paint your own car. And then afterwards you notice a couple of problems in the clear coat, like runs orange peel or dirt. I mean, check out this gravity indicator I got in here but it's not the end of the world. Now, I'm gonna show you to take care of these little things with something called wet sanding.
All right, this job's gonna start with wet or dry sandpaper. Usually a grit like 600
then you can work your way all the way up to 3000. But you don't want to start with a grit rougher than 600.
The clear coat is the hardest one to get right because the paint is so much thinner than the colored coats.
We're wet sanding to keep the sandpaper from clogging up.
The water helps the dust flow away rather than sticking to the sandpaper or the paint.
You wanna switch from the rougher grits like six and 800 as soon as you knock down most of the run and then come back with like 1000 and 15 and work your way up pretty rapidly. This is gonna help keep you from breaking through.
You also want to be careful to take your time. So you're not saying through the clear coat because then you got big problems.
Jarrett's focusing on the run right now and leaving the rest of the defender alone
because the run is the only part of defender that needs 600 grip paper. If you're not paying attention, you'll go right through that clear coat and then it's too late.
If you don't have any runs and you just have to go after dirt or orange peel, you're gonna wanna start with 1500 grit and work your way up from there.
You can do this with a machine, but it's dangerous. Jared will use a machine when it gets to around 3000 grit,
but it's like send it with a piece of notebook paper
and here's the last step. 3000 grid on AD A is gonna get rid of all those other scratches before we polish.
Oh And one more thing. Never ever san an edge you don't need to and you're guaranteed to break through and you don't want that.
Once you work over the whole panel, then you have all the scratches out on,
wipe it down with a clean paper towel to make sure you didn't break through
because it's wet. Sometimes it's hard to tell if you cut through your clear coat into your base. A good indicator would be if the base color was on your paper towel and you get done wiping it off,
then it's time to go home and cry about it.
But as you would expect our fender perfect.
So Jarrett's gonna polish it out for that final shine.
Be careful when you're polishing too to stay away from edges because the buffer will always cut through and also don't stay in one place for too long because you'll get the paint hot and mess it up.
See the runs gone told you I can get,
I
can see
myself
runs gone. Dirt's gone. Orange
field.
What have you been working on? Nothing.
Yeah, let's go see about that. I've been lollygagging. I believe it.
Here we go. Dual rapids.
We've been in this situation before the big progress this week on the crate. Camara, we've had the engine in it before this time. It's going to stay and that crate 350 is gonna sit in front of a GM performance transmission.
Um We're going with this ZZ four crate mode. We
and the four L 60 E four C computer controlled automatic over drop.
All right. Last time we had the engine in here, we noticed there wasn't much firewall clearance for the distributor that came with the engine. So we're gonna trade it out for a small cap distributor.
Lou is gonna show you how to do that and get your engine on top dead center and get all that stuff done. Right.
Uh
Let's push it on back to see where we're at. The engine goes in before the accessories go on.
We're less likely to break something and it's just easier to work. This way.
Limbo champion 2002.
All right. Hold on. Go with the yellow hammer.
Get everything lined up inside the engine so we can put in the distributor. Yellow hammer work yellow hammers. Never let you know.
Y
Hammer
pull out all the spark plugs so you won't be fighting the compression when you're turning over the engine.
Now when you b
the engine over, you're gonna turn the crank shaft by hand till the number one piston comes to top. Dead center to fresh and stroke. Crashing starts. Now
we put the engine at top, dead center. Number one. So the distributor can tell the spark plug when to fire. So it's on the compression stroke really important. But we realized that this, he, I would hit the firewall. So we decided
to get a mallory with a smaller cap.
Nice piece. Don't have to modify the firewall.
Ah
You need a hand with that.
Hey, say you guys wanna start a project, but you don't wanna take on anything of this size. We'll show you what to look for. Coming up,
coming up. Backyard body repair. You can do all metal. No mud.
Hey, guys, welcome back to muscle car. You are not gonna believe what Lou and I found this is a 1970 Nova with only like 30,000 original miles on it that comes out to something around 17 miles a week on this fashionable in line 236 cylinder. This is the ultimate old lady car and you're probably never gonna find one like it. But if you wanna try, we'll show you what to look for.
Hey, can we call this thing? Project Blue hair, whatever you want, man,
whatever you want. Sandy. I
now this is a fine but a lot of potential.
It really did belong to a little old lady who drove it 17 miles a week.
This was about a $2200 car back in 1970
we paid her great granddaughter 7500 for it.
That's more than three times the original price,
but it's still some kind of deal.
The most obvious area on this car is this little spot of rust, but this is in no way a deal killer. We can fix that pretty easily. And as I looked on, I noticed body work in the quarter panel here
because I could see the sand scratches under the paint.
The next thing that really gave it away was the fact that this edge is really inconsistent. It's bulbous and there's a lot of hips and dips and valleys and things in it.
And then when I ran my hand behind the quarter, I could feel the dents, the body filler hiding. Now, these are things to search for when you're looking for that perfect project car
and check out this interior. It's like 36 years old and pretty much perfect since we're gonna leave this thing as sleeper,
this is gonna save us a lot of work. We're just gonna leave it alone.
So I'm gonna turn over to Lou who's gonna show you what to look for underneath and on the mechanical side of things,
blue hair,
you never wanna look at a car at night because you can't see nothing. The other thing during the day, bring a flashlight with you. You might have to look underneath the dashboard. This way you can see what you're looking at your potential car. Let's get this thing in the air.
You look for structural damage. All this up here looks really good. This car obviously has not been punched in the nose at any time and if it was, they did a really good repair, but it wasn't
look for leaks. I mean, there's oil on the oil pants is more than likely gonna be oil on the ground, but, I mean,
it's probably from the valve cover gas. It's all minor stuff depending on what direction you wanna go with the car. There's a really sound car
and only a teeny spot of rust on the tow board. That's an easy fix. Obviously, this is some professional exhaust repair work that's been done here. They use the drive shaft, the whole the exhaust pipe in place. I kinda like that. It's high tech.
This car overall is in great shape. If the only thing you got is some rust in the tow boards you're doing good for a car. That's 30 something years old. Notice how I said, 30 something women don't like to divulge their age.
Get out of there. So on crushes. No,
this car may be in good shape, but it is 30 some odd years old and we got a couple of things that we need to take care of
like this. Now, there is no need to replace the whole quarter panel for something like that.
You can just go to your local hardware store and get some steel the same thickness and go to town.
All right, the first step is just going to be to cut the old area out with straight cuts
and get rid of the rust.
One of the most important steps is to get rid of what caused the rust in the first place and in this case, it was definitely his foam
i the house,
the foam's there for sound dead,
but it can also collect moisture.
Oh,
we'll see you later
a present for you.
The
main goal in grinding like this is to get rid of all the rust.
All right. Now we got the area free of paint and rust. So we got a good clean starting and stopping point for our new metal.
This is regular old 18 gauge mild steel.
The first line of defense in keeping those new pieces from rusting is to spray all the bare metal areas with some wel through primer. Then you're ready to rock.
You go,
I'm gonna go ahead and make our patch piece out of three pieces total because there's a lot of complex shape here and that's gonna help me to do it a little easier.
Ok. See where I still have this tail sticking up. That's where I need that shape to be put in. I'm gonna show you how I'm gonna do that.
There you go. Good as new.
All it took was a couple hours, some hand tools and a welder. And if you have a weekend, you can attack several areas like this on your car and really turn it around
next on. Muscle car. Plymouth only made it for one year but the Potent Superb Bird is still flying.
1970 was a classic year for American muscle cars. This one here though wasn't too muscular when you got it new,
but that's all gonna change when we get done with it.
Yeah. And for this week's muscle car flashback. Lou and I got to drive another 70 now. It was a Mopar and this thing was a muscle car right off the lot.
Muscle car flashback this week. The Super bird.
That was awesome. Oh my God. We're driving a Super Bird. They were too fast on the track and just too weird for the showroom. The Super Birds long Beacon tail were designed for NASCAR
Super Speedways and the birds won so many races. They were outlawed after one season.
You could buy them for the street with a monster. 426
hemi, the Super Commando 444 barrel or the legendary 446 pack Chrysler made two wings cars in 69 and 70. The Super Bird and the Dodge Daytona, the Super bird's final roof is the easy way to tell them apart. It's there to cover up the rough body work around the special aerodynamic rear window,
but that slippery shape and at least 375 horsepower totally stopped meant the racing Super Bird would run well over 200 miles an hour.
And the birds at your local Plymouth dealership, they weren't that far behind.
Let's go find some cops and get them chase through the woods
every time I drove one of these, I stole it.
Super Birds looked like some kind of crazy spaceship sitting there next to all the other new cars,
but they were really standard Plymouth road runners with an extra 19 inches in the nose.
What looked like a streamlined park bench
was a 2 ft spoiler that ran across the rear deck and it had a cartoon roadrunner horn. Chrysler made these because they had to,
they needed an
package to keep up on the track, but NASCAR
wouldn't let the Super Birds run until they actually went on sale at the Plymouth dealership.
They were in big demand on the race track but not on the streets. Some of them sat on the dealership lot for as long as two years, brand new,
quarter mile times, but usually pretty close to the standard road run,
but longer runs with something entirely different.
Once you get that bird up to speed,
you know, all that arrow stuff is there for one good reason.
Going fast. You get, you get up around 90 100 mile an hour.
Um, you can, you can still start the down force starting to starting to push the car into the ground.
Plymouth made just under 2000 super
birds and maybe half of those are still around.
Most of them had 440 under the hood.
Only 100 and 35 were hem
and the price of those is through the roof.
The highest tag we know of was 100 and 94,000. That's nearly 50 times the original price.
The deck a
beat up herd that barely runs. It'll cost you at least 30 grand.
But that
racing history,
a classic example of American muscle,
the engine's in and it's going together more Craig Camaro coming up.
Hey, welcome back to the shop. We decided for the accessory system to go with a vintage air front runner kit and the reason why we decided to do that because we're giving this car away. So we figured, you know what, let's just put as many cool parts on this thing as we can.
We're using a serpentine belt setup because it's more compact and it gives us a cleaner looking set up. This way, there's more room for your accessories.
Not to mention, it's a real simple install
one step out. Never leave out at this stage in your build is using a sound ending product like this stuff from Hush Mat. It's got an adhesive back on it that allows you to stick it to an open panel. And the goal is to cover about 75% of the car with this stuff. And it really makes it sound more like a luxury car than
old clunker from the sixties.
This stuff works by killing the vibrations in the body panels.
So you wanna stick it just about anywhere. There's a flat panel that can transmit some kind of noise, say you've got an old muscle car that suckers rattling and making noises that would wake the dead.
Mr Santiago, how would you take care of something? Like what we've done is we've covered 75% of this quarter panel of this 1969 Camaro with hush mat. And what it does is it makes it as quiet as a church mouse. That's right. Listen right here
and for a limited time, what's that? You say a limited time? Yes, a limited time only you can get. This product, operators are standing by
seriously.
This is good stuff. It does make your car a lot more comfortable.
And when you're doing your wiring,
stick your wires down with little pieces of sound deader. So they don't rub on the body. We got word that some of you guys want us to put ef I on the crate Camaro. We decided not to go that route. Why?
Because ef I just wouldn't be cool on a vintage 69 Camaro. That's what we think. So we decided to go with the enduro
Shine carburetor. Now, Eden
Rock made this baby to match their manifold and the thing that's cool about it. You don't have to polish it.
Let's work.
It doesn't just look better than the original. It works better too.
It uses metering rods between the circuits. This way you get smooth throttle response and its simple, straightforward design is easy to adjust and it holds up a tune. We decided to hold off on putting on body panels on for one simple reason. You're not scratching them up, you're not leaning over the car. That's actually two reasons, but that's ok. It makes it easier to access everything as we go along. So I'm gonna put on this fuel pump. You guys go get a cold beverage
and do whatever it is you do. I'll see you next week.