MuscleCar Builds

Parts Used In This Episode

ARP
Wheel Studs
Doug's Headers
Ceramic-Coated Headers with 1 3/4" primary tubes and 3" collectors
Flaming River
Steering Components- Column, Steering Shaft, Steering Box
Moser Engineering
Full float rear end conversion with upgraded axles
Summit Racing
Hotchkis Sport Suspension
TCI Automotive
700 R4 Transmission Package (Transmission, Converter, Fluid, Cooler, Lines, Yoke, & Shifter)
Video Transcript

Today on a special muscle car search and restore edition. It's stage two of our project G machine giveaway Monte Carlo, one lucky winner gets to drive it home. But first we want to take this flippy floppy frame and turn it into a diamond tough foundation for this big bad Chevy. Also, Ian from extreme built us a full float rear and learn what components make a stock style tranny handle over 700 horsepower.

It all started with a concept,

take one of the lesser known muscle cars from the classic muscle era.

Give it a top to bottom makeover

and then give it away to one lucky viewer.

This 1970 Monte Carlo has a ton of potential,

but it's gonna need a pile of work. The interior vinyl top, puny little small block engine paint

and most of the chrome were shot.

But if you look underneath all that tiredness, you might see what we see.

So with the help from horsepower, we tore it down and pulled the body off the chassis, then built a 500 horsepower LQ four. So we're off to a good start

to our giveaway Monte Carlo

G machine.

Hey guys, welcome back. Today is chassis and suspension day. And as you can see, we're about elbow deep in an old school muscle car taking it from greatness to beyond. Now, we're gonna get started with some pretty extensive frame modifications. Now, this thing's already been torn down and sense of the blasters. Here's a look at how all that went

with a hand from one of our techs. It goes by the name truckers. We dropped the frame and the rear end off at blast from the past in Le in Tennessee so that they could get after him, knock off all that old cruddy stuff.

Now, this frame may be clean but it has a couple of issues. Let me show you what I'm talking about.

Now, this old chassis has got quite a bit of flex to it and for the type of car that we're putting together, well, it could use some more structure and I know once it's bolted to the car that it does add some.

But

for that type of ride,

we're gonna put a little extra in it. We'll start by boxing the original frame rail on both sides. Then we'll add another inner frame rail from there all the way back to the torque box. Now, we'll triangulate it through the inner and outer framer on this side. Now, the opposite side is gonna be a mere image. Now, right through here in the transmission area, there's gonna be a transmission cross member that ties the two inner frame rails together. And that's really gonna stiffen this thing up.

We're using a tried and true method of strengthening the main backbone of the frame by cutting out eight inch steel plates which will fit right into these openings.

Of course, since we want them to plug in all nice and pretty, a cardboard template is a great way of achieving a good fit.

Sometimes when we do this, we use that thinner style cardboard for the template making

either one works.

But today, I'm just using the thick stuff and a good old box cutter.

Another bonus if you mess up cardboard is way cheaper than the metal, you just waste it.

Once all the weak points are templated up, it's time to move on to making the steel version.

Luckily, trucker pretty handy with our shop saber plasma table. So we're gonna go ahead and set our home position. Here is XY zero

and that's gonna give us our starting point based off our template to go ahead and cut these pieces out,

gonna go ahead and open up this program and

start to cut these pieces out

and I've added some holes in this program so we can go ahead and

run some dimple dyes in these panels to give us a little more stiffness.

Of course, most people aren't going to have access to a piece of machinery like this.

But there are a number of ways to cut out your plates, including the regular plasma torch or a cut off wheel.

We're gonna use our shop saber because we've got it

and these pieces are gonna come out looking great.

Well, it looks like we got a boatload of plates made. Well, we gotta do a little bit of dressing on them before we can weld them on. But we'll catch you guys here in just a few

still ahead. Our

G machine frame gets plated up like a tank to stand up to all the abuse we can throw at it.

Later on. See, the suspension upgrades that are going to make this car handle like a new model.

Well, we got our pieces back from the plasma table and these things are still worn. We've got some holes in it and went ahead and dimpled on them. Now we just need to fit them to our frame,

do a little marking so we can tweak them so they fit just right

now. What my plan is is to make a mark here

and a mark say here

that way I can bend this part of it up to meet this edge right here.

Now, to bend this piece of eight inch plate, I'm just gonna use a vice and a hammer to persuade it. It shouldn't be all that big of a deal because it's such a narrow piece.

I find the most efficient way to do this is to put a little bit of pressure on the metal with your hand while you're using the hammer to persuade it to bend where you want it to.

Now, let's check to see if this thing fits before we go too far.

Give that fit thumbs up.

Now, before we start getting too excited

and go to welding this thing all up, we need to double check that it's sitting straight and level if it's sitting tweaked one way or another or on an uneven surface, once you go to welding the plates onto it, you're gonna make it permanently crooked.

Ain't nobody got time for that.

Now, I'm using this little piece of metal to keep the panel from kind of falling inside this hole. And also I use it as a tool to kind of tweak the rail a little bit to give me a perfect corner so I can lay my weld in there.

And

this is that perfect little corner that I was talking about. It is a happy medium between the two panels

and I'll be able to fill them up with some. We

make sure that your tracks are good enough to keep the piece where it needs to be.

But in case you need to remove the panel, if there's a boo boo

don't get carried away.

Old truck is gonna grab every darn sea clamp east of the Mississippi and

tack this panel into the frame. She walk the piece around the bin here there and yonder using a hammer and a multitude of clamps to make it adhere to the contours of the frame. If you'll notice the jack stands are sitting into points where the springs would normally support the weight of the vehicle because placing them in other locations can cause your frame to flex one way or the other.

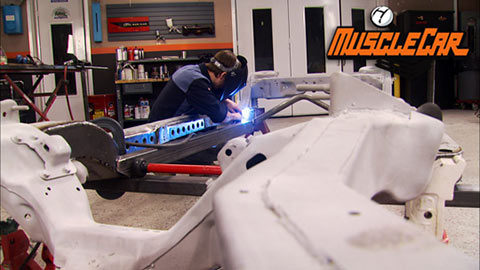
Now that we've got our original frame rails all welded up, we went ahead and built some inner frame rails, two by three box tubing. It's really gonna add some torsional stiffness to this chassis

and we're gonna tie the back of our rails into the lower link mounts here. That way, the force of the rear end gets distributed through the frame more evenly.

In addition to the two by three that we added, we came back in with some one by three and connected the inner and outer rail together. That way it gives the center of the car a tremendous amount of structure to it.

Now, we had to modify this brace just a bit so that it would clear the floor pans, we could have sliced them, but that's just a lot of extra work versus just notching this piece of tubing.

Now, we wanted these to also hang as close to the floor as possible

with all of them not hanging way out from under the car.

So that's the idea taking this plain old floppy factory frame from this

to this. Now, she's got way more than enough backbone to stand up to the power and stress that we're gonna be putting it under

up next. Find out why a full float rear can give you some extra toughness in the tail end and then our frame gets the powder coating treatment.

Oh, that looks nice.

Now, I said everybody was gonna jump in on the Monte Carlo Bill. It's ian with the extreme show and I hear he's pretty good working on his arrears. So I'll

let you do your thing, Bud. Thanks Tommy.

Now, Tommy specked a 12 bolt for the back of this Monte, which is pretty cool because it's gonna stay with the whole theme of the car, but we wanted to step it up, make it truly hard core because of the nature of the finished build that we're working on.

So we sent the rear end out and had Moser do a full float conversion, which included installing these spindles on the end of the axle too.

Now, you've seen us do this many times in the extreme shop and we do it to make axle easier to serve us when we're on the trail. If we break a shaft, we can just simply remove the cap and pull it out. But there is a reason to perform a full float conversion when you're on the street. See a semi

float axle, the weight of the car is actually carried by the axle shaft on a full float conversion. The weight of the car is carried by the bearings on the spindle.

That means that the shaft itself can be a lot stronger and can be reflect more. That means that when it's inside that axle, it can twist. So when this car grabs a lot of traction, the axle is gonna be able to twist a lot more than it would with a semi float axle shaft. We basically have a bare housing and a pile of parts. My job now is to put it all together.

The first step is to determine the thickness of our opinion. Chim by measuring the depth of the pin in the housing with pin depth checker tool

and the ring gear is installed on our limited slip differential that we got from summit racing

conversions require these axle seals that came in the kit to be installed right beside the side bearings.

Once in the housing,

the backlash is adjusted

and then the remainder of the moor

full float kit can be installed.

It consists of new axle shafts,

new hubs

and drive phalanges that will connect the differential out to the wheel. So with this rear axle completely rebuild, now it matches the rest of the drive train that Tommy chose for this Monte Carlo.

All that's left to do now is drop a diff cover on it and Tommy can go ahead and give this axle housing a nice coat of shiny paint.

The next part of the drive train that I wanna touch on is our TCI Street Fighter transmission. It's based off of a 700 R four and this thing's been re-engineered from the R pump to the tail housing to improve performance, longevity and strength.

And it's rated up to 725 horse. You saw our training earlier when we were using it to mock up our frame months, but now we're gonna get in depth on the transmission itself. This is O Evan with TCI performance. What did you bring us, man?

Well, you guys have opted for the kit now that includes everything you need to transfer power from the fly wheel to the drive shaft. Now, obviously that includes the transmission,

but you also get transmission fluid, the torque converter cooler

and an adjustable TV cable. Well, all right, let's talk about a few of the key components that makes this thing superior to just a stock unit. Let's start with the clutches. The street fighter uses a greater number than the stock build and they're built out of heavier duty material. The end result a longer life. Now, the valve body maintains constant fluid pressure and employs calibrated springs which are tailored to how you want your transmission to shift. They also use a T vein billet pump which moves more fluid than a stop

keeping pressure higher and extending the life of the unit. The spray that you find in these units is significantly stronger, which is crucial in helping the transmission handle more power and it comes with a heavy duty servo which will help increase band force leading to better shifts and prolonged life span. With the TCI unit, you get higher fluid pressure, less slip and firmer shifts with stronger parts. Well, man, we sure appreciate you helping out. This brings us one step closer to getting the Monte Carlo back on the road.

We're not baking cookies in this oven, but we are cooking up a sweet looking frame. Also, check out the suspension. We snagged for our Chevy.

We're back and we hauled our Monte Carlo frame back to blast from the past in Le in Tennessee so that they can put the finishing touches on it,

namely one more round through the blaster to get rid of any of the remaining nastiness and clean up around the Well,

we just blast it to the raw metal

and take it out, blow it out, clean it out, wash it dry

and we take it in the booth and put the powder on it. That's right. We're opting for powder coat on this frame. Powder is tougher than paint and due to the way it's attracted to the metal, it does a better job of protecting the inside of it as well. I pull it out of the bows and

bake it for about 20 minutes.

It takes a metal temperature of just about 400 degrees to make the powder properly. Adhere to the frame and the results. Well, you can't argue with that.

Well, we got our chassis back from the guys that blast from the past and they done one awesome job because it looks great. We're gonna go ahead and drop in our motor and transmission. You don't have to do it at this point, but it's just a whole lot easier to do.

Now, as for headers, we decided to go with a set of long tubes from Doug's, these things are ceramic coated inside and out.

And even with the frame modifications that we have, these things should fit like a glove

in the case of the bolts that we'll use on our headers, we're opting for a set of stage eight locking fasteners.

Once you've attached their unique hardware,

they're not going anywhere

now to make this car turn, we went ahead and called up Flaming River and got their complete kit.

Now, it includes everything from the steering column to the box.

When it comes to the box, we're going with a 14 to 1 ratio from Flaming River.

That quick ratio will help us throw that big old Chevy into the twisty bits.

And since the engine is really easy to work on right now, we're gonna go ahead and plug in our dinosaur starter from MS D.

Not only does it look good with its billet mounting bracket, but it's also a high torque, high speed model that's capable of withstanding a great deal of heat and abuse. So it'll keep working well and looking good for a long time.

Our goal now is to make our chassis a roller and to get there, we're gonna use some of this hotcha

sports suspension that we got from summit racing

to start with. This kit employs tubular control arms which along with all the rest of the kit boat right into the original factory location. When it comes to the concept, we want to dramatically improve the way this car handles. This suspension kit is the biggest piece of the puzzle.

The rear upper links are adjustable. So if you need to make a few tweaks, you can

no problem.

Good go and tighten it up. If you go in, see you

all in all. Not a bad foundation for our old Monte Carlo second time around

and you never know it just might be you that gets the test this revamped chassis out.

If you have any questions about anything you saw on today's show head on over to Power block tv.com.
Show Full Transcript