More '01 Chevy "Second Chance" Silverado Episodes

Trucks! Builds

Parts Used In This Episode

Bilstein
Bilstein Gas Pressure Shock Absorbers.
Bushwacker
Pocket Style Fender Flares fits '99-'02 Chevy Silverado 1500, '01-'02 HD.
CTEK Power Inc.
The MULTI US 3300 is a versatile battery charger in a compact format that makes it convenient and easy to charge and maintain all household vehicles. Comfort Indicator panel.
Daystar Products International, Inc.
Torsion bar leveling kit 1988-2006 6-lug 4WD.
Dick Cepek
16x8 6-5.5 DC-1 Chrome wheels.
E3 Spark Plugs
DiamondFIRE Technology spark plugs.
EBC Brakes
Ultimax BlackDash USR Slotted Rotors, EBC Yellowstuff is an aramid fibre based brake compound with high brake effect form cold and is possibly one of the first ever compounds that can be used for street and track driving.
Flowmaster
1/2 Ton, 4.8L / 5.3L with Single Flanged Cat, 2 & 4 Wheel Drive, Extended Cab / Short Bed 143.5" WB, Resonator, 2.50" Outlets, 30 Series Top Ten Muffler, Stainless Tips, American Thunder, Dual pipes out the Side exit (DOS).
Hypertech
Max Energy Power Programmer.
Loctite
Threadlocking compound.
Mickey Thompson
285/75R16 Baja Radial ATZ
Motive Products
The Motive Products POWER BLEEDER(TM) is the number 1 selling DIY pressure brake bleeder. The POWER BLEEDER(TM) operates just like the professional mechanics' tool at a fraction of the price.
Spectre Performance
Chevy/Cadillac/GMC V8 Intake Kit.
Kwicksilver Wheel Repair of TN
Cosmetic repair and finishing of aluminum wheels.
The Industrial Depot
Bolts and hardware of all types.
Video Transcript

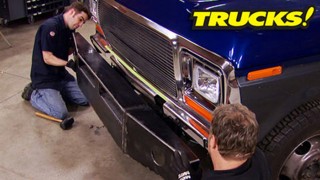
Today project. Second chance Silverado returns to get some easy to install upgrades. These low buck boltons

will get our truck running looking and sounding better than ever and a lot better than this guy. It's all today here on trucks.

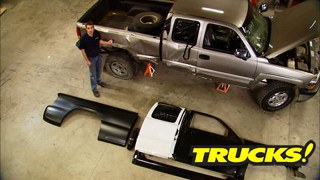
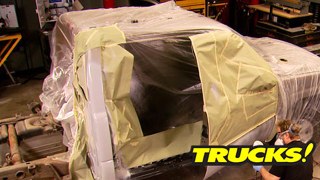
Hey, welcome to trucks. Well, we got our crashed out. Second chance Silverado all fixed up painted and looking pretty good.

We've been driving this thing around town for the last few weeks and there's one thing we've noticed.

Well, we're not the only ones driving a tan or pewter colored late model Chevy. So we wanna separate ourselves from the crowd a little bit without breaking the bank.

Now, this truck actually runs pretty good, but with 100 and 5000 miles on the clock with a bone stock. 53, it's probably safe to assume that we've exceeded some basic maintenance intervals, for instance, take a look at the brake fluid. It's not supposed to be black, so we'll do some basic maintenance and we'll do some upgrades, but right here it's no different than anywhere else and money is not exactly

growing on trees. So the improvements and upgrades that we do are going to be practical, cost efficient and it's going to be stuff that you guys can do at home in your driveway. We'll open it up, let it breathe a little bit better, make sure it's getting enough spark and we'll throw on some electronics that pay as much attention to efficiency and economy as they do. Putting power to the back wheels.

Speaking of getting power to the ground, here's the tires we have picked out. Now they're a little bit larger than stocks. So we're gonna have to make some room for them and we'll show you guys one of the cheapest and easiest ways to gain some clearance on these kind of trucks

that we didn't select any crazy off road tread pattern because we're gonna use our truck, like most of you guys use yours for hauling stuff in the bed, towing the occasional trailer as well as daily driving duties and the occasional off road excursion.

So we picked up these Mickey Thompson Baha A TZ radials. It's got a nice tight tread pattern. Should be plenty quiet while cruising down the highway and offer up some low rolling resistance as well, which is key for efficiency and we should get plenty of miles out of these things too.

Now, if you remember when we first dragged this truck into the shop, it was limping in on the steel spare.

That's because this wheel was damaged in the wreck. Now GM wanted almost 400 bucks for a new replacement, but we had this wheel fixed at Quicksilver Wheel repair in Goodlettsville, Tennessee.

They filled polished clear coated and balanced this wheel all for less than 100 bucks. It's a pretty standard repair for them. So now we've got a nice looking set of original factory aluminum wheels that we can either trade or sell, trying to recoup some of the funds that we spent buying new wheels and tires.

Now, one of the easiest and most effective bolt on upgrades you could do to a late model vehicle is a cold air intake.

Now, with the specter system, we're going to put on the only thing that gets left behind from the sock air box is the mass airflow meter.

This system uses a metal shield that bolts into stock locations in the apron to properly isolate engine temperature from the cold air inlet.

Now, keep in mind that these electronic systems are extremely sensitive to contamination

and just a little bit of oily build up. We're cleaning from the inside of the throttle body can potentially cause some pretty serious idle problems.

Well,

yeah,

the stock air meter gets re installed into the specter system using couplers provided for a nice secure fit.

Now, it's a good idea to leave your clamps just a little bit loose until you get the entire system assembled just in case you have to make any adjustments. For instance, you want to make sure your air meter is clocked so that your electronic connection is not under any stress.

And with the help of camera guy, Rob, we can now show you the new airflow path kind of interesting.

Now, this is exactly why the specter cold air intake is going to work so well, the shield

isolates the air intake from the hot engine bay air. And since the bottom mounting blade for the stock air box is completely gone, we've got unrestricted air flow from a cool exterior air charge, even with a bit of a ram air effect, this is going to work great.

Now, like Kevin said, this truck's got over 100,000 miles and I'm sure it's due for a new set of plugs. Now, these LS series engines, they're really efficient. We got 100,000 miles out of the Stockers and I'm sure we'll get the same out of these E three diamond fire plugs and they'll maximize every drop of fuel that enters the combustion chamber.

All right. Now, going to a larger tire size like we are, we know we're gonna throw off a speedometer about a few miles an hour. So we thought about going with hypertext speedometer recalibrated,

but we also wanted the benefits of their econ programmer to maximize efficiency. But the max energy tuner has all those features rolled into one. So that's what we ponied up for.

The installation is as easy as following some on screen prompts and it lets you adjust for things like tire size, a new RPM rev limit or even a top speed limiter

as long as your tires are up to the task.

And

our metric tires turned out to be about 32 and three quarter inches tall.

So now that we're ready for a larger tire diameter, we're also going with a better looking after market wheel that has a different offset. So these stock fender players no longer offer the protection we need.

So we're gonna throw on a set of these bushwhacker pocket style flares that are more than an inch wider at each corner. This should give us the protection that we need from flying debris coming off the new wheels and tires and even though they look like they're held on with these giant cool looking stainless rivets, the fact is they're held in place in the factory location without cutting or drilling with the provided fasteners.

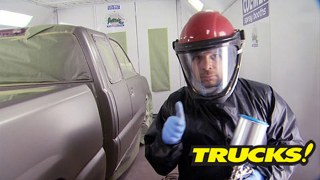
Now, you've seen us throw these flares on before and leave them black like on Das Bronco and they look kind of tough, but we're going for a little more of a street approach with this truck. So we're gonna paint them body color especially since we got such a bang on color match.

But before we do that,

we're gonna scuff these and paint them a little bit of work to do.

Tell him, Jim.

That's right, Kevin. When the guys come back, we'll have the truck on the lift to uncork the exhaust for more gold and it's new brakes for more wool. Stick around.

Let me put you to work here. I ain't working.

How you mean it? You want me? What, what am I supposed to do with?

Hey, welcome back to trucks. Thanks for sticking with us. Well, half of the equation for opening up our second chance Silverado Lipner breathe a little bit better is already under the hood in the form of our specter cold air intake. The other half sitting right down here, the flow master forced to exhaust system

and they've added a resonator here. So we don't have any of that in cab annoying droning and the intermediate pipe has been increased to a three inch man

diameter which is going to help scavenging and evacuate heat from under the hood. But right here, this is where the fun starts. This is their 70 series big block tool, single inlet, dual outlet configuration. You've got some choices. We want a dual exhaust. Well, because it looks cool and it sounds like dual exhaust. The stainless steel tips don't hurt either. So now we can have the sound. We want the efficiency we want without waking up the neighbors

and with all the heating and cooling cycles, an exhaust system goes through over its life. Even on a newer vehicle, sometimes you're going to have studs break off. We applied a little heat to the other side and the nut backed right off.

You wanna get it out one piece. Yeah.

Heck yeah, man, I'll take it. Yeah,

that wasn't very heavy.

Now, a quick fix for the broken stud is grabbing a three eights bolt from the industrial Depot bin and welding it in from the back side. Then we can assemble the rest of the cat back flow master system

with the muffler attached to the intermediate pipe. Now you can route your exhaust outlets around the spare tire.

The clamps are in place for adjustment.

Once you've got your final fit established, then you can weld the pipe joints together.

Now, even though it looks finished with the tips on, you don't want to lock everything in place until you've set the vehicle back down on the suspension and cycle it with its own weight.

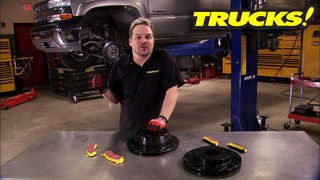
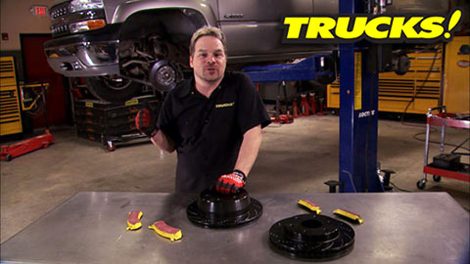
Now, we're going to flush the braking system on our second chance Silverado, but let's face it. The brakes themselves are mild up, the rotors are warped and the pads are worn out. So it's time for an upgrade. We're going to start with these E BC brake rotors. These things are a stock replacement size, but as you can see, they're dimpled and vented, this allows them to handle more heat and dissipate gasses. Now, what that'll do for you is give you more consistent braking under any condition, but especially under extreme conditions such as towing or hauling a heavy load. Now to complement the cool looking black rotors, we're going to use EB C's yellow stuff, brake pads which have the most aggressive pad compound of any of their street brake pads. The combination of the yellow stuff pads and the dimpled invented rotors are going to give you more clamping power with the same diameter rotor and that's pretty cool. But check this out. One of the neat things about these pads is the break in compound that they have, which eliminates any need for a complicated bedding procedure for your pads. All you do is drive on them for a couple of 100 miles of easy breaking and the pads are perfectly seated, which is going to give you a longer extended life for your whole break in system.

Yeah.

Now if you find that your new E BC rotors just won't slide right up onto the rear hubs. Well, it may be that your

E brake shoes have been seated into the old rotors and expand it out. This is an easy fix.

There's usually a release tab on the adjuster and this truck is in behind it.

You just

rotate the adjuster counter clockwise and it brings the shoes in

gives you that slight interference fit that you need.

Perfect

that

up next. It's new torsion keys for a better stance. And later we'll install our new flares, wheels and tires. Stay tuned.

Hey, welcome back to the shop. And we've got our new pads and rotors installed at all four corners. But before we set the truck back down on the ground and flush the braking system. Well, we wanna throw in a set of Bill Stein shocks to help dampen and control the heavier tires and wheels we're gonna be installing. If you guys remember Bill Steins were originally installed on a lot of the ZSE

ones that rolled out of the GM factory. Now up front to level the truck out and gain a little extra hire clearance, we're gonna be installing these Daystar forg torsion keys that basically re index the torsion bar and they'll give us about two inches of lift up front. Now, typically you need a special tool to install these so it'll unload the pressure on the torsion bar so you can safely back the adjuster out. But what we're gonna use is ac clamp that we've cut the pad off of and what's left of the post will fit in the relief, cutting the torsion key so you can safely swap it out.

Now, if you're gonna be doing this like we are and using a heavy duty C clamp. Well, it's a good idea to go ahead and disconnect the shock, maybe even the sway bar end link, let the suspension droop as much as possible. That way you're not fighting so much tension.

Now, before you start removing parts, make sure you use a paint marker or count the number of exposed threads on the torsion bar, adjusting bolt.

Now, if you have access to the appropriate torsion bar unloading tool. Well, it's best to use that,

but it can be done with AC clamp, just be extra careful.

And you guys that have done this job before, will you know that rust and corrosion can almost bond the torsion key to the bar? So if you're going to tackle a job like this, soak it with penetrating oil a few days prior,

then once you have enough tension on the torsion key, you can install the nut block and the torsion bar, adjusting bolt,

just make sure the bolt centers itself in the relief cutting the torsion key,

then just tighten up the adjusting bolt. See your paint mark lines up or the number of threads you counted is the same.

And once you get the vehicle back down on the ground, well, you can fine tune to ride height if you need to by tightening or loosening up the adjusting bolt.

Now, replacing the shocks is a piece of cake and something you could easily do in your driveway with a floor jack and a couple of jack stands

a couple of hours. It'll take, it'll be well worth it when you take it for a test drive,

build on a budget truck projects that save you time and money.

Now, like we told you before, we're gonna be flushing the brake system on this truck. So while Kevin's laying some paint down on our new fender flares, I'm gonna show you how you can bleed your braking system

all by yourself.

The mode of products kit we got, came with the GM adapter that fits right onto our master cylinder.

Once that was on, we filled the container with the appropriate 0.3 fluid for our truck,

then pressurize the tank to about 10 P si

and with the power ble

well, it eliminates the need to have somebody else in the cab pumping and holding the brake.

Now, if you guys haven't done this before, you need to start with the wheel cylinder or brake caliper farthest away from the master cylinder and work your way back,

crack the bleeder open and let the fluid escape.

And what came out of our truck was nasty.

You can tell this is probably the first time the brake fluid has ever been changed and it was in dire need of some fresh fluid.

And after a few minutes, you can see fresh fluid coming through the lines and the system completely flushed out for that caliper.

All right, let's take a look at what we got here. All right. Now, what fluid do you want in your breaking system?

Now, the reason this first one took so long is the reservoir was full of that old nasty fluid and we had to flush it out completely and push it through the lines now that the reservoir is full of nice fresh fluid. Next three shouldn't take nearly as long.

All these power bleeders start at about 50 bucks. We picked ours up mode of products.com.

Hey, welcome back. Well, check out our painted bushwhacker flares. Part of the reason these things color matched so well is because we use the same recipe as the rest of the paint job. We started off with an adhesion promoter on the raw plastic, followed it with a gray sealer just like the rest of the truck and the same amount of base coat the same way with the same paint gun to get a perfect color match. It's really no secret once you break it down into simple steps. But before you start thinking, these are just for show, check this out

with our new, wider than stock wheels with more offset, these new, wider than stock fender flares are gonna give us the coverage we need. So we don't beat the paint off the rest of the second chance Silverado and a neat benefit of these flares is that they only took about two minutes a corner to throw them on.

They look pretty tough.

Now, check out our chrome plated DX CPD C one wheels. Now we went with the 16 by eight because it just matches the theme of the rest of the truck and with the clearance we gained with our day start torsion keys. Well, we got plenty of room for our 2 85 75 16 Mickey Thompson tires and with the chrome. Well, it just the whole thing together matching the mirror covers and the bumpers,

the battery in any vehicle is a consumable part, meaning that it's going to wear out at some point in your vehicle's life, nothing you can do about it. However, you can maximize your battery's life with ac tech charge.

Now,

CTE has several models available. This one is a multi us 3300 and can maintain any vehicle with a 12 volt system including

motorcycles or a TV S regular passenger cars. And it has a unique cold temperature mode that enables faster recharge even in the coldest winter conditions. C tech has accessories as well like this comfort connect that you leave hardwired to your battery in case your terminals are difficult to get to. It's got an led feature that constantly lets you know the state of the charge your battery and a quick connection and you're up and running.

Now. C

tech will never overcharge a battery because of the unique design of the internal circuitry and with features like that. This may very well be the smartest battery charger in the world.

Now, if you've got any questions about this truck or anything else you saw on today's show, go to Power Block tv.com

now. Yeah, one more thing. Take a listen.

Yeah,

Flowmaster.

Hey, thanks for watching trucks. See you guys next week.
Show Full Transcript