More '01 Chevy "Second Chance" Silverado Episodes

Trucks! Builds

Parts Used In This Episode

Lincoln Electric
Power MIG 255C MIG Welder.
Agri-Cover, Inc.
Lorado truck bed cover '99-'07 CHEV/GM SB.
Auto Body Color & Supply Co.
Paint and prep supplies.
Grainger
Shopping Wheel Casters (4)
O'Reilly Auto Parts
Pinstripe and steel wool.

Video Transcript

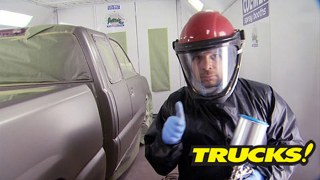
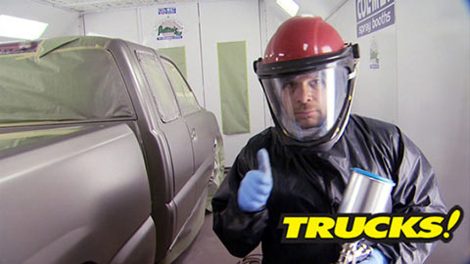
Today. Now that our second chance Silverado is the right shape. Again, it's time to make it the right color. Again. We'll show you how to paint only the parts you need to and how to blend the color. So no one can tell what's new from what's original. It's all today here on trucks.

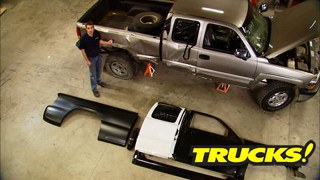
Hey, welcome to trucks. Well, today we're back on our second chance Silverado, which started out as a totaled out wreck that we rescued from a salvage auction with almost the complete right hand side sheet metal wiped off of it in a wreck over the course of a couple of shows, we built it back up to what you see here, which is a complete truck with no body damage. But as you can see, it looks kind of like a patchwork quilt or a jersey cow. So today's show is all about pay

only what we need to because we are on a budget with this thing and giving the illusion of a perfect color match. And we just got back from the car wash and believe me, it's a pocket full of change. Well spent. It gave us a chance to blow out all the dirt and crap and leaves that build up in the cow and the engine bay and in the door jams that way, it'll keep all that debris from flying out when you're laying down your paint ruining all your hard work.

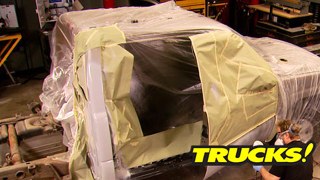
Now, we had installed the door panel and all the weather stripping when we were adjusting the fitment of the door. Now, all that stuff's got to come back off because we need to paint the exterior. Now, there's two ways of doing it. You can do it the quick and dirty way and grab a roll of masking tape and just tape up everything and shoot her around it. But you're gonna end up with tape lines and you run the risk of getting overspray in parts. You didn't wanna paint or you can just spend 15 minutes of your time and remove things like the rubber weather stripping the exterior mirror and the door handle that way

lined up with professional results.

Unlike the front door, the trim panel in the back door. Well, it stays in place. We'll get rid of this weather seal, but the side glass it also stays in. Now, a professional body shop would pay a glass company to come in and cut this piece out since it's glued in as an assembly. But you can save some money by using aperture tape that peels the reveal molding back, allowing the paint to blow in under the molding. When you unmask. Well, the molding covers it up again, giving a very nice professional result. Now, we've got this thing torn down, but there's still quite a bit of prep work to do. So let's get cooking.

So, what we're doing here is prepping the surface for paint. This lower portion has already been primed, blocked and primed again. So we know it's flat. We're just giving the paint something to stick to

and down here in the gray portion. But we're gonna use 320 grip paper up top on the painted surface. We're gonna use something a little bit finer. Oh Yeah, we're using a flexible sanding board as to not put finger marks into the primer when we're sanding that'll show through our paint job

as you can see, we got our tailgate torn down, but check it out. There's nothing wrong with this panel. There's not even a scratch on this panel. So what in the world are we doing prepping this for paint when there's nothing wrong with it? Well, like we said, we want to create the illusion of a color match and the way you do that is to paint up to your blend panels and blend that color in a transition that's smooth enough to where your eye can't pick it up color match. The way you prep these panels is a little bit different than you would on a primer surface. For instance,

we're using 800 grit pads on ad a with an interface. So we don't dig into the corners

and it cuts it down enough to where the panel stick, but it doesn't cause a scratch. It'll cause your metallic to stand up on end where you can see it.

If you don't want to spring for the money for these pads and ad a standard, you can do it on the cheap,

a gray scuffing pad is the perfect vehicle for this. It creates a fine enough tooth to where the paint will stick and it just hazes out the clear coat. Perfect prep for that. If you got a little more time, a

little more energy.

Now, for the illusion of color match, we're talking about a paint transition between a repaired panel and a blend panel that's so subtle. You can't even see it. We're using this fender as an example and a paint system with silver color. So it contrast against the black and you can see the blend. We're using a PPG system because in my experience, this is the best way to blend color, which uses a PPG base code and D BC 500 clear base. There's lots of ways to blend. This is what works best with me and here's how to do it.

The technical term for this type of blend is a wet bed blend. The first step to a wet bed blend is a coat of clear base.

Next, we'll start with full strength color

we'll keep our blend small because all we're after is getting our transition or our edge up to color.

This will take us a couple of coats and notice my gun technique. I'm painting away from the panel that I wanna blend into.

This gives me a lot more room to do my color transition the way I want to do it nice and gradual.

Then the full strength color gets poured out of the cup and we're ready for the next step, which is a 5050 mixture of clear base and the full strength color, this is called stepping down your paint. With the clear base, you keep the consistency of the base coat, but you dilute the color strength

with the step down paint, you're bridging over top of your transition again, with your gun pointed away from the rest of the panel.

Now, with our step down base code, we'll step it down again again with a 5050 mix of our color and more clear base.

There are two huge advantages for doing this method. The first one being that your metallic distribution is very even the second one with painting into a clear wet bed, your metallics sink into it rather than sit on top

will continue to step down and bridge over the transition. And by the way, we're waiting 5 to 10 minutes in between cos

by now, the original paint in the cup has been cut in half, at least three times

you can see that the color strength is very diluted.

Now, normally, when you're blending into the same color code, you're not going to need this many steps. What I wanted to show here is that you can get a beautiful slow transition quite easily.

My LP H 400 LV paint gun has got about 20 pounds coming into the air inlet.

My gun distance from the panel is about four inches.

I'm taking my time and watching what I'm doing.

I'll do one more 5050 makes of what's left to the color and more clear base code.

This time, we'll bridge over the entire transition.

And by the way, there's no catalyst or no hardener in this base coat. So it's safe for me to spray without my positive pressure system.

So you've just learned how simple it is to do a blend in a transition like this. But guess what else you've learned? You've learned a custom painting, standard color fading. This is for flame jobs for shade downs and that is a skill that you can bank on for as long as you wanna paint

up next. Now that you know how we color match our Silverado. And later, it's an inexpensive way to make your jack stands, mobile, jack stands stick around.

Hey, welcome back to trucks. Well, we got the second chance Silverado in the booth. The bed is scooted back on the frame, the wheels are off so I can get access to the inside of the bedside and to blend the back of the cap. So we don't have any dry spray back there. Again, professional results. The only thing I haven't wrapped up is this corner glass here and we're gonna use the aperture tape. We're talking about to peel this reveal molding back. This you can get at any body shop supply and it's got a hard plastic edge here and sticky masking tape. Here, here's how it works.

The plastic edge slides in behind the reveal Molly,

putting a little bit of tension on the rest of the tape pulls the molding away from the painted surface.

This allows enough room for the paint to blow in behind the reveal molding, creating the illusion that she took the glass out in the first place.

This method works great on all kinds of encapsulated glass like windshields, back glasses and side glass like ours.

We give a quick tack to all the panels and then start with our Epoxy sealer.

The function of a sealer is not to cover up body work or bare metal. All you're trying to do is give yourself a consistent ground coat for your color to sit on. Otherwise you're over coating your color and trapping solvents hiding the spot.

Now, just like in our practice panel, we're doing a wet bed blend by using clear base on all of our blend panels like the tailgate back of the cab, the other bedside the front fender and the top of the door.

After about 15 minutes of flash time, our first coat of color goes down beautifully over the gray Sealer.

It almost comes up to full color after one coat, which is another beauty of using a cedar coat.

Now, here's a technique for you painters to try. It's called walking the panel. Basically, what you're doing is painting the whole panel in one swoop rather than break it up into sections.

This gives you a smoother transition and less chance of modeling or splotching your color.

Now, after a second coat of base, we can unmask our blend panel which shows us two things in the first place, our color is pretty darn close. But in the second place, you can see enough of a difference to where we know we have to blend because this would be visible with clear coat on outside. It would look like a mistake. So with our gun loaded with full strength color will blend slightly into the blend panel.

Every place where the original paint is meeting new paint, we're going to blend the back of the cab is almost invisible, but it's enough where it would throw you off if the color didn't match,

same as the top of the door and the front of the fender

step two of the blend just like on a practice panel is a 5050 mix of full strength color and D BC 500 clear base coat

now, because we're blending onto the same color, it's not going to take nearly as many steps as our practice panel did to achieve the illusion of color match

on any vehicle. Your eyes are naturally drawn to the panel gaps, blending your color over top or in between the panel gaps creates a distraction and the illusion of color match.

Taking it to the next level with a wet bed blend and stepping down your color creates a transition that can't even be seen in direct sunlight.

Now, I'm real happy, not only with the color match, but also with how my blends turned out. And we only actually had to do two stages of stepping down with the clear base. So the point is once you're satisfied with your color transition, well, you can stop. So now all we gotta do is put two fat coats of clear in this thing, throw it back together and drive the heck out of it

up. Next shopping cart casters can help you move your grocery getter and later adding your own stripes is cheaper and easier than you think. Stay tuned.

Build on a budget truck projects that save you time and money.

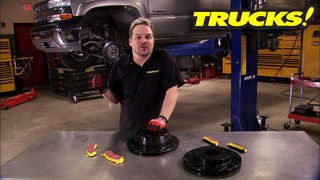
Hey guys, welcome back to the shop. Now, while Kevin's in the paint booth, finishing up some details on the second chance Silverado paint job. Thought I'd take a few minutes and show you guys how to make a jack stand into a mobile jack stand

because let's face it. Sometimes you're halfway through a project and you need to move on to something else or you got a long term project you're working on. You just need to shove off into the corner of the garage. Well, here's an easy way to give this jack stand some wheels. It's not gonna take anything but some scrap metal

and some casters. Now believe it or not, these are just shopping cart casters and before you get any big ideas and head down to your local mall to steal a cart.

Well, these things are only 10 bucks a piece and they're load rated for 350 pounds. Now, the scrap metal, it's just tubing cut offs. We had from a previous project

and this is just a piece of quarter inch angle iron. You can pick up almost anywhere. The only other thing we're gonna need

is our Lincoln Mig welder.

Now, the first thing we're gonna do is measure for our angle iron base. Now this jack stand isn't square. So we're gonna put the angle on the short side and extend the mounting legs for the casters out a little bit for a little extra stability. Then we'll just tie the angle together. Using our round tubing

looks like we need a piece about 19 inches long.

Now, if you're gonna be taking on a project like this, don't skimp on materials, make sure you select something that can support the weight your jack stand is gonna be holding.

And you'll notice for the cross braces, we're not using angle iron, we're using round tubing

and I'll show you why here in a second.

All right, with holes drills for our casters and some of the sharp edges knocked off some to weld in our cross braces.

So make sure you put them too close to the jack and lock everything in place.

Now, if this is your first welding project, well, it's always a good idea to have an experienced set of eyes. Look over your work before you put any weight on it

because nothing would be worse than you getting hurt or your project getting damaged because of a failed. We

another benefit of these large diameter shopping cart casters is they'll easily roll over cracks or any imperfections in your shop floor.

All right, for about 15 minutes of your time and about 50 bucks in materials, or you're gonna end up with a jack stand dolly that not only comes in really handy, would hold a good bit of weight too with each caster rated at 350 pounds. Well, this dolly should support 1400 pounds. No sweat. One on each corner of your truck. You got 5600 pounds of capacity, which should hold most full size trucks. If you drive something a little bit heavier, you're gonna have to fork over a little bit more coin for a stronger caster and check this out. Not only does it work as a jack stand dolly,

but doubles as a car dolly

even for some pretty big tires and wheels.

Hey, welcome back to trucks. Well, second chance Silverado is road ready once again and we have successfully created the illusion of a color match. For instance, look at the wheel opening. This piece was not painted, that's factory painted, it matches the bedside almost perfectly. We're also liking the clean look of no Z 71 stickers and no body side moldings, but it's almost too much of one color. So we got one more project just to break up the tone a little bit.

The best way to use vinyl pinstripe is to pull tension and stripe the whole truck side at once

right about there,

then we'll peel the cellophane back a little bit and have some fun with the ends.

Here's where you can get creative and do pretty much whatever you want and what the stripe will allow

when you're trimming your hands, use light pressure, don't cut into your paint if you can possibly help it.

Now, on your panel gaps, you wanna cut just ahead of the gap. So the stripe doesn't peel off, work your way down this side, cutting your gaps as you go

on the back, we can have some fun again

and do the reverse design that we had on the front. This gives us balance and symmetry in the design and looks much more expensive than it is.

Now, this stripe at a dealership, it costs you about 50 bucks, but a roll of stripe tape with enough to do both sides and a little left over 10 bucks and you can do it yourself.

Now, we plan on using this truck, like most of you guys use yours for hauling stuff around in the bed. So we install this Lorado

Tono from agri cover. Now, it's essentially the same cover that we installed on the Toyota Tundra last year. It's got the same weather strip seal up front, same style of attachment and it's got built in tensions so you can keep the cover nice and tight.

But the Lorado has lower profile angled side rails for a little bit sleeker and cleaner look.

Plus we got the side benefit of possibly increasing fuel mileage, which is always nice.

Ed this thing's got a lifetime warranty.

Well, there you have it. Our second chance Silverado is all fixed up.

Now, if you guys remember we're into this thing for $3094 that's for the truck and all the replacement body panels, another 140 for the paint and all the materials including the $10 Pinstripe. And that gives us a grand total of $3234 which is pretty smoking, especially when you consider this truck is a $9000 book value. So what do we have, we've got a nice clean truck with lots of life left in it that is primed and ready for some cool upgrades, which is exactly what we're gonna do next time. You guys see the second chance Silverado. So if you got any questions over this build or anything else we've done on trucks, go to the power block website, check us out. Thanks for watching trucks. See you guys next time.
Show Full Transcript