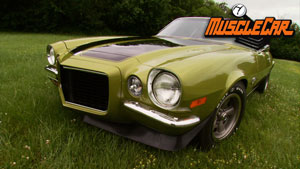
More '70 Chevy Camaro RS "Limelight" Episodes

MuscleCar Builds

Parts Used In This Episode

Auto Body Color & Supply Co.
Custom mixed vinyl dye by application
Auto Body Color & Supply Co.
PPG's OneChoice Plastic Prep System- 3 Steps for Better Prep
Classic Industries
Interior Restoration Parts
Dupli-Color
Paint, Engine, Enamel with Ceramic Resin, Semi-Gloss, Black, 12 oz., Aerosol, Each
Dupli-Color
Paint, Self-Etching Primer, Flat, Green, 12 oz., Aerosol, Each
Hurst
Manual Shifter, Competition Plus, Chevy, Mercury, Ford, Pontiac, Each
Video Transcript

Today on Muscle car, it's an interior extravaganza.

Limelight gets a cavalcade of creature comforts. Rick spent some time yanking on the headliner and seat covers plus A MC gets its due with the 1970 Javelin.

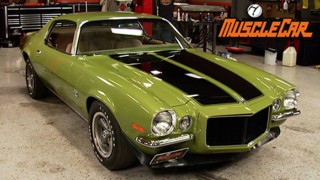
Hey guys, welcome to Muscle car. We got a project sitting in the shop and it's been getting a lot of attention and you can see why our 70 Rss S Camaro project limelight is sitting pretty sweet.

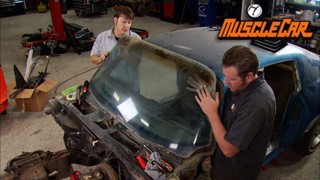
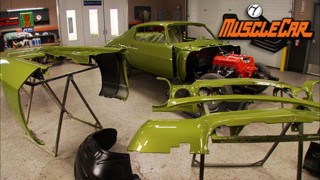
Now, this is a stock style build with every performance option in 1970 had to offer including a 375 horse big block 12 volt rear end and heavy duty suspension, but it's still missing something. Every car has to have an interior before the car was blasted. We pulled everything out. We don't plan to reuse very much of it because it's the wrong color and it's in pretty bad shape, but we did save the seats because we plan to ref foam and recover them. We're also replacing the whole wiring harness because we don't trust 40 year old wires plus right in a full set of factory type gauges. So we need a different kind of set up but before we put in any new parts, we need to cover up all this bare metal,

many GM cars came from the factory with no coating on the inside, but we want to give limelight every bit of protection we can.

So we're breaking out the dup color

and since it'll be hidden under the carpet, it'll still look factory

beautiful.

It's hard to get excited about wiring, but it's a step that you cannot afford to neglect. It runs under and through all the interior components. So it needs to go in while the car's still gutted.

But no need to panic. Just take your time, go one step at a time and it's really not that hard.

Do yourself a favor and get the steering column completely out of the way. It will make this job much easier.

I

left the old harness in until the last minute. So the routing and hook ups will be fresh on my mind when putting the new one in,

there are several points that attach the main harness to the car, start by removing the fuse block and then look for any other clips, plugs and brackets until the whole thing comes out in one piece.

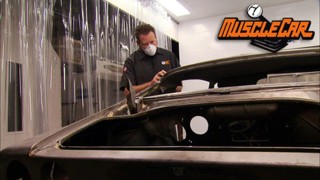
This area was covered up when the car was blasted. So it needs a little attention before the new harness goes in. Clean off the rust with a wire brush, hit it with some etching primer and semi gloss black,

a new firewall insulation mat will keep the engine noise down

with the mat in place. The new harness goes in using all the same mounting points as the old one.

This is where using a quality oe style harness pays off all the plugs and clips will match. So it's actually kind of hard to get it wrong.

War

is awesome. You just gotta take some time through it. It's really not all that big of a hassle or all that complex.

Once the main harness is installed, you can run the body harness out back using the existing clip.

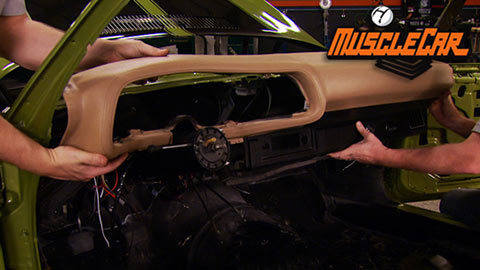
Well, Tommy gets a steering column put back in and gets the last few wires run. I'm gonna get some dye laid down in all these parts.

Now, some stuff you can order in the factory, correct light saddle, which is the color that we chose for the interior, but other stuff you can only get in black and that means you have to dye it. But before we do that, we gotta get all stuff prepped out

PPG designed a whole system just for cleaning non metallic parts. It takes all the guesswork out of prepping everything from interior plastic parts to exterior, flexible bumpers and body kits.

The three step system includes sealed disposable applicators and a final spray on adhesion promoter.

Now, you can use the OEM color codes to order the dye. But if you want an exact color match, then do like we did. We send a whole door panel over to auto body color and supply. They mix up a custom batch so we know it's dead on. This stuff comes straight out of the can and ready to spray. So just dump it in. You're ready to go.

Bye.

Dye goes on a lot like base coats to build it up in three or four thin layers.

Once it looks covered, add one more coat. Now, this is going to help longevity for parts that get a lot of contact or abuse like armrest and kick panels. You can add a layer of flat clear for extra insurance.

Coming up, Tommy installs a spiffy new set of gauges and Rick makes our tired old Camaro seats super cozy and comfy.

Here

we go.

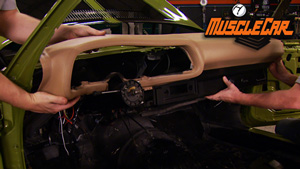
Hey guys, welcome back. Before we install that freshly dyed dash, we're gonna assemble the gauge cluster. Classic industries has all we need to swap out this basic goal set with the deluxe gauges and all we'll be reusing is a few pieces of hardware.

This plastic assembly is over 40 years old and it's obviously seen better days. Luckily, the most important pieces for us to save are the screws since we're able to replace pretty much everything else.

The new housing is the same as the old one, but what we're putting in it is not to make the deluxe gauge set complete. We're adding attack and clock and the idiot lights are being replaced by actual gauges for water temperature and alternator

while you've got it all apart. This is a great time to change any old bolts. These things aren't the easiest to change with the gauges in the car. So you could spend a few extra bucks on the front end and save tons of time later on.

You spend a lot of time staring at the dash while you drive so you might as well make sure it looks good, not to mention. It's also one of the first things people see when they check out your interior,

we're topping it all off with a new gauge bezel. The original one was just too far gone.

Now, a lot of the interior panels overlap the headliner. So what's gotta go in next? Now, there are some one piece molded headliners that are a little bit easier to install that you can get, but we wanna keep this car all original. So we're going with the bow type.

Now, this one from Classic Industries is available in the correct color and it even has the original grain and pattern.

We're reusing the factory bows which need to be removed and installed in the new headliner in the same position that they were originally in the car.

If you're reusing the original clips, beware, it doesn't take much to turn them into a pile of plastic shavings

in there.

I'm marking the edges so I can be more precise with the application of the glue with this perforated style headliner. It can actually bleed right through those holes to the visible side.

It takes about 10 or 15 minutes for the adhesive to be ready to stick.

I got a little bit of stretching and pulling and gluing.

I gotta come back here and trim this edge, roll it,

finish gluing it in place

pretty much. There doesn't look too bad.

And now obviously there's still a few little wrinkles in it, but that all smooth out once it gets out in the sun and heats up and if it bugs me too bad, I can always use a heat gun and kind of smooth it out that way too. But for now

it's pretty good.

Still ahead AM C's entry into the T A racer world. Plus seat covers, door panels and consoles. Oh, my.

Today's flashback. A 1970 javelin SST Donohue

way back in 69 Mark Donohue took first place in the Trans Am racing series behind the wheel of a Camaro.

The next year. A MC desperate to make its mark on the road course series lured him into a Jave

Mark Donohue trans AM champion last year in a Camaro

and Roger Penske team captain

are out to do it again with two brand new Sonoco.

Javelins. Cars are spectacular on a racetrack because they don't go around like you're on a rail. They slide and

wheels up in the

corner.

They're really fun to watch.

Donohue fought hard making eight top three finishes and three wins. But in the end, Parnelli Jones and his boss Mustang edged him out for the title by just one point

in order to race the Javelin A MC had to homologate it and sell 2500 units.

Thus, the Mark Donohue edition was born.

Its most obvious race mod is the huge duck tail spoiler designed by Donohue himself.

All additions were supposed to be SST S with a Ram

360

but several were ordered with 390.

This one's got the 360 which had a higher 10 to 1 compression than the base model and made 45 more horse for a total of 290. A valve tied to the throttle activated the Ram air scoot.

The power blister hood was part of the new design for 70 along with a twin vent

grill taillights were stretched across the full width of the rear end with a one year only center backup light. The inside,

it was all new too. It featured a redesigned dash with 100 and 40 mile an hour speed up a

sports steering wheel and a set of optional rally pack gauges.

Oh, and check out those seats that ain't vinyl. It's corduroy.

This one's also equipped with the weather I ac unit whether I like it or not and I do

now what a MC Muzzle car would be complete without the go packing

that got you front disc brakes, heavy duty suspension, dual exhaust. And most importantly, that sweet c strike

options like a front fuller

simulated side pipes,

seven inch steel wheels and a Landau top were extra.

The car was kind of pricey at around four grand. About 1000 bucks more than a javelin SST

A MC just barely met the race quarter

so

and 2500 and one.

So you don't see too many of these around. This car is a real survivor, retaining all of its stock components and wearing most of its factory big bad orange paint.

It was originally bought by a 70 year old lady whose grandson simply liked the color.

That's one cool little grandma. Now it's in the hands of Mike Gray.

A lifelong a MC fanatic. It gets driven quite frequently. It's a, it's a good weekend car

really stands out, looks good at car shows and you certainly don't lose it in the parking lot. The Mark Donohue edition was only around for one year though. He did continue to race with the Javelin team in 71 and 72 when A MC won the Trans M Series titles. Tragically, he died from injuries, he sustained in a formula one crash in 75.

But his racing legacy lives on in the car that bears his name

later. Rick gives the Camaro seats, the naughty treatment.

Who's your daddy?

You're watching Muscle Car for a DVD copy of this episode. Just go to Power Block tv.com and order your copy for just 595 plus shipping and handling. Start your own muscle car collection delivered right to your door from the power block.

Hey guys, welcome back. While Tommy gets the back seat carpet and shift are installed. I'm gonna tackle the front seats. I know a lot of you guys out there may think that the eighties upholstery job here is totally rad, but we need a stock type interior. The best way to do that

is to recover the original frames. Now, Classic industries has foam and covers that match the original style and colors. All you need is the bones to build off of. That's real common for the seat frames to actually outlast the rest of the car. And even if they are a little damaged, they can usually be repaired. Now, before we get in this thing too deep, we need to get this whole cover off and see what condition our frames are in

there it goes,

save all the little parts, try not to break anything.

The beauty of a kit like this. So you can recover your seats with the tools you already have lying around, plus a few bucks for a set of hog rigg players.

At this point. You want to check for things like broken springs or cracked frames so you can repair any damage before you cover it back up. Our frames don't need any repair, but we still need to get rid of the rust if you can't blast them, use a wire brush to clean them up

with the frames freshly blasted, we'll seal them up with some duplicate

engine enamel. Now, normally these things aren't painted from the factory, but these are rolls so they need all the rust protection that they can get.

All right now, for the hard part getting that new seat cover over the new foam. If your old foam is still in decent shape, we can go ahead and reuse it, maybe save yourself a few bucks. But odds are, especially on the driver's side, it's probably beat up pretty good. It's gonna need to be replaced.

Start out by hogging in the cover to the center of the seat foam, then work your way out.

Put it on seat covers, like headliners or vinyl tops is a whole lot of pulling and stretching. Just make sure the cover stays centered on the pad. The stitching lines will make it painfully obvious if it's out of.

That's looking pretty good.

The seed back is similar to the bottom stretch. It, hog, ring, it

stretch it, hog, ring, it

stretch it.

Yeah, you get the idea.

Now, there are some areas where no amount of stretching is going to remove the wrinkles and that's where batting comes in,

stuff it into the loose areas until they're nice and smooth.

Then install the seat back cover. I also cleaned up the seat tracks and painted them and now they're ready to install.

That's a good looking seat right there.

I'm gonna bolt this dude in.

Look out, boss, man coming through.

Oh,

hey, man, that thing looks pretty good for a Bondo Bandit like yourself. Thanks. The rest of the interior doesn't look bad for a push rod Benzi.

Well, you know, man, I started off with a huge box from classic industries, including the carpet, rear panels, rear seat covers, console and then I added the original style shift rehearse in us. Yeah, it looks like you got the glass installed too, man. Looks good. Yeah, neither one of us are done yet. We still got to get the steering wheel and the door panels installed. Yeah, and I still gotta finish the driver seat. So I'm out.

We already stuffed the guts into the doors so now we can cap them off with the door panels. We've even got some fresh shiny for that factory fresh look

and the cherry on top is a brand new steering wheel

heads up, man. Got the driver's seat done. Cool man. Set it in there. Let's check it out.

This interior is looking nice. Couple little details we can call this dude done. Yeah, but we're all out of time for this week. So until next week y'all keep it between the ditches.
Show Full Transcript