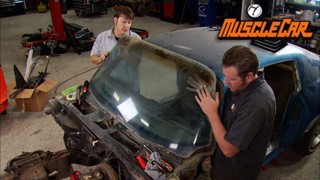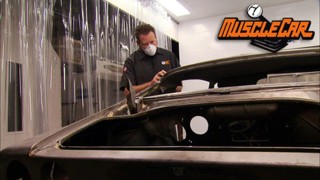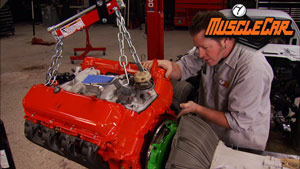
More '70 Chevy Camaro RS "Limelight" Episodes
MuscleCar Builds
Want more content like this?
Join the PowerNation Email NewsletterParts Used In This Episode
Matco Tools
Balancer Puller Kit
Matco Tools
Starter Plus Stud Welder
Strip Masters of Nashville
Plastic Media Blasting
YearOne
Hood Cowl Vent
YearOne
LH/RH Fender Patch Panel Pair
Video Transcript
Today on Muscle Car project limelight shows off its birthday suit. Rick fixes some minor flaws and Tommy shows how to update an old repair mercifully. He doesn't show his birthday suit. Plus this old +402 has a story to tell
story.
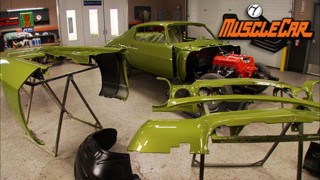
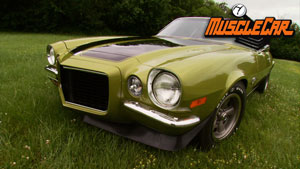
Hey guys, welcome to Muscle car. It's not every day that you see 40 year old sheet metal that's still in this good a condition. So you can imagine how stoked we were when we got our 1970 Camaro back from the blaster. Now, this is what you hope for with a California car. I mean, look at these floorboards seems look like they were just stamped out yesterday. Overall, we got really lucky. The hood deck lid and doors only have a few minor dinks.
The fenders are by far the worst panels we're gonna have to
build in a few patch panels and rework a previous repair and then we can get started on the body work.
Now, we like to think that we know cars pretty darn well around here and after a thorough inspection of project limelight, she looks pretty solid, but some people will go through a lot of effort to cover up flaws. So you never really know what you got till you get her down to her birthday suit. And that's where strip masters comes in.
These guys don't do sand blasting. They do plastic media blasting, which is a lot less.
These have been sand when you sandblast something. It does take a little bit of the metal off of the product and the sand hitting the metal, it creates heat,
maybe, sometimes warping
with this plastic media. It doesn't heat up as much.
That means if you have soft parts like our Camaro grill, she here, they can be stripped without being damaged. And unlike soda blasting, it doesn't leave a residue that needs to be prepped before any primer or paint can go on, blow it off, get all that stuff off and you're ready to paint.
Now, if we had a lot of body work to do, I'd go ahead and put primer on it now to keep all this bare metal from rusting. But honestly,
there's just not much to do on this thing. So I'm gonna buzz it down with 80 grit and knock out all the body work now, then prime the whole thing.
I'll start by opening up the surface of the areas that need filler. So they pair will have a stronger bite. The plastic bead blasting doesn't remove rust. So I'll clean these small spots with the stripper. Wheel, metal to metal filler is the best choice for high stress areas like the sea pillars. It's strong and stable but hard to sand. So I'll finish it out later with standard plastic fillers.
Well, that area is ready to get cleaned off and have some plastic put on it and I'm going to straighten out some dents. There's a little crease that runs right through there. And for that,
I need a stud gun.
Mat's
newest stud gun features a magnetic tip so the stud won't fall out before you get it into place.
Just pull the trigger but not too long or you could warp the panel.
Now, I'm using studs right here because
there's a wheel o right there. So I can't get at the back side of it.
But you can see where this dent actually runs all the way down and ends clear down here with this area. I can get that from inside the trunk. So no studs required.
A special slide hammer comes in the kit that locks onto the studs allowing you to pull the metal back into shape.
Just go easy and move it a little at a time. So you don't over pull and stretch the metal.
Now, I can move to the inside of the trunk to roughen the rest of the crease with the shaping hammer.
Once it's close, I can cut the studs off and finish it all out with a hammer and dolly.
Yeah,
if you look right there where that real deep part was it's almost completely gone.
Well, that's probably close enough right there. I could prime it and block it out, but filler is a lot more stable than primer. So I'll do a little skim co first and then prime the whole thing
after the break, how to fix a common fender flaw.
And later time he got to tear down blues
while Rick's filling in the rest of the dents on the body. I'm gonna get started on the metal work. We're pretty sure the car was repainted in the mid eighties back then. This drill and slide hammer type of repair was typical at most body shops. Nowadays, most pros would use a stud gun like Rick just showed you that doesn't mean this type of repairs wrong. A lot of you guys out there are probably still doing it this way,
the stud gun method does give cleaner faster, better results. We want the best repair possible. So I'm gonna cut it out patch in some new metal
before I do any cutting, I need to get the shape of the surrounding metal back to where it's supposed to be
on something like a lip, you can eyeball it. But if this butted up against another panel, it would need to be in place to make sure the lines are right.
I'm cutting out the old metal on the body line. This way, I'll be making a flat patch instead of one with a complicated shape.
Mhm
I follow up the cut off wheel with a 24 grip grinding disc to clean up the edges.
The easiest way to make a patch is to use old metal as a template. 18 gauge steel is pretty standard for body panels. So that's what I'm using for the patch. It's thin enough to be cut with a sheer or snitch. If you don't have a bandsaw
with a patch that will be butt welded all the way around, it needs to fit very precise. This means taking off a little at a time and checking to fit a lot.
I left the inside edge a little long when I cut this piece because I knew I would need some extra metal to form the new lip.
Instead of using pliers. I made a simple tool out of eight inch plates, so I'd have a consistent bend all the way across this edge and it worked perfectly. This piece fits like a glove
as it wel to patch in. I'll check the fitment as I go to make sure there's no low spot.
Take your time, especially when welding in the center of a panel and don't heat the metal up too much or it will end up warping causing you a lot more work to fix it.
Once it's welded all the way around ground it all smooth with 24 grips.
This next area is hands down the most common place to find rust. A lower fender behind the wheel dirt and moisture get trapped behind the inner brace and it's all downhill from there. These patch panels are available from year one for most muscle cars they're preformed. So you just trim off what you don't need, weld them in
for now. We're only cutting out the obvious stuff with layered panels. It's hard to know what lies underneath until you open it up. So we may end up cutting out more
looks like we got rid of enough of the outer skin, but the inner brace will need some repair as well. So it's time for some more slicing and dicing.
Mhm
Just like before the old piece is a template for the new, I'm using 16 gauge for this because the inner structure is a little thicker than the body panels.
I'll use the brake to recreate the bin this piece needs. But a vice and a mallet would work too
once it's trimmed and shaped to fit, you can weld it in, grind it down,
dup colors. Well, through primer work is a barrier to keep the rust from coming back.
Our panel didn't include this mounting edge.
So a f
of a simple piece that matches what we had to cut off. I'll cut the notch out when I do the final grinding.
The great thing about using a preform panel is you don't have to spend so much time shaving it for a good fit.
Coming up, got rust under glass. We'll show you how to fix it. And later our engine reveals a dirty little secret.
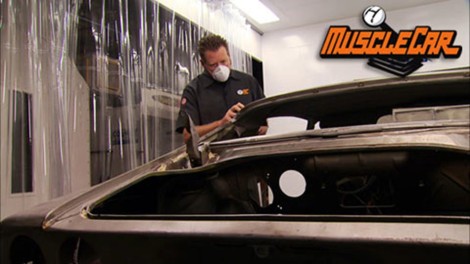
Hey guys, welcome back with the fenders patched and the majority of the body work done. There's just one more area that still needs to be repaired. These rusty corners here where the windshield meets the dash.
Now, we can get away with a couple of spot repairs, but classic cars are notorious for rotting out in this area.
Now, if you're not lucky enough to have an F body as clean as ours. Year one offers a whole panel that runs from your dash all the way up to the firewall
before I start cutting out the bad chunks, I'm gonna remove the VIN tag to keep it from being damaged. All I have to do is grind down the two rivets, punch them out and store the tag in a safe place so we can reinstall it later.
I'm planning my cuts to avoid a brace that's underneath. I only want to cut through the top layer for now. Then I can see what part of the bottom layer has to be replaced.
And here you can see on the backside of this piece,
that's why I only cut it back as far as I did. The sheet metal from there on over
is still good. So why chop it out
with all the rust uncovered? I'll use a strip and clean disk to get all the flakes out of the way. So I can see exactly what I've got before cutting out any more metal.
I'll make a simple template out of cardboard. So my patch will be as accurate as possible
that work.
Now, this patch is just small enough that I'm not going to bother with the band song.
I'll just use the snips to cut it out by hand.
I attach the stud to help hold the patch in place and I'll slice it off as soon as it's welded in
with inner structure repaired. I can move on to the outer skin and this area is too complicated to make in one piece. So I'll break it into two patches
for a patch like this. You really don't need any fancy equipment, snips, a hammer and advice will do everything you need
once you have a good fit, seal up the area with some well through primer and you can weld in the new pieces.
The nice thing about doing it this way is that when you're done, you still have all the factory spot welds. No one will ever know that that's been repaired
up. Next. Doctor Tom examines our 402.
You're watching Muscle car for a DVD copy of this episode. Just go to Power Block tv.com and order your copy for just 595 plus shipping and handling. Start your own muscle car collection delivered right to your door from the power block.
Hey, welcome back. Believe it or not. The sheet metal and body work on. This thing are done before we know it. It's gonna be ready for a new drive train. So while I get this thing sealed up as a primer, Tom is gonna crack open our 396 to see what we got.
Like we've said before, this engine is actually out of a 72 GMC. But that's ok because we're not building a numbers matching car, any 402 block will do. And remember starting in 70 any Chevrolet style big block sold as a 396 or 400 is actually a 402.
The brackets and accessories for a Camaro are different from a truck. So we won't be reusing most of these parts, but they're still valuable. So we're going to keep everything together for the next guy to use.
All these parts can be refurbished and are number stamped. So if you're doing the numbers matching restoration, hang on to every little piece.
Most harmonic balancers are press fit. So have a puller ready. Our mao
set made this job easy.
L 78 came with a Hollick, not a Q jet. So this one's going somewhere else.
It's always a good idea to get the big chunks out of the way before you pop the intake off. So nothing falls into the block.
Well, I think we found a miss
a big hunk of crud in here.
Yeah, this thing looks like it's cooked ac bear or something out in it.
It's not a good sign.
Now, engines may not really be able to talk, but they sure can tell a story if you know what to look for. Pay attention to each and every part as you tear it down.
They could be trying to tell you something important.
Well, it looks like that's where our baring fragment came from. That pistons hit in the head.
Oh, not a good time.
Oh, no, that's not good.
And here comes the jelly.
This thing's had some water in it.
Maybe it's not that big of a deal. Maybe a big deal.
Here comes the good oil now.
Yeah, that's gross.
Well, from the beginning of the tear down, we've had a few signs that weren't in our favor. Push right out of place. Well, the thing may have been over Rebb or a lot of miles flakes in the Lifter valley. It's not that big a deal we planned on rebuilding it anyhow. Water in the oil pan. Not a big deal either because it probably just got wet at some time. Well, then I started trying to take the oil pan off. Something on the inside wanted it out in a bad kind of way. So, I'm pretty sure we're gonna find some metal where it's not supposed to be.
You may have been wondering why I didn't roll the motor over to take the oil pan off. Reason being is because when you're tearing the motor down. You don't know nothing about this. Keeps the story in the pan. So let's see what we can find.
Yeah, that's
not good.
Oh,
there's two
that looks like a rod
man. There are some big chunks off in here.
Oh, big jump.
Yeah, right there. Broke piston. Like that's our problem. Like it broke the bottom of that piston and smoke the other rod. Bang.
Yeah.
No rod bearing in sight.
So I get that. It feeling
hurt
ain't much of that thing left.
Oh,
yeah, this thing's pretty trash.
Rig's gotta see this.
We got a decision we gotta make.
Hey, brother, come here a minute.
Got good news and we got bad.
You got a bad look on your face. Good news is that I've tore the engine down and kept your hand clean the whole time.
Bad news is
we've got two giant cooling holes inside the cylinder wall.
What you think about that?
Whoa, dude.
Yeah.
Time to board and sleeve it.
Yeah. I don't even know if that's repairable. Probably need to give the machine shop a call and see what they have to say. Even if they sleeve it, they're still gonna have to magni flex it. Who knows how far the cracks go, man? Tell you what, I'll check around. See what else I can come up with. All right, brother.
Well, I carried our block down to the machine shop and I got some good news. Our busted cylinder can be sleeved and it's only gonna cost a little over 100 bucks more than we're gonna spend anyways. So that means we're right on track. Now, all our metal work is done and the body and most of the panels are in first prime.
Really looking nice. If you guys have any questions about product used on the show, you can check it out at Power block tv.com. Now we're gonna get all this stuff blocked out in final prime. Then we'll be ready to swap out the suspension brakes and rear end. But for this week, we're out of time. So until next time we're out of here.
Show Full Transcript
story.
Hey guys, welcome to Muscle car. It's not every day that you see 40 year old sheet metal that's still in this good a condition. So you can imagine how stoked we were when we got our 1970 Camaro back from the blaster. Now, this is what you hope for with a California car. I mean, look at these floorboards seems look like they were just stamped out yesterday. Overall, we got really lucky. The hood deck lid and doors only have a few minor dinks.
The fenders are by far the worst panels we're gonna have to
build in a few patch panels and rework a previous repair and then we can get started on the body work.
Now, we like to think that we know cars pretty darn well around here and after a thorough inspection of project limelight, she looks pretty solid, but some people will go through a lot of effort to cover up flaws. So you never really know what you got till you get her down to her birthday suit. And that's where strip masters comes in.
These guys don't do sand blasting. They do plastic media blasting, which is a lot less.
These have been sand when you sandblast something. It does take a little bit of the metal off of the product and the sand hitting the metal, it creates heat,
maybe, sometimes warping
with this plastic media. It doesn't heat up as much.
That means if you have soft parts like our Camaro grill, she here, they can be stripped without being damaged. And unlike soda blasting, it doesn't leave a residue that needs to be prepped before any primer or paint can go on, blow it off, get all that stuff off and you're ready to paint.
Now, if we had a lot of body work to do, I'd go ahead and put primer on it now to keep all this bare metal from rusting. But honestly,
there's just not much to do on this thing. So I'm gonna buzz it down with 80 grit and knock out all the body work now, then prime the whole thing.
I'll start by opening up the surface of the areas that need filler. So they pair will have a stronger bite. The plastic bead blasting doesn't remove rust. So I'll clean these small spots with the stripper. Wheel, metal to metal filler is the best choice for high stress areas like the sea pillars. It's strong and stable but hard to sand. So I'll finish it out later with standard plastic fillers.
Well, that area is ready to get cleaned off and have some plastic put on it and I'm going to straighten out some dents. There's a little crease that runs right through there. And for that,
I need a stud gun.
Mat's
newest stud gun features a magnetic tip so the stud won't fall out before you get it into place.
Just pull the trigger but not too long or you could warp the panel.
Now, I'm using studs right here because
there's a wheel o right there. So I can't get at the back side of it.
But you can see where this dent actually runs all the way down and ends clear down here with this area. I can get that from inside the trunk. So no studs required.
A special slide hammer comes in the kit that locks onto the studs allowing you to pull the metal back into shape.
Just go easy and move it a little at a time. So you don't over pull and stretch the metal.
Now, I can move to the inside of the trunk to roughen the rest of the crease with the shaping hammer.
Once it's close, I can cut the studs off and finish it all out with a hammer and dolly.
Yeah,
if you look right there where that real deep part was it's almost completely gone.
Well, that's probably close enough right there. I could prime it and block it out, but filler is a lot more stable than primer. So I'll do a little skim co first and then prime the whole thing
after the break, how to fix a common fender flaw.
And later time he got to tear down blues
while Rick's filling in the rest of the dents on the body. I'm gonna get started on the metal work. We're pretty sure the car was repainted in the mid eighties back then. This drill and slide hammer type of repair was typical at most body shops. Nowadays, most pros would use a stud gun like Rick just showed you that doesn't mean this type of repairs wrong. A lot of you guys out there are probably still doing it this way,
the stud gun method does give cleaner faster, better results. We want the best repair possible. So I'm gonna cut it out patch in some new metal
before I do any cutting, I need to get the shape of the surrounding metal back to where it's supposed to be
on something like a lip, you can eyeball it. But if this butted up against another panel, it would need to be in place to make sure the lines are right.
I'm cutting out the old metal on the body line. This way, I'll be making a flat patch instead of one with a complicated shape.
Mhm
I follow up the cut off wheel with a 24 grip grinding disc to clean up the edges.
The easiest way to make a patch is to use old metal as a template. 18 gauge steel is pretty standard for body panels. So that's what I'm using for the patch. It's thin enough to be cut with a sheer or snitch. If you don't have a bandsaw
with a patch that will be butt welded all the way around, it needs to fit very precise. This means taking off a little at a time and checking to fit a lot.
I left the inside edge a little long when I cut this piece because I knew I would need some extra metal to form the new lip.
Instead of using pliers. I made a simple tool out of eight inch plates, so I'd have a consistent bend all the way across this edge and it worked perfectly. This piece fits like a glove
as it wel to patch in. I'll check the fitment as I go to make sure there's no low spot.
Take your time, especially when welding in the center of a panel and don't heat the metal up too much or it will end up warping causing you a lot more work to fix it.
Once it's welded all the way around ground it all smooth with 24 grips.
This next area is hands down the most common place to find rust. A lower fender behind the wheel dirt and moisture get trapped behind the inner brace and it's all downhill from there. These patch panels are available from year one for most muscle cars they're preformed. So you just trim off what you don't need, weld them in
for now. We're only cutting out the obvious stuff with layered panels. It's hard to know what lies underneath until you open it up. So we may end up cutting out more
looks like we got rid of enough of the outer skin, but the inner brace will need some repair as well. So it's time for some more slicing and dicing.
Mhm
Just like before the old piece is a template for the new, I'm using 16 gauge for this because the inner structure is a little thicker than the body panels.
I'll use the brake to recreate the bin this piece needs. But a vice and a mallet would work too
once it's trimmed and shaped to fit, you can weld it in, grind it down,
dup colors. Well, through primer work is a barrier to keep the rust from coming back.
Our panel didn't include this mounting edge.
So a f
of a simple piece that matches what we had to cut off. I'll cut the notch out when I do the final grinding.
The great thing about using a preform panel is you don't have to spend so much time shaving it for a good fit.
Coming up, got rust under glass. We'll show you how to fix it. And later our engine reveals a dirty little secret.
Hey guys, welcome back with the fenders patched and the majority of the body work done. There's just one more area that still needs to be repaired. These rusty corners here where the windshield meets the dash.
Now, we can get away with a couple of spot repairs, but classic cars are notorious for rotting out in this area.
Now, if you're not lucky enough to have an F body as clean as ours. Year one offers a whole panel that runs from your dash all the way up to the firewall
before I start cutting out the bad chunks, I'm gonna remove the VIN tag to keep it from being damaged. All I have to do is grind down the two rivets, punch them out and store the tag in a safe place so we can reinstall it later.
I'm planning my cuts to avoid a brace that's underneath. I only want to cut through the top layer for now. Then I can see what part of the bottom layer has to be replaced.
And here you can see on the backside of this piece,
that's why I only cut it back as far as I did. The sheet metal from there on over
is still good. So why chop it out
with all the rust uncovered? I'll use a strip and clean disk to get all the flakes out of the way. So I can see exactly what I've got before cutting out any more metal.
I'll make a simple template out of cardboard. So my patch will be as accurate as possible
that work.
Now, this patch is just small enough that I'm not going to bother with the band song.
I'll just use the snips to cut it out by hand.
I attach the stud to help hold the patch in place and I'll slice it off as soon as it's welded in
with inner structure repaired. I can move on to the outer skin and this area is too complicated to make in one piece. So I'll break it into two patches
for a patch like this. You really don't need any fancy equipment, snips, a hammer and advice will do everything you need
once you have a good fit, seal up the area with some well through primer and you can weld in the new pieces.
The nice thing about doing it this way is that when you're done, you still have all the factory spot welds. No one will ever know that that's been repaired
up. Next. Doctor Tom examines our 402.
You're watching Muscle car for a DVD copy of this episode. Just go to Power Block tv.com and order your copy for just 595 plus shipping and handling. Start your own muscle car collection delivered right to your door from the power block.
Hey, welcome back. Believe it or not. The sheet metal and body work on. This thing are done before we know it. It's gonna be ready for a new drive train. So while I get this thing sealed up as a primer, Tom is gonna crack open our 396 to see what we got.
Like we've said before, this engine is actually out of a 72 GMC. But that's ok because we're not building a numbers matching car, any 402 block will do. And remember starting in 70 any Chevrolet style big block sold as a 396 or 400 is actually a 402.
The brackets and accessories for a Camaro are different from a truck. So we won't be reusing most of these parts, but they're still valuable. So we're going to keep everything together for the next guy to use.
All these parts can be refurbished and are number stamped. So if you're doing the numbers matching restoration, hang on to every little piece.
Most harmonic balancers are press fit. So have a puller ready. Our mao
set made this job easy.
L 78 came with a Hollick, not a Q jet. So this one's going somewhere else.
It's always a good idea to get the big chunks out of the way before you pop the intake off. So nothing falls into the block.
Well, I think we found a miss
a big hunk of crud in here.
Yeah, this thing looks like it's cooked ac bear or something out in it.
It's not a good sign.
Now, engines may not really be able to talk, but they sure can tell a story if you know what to look for. Pay attention to each and every part as you tear it down.
They could be trying to tell you something important.
Well, it looks like that's where our baring fragment came from. That pistons hit in the head.
Oh, not a good time.
Oh, no, that's not good.
And here comes the jelly.
This thing's had some water in it.
Maybe it's not that big of a deal. Maybe a big deal.
Here comes the good oil now.
Yeah, that's gross.
Well, from the beginning of the tear down, we've had a few signs that weren't in our favor. Push right out of place. Well, the thing may have been over Rebb or a lot of miles flakes in the Lifter valley. It's not that big a deal we planned on rebuilding it anyhow. Water in the oil pan. Not a big deal either because it probably just got wet at some time. Well, then I started trying to take the oil pan off. Something on the inside wanted it out in a bad kind of way. So, I'm pretty sure we're gonna find some metal where it's not supposed to be.
You may have been wondering why I didn't roll the motor over to take the oil pan off. Reason being is because when you're tearing the motor down. You don't know nothing about this. Keeps the story in the pan. So let's see what we can find.
Yeah, that's
not good.
Oh,
there's two
that looks like a rod
man. There are some big chunks off in here.
Oh, big jump.
Yeah, right there. Broke piston. Like that's our problem. Like it broke the bottom of that piston and smoke the other rod. Bang.
Yeah.
No rod bearing in sight.
So I get that. It feeling
hurt
ain't much of that thing left.
Oh,
yeah, this thing's pretty trash.
Rig's gotta see this.
We got a decision we gotta make.
Hey, brother, come here a minute.
Got good news and we got bad.
You got a bad look on your face. Good news is that I've tore the engine down and kept your hand clean the whole time.
Bad news is
we've got two giant cooling holes inside the cylinder wall.
What you think about that?
Whoa, dude.
Yeah.
Time to board and sleeve it.
Yeah. I don't even know if that's repairable. Probably need to give the machine shop a call and see what they have to say. Even if they sleeve it, they're still gonna have to magni flex it. Who knows how far the cracks go, man? Tell you what, I'll check around. See what else I can come up with. All right, brother.
Well, I carried our block down to the machine shop and I got some good news. Our busted cylinder can be sleeved and it's only gonna cost a little over 100 bucks more than we're gonna spend anyways. So that means we're right on track. Now, all our metal work is done and the body and most of the panels are in first prime.
Really looking nice. If you guys have any questions about product used on the show, you can check it out at Power block tv.com. Now we're gonna get all this stuff blocked out in final prime. Then we'll be ready to swap out the suspension brakes and rear end. But for this week, we're out of time. So until next time we're out of here.