More Monte Carlo Episodes
HorsePower Builds
Want more content like this?
Join the PowerNation Email NewsletterParts Used In This Episode
American Racing
17 x 8 American Racing Hopster, custom powder coated black finish.
ARP
ARP assembly lube, rod bolt stretch guage.
Bridgestone Firestone North American Tire, LLC
235/45r17 Bridgestone RE960 on the front, 255/50r17 Bridgestone RE960 on the rear.
CCI Driveline Engineering and Fabrication
Custom length driveshaft, TH-400 yoke, 1350 U-joint.
Chevrolet Performance
ZZ502/502 DELUXE.
Fidanza
Clutch assembly, throwout bearing, balanced, flywheel.
Flex-a-lite Automotive Division
56000l 26"core left side inlet.
Flowtech
3 inch exhaust tubing kit, Super 40 Muffler, stainless exhaust tips.
Hayden Auto
16" electric super duty high flow fan.
Holley
950 cfm double pumper.
Holley
Ceramic coated 2 inch primaries, 3.5 " collector.
Holley
HP fuel pump billet base gerotor design, fuel pressure regulator, fuel pressure safety switch, fuel pump relay kit.
Holley
pre-filter -8,fuel filter -8, 15 psi pressure guage, guage adaptor -6 to -6, -8 single feed fuel line, pipe to an fitting adaptors, Pro-Lite hose, -6 10ft. and -8 20 ft., weld-in adaptors for tank and bulkhead fittings with stat-o-seals.
Honest Charley
Manual transmission pedal conversion.
Honest Charley
Transmission cross-member for Richmond 5 speed overdrive.
Hotchkis
Rear control arms, coil springs shocks by Bilstein, sway bars and end links, tie rod sleeves, and hardware.
Lakewood Industries
Safety bellhousing, clutch fork, solid pilot bearing, safety plate, clutch fork boot, adjustable pivot ball, adjustable dowel pins.
Lokar
36" stainless throttle cable, throttle cable bracket.
Master Power Brakes
12 " front brake rotor upgrade with master cylinder and power booster.
Master Power Brakes
FORD 9 inch, 31 spline axels, 5x4.75 B/C, locker diff, 4.11 gear, 1/2 studs, rear disc brakes.
MSD Ignition
Lazer series guages, 2 5/8" oil pressure, 2 5/8" water temperature, 3 3/8" tachometer.
Richmond Gear
Five speed overdrive.
Summit Racing
Summit aluminum stage 1 intake manifold, remanufactured 750cfm quadrajet carburetor, Summit cam and lifter kit, hydraulic lifters, .282"lift/.465"duration, true roller timing set.
Video Transcript
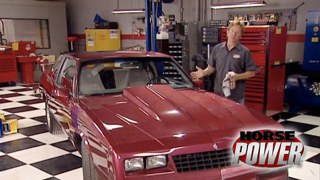
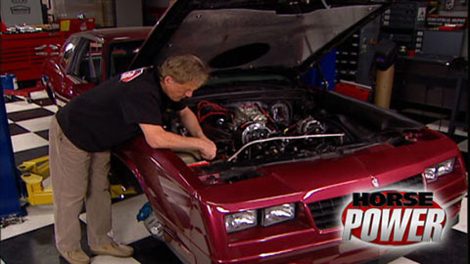
Hey, welcome. The Mighty Carlo is back and so are we hopefully to wind up our build up of this later model muscle machine.
It's a project we've described as making the money, Carlo the way Chevy should have made it back in the mid eighties.
Well, like with the nine inch rear end, we got from master power. We also upgraded the brakes all the way around
and beefed up the suspension with the Hotchkiss
kit.
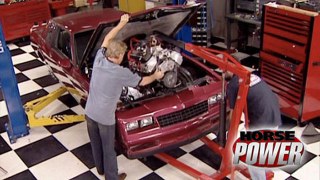
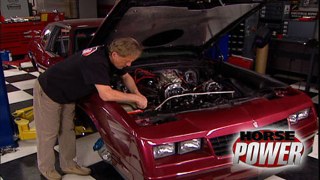
All that was to make way for our ZZ 502 crate engine
with long tube hooker headers to help it. Exhale GM never offered a manual transmission for these cars back in 86 but our ultimate money will have one. Thanks to this Richmond Super Street
and a conversion kit that lets us go all the way from automatic to gear banging five speed.
But first, we had to give it a manual clutch which we handled with a set up from finanza,
followed by a Lakewood bell housing.
Then after a little massaging for fitment, we installed the Pran
and bolted up a special cross member from honest Charlie.
The last time we also handled the exhaust. Thanks to a flow master kit
and installed a GM accessory drive.
Today, we want to finish up the five speed conversion using this kit we picked up from honest Charlie's now it includes the pedals, the Z bar pivot ball, neutral safety switch and all the necessary linkage, not to mention the hardware. Now, the first thing we're gonna do is jump inside the car and hang some pedals.
They install using the existing bracket from the original brake pedal.
Then we slide the Z bar onto the pivot ball on the engine block
and attach the second pivot ball and bracket to the driver's side frame rail.
Next, we connect this rod from the pedal to the Z bar.
And finally, we can connect the push rod from the clutch fork to the Z bar.
We need to say that 502 is gonna need a lot more fuel than the stock 305 we took out of the car.
So Holly hooked us up with the parts. We need to build a new fuel delivery system
and it includes this HP pump that flows 100 40 gallons an hour at seven P. Si
Now, this thing is a geo rotor design for durability
and it can feed motors making up to 900 horsepower. Well, we'll show you how to install it after we remove the fuel tank for some modifications
to make this easier. We remove fuel from the tank before going to work on it
to pick up fuel from the tank. We're going to use the stock sending unit, but I went ahead and cut off the barb on the pickup tube and we're going to weld on this sleeve fitting to dash eight. That's new for Earl's that way we can run dash eight lines straight from here to the fuel pump
with the pickup back inside the tank, we can move on to the fuel pump
as with any electric pump. You want to mount it as close to the tank as possible. And in a position where it can be gravity fed.
Well, next, we were out more of the new fuel line up to the engine
and of course, we don't want too much fuel flowing into that carburetor. So we'll mount up this fuel pressure regulator designed to flow from 4.5 to 9 P si
and we'll mount it down here on this bracket from the kit.
Now we can go ahead and install the carburetor. Now, our GM crate engine came with the street Avenger 870 with a vacuum secondary and electric choke which is fine for automatics, but with our rear end gear ratio and five speed transmission, we're going to run into a little hesitation after the shifts. So we stepped up to this other Haley which has a mechanical secondary. It's a double pumper and flows 950 CFM
from the regulator. We're running our supply into the gauge fitting. And then to this fuel line kit from Earl's with a dual feed to the car,
the distance between the motor and that electric fuel pump back there can cause a voltage drop in the wiring. So with that in mind, a relay kit is always a good option.
This one came from Holly. It's a basic four wire set up and it's a 30 amp capacity working with 1216 and 24 volt systems
and mounting the relay box next to the fuel regulator here on the frame and
ring the long red wire along with the fuel line
and back to the fuel pump
where it's connected.
Now, the other red wire connects to this fuse holder.
Then on to the positive battery terminal,
the black wire is a ground which we've got bolted to the frame. Now this green wire goes to a switch 12 volt source, which in our case will be this electric choke connection,
but we'll need to wait and route this harness. So we know how much to cut this wire.
Well, we're getting close to finishing up and firing up this project. Mighty Carlo, but we got a lot more cool stuff ahead. Stay with us.
We're in the final laps of the race to finish our Mighty Carlo. Now with a 502 horse big block engine, a five speed trans and more upgrades to make it a trick late model hot rod
when it comes to big build ups like this 11 thing definitely leads to another case in point, this big block 502 needs a lot more fuel than the factory 305.
So we just modified the fuel delivery system with the high flow fuel pump, fuel regulator and relay kit.
Our concern now is keeping that big block cool enough. The stock radiator wasn't designed to work that hard.
So we're going to try something from flexo
light called a Flexo
fit.
It's a cross flow design and
hey, check out this feature
inside
it has internal fins that absorb heat from the coolant and radiate that heat to the external fins for more efficiency.
Hey, here's another cool feature. No pun intended, these T channels on the side tanks allow you to mount the brackets in a way that you can
slide them up or down for perfect positioning.
We're going to mount this Hayden 16 inch electric fan right to the radiator. Now, this thing has a high output motor that spins the reversible eight inch blades and flows 1300 cubic feet per minute. Now, it's housed inside this finger guard shroud and they make it pretty easy to mount using this integrated mounting kit that's supplied with the fan.
Next, we can lower the radiator fan assembly into place,
secure it with rivets,
connect new hoses
and wire it to the harness using a relay kit.
Now, we can go ahead and install this throttle linkage kit from low car that comes with the bracket linkage adapter and the other parts needed to make it work smoothly.
Hey, how about a little bling for the dashboard? Next, we've been looking for a reason to try out some of these laser gauges from MS D.
There's no needle, just a dual sweep led read out. Of course, we got one for the tack
water temperature and oil pressure and of course, you got to see these things powered up to appreciate them. And you will, after we get busy,
we're installing them in the dash of the car, which for us involves cutting three holes in the factory dash cover with whole salt,
then marking and cutting holes in the dash itself.
But now we can load the gauges up in the panel. Hey, they actually fit
and that looks great.
Now, let's see how they're gonna look up here.
Hey, pretty cool. I would say,
but before we install them with the brackets, we need to handle the wiring
for all three gauges. We mounted the grounds to the floorboard,
the positive 12 volt sources to the factory stereo harness
under the hood. Two wires from the water temp gauge, go to this sensor
from the oil pressure gauge. This weather pack connector goes to a sending unit.
Finally, the tank gets its signal from right here at the distributor.
There are a couple ways you can program these gauges. Let's take the tech for example,
you can set the shift light RPM by simply touching the screen and holding until a sweep reaches the desired RPM. Then just let go. They also come with software and a serial port adapter. So you can program them on your PC. This way you can set all your highs and lows and so on.
Next, I'm going to install this drive shaft from CC I drive line with a Turbo 400 slip Yoke and
1350 U joints out back.
Now, do you remember that black wheel? Look that NASCAR had going on in the eighties? Well, check this out. We're bringing it back with this set up. We found these wheels in the power block storage area, powder coated in black. Now, they're ready to make a new fashion statement. We hope
we wrapped them in Bridgestone for tens of rubber, 235 forties up front, 255 fifties out back.
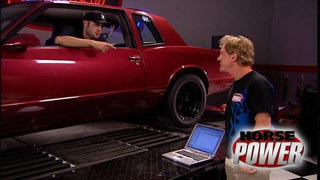
Well, I guess you either like it or too bad. Now, we still have a little bit of work to finish up on the 502 before we fire it up. But in a couple of weeks, we're gonna see how it performs on the
dyno Jet and out on the street. Meanwhile, up next, we've got another bang for the buck. So stick around.
Hey, welcome back. Well, Mike's out chasing down parts for a future project of ours. Meanwhile,
I can't wait to introduce you to a new member of our horsepower team.
He's a guy who brings to this program many years of experience working with race teams building high performance engines
and uncovering power secrets that he'll share with you here on horsepower
buddy Hendricks has been building high performance engines for more than 30 years for speed and competition on land
and on water.
Also with winning experience as a driver,
he built this drag boat for the legendary Tom Black,
a crew chief for this race car that won ninth place at the famed 24 hours at Daytona
at his Florida race shop. He quickly gained a reputation for transforming project cars. From this
to this,
this guy's built everything from street rods to drag racers, from blown big block show cars to competitive road racers,
buddy. Once again, welcome aboard. It's great having you on the team. Thanks Joe. It's great to be here. I'm really fired up to help a great show, be even better.
And I know we're gonna have a lot of fun. You bet we are kind of look at it this way. We're like a high performance engine now, we got a great power at her with you on board. Thanks. How are we doing here? We're doing great. All we gotta do is get the rest of those new parts,
them installed fire of the dinos. What kind of power we make. Good deal. It is bang for the buck time again. And this time we answer the question.
How can I make some more power in my Chevy small block on a very tight budget of time and money. Once again, our test motor is a 350 Chevy with an advertised horsepower rating of 290.
Now, let's take a look at the components we'll be adding and testing.
It's a kit from summit bracing that includes their cast aluminum intake manifold that has runners designed to give more power from idle up to 6000 RPM.
It's calibrated for small blocks up to 400 cubic inches.
Now, the 750 CFM quadrajet is remanufactured which means
it has new seals, gaskets,
needles, whatever it needs, then they calibrate it
and flow bench test it to make sure it's ready for your ride.
The Camshaft Summit sent us is their flat tap at hydraulic with an intake and duration of 224
at 50,000 slip. Now, that's a couple degrees more than a stock GM piece that
comes in their small block
motor. Of course, when you swap out the cam gotta have new lifters too and they include a set of these in the kit as well. Well, finally a double roller timing set, but he's already installed the bottom sprocket. Now, this won't mean anything in the way of horse power, but
when you spread the load over two sets of rollers instead of one,
it should add up to a longer life as well as accurate timing,
the new cam shaft can go in first and oh, here's a tip that buddy showed me
by installing the camp sprocket first makes a pretty handy installation tool.
Here's something else worth pointing out. Notice how he had a clearance, the block, they're all different, but this one had to be cleared in order to accommodate that double roller chain.
Then with the sprocket back off, line up the marks and install the new timing set.
Then using a new gasket, replace the stock cover.
Next, using plenty of lube, we can drop in the lifters from our kit,
reinstall the stock push rods.
Then after a dab of assembly lube on the tips of the push rods and valve stems,
we can reinstall the stock rocker arms.
Don't forget a dab of oil in the rockers themselves before you tighten them down.
Next, we can go ahead and adjust all the rockers.
Then with the intake gaskets in place and a beat of silicone on the ends, the new intake manifold can go on
followed by a new carb gasket
and the quadrajet.
Ok. After buttoning up the rest of the motor, we can start it up and with the usual warm up,
we're ready to make a full at 6000 RPM.
Now, remember our baseline is 290 horsepower,
326 ft pound support.
All right. What's the verdict buddy?
Ok. Well, we got 345 ft pounds of torque. At 3800
and we got 304 horsepower at 5500. All right. Now,
as we mentioned, time is also part of the equation here.
You should be able to handle this project with the engine in your car all in a day of your weekend and we'll still have time to watch horsepower and eat lunch.
Now, here's a quick recap of the entire bang for the buck project.
We used a summit racing street strip aluminum intake manifold, 750 quadrajet carburetor, hydraulic flat tappet cam shaft lifter set and double roller timing set.
We gained 14 horsepower from our baseline
and 19 ft pounds of torque.
The combo price $479.95
on our next bang for the buck in a week or so. We'll try out some performance parts on a Ford small block. Meanwhile, stay with us. We're not done yet.
Hey, welcome back. Now, a high performance engine is put together with hundreds of fasteners. But what would you say are the most abused ones when race cars blasting down the track at full throttle?
Well, if you said connecting rod bolts, you can advance to the next round.
It's hard to imagine how much stress rods have to withstand under reciprocating load. The pressure can amount to four or five tons under maximum RPM.
When a racer says his engine threw a rod that basically means the rod broke and ended up slamming into the crank case. Well, obviously this is the only way you want to throw a rod. If you're building a street motor, torquing your rod bolts to manufacture specs with a simile
lube is adequate, but for a high horsepower race motor, what's your take on that, buddy? Well, it's always good to make sure that your torque specs equal your stretch length. All right. Well, he's gonna show you how to do that with this little tool from A RP.
Go to it.
You first apply a RP Molly assembly lube to the threads and under the cap of the bolt.
Then the bolt goes into the rod
and you next install the A RP stretch gauge. Look to the dip
of the rod bolt,
then zero the indicator dial
and torque the boat to specs which is 70 ft pounds equal to 6000 stretch here.
Then you recheck it with the gauge to make sure it's correct.
And here it's right on the money. All right. Let's say you torch it down according to specs. But the numbers on the gauge don't correspond. Could it be this guy's fault? Yes, it could be. It could have been dropped at one point in time.
That's why it's very important to keep your torque wrench calibrated and this could be a good way to check it. Yes, it can. All right. Well, we should point out that A RP includes a little piece of paper and all their boat kits that gives torque numbers both in foot pounds and boat stretch. So, I guess it's all about keeping these, uh, most abused fasteners in place and doing their job. Well, our job's done for this week. We'll see you next week with more horsepower.
Show Full Transcript
It's a project we've described as making the money, Carlo the way Chevy should have made it back in the mid eighties.
Well, like with the nine inch rear end, we got from master power. We also upgraded the brakes all the way around
and beefed up the suspension with the Hotchkiss
kit.
All that was to make way for our ZZ 502 crate engine
with long tube hooker headers to help it. Exhale GM never offered a manual transmission for these cars back in 86 but our ultimate money will have one. Thanks to this Richmond Super Street
and a conversion kit that lets us go all the way from automatic to gear banging five speed.
But first, we had to give it a manual clutch which we handled with a set up from finanza,
followed by a Lakewood bell housing.
Then after a little massaging for fitment, we installed the Pran
and bolted up a special cross member from honest Charlie.
The last time we also handled the exhaust. Thanks to a flow master kit
and installed a GM accessory drive.
Today, we want to finish up the five speed conversion using this kit we picked up from honest Charlie's now it includes the pedals, the Z bar pivot ball, neutral safety switch and all the necessary linkage, not to mention the hardware. Now, the first thing we're gonna do is jump inside the car and hang some pedals.
They install using the existing bracket from the original brake pedal.
Then we slide the Z bar onto the pivot ball on the engine block
and attach the second pivot ball and bracket to the driver's side frame rail.
Next, we connect this rod from the pedal to the Z bar.
And finally, we can connect the push rod from the clutch fork to the Z bar.
We need to say that 502 is gonna need a lot more fuel than the stock 305 we took out of the car.
So Holly hooked us up with the parts. We need to build a new fuel delivery system
and it includes this HP pump that flows 100 40 gallons an hour at seven P. Si
Now, this thing is a geo rotor design for durability
and it can feed motors making up to 900 horsepower. Well, we'll show you how to install it after we remove the fuel tank for some modifications
to make this easier. We remove fuel from the tank before going to work on it
to pick up fuel from the tank. We're going to use the stock sending unit, but I went ahead and cut off the barb on the pickup tube and we're going to weld on this sleeve fitting to dash eight. That's new for Earl's that way we can run dash eight lines straight from here to the fuel pump
with the pickup back inside the tank, we can move on to the fuel pump
as with any electric pump. You want to mount it as close to the tank as possible. And in a position where it can be gravity fed.
Well, next, we were out more of the new fuel line up to the engine
and of course, we don't want too much fuel flowing into that carburetor. So we'll mount up this fuel pressure regulator designed to flow from 4.5 to 9 P si
and we'll mount it down here on this bracket from the kit.
Now we can go ahead and install the carburetor. Now, our GM crate engine came with the street Avenger 870 with a vacuum secondary and electric choke which is fine for automatics, but with our rear end gear ratio and five speed transmission, we're going to run into a little hesitation after the shifts. So we stepped up to this other Haley which has a mechanical secondary. It's a double pumper and flows 950 CFM
from the regulator. We're running our supply into the gauge fitting. And then to this fuel line kit from Earl's with a dual feed to the car,
the distance between the motor and that electric fuel pump back there can cause a voltage drop in the wiring. So with that in mind, a relay kit is always a good option.
This one came from Holly. It's a basic four wire set up and it's a 30 amp capacity working with 1216 and 24 volt systems
and mounting the relay box next to the fuel regulator here on the frame and
ring the long red wire along with the fuel line
and back to the fuel pump
where it's connected.
Now, the other red wire connects to this fuse holder.
Then on to the positive battery terminal,
the black wire is a ground which we've got bolted to the frame. Now this green wire goes to a switch 12 volt source, which in our case will be this electric choke connection,
but we'll need to wait and route this harness. So we know how much to cut this wire.
Well, we're getting close to finishing up and firing up this project. Mighty Carlo, but we got a lot more cool stuff ahead. Stay with us.
We're in the final laps of the race to finish our Mighty Carlo. Now with a 502 horse big block engine, a five speed trans and more upgrades to make it a trick late model hot rod
when it comes to big build ups like this 11 thing definitely leads to another case in point, this big block 502 needs a lot more fuel than the factory 305.
So we just modified the fuel delivery system with the high flow fuel pump, fuel regulator and relay kit.
Our concern now is keeping that big block cool enough. The stock radiator wasn't designed to work that hard.
So we're going to try something from flexo
light called a Flexo
fit.
It's a cross flow design and
hey, check out this feature
inside
it has internal fins that absorb heat from the coolant and radiate that heat to the external fins for more efficiency.
Hey, here's another cool feature. No pun intended, these T channels on the side tanks allow you to mount the brackets in a way that you can
slide them up or down for perfect positioning.
We're going to mount this Hayden 16 inch electric fan right to the radiator. Now, this thing has a high output motor that spins the reversible eight inch blades and flows 1300 cubic feet per minute. Now, it's housed inside this finger guard shroud and they make it pretty easy to mount using this integrated mounting kit that's supplied with the fan.
Next, we can lower the radiator fan assembly into place,
secure it with rivets,
connect new hoses
and wire it to the harness using a relay kit.
Now, we can go ahead and install this throttle linkage kit from low car that comes with the bracket linkage adapter and the other parts needed to make it work smoothly.
Hey, how about a little bling for the dashboard? Next, we've been looking for a reason to try out some of these laser gauges from MS D.
There's no needle, just a dual sweep led read out. Of course, we got one for the tack
water temperature and oil pressure and of course, you got to see these things powered up to appreciate them. And you will, after we get busy,
we're installing them in the dash of the car, which for us involves cutting three holes in the factory dash cover with whole salt,
then marking and cutting holes in the dash itself.
But now we can load the gauges up in the panel. Hey, they actually fit
and that looks great.
Now, let's see how they're gonna look up here.
Hey, pretty cool. I would say,
but before we install them with the brackets, we need to handle the wiring
for all three gauges. We mounted the grounds to the floorboard,
the positive 12 volt sources to the factory stereo harness
under the hood. Two wires from the water temp gauge, go to this sensor
from the oil pressure gauge. This weather pack connector goes to a sending unit.
Finally, the tank gets its signal from right here at the distributor.
There are a couple ways you can program these gauges. Let's take the tech for example,
you can set the shift light RPM by simply touching the screen and holding until a sweep reaches the desired RPM. Then just let go. They also come with software and a serial port adapter. So you can program them on your PC. This way you can set all your highs and lows and so on.
Next, I'm going to install this drive shaft from CC I drive line with a Turbo 400 slip Yoke and
1350 U joints out back.
Now, do you remember that black wheel? Look that NASCAR had going on in the eighties? Well, check this out. We're bringing it back with this set up. We found these wheels in the power block storage area, powder coated in black. Now, they're ready to make a new fashion statement. We hope
we wrapped them in Bridgestone for tens of rubber, 235 forties up front, 255 fifties out back.
Well, I guess you either like it or too bad. Now, we still have a little bit of work to finish up on the 502 before we fire it up. But in a couple of weeks, we're gonna see how it performs on the
dyno Jet and out on the street. Meanwhile, up next, we've got another bang for the buck. So stick around.
Hey, welcome back. Well, Mike's out chasing down parts for a future project of ours. Meanwhile,
I can't wait to introduce you to a new member of our horsepower team.
He's a guy who brings to this program many years of experience working with race teams building high performance engines
and uncovering power secrets that he'll share with you here on horsepower
buddy Hendricks has been building high performance engines for more than 30 years for speed and competition on land
and on water.
Also with winning experience as a driver,
he built this drag boat for the legendary Tom Black,
a crew chief for this race car that won ninth place at the famed 24 hours at Daytona
at his Florida race shop. He quickly gained a reputation for transforming project cars. From this
to this,
this guy's built everything from street rods to drag racers, from blown big block show cars to competitive road racers,
buddy. Once again, welcome aboard. It's great having you on the team. Thanks Joe. It's great to be here. I'm really fired up to help a great show, be even better.
And I know we're gonna have a lot of fun. You bet we are kind of look at it this way. We're like a high performance engine now, we got a great power at her with you on board. Thanks. How are we doing here? We're doing great. All we gotta do is get the rest of those new parts,
them installed fire of the dinos. What kind of power we make. Good deal. It is bang for the buck time again. And this time we answer the question.
How can I make some more power in my Chevy small block on a very tight budget of time and money. Once again, our test motor is a 350 Chevy with an advertised horsepower rating of 290.
Now, let's take a look at the components we'll be adding and testing.
It's a kit from summit bracing that includes their cast aluminum intake manifold that has runners designed to give more power from idle up to 6000 RPM.
It's calibrated for small blocks up to 400 cubic inches.
Now, the 750 CFM quadrajet is remanufactured which means
it has new seals, gaskets,
needles, whatever it needs, then they calibrate it
and flow bench test it to make sure it's ready for your ride.
The Camshaft Summit sent us is their flat tap at hydraulic with an intake and duration of 224
at 50,000 slip. Now, that's a couple degrees more than a stock GM piece that
comes in their small block
motor. Of course, when you swap out the cam gotta have new lifters too and they include a set of these in the kit as well. Well, finally a double roller timing set, but he's already installed the bottom sprocket. Now, this won't mean anything in the way of horse power, but
when you spread the load over two sets of rollers instead of one,
it should add up to a longer life as well as accurate timing,
the new cam shaft can go in first and oh, here's a tip that buddy showed me
by installing the camp sprocket first makes a pretty handy installation tool.
Here's something else worth pointing out. Notice how he had a clearance, the block, they're all different, but this one had to be cleared in order to accommodate that double roller chain.
Then with the sprocket back off, line up the marks and install the new timing set.
Then using a new gasket, replace the stock cover.
Next, using plenty of lube, we can drop in the lifters from our kit,
reinstall the stock push rods.
Then after a dab of assembly lube on the tips of the push rods and valve stems,
we can reinstall the stock rocker arms.
Don't forget a dab of oil in the rockers themselves before you tighten them down.
Next, we can go ahead and adjust all the rockers.
Then with the intake gaskets in place and a beat of silicone on the ends, the new intake manifold can go on
followed by a new carb gasket
and the quadrajet.
Ok. After buttoning up the rest of the motor, we can start it up and with the usual warm up,
we're ready to make a full at 6000 RPM.
Now, remember our baseline is 290 horsepower,
326 ft pound support.
All right. What's the verdict buddy?
Ok. Well, we got 345 ft pounds of torque. At 3800
and we got 304 horsepower at 5500. All right. Now,
as we mentioned, time is also part of the equation here.
You should be able to handle this project with the engine in your car all in a day of your weekend and we'll still have time to watch horsepower and eat lunch.
Now, here's a quick recap of the entire bang for the buck project.
We used a summit racing street strip aluminum intake manifold, 750 quadrajet carburetor, hydraulic flat tappet cam shaft lifter set and double roller timing set.
We gained 14 horsepower from our baseline
and 19 ft pounds of torque.
The combo price $479.95
on our next bang for the buck in a week or so. We'll try out some performance parts on a Ford small block. Meanwhile, stay with us. We're not done yet.
Hey, welcome back. Now, a high performance engine is put together with hundreds of fasteners. But what would you say are the most abused ones when race cars blasting down the track at full throttle?
Well, if you said connecting rod bolts, you can advance to the next round.
It's hard to imagine how much stress rods have to withstand under reciprocating load. The pressure can amount to four or five tons under maximum RPM.
When a racer says his engine threw a rod that basically means the rod broke and ended up slamming into the crank case. Well, obviously this is the only way you want to throw a rod. If you're building a street motor, torquing your rod bolts to manufacture specs with a simile
lube is adequate, but for a high horsepower race motor, what's your take on that, buddy? Well, it's always good to make sure that your torque specs equal your stretch length. All right. Well, he's gonna show you how to do that with this little tool from A RP.
Go to it.
You first apply a RP Molly assembly lube to the threads and under the cap of the bolt.
Then the bolt goes into the rod
and you next install the A RP stretch gauge. Look to the dip
of the rod bolt,
then zero the indicator dial
and torque the boat to specs which is 70 ft pounds equal to 6000 stretch here.
Then you recheck it with the gauge to make sure it's correct.
And here it's right on the money. All right. Let's say you torch it down according to specs. But the numbers on the gauge don't correspond. Could it be this guy's fault? Yes, it could be. It could have been dropped at one point in time.
That's why it's very important to keep your torque wrench calibrated and this could be a good way to check it. Yes, it can. All right. Well, we should point out that A RP includes a little piece of paper and all their boat kits that gives torque numbers both in foot pounds and boat stretch. So, I guess it's all about keeping these, uh, most abused fasteners in place and doing their job. Well, our job's done for this week. We'll see you next week with more horsepower.