More Monte Carlo Episodes

HorsePower Builds

Parts Used In This Episode

ARP
Flywheel bolts.
Chevrolet Performance
ZZ502/502 Deluxe.
Fidanza
Clutch assembly, throwout bearing, balanced, flywheel.
Fitch
Fuel catalyst, drop-in catalysts.
Flowmaster
3 inch exhaust tubing kit, super 40 muffler, stainless exhaust tips.
Holley
-12 Fittings for plumbing dry sump tank.
Holley
Full length ceramic coated headers for '00-'02 Camaro.
Honest Charley
Transmission cross-member for Richmond 5 speed overdrive.
Hotchkis
Rear control arms, coil springs shocks by Bilstein, sway bars and end links, tie rod sleeves, and hardware.
Hypertech
Max Energy programmer.
Lakewood Industries
Safety bellhousing, clutch fork, solid pilot bearing, safety plate, clutch fork boot, adjustable pivot ball, adjustable dowel pins.
Latoff Chevrolet
Accessory drive with A/C.
Master Power Brakes
12 " front brake rotor upgrade with master cylinder and power booster.
Master Power Brakes
FORD 9 inch, 31 spline axels, 5x4.75 B/C, locker diff, 4.11 gear, 1/2 studs, rear disc brakes.
Moroso
Dry sump tank and mounting bracket.
Optima
Yellow top battery/Red top battery.
Precision Measurement Supply
Bellhousing indexing tool.
Prothane
Motor mount inserts.
Richmond Gear
Five speed overdrive.
Spectre Performance
4" silicone couplers, red cone filters, 4"X3.5" couples, intake tubing 45 degree bends, intake tubing 60 ° bends, Y-pipe.
Taylor Cable Products
Battery box and hold downs, made for Optima batteries.
Video Transcript

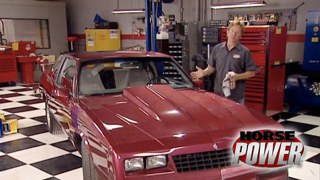
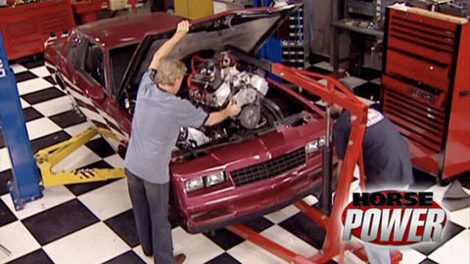
Hey, welcome to the shop. Well, the Mighty Carlo is back and today we're gonna help it live up to its mighty name.

We introduced this 86 to you a few weeks ago and well, we like it because it's G M's last rear wheel driven, full frame, carbureted muscle car. However,

we're gonna build ours the way we think the factory should have made them.

We got started by jerking out its tired 180 horse 305 to make way for some real power.

Then we installed a nine inch crate rear end for master power that has a Detroit locker and 411 gears.

It also came pre assembled with calipers and rotors.

Then we added a Hotchkiss

suspension set up out back

as well as up front

along with the front brake upgrade.

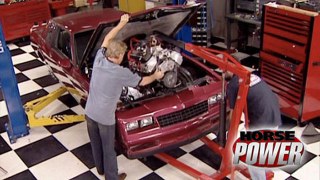
Now that the car can handle the extra power we're ready to drop in our GM performance part ZZ 502 deluxe crate engine.

Before we do that, we need to beef up the factory mounts using these urethane inserts from pro

they'll absorb the vibration of our big block and they install inside the factory clam shells.

Oh there's something else we need to do before we drop in that new motor. We're stepping up to a dual diaphragm booster and larger board master cylinder to compensate for that added line pressure needed. Thanks to the disc brake upgrade.

So, while we've got the room, we might as well remove the factory parts by disconnecting the brake lines and removing four bolts inside the car.

Then we can install the new booster and master cylinder in their place.

Well, these headers ought to make that 502 exhale properly.

They're super comps from hooker and they're designed for big block engine swaps and G bodies like ours. Now, they've got two inch primaries that feed into 3.5 inch collectors and they got a ceramic coating. Now, these pieces come off for easy installation around other components

and we'll lay these in place for now, we'll bolt them up when we get the engine in.

Well, it wasn't very pretty, but after a few modifications to the headers and a little bit of cuss and we finally got it in

the good news. We didn't have to remove the factory ac who wants to drive around in a hot rod that's hot on the inside anyways.

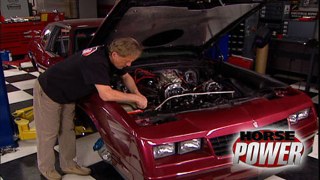
Now, we can bolt up our headers with gaskets and hardware from the kit

with the high horsepower engine. You need a bell housing that's stouter than OEC aluminum.

This one's from Lakewood and it's hydrophone from steel plating.

That's for thickness and strength.

Anytime you install a new bell housing, you gotta make sure it's in proper alignment so that the throw out bearing and clutch fork operates smoothly and that you've ensured that the input shaft of the transmission and then center line of the crank shaft are centered up. Well, here's a tool that will help you do that.

It's a bell housing indexing fixture from a company called Precision Measuring Supply

with the dial indicator mounted to the crank flange

and the stem mounted inside the transmission hole, rotate the crank shaft 360 degrees

and note the highest readings,

then reset the dial indicator

and rotate another 360.

Combine the highest readings in our case, 4005 thousands divide by two and anything under five thousands is acceptable.

Now, if the numbers prove you do need to move the bell housing, you can use some of these offset dow pins from Lakewood to get it lined up

with the bell housing off. Again, we can get joined with this safety plate

on the dow pins

followed by a balance plate that goes on the crank shaft, our aluminum fly wheel, it came from fed Anza. Now the friction surface it's made to handle any kind of clutch material from organic to ceramic.

Now, the ring is also made of a 1045 steel which is super strong and it's removable to save you time and money down the road.

Now, we can bolt up the fly wheel using a RP fasteners.

We also went with FED Anza for our clutch set up, which comes with a Kevlar clutch disk. Now, they also include a pressure plate which the manufacturer claims will last five times longer than a stock piece.

Now, the kit also includes an alignment tool for easy accurate installation.

Now, we can install our bell housing permanently this time and along with it, we need to install this clutch fork

at our throw out bearing otherwise would never fit them through these holes here. Notice also, we've installed this pivot ball and well as the name implies, it gives the fork a nice pivot point for smooth operation. Now, on the other side is a pivot bushing.

We'll make final adjustments to it once we get our leakage hooked up.

All right, the next step is the transmission and this should be pretty cool after the break. We're gonna come back and show you how to finish swapping an unexciting automatic into a gear bang at five speed.

Welcome back to the horsepower shop where we're transforming our mighty Carlo from a weak stock automatic to a big block with a five speed manual trans.

Earlier, we dropped in our 502 gm crate motor

installed a set of long two petters

checked our new bell housing for proper alignment,

then bolted up a flywheel

and clutch set up.

After that, we installed a clutch fork and throw out bearing in the bell housing.

Well, this five speed Richmond Super Street trans goes up next. Now, this is a NASCAR type design that's rated at 600 ft pounds. And as our cutaway reveals, it's got very robust gears much more so than street models. Now, Richmond also offers this longer shifter set up and you see this in a lot of circle track cars for good reason.

That's because of the short solid throws and reputation for durability.

We got the transmission in place and now it's bolted to the bell housing as you can see what you didn't see was what we went through to make it fit. We had Tech Center Tommy cut out part of the trans tunnel to clear a long shifter since it's mounted so high on the transmission.

It also had to be big enough to clear the linkage after the surgery, he then used some 18 gauge sheet metal to make a patch panel.

The next step was finding a cross member that could support everything and allow us to run our dual exhaust. So we got a hold of the guys at AM

Charlie's who have this Bolton cross member that's specially made for the G bodies and the Richmond transmission. Now, they also have these available for any other transmission combination.

It's got a lot of strength and with a double hump design, it should easily accommodate a big dual exhaust system.

Speaking of exhaust, our big block 502 is gonna be moving a lot of air and it needs to sound pretty good too. So we're gonna use a Flow Master Super 40 with a three inch inlet and a three inch outlet. We're pretty tight for room under the car too. So we're gonna have a pretty unique system utilizing a three inch universal tailpipe kit and a metal cat catalytic converter.

After some fitting, cutting and welding, we've got our Y pipe made.

Now, some of you may be wondering why we're using the cat. Well, it's a local law here in Tennessee. So be sure to check your local and state laws to see what you have to run on your exhaust system.

Yeah,

this will have a turn down on it, but since the mufflers in place, we're through with the system

while we've still got the car in the air, we might as well install the GM starter that came with our crate engine. Now, it's a lightweight gear reduction piece that fits both small and big block Chevys

and it bolts up to the engine block.

We're back on the ground where I'm gonna get a jump start on that 50 two's accessory drive system. Now, this is a GM performance parts kit and we had it rushed to us from Latos

Chevrolet in Arlington Heights, Illinois.

It's a deluxe kit for cars with AC like ours and I'll get started with our crank shaft drive pulley,

it installs in front of the balancer with three bolts from the kit.

Now, we have to remove the short style water pump that came with our crate motor

and replace it with this longer style pump from the kit.

And that's to keep the pulleys lined up

next, the water pump pulley can go on

and with a stud in the right hand cylinder head, we install the main ac bracket

followed by the ac compressor and the brace.

We preassembled our alternator and power steering pump to go on. Now,

the tensioner needs to go on next,

followed by the power steering pump pulley

and now the idler pulley

and finally the serpentine belt from the kit to complete the installation.

Of course, we got to handle the plumbing and electrical work which we'll do next time we bring the mighty Carlo in for another phase of the build up.

Oh, we'll also show you how to beef up a fuel delivery system that's up to the job of feeding a hungry big block like ours.

Meanwhile, over the years, we've all seen potions and products that claim to help fuel economy or increase horsepower.

Well, we found a new one that claims to do a little of both and we'll see if it passes the undeniable

dyno

test. Hang with us.

So what's the factory rate this thing? Horsepower wise GM rates this motor at 505 horsepower. I bet you get more than that. I hope

so.

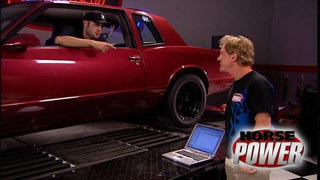
Hey, today we got a new little EF I monster to play with in our DTs dyno. In

fact, it's one of the coolest crate motors geo performance parts came out with the LS

starting with an all aluminum block. This motor is built with race ready parts like CNC machine heads with 70 cc combustion chambers

and 56 millimeter titanium valves. Now to run it on our

dyno, we just installed the new GME 67 plug and play system.

It's complete with harness and all the sensors. Now, it's a factory calibrated set up that works with the LS seven

LS two and the new L S3.

Now ours is all set up and about ready to run and believe it or not, this is probably the most important component, a sleeve between the air filters and throttle body to house our mass airflow sensor. It's gotta be at least six inches from the throttle body blades. And over here, of course, we're running an electric water pump

back here, we fed

up a couple of boards to mount the system's fuse relay center,

the controller

and this electronically controlled throttle pedal. Now, even further back, we mounted a moroso tank to use with the engine's dries up oiling system.

Today, we're not only measuring horsepower and torque of this engine, but we're going to be performing some tests on a system designed to save you money.

What if you could improve the power and fuel economy from your car's engine, whether it's a high performance late model. Now running on premium or

mi

to ride, running on middle grade fuel.

That's the idea behind this bolt on fuel catalyst from Fitch. Now, unlike those other additives you've seen over the years, this is designed to be a permanent treatment for both gasoline and diesel powered engines. Now, inside the canister are these little bullets made of a proprietary metal alloy. Now, Fitch claims they can return fuel to its refinery fresh state, adding octane allowing you to burn a lower grade fuel.

All right, I just put 93 octane premium gas in our fuel cell here.

Now, we need to make three consecutive pulls on the dyno

to get an accurate baseline.

Our average horsepower through the RPM range was 424 average torque was 490. Now, here's the main number, the one that counts average gallons of fuel per hour, which is 20.26.

Now to use the Fitch fuel catalyst, we'll run this short line we made from the fuel regulator

to the canister inlet on the bottom

and we connect the line that runs to the engine to the outlet top side of the canister

to warm the engine up to the same oil and water temperatures as before

and make three more runs.

Now running 93 octane through the catalyst, we made a few horsepower at 426 picked up a few foot pounds of torque at 493. And we did it using less fuel, an average of 19.64 gallons per hour

earlier, we mentioned something about dropping down to a lower grade of fuel. Well, as soon as I get the fuel system hooked back up without the Fitch, we're going to do this test again using an 89 octane,

but you guys need to hang out because we're taking a break

and welcome back to the horsepower shop.

We just made some

dyno test using that G MLS seven back there with some pretty interesting results.

We were running 93 octane fuel and after our stock baseline runs, we tried out this Fitch fuel catalyst.

Our best baseline was 424 horsepower 490 ft pounds of torque using 20.26 gallons of fuel per hour.

Then we ran our fuel lines through the catalyst canister

and made three more runs. The results.

We made a couple more horses and three extra foot pounds of torque and we use less fuel to do it over a half a gallon per hour less.

Ok. That was premium 93 octane the fuel recommended by the factory. Now, just out of curiosity, we went ahead and switched all the dyno fuel lines back to stock without the Fitch catalyst drain the fuel tank. Now, we're gonna do this whole test again,

but instead of 93 we're using 89.

Ok, same drill as previously warm up the motor until the oil and water tips are the same as before

and three more pools to 6500 RPM.

Now this time average horsepower is 4, 17

torque is 484 ft pounds

and Dallas per hour, 23 03,

we reinstall lines to run fuel through the pitch catalyst and make three more runs.

Ok. Horsepower and torque numbers are essentially the same, but check this out,

the motor only needed 20.59 gallons of fuel on this run versus 23.03 on the baseline.

That's almost a 2.5 gallon per hour difference, which could add to a big savings over time.

Now, we noticed that the kit also comes with these brackets that we used in

the dyno poses with brass fittings and even this oe style fuel line fitting with a disconnect tool.

Now, for odor vehicles, they've got these pellets that you just drop right into the fuel tank through the filler.

Now, the kits start at 177 more for performance cars and diesels. Ok?

To the special effect, it's horsepower, hot parts time.

So you've been thinking about getting a power programmer for your daily driver, car or truck, a

lot of choices out there. But Hypertech is up the ante with their new one called the Max Energy. Now, this thing is internet upgradable. It gets the most power possible from every ounce of fuel they say and has all the features you'd expect from a premium power programmer.

Not so premium price though at

only 380 bucks, here's a new product right out of the box Taylor cable products now offers an aluminum battery box, specially made for optima batteries.

Now it gives you easy access to the battery without removing it and complies with N hr A rules. It comes with this heavy duty, hold down and spacers for different with batteries. The best part, some eras will box you one up and ship it to you for right at 90 bucks

here. Catch this

nice toss. Well, that's a wrap for this week's horse power. Hey, you don't wanna miss next week's show. It's a special competition we're staging right here in the shop. Get this two teams of gearhead grads with identical short blocks and they got the same parts budgets. They build their motors and then what? Then we have a big shoot out back there on our DTs dyno. And believe me, these guys are all revved up and raring to go and hey, we gotta check out of here too. We'll see you next week.
Show Full Transcript