Engine Power Featured Projects
Engine Power Builds
Want more content like this?
Join the PowerNation Email NewsletterParts Used In This Episode
PowerTrain Products
We are the Nation's Leading Supplier of Engines, Differentials, Transmissions and Transfer Cases
ARP
ARP is the Official Bolt Supplier to Engine Power
Matco Tools
MATCO Tools are the Official Tool Supplier to Engine Power
Video Transcript
(Narrator)>> What do you call a 1,200 horsepower turbocharged LS in an 1,800 pound vehicle? Some call it madness. We call it the test sled. Today on Engine Power our mobile chassis dyno receives its Powertrain, and in this week's Driveway Rescue we'll help one of our viewers get his 1979 F-100 road ready. [ music ]
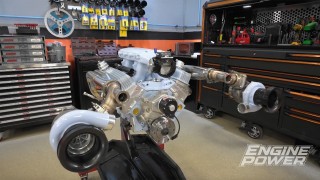
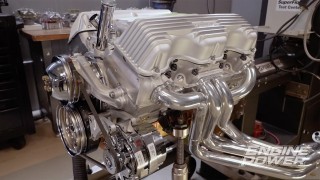
(Mike)>> Welcome to Engine Power. Today we're going to advance our test sled, or as some call it a rolling dyno. It's a Factory Five Racing Type 65 Coupe-R, a race version of their all new gen three Daytona coupe. Ours isn't getting a body. The whole idea behind this thing is to be able to swap engines and parts quickly for testing purposes or to just to go out and have fun. And speaking of that check out the first engine going into this thing. This is a 427 inch LME LS Extreme crate engine. It's rated to handle 2,000 horsepower and is offered in different configurations. A Precision 86-85 Gen Two Sportsman flange turbo and air to air intercooler will send some artificial atmosphere into the super slick billet manifold machined at LME. Holley's HP e-f-i handled the timing and fuel duties, and they were commanded by turbo guru and engine building legend Kenny Duttweiler. On 17 pounds of boost this bullet made 1,210 horsepower and 993 pound feet of torque.
(Pat)>> We are also going to be hitting the road to help out a viewer with his 1979 Ford F-100. He has owned this rig since high school and has had some problems come about that he needs a hand with. So we are going to load up some Rock Auto boxes in the back of the Driveway Rescue van and go help him out, but before that we are gonna show you some cool stuff on our test sled.
(Mike)>> Today our goal is to get the engine and transmission mounted in the chassis. In case you're seeing this for the first time it's designed to accept big and small block Chevys, LS's, big and small block Fords, Mopars, and the list goes on and on. We don't want to be changing driveshaft lengths and constantly moving the location of the transmission crossmember. So Pat and I decided that the transmission had to be the stationary piece to the puzzle to make all of this as simple as possible.
(Pat)>> The solution was way easier than we thought it was going to be thanks to Reid Racing. We are gonna be using one of their super hydro 400 transmission cases that accepts removable bell housings, and here is where it gets interesting. We have one for a small block Ford, a Buick, Olds, Pontiac setup, and one for Chevrolet, which encompasses small blocks, big blocks, and even LS's, and the one thing that they all have in common is their length, and this will allow the transmission mounting point and the driveshaft length to remain the same no matter what we run. So all we have to do is change bell housings and converters if we want to run a different engine.
(Mike)>> FTI Performance is a family owned transmission and torque converter company that builds units for street cars all the way up to wild Pro Mods. Now being competitive bracket racers they know the importance of quality, consistency, and reliability. Now they tailor each transmission they build to the customer's individual specifications. We discussed the project goals and they put together a stout stage five Reid case 400 rated to 2,000 horsepower. It has an aluminum full manual reverse pattern trans brake valve body, custom direct drum with Pro Mod sprag, high pressure pump, air met input shaft, and large spline drum. A billet forward clutch hub, rollerized output shaft, high flow filter, straight cut 248 low gear assembly, and an air met main shaft wrap up the internals. A cast aluminum deep pan was installed for extra fluid capacity. Easily put we have a super strong transmission that will handle big power and be super reliable. The converter is being built by FTI right now. If you want more information on what they offer visit FTI Performance dot com. You can purchase their transmissions and converters at Summit Racing.
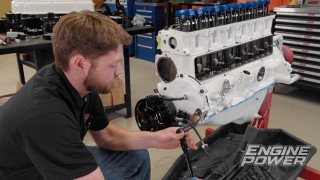
(Pat)>> We needed a transmission mount that can withstand high torque load. So we chose a Prothane due to their internal run safe interlocks. They are engineered to prevent breakage and mount separation. Plus a strong formula of urethane is used, and it's impervious to deterioration caused by oil, grease, or other contaminants. This mount is designed with a three hole mounting configuration. It allows for multiple mounting applications like a hot rot chassis or a factory style crossmember in a stock chassis. Reid Racing couldn't have made it any easier to change bell housings. This is the one we need to mount the LS to the 400. It simply bolts to a machined face on the transmission case.
(Narrator)>> Up next Branon's been driving this Ford Ranger since high school, and he won't let engine trouble stop him now. We'll make a house call for a little driveway diagnosis.
(Mike)>> We're heading out in the Driveway Rescue van to meet a guy who loves his F-100 so much it might as well be a family member. Exactly the kind of gearhead we like hanging out with.
(Branon)>> My name's Branon Saldana. It's a 1979 Ford F-100 Ranger. I was 15 years old. My dad bought it for me. We've built it in his shop. Everything on the truck is all steel. There's no plastics, there's no fiberglass. It's American made steel pickup truck, and then as it got older it started to have issues, and it slowly started sitting more. I need to get the timing figured out. It falls on its face when it's driving. Just doesn't have the power like it had at one time. Everybody has a price tag. To me this truck's priceless. I drove this through high school. I met my wife driving this truck. I'm sure there's a lot of police officers that know because of this truck, and it's funny cause like my whole family knows that this truck means more to me than anything. Guys how you doing.
(Pat)>> Pat.
(Branon)>> An honor, it's an honor.
(Pat)>> So we come pulling in and the first thing we see is those square headlights and the old body style, and I'm old Ford truck guy myself. So I got excited. Tell me what you got going here.
(Branon)>> '79 Ford Ranger F-100, and as time goes on life happens, projects go to the side, bills get paid.
(Pat)>> Well now tell us about some of the issues that you're having.
(Branon)>> It runs but when you start driving it it bogs down, falls on its face, and sometimes it idles a little weird.
(Mike)>> We brought a few boxes of parts and we're ready to work on it.
(Pat)>> I think so, let's get started.
(Branon)>> Perfect I'm ready too. [ music ]
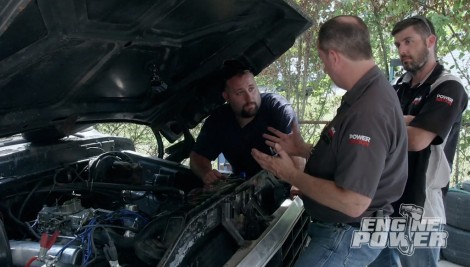
(Mike)>> Alternator, some gaskets. After hearing the issues that Branon was having with his truck Pat and I decided it had to be a fuel or spark issue. So we logged onto Rock Auto dot com and ordered pretty much everything to cover either one. Now the good thing about Rock Auto is they have so many different brands for each item. Now we have stuff from Power Select, Pioneer, Motorcraft, NGK, and the list goes on. The first thing to do is pull off all the old stuff.
(Pat)>> Alright do you have a Chiltons manual so we can know where all the wiring goes cause I'm pulling that off right now. Look I'm not even looking, I'm not even looking.
(Branon)>> Well gotta start somewhere.
(Pat)>> Okay typically what you would do is if you didn't know that the distributor was where it was supposed to be you would pop the cap off it and you'd note the rotor position, and then if you got confused on where it goes and you didn't turn the engine over you could just literally put it back in the same position. We don't care about that because we don't know where it was in the first place, and we're getting a new one. So this is going ahead and this is coming out. People always make fun of us for taking pictures of stuff. I take pictures of everything because I'd rather get laughed at and get it back together the right way. [ music ] You always want to pull something like this. Make sure there's no guck that's around the hole that can fall in.
(Mike)>> Throttle cable out. Get off there.
(Pat)>> We have new fuel lines. Not too worried about that. [ music ]
(Branon)>> Fuel pump.
(Pat)>> That has the old fuel pump aroma.
(Mike)>> Boy that gas is old. I got a shot in the hair, shot in the arm. Lots of sediment can settle in older vehicle's fuel systems. Since we're taking the time to refresh this 351 Cleveland we might as well install new fuel lines and a new pump.
(Pat)>> We'll use some shop towels to keep the rotten gasket chunks from falling into the intake. Once it's scraped clean this Ford is ready for some fixing.
(Narrator)>> Up next, with engines timing is everything.
(Mike)>> Rock Auto dot com is known for hard parts and fluids, but they now carry a wide selection of Permatex sealants, thread lockers, and more. We're using red r-t-v gasket maker during the installation of the fuel pump. You can tell a lot about how an engine's running by looking at the plugs. These look like they came out of a two stroke boat motor. There's no oil but there's heavy carbon build up from the engine running too rich. Our new Power Select alternator is not remanufactured. It's brand new, and the cool thing with this is it even comes with its own dyno sheet. It shows that this thing at 6,000 r-p-m made 71 amps and it's rated for 70. So it must be a good one.
(Pat)>> Along with a new alternator we replaced the battery and ground cables to ensure a good connection with plenty of power. From Rock Auto dot com's many spark plug offerings we chose NGK's for Branon's F-100, and used Permatex anti-seize lube on the threads. The entire ignition system is getting an upgrade, starting with a canister style coil and new plug wires, and of course a new distributor. You know this distributor actually has a mark for number one, and you can put these anywhere. The important part is your vacuum advance is pointing somewhere where it's not getting in the way. So you can swing it for timing. It has to be unhooked when you're timing it, but you can actually put the wires anywhere you want, but because this one's actually numbered we're gonna put it in. We've rolled the engine over to t-d-c on a compression stroke. Here's where everybody messes that up. They'll roll it over until they see a mark. Well if you don't stick your finger in the spark plug hole and it blows air you're not on a compression stroke. So we've done that. So now what I'll do is I'll mark the position of where we want to start the number one, and always remember too, these Fords, they turn counterclockwise. So what we're gonna do is we're gonna mark number one's location, and we'll pull the cap off it. Now we drop our rotor in. When that drops in that rotor button, if it's pointed at number one, we're in there like swimwear. [ music ] With the distributor in the plug wires are attached in the correct firing order. So one, three, seven, two, six, five.
(Mike)>> Since Branon was running a Holley carb to begin with we're replacing it with another Holley. A 650 c-f-m four barrel. To freshen up the interior the ultimate dash cover replaces years' worth of cracked plastic with a u/v resistant carpeted cover that fits perfectly.
(Pat)>> Yeah go ahead. [ engine starts and idles ]
(Pat)>> Now we can make some fine adjustments to the carburetor and timing. Unfortunately this engine has a problem a little deeper down. We believe it has a stuck or burnt valve, indicated by the number one cylinder being 200 degrees cooler than all the rest. This is the point where people go oh my god now I've got to start working on it a bunch. Well this is the part where you don't get discouraged. Now this is the motivation to do it. You have a new charging system, new mixer valve on the top, all new ignition, new belts, and you have a good starting point for the rest of it. Now it's gonna take a little bit of work on your end. On this beautiful hot day you wore us out is what happened.
(Mike)>> Like most older vehicles there's a lot more work to do be done, with Branon and his father Joseph working on something that means so much to the both of them.
(Branon)>> If something ever happens to him I still have this and I still have the pictures, I still have the memories. Now I have this just to look back and say, well you know this is what we did, and when I have kids they'll be like, your grandfather and I built this. A lot of blood, a lot of sweat, a couple of cuss words.
(Joseph)>> More than a couple.
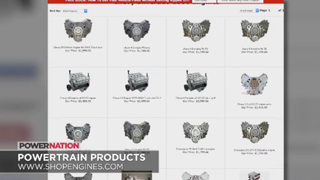
(Mike)>> When your engine or other drivetrain component fails and needs to be swapped out we know the perfect place to get a remanufactured replacement with all the known factory issues addressed. Powertrain Products offers engines, transmissions, transfer cases, and differentials. Shop Engines dot com offers a three, five, and seven year Powertrain promise warranty with coverage up to one million miles. If that's not good enough upgrade to the Powertrain pure care warranty for $349 bucks. It provides additional coverage like no fault replacement regardless of the failure. They will also cover labor up to $110 dollars per hour and cover your tow bill up to $150 bucks. Plus they'll put you in a rental car for up to 10 days. Diagnostic time is also covered. So don't be fooled by the lesser quality imposters. Log on to Shop Engines dot com to learn more.
(Narrator)>> Up next the test sled gets fed.
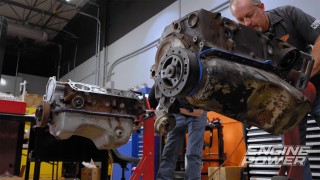
(Mike)>> We're back at the shop and this is an exciting time for us. We finally get to remove the Pyar mock up block and get ready for over 1,200 horses of LS single turbo power between these frame rails. Now we're still waiting for the torque converter to get to us but that's not going to slow us down. [ music ] This thing's really heavy, so be careful.
(Pat)>> I know, I remember how heavy it was going in.
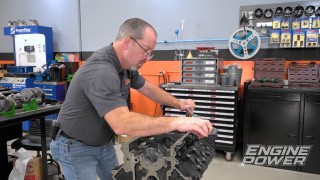
(Mike)>> The mock up block is awesome to have. They allow you to bolt everything up in the engine bay to prep your setup. It works out great if you're waiting on your engine to be finished at the machine shop or just want something lighter to work with. [ music ]
(Pat)>> Precise fit.
(Mike)>> You want me to get your back strap?
(Pat)>> I got it.
(Mike)>> We pulled the engine off the dyno. Now we can bolt up this billet flex plate. Like the transmission and several other components going on this car, it is SFI rated. 29.2 to be exact. The SFI foundation is funded by safety equipment manufacturers to ensure that products meet or exceed recommended standards. [ music ]
(Pat)>> We're close on this. Yep, right there.
(Mike)>> Factory Five Racing supplied the motor mount plates for the engine. We're going to give them some color with VHT epoxy paint. It's a one-step epoxy coating that does not require the use of a primer. It's formulated to give the appearance and durability of a baked on finish, and it is chemical, rust, corrosion, and salt resistant. [ aerosol can hissing ] [ drill spinning ]
(Mike)>> With the mounts bolted up it's time for the glory moment. Let's get this bullet dropped in. [ music ] Alright, and hold it here.
(Pat)>> There you go. [ music ]
(Mike)>> Ready?
(Pat)>> Oooh yeah, oh yeah. A high strength eighth inch piece of steel was fabricated into a plate to secure to the transmission mount. It bolts into the original mounting location on the chassis.
(Mike)>> Alright man, it's in there on its own.
(Pat)>> Oh man. It's a long time coming right here.
(Mike)>> Look at this thing.
(Pat)>> Now the great thing is, I don't know if we've ever worked on something that has this much room everywhere.
(Mike)>> I'm already envisioning things. Turbo down low, up in that space. I mean look at the amount of room we have between the manifolds and the foot boxes.
(Pat)>> Absolutely gorgeous. Transmission went in nicely. There's more room than we thought there where the height was on the bar.
(Mike)>> We're gonna be able to plumb this thing, the transmission and everything, up to the cooler from the top. There's no getting under it.
(Pat)>> The idea is not having to work super hard on this. This is supposed to be like the dyno right? So I think that we've achieved our goal in having a mobile rolling road dyno.
(Mike)>> That's exactly what this is.
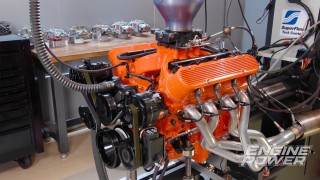
(Pat)>> If you'd like more information on anything you've seen on today's show visit Powernation TV dot com. [ music ] Recently we had turbo guru Kenny Duttweiler in our shop working on our LME 427 cubic inch LS. It featured a massive 86 millimeter Precision turbo, and it laid down 1,210 horsepower and 993 pound feet of torque on the engine dyno. [ engine revving ]
(Pat)>> Kenny shared his years of engine building knowledge with us, including a simple, effective modification to help protect the turbo piping from getting damaged.
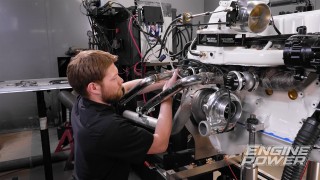
(Mike)>> When you push a high powered turbocharged engine to high r-p-m, 7,500 in our case, the turbocharged air puts a serious strain on the piping. Sometimes the pressure is so great that the pipe breaks free from its clamp. This can really slow down a good dyno session, and that gets frustrating fast. Kenny showed us how to fab up a strap between the pipe and intercooler to keep everything in its place. Like many engine builders he learned this trick from hard experience.
(Kenny)>> We were kinda hard headed. For a long time we'd clamp them on there, we'd take a pull, and blow the pipe off. And then we'd go out there and clamp it on with two hose clamps or something, and finally we decided, you know maybe if we just got smart and we just strapped those things where they wouldn't blow off we could make more than one or two pulls in an hour.
(Pat)>> We started by making four aluminum bosses that are threaded for five-sixteenths fasteners. Two of them are tig welded to the top of the intercooler, and two will be welded to the pipes. To help keep the pipe in place we rolled a bead on the end of the cold side and attach it using a T-bolt clamp. A simple hose clamp is simply not strong enough.
(Mike)>> On the turbo side we welded on a flange and attached it to the turbo with a V-band clamp. Once the plumbing is completed we'll bolt up a couple of eighth inch steel plates to secure the pipes to the intercooler. After installing the strap we made dyno run after dyno run with no problems. [ engine revving ]
(Kenny)>> When I looked at the intercooler there I realized it would be kind of unfortunate if we we're taking a pull and it pushed the pipe off. So I thought well you know why don't we just strap them before we start, and as it turned out we had zero issues with that. So that was good. It just comes from experience. You know if you do any of this stuff long enough you're gonna go through every crazy thing that can happen. From a clamp that's too big or too small that you can make the right size, to just looking at things and saying, I remember when we did that and it didn't work, or this is how we fixed that. It's just a depth of experience. It comes with age.
Show Full Transcript
(Mike)>> Welcome to Engine Power. Today we're going to advance our test sled, or as some call it a rolling dyno. It's a Factory Five Racing Type 65 Coupe-R, a race version of their all new gen three Daytona coupe. Ours isn't getting a body. The whole idea behind this thing is to be able to swap engines and parts quickly for testing purposes or to just to go out and have fun. And speaking of that check out the first engine going into this thing. This is a 427 inch LME LS Extreme crate engine. It's rated to handle 2,000 horsepower and is offered in different configurations. A Precision 86-85 Gen Two Sportsman flange turbo and air to air intercooler will send some artificial atmosphere into the super slick billet manifold machined at LME. Holley's HP e-f-i handled the timing and fuel duties, and they were commanded by turbo guru and engine building legend Kenny Duttweiler. On 17 pounds of boost this bullet made 1,210 horsepower and 993 pound feet of torque.
(Pat)>> We are also going to be hitting the road to help out a viewer with his 1979 Ford F-100. He has owned this rig since high school and has had some problems come about that he needs a hand with. So we are going to load up some Rock Auto boxes in the back of the Driveway Rescue van and go help him out, but before that we are gonna show you some cool stuff on our test sled.
(Mike)>> Today our goal is to get the engine and transmission mounted in the chassis. In case you're seeing this for the first time it's designed to accept big and small block Chevys, LS's, big and small block Fords, Mopars, and the list goes on and on. We don't want to be changing driveshaft lengths and constantly moving the location of the transmission crossmember. So Pat and I decided that the transmission had to be the stationary piece to the puzzle to make all of this as simple as possible.
(Pat)>> The solution was way easier than we thought it was going to be thanks to Reid Racing. We are gonna be using one of their super hydro 400 transmission cases that accepts removable bell housings, and here is where it gets interesting. We have one for a small block Ford, a Buick, Olds, Pontiac setup, and one for Chevrolet, which encompasses small blocks, big blocks, and even LS's, and the one thing that they all have in common is their length, and this will allow the transmission mounting point and the driveshaft length to remain the same no matter what we run. So all we have to do is change bell housings and converters if we want to run a different engine.
(Mike)>> FTI Performance is a family owned transmission and torque converter company that builds units for street cars all the way up to wild Pro Mods. Now being competitive bracket racers they know the importance of quality, consistency, and reliability. Now they tailor each transmission they build to the customer's individual specifications. We discussed the project goals and they put together a stout stage five Reid case 400 rated to 2,000 horsepower. It has an aluminum full manual reverse pattern trans brake valve body, custom direct drum with Pro Mod sprag, high pressure pump, air met input shaft, and large spline drum. A billet forward clutch hub, rollerized output shaft, high flow filter, straight cut 248 low gear assembly, and an air met main shaft wrap up the internals. A cast aluminum deep pan was installed for extra fluid capacity. Easily put we have a super strong transmission that will handle big power and be super reliable. The converter is being built by FTI right now. If you want more information on what they offer visit FTI Performance dot com. You can purchase their transmissions and converters at Summit Racing.
(Pat)>> We needed a transmission mount that can withstand high torque load. So we chose a Prothane due to their internal run safe interlocks. They are engineered to prevent breakage and mount separation. Plus a strong formula of urethane is used, and it's impervious to deterioration caused by oil, grease, or other contaminants. This mount is designed with a three hole mounting configuration. It allows for multiple mounting applications like a hot rot chassis or a factory style crossmember in a stock chassis. Reid Racing couldn't have made it any easier to change bell housings. This is the one we need to mount the LS to the 400. It simply bolts to a machined face on the transmission case.
(Narrator)>> Up next Branon's been driving this Ford Ranger since high school, and he won't let engine trouble stop him now. We'll make a house call for a little driveway diagnosis.
(Mike)>> We're heading out in the Driveway Rescue van to meet a guy who loves his F-100 so much it might as well be a family member. Exactly the kind of gearhead we like hanging out with.
(Branon)>> My name's Branon Saldana. It's a 1979 Ford F-100 Ranger. I was 15 years old. My dad bought it for me. We've built it in his shop. Everything on the truck is all steel. There's no plastics, there's no fiberglass. It's American made steel pickup truck, and then as it got older it started to have issues, and it slowly started sitting more. I need to get the timing figured out. It falls on its face when it's driving. Just doesn't have the power like it had at one time. Everybody has a price tag. To me this truck's priceless. I drove this through high school. I met my wife driving this truck. I'm sure there's a lot of police officers that know because of this truck, and it's funny cause like my whole family knows that this truck means more to me than anything. Guys how you doing.
(Pat)>> Pat.
(Branon)>> An honor, it's an honor.
(Pat)>> So we come pulling in and the first thing we see is those square headlights and the old body style, and I'm old Ford truck guy myself. So I got excited. Tell me what you got going here.
(Branon)>> '79 Ford Ranger F-100, and as time goes on life happens, projects go to the side, bills get paid.
(Pat)>> Well now tell us about some of the issues that you're having.
(Branon)>> It runs but when you start driving it it bogs down, falls on its face, and sometimes it idles a little weird.
(Mike)>> We brought a few boxes of parts and we're ready to work on it.
(Pat)>> I think so, let's get started.
(Branon)>> Perfect I'm ready too. [ music ]
(Mike)>> Alternator, some gaskets. After hearing the issues that Branon was having with his truck Pat and I decided it had to be a fuel or spark issue. So we logged onto Rock Auto dot com and ordered pretty much everything to cover either one. Now the good thing about Rock Auto is they have so many different brands for each item. Now we have stuff from Power Select, Pioneer, Motorcraft, NGK, and the list goes on. The first thing to do is pull off all the old stuff.
(Pat)>> Alright do you have a Chiltons manual so we can know where all the wiring goes cause I'm pulling that off right now. Look I'm not even looking, I'm not even looking.
(Branon)>> Well gotta start somewhere.
(Pat)>> Okay typically what you would do is if you didn't know that the distributor was where it was supposed to be you would pop the cap off it and you'd note the rotor position, and then if you got confused on where it goes and you didn't turn the engine over you could just literally put it back in the same position. We don't care about that because we don't know where it was in the first place, and we're getting a new one. So this is going ahead and this is coming out. People always make fun of us for taking pictures of stuff. I take pictures of everything because I'd rather get laughed at and get it back together the right way. [ music ] You always want to pull something like this. Make sure there's no guck that's around the hole that can fall in.
(Mike)>> Throttle cable out. Get off there.
(Pat)>> We have new fuel lines. Not too worried about that. [ music ]
(Branon)>> Fuel pump.
(Pat)>> That has the old fuel pump aroma.
(Mike)>> Boy that gas is old. I got a shot in the hair, shot in the arm. Lots of sediment can settle in older vehicle's fuel systems. Since we're taking the time to refresh this 351 Cleveland we might as well install new fuel lines and a new pump.
(Pat)>> We'll use some shop towels to keep the rotten gasket chunks from falling into the intake. Once it's scraped clean this Ford is ready for some fixing.
(Narrator)>> Up next, with engines timing is everything.
(Mike)>> Rock Auto dot com is known for hard parts and fluids, but they now carry a wide selection of Permatex sealants, thread lockers, and more. We're using red r-t-v gasket maker during the installation of the fuel pump. You can tell a lot about how an engine's running by looking at the plugs. These look like they came out of a two stroke boat motor. There's no oil but there's heavy carbon build up from the engine running too rich. Our new Power Select alternator is not remanufactured. It's brand new, and the cool thing with this is it even comes with its own dyno sheet. It shows that this thing at 6,000 r-p-m made 71 amps and it's rated for 70. So it must be a good one.
(Pat)>> Along with a new alternator we replaced the battery and ground cables to ensure a good connection with plenty of power. From Rock Auto dot com's many spark plug offerings we chose NGK's for Branon's F-100, and used Permatex anti-seize lube on the threads. The entire ignition system is getting an upgrade, starting with a canister style coil and new plug wires, and of course a new distributor. You know this distributor actually has a mark for number one, and you can put these anywhere. The important part is your vacuum advance is pointing somewhere where it's not getting in the way. So you can swing it for timing. It has to be unhooked when you're timing it, but you can actually put the wires anywhere you want, but because this one's actually numbered we're gonna put it in. We've rolled the engine over to t-d-c on a compression stroke. Here's where everybody messes that up. They'll roll it over until they see a mark. Well if you don't stick your finger in the spark plug hole and it blows air you're not on a compression stroke. So we've done that. So now what I'll do is I'll mark the position of where we want to start the number one, and always remember too, these Fords, they turn counterclockwise. So what we're gonna do is we're gonna mark number one's location, and we'll pull the cap off it. Now we drop our rotor in. When that drops in that rotor button, if it's pointed at number one, we're in there like swimwear. [ music ] With the distributor in the plug wires are attached in the correct firing order. So one, three, seven, two, six, five.
(Mike)>> Since Branon was running a Holley carb to begin with we're replacing it with another Holley. A 650 c-f-m four barrel. To freshen up the interior the ultimate dash cover replaces years' worth of cracked plastic with a u/v resistant carpeted cover that fits perfectly.
(Pat)>> Yeah go ahead. [ engine starts and idles ]
(Pat)>> Now we can make some fine adjustments to the carburetor and timing. Unfortunately this engine has a problem a little deeper down. We believe it has a stuck or burnt valve, indicated by the number one cylinder being 200 degrees cooler than all the rest. This is the point where people go oh my god now I've got to start working on it a bunch. Well this is the part where you don't get discouraged. Now this is the motivation to do it. You have a new charging system, new mixer valve on the top, all new ignition, new belts, and you have a good starting point for the rest of it. Now it's gonna take a little bit of work on your end. On this beautiful hot day you wore us out is what happened.
(Mike)>> Like most older vehicles there's a lot more work to do be done, with Branon and his father Joseph working on something that means so much to the both of them.
(Branon)>> If something ever happens to him I still have this and I still have the pictures, I still have the memories. Now I have this just to look back and say, well you know this is what we did, and when I have kids they'll be like, your grandfather and I built this. A lot of blood, a lot of sweat, a couple of cuss words.
(Joseph)>> More than a couple.
(Mike)>> When your engine or other drivetrain component fails and needs to be swapped out we know the perfect place to get a remanufactured replacement with all the known factory issues addressed. Powertrain Products offers engines, transmissions, transfer cases, and differentials. Shop Engines dot com offers a three, five, and seven year Powertrain promise warranty with coverage up to one million miles. If that's not good enough upgrade to the Powertrain pure care warranty for $349 bucks. It provides additional coverage like no fault replacement regardless of the failure. They will also cover labor up to $110 dollars per hour and cover your tow bill up to $150 bucks. Plus they'll put you in a rental car for up to 10 days. Diagnostic time is also covered. So don't be fooled by the lesser quality imposters. Log on to Shop Engines dot com to learn more.
(Narrator)>> Up next the test sled gets fed.
(Mike)>> We're back at the shop and this is an exciting time for us. We finally get to remove the Pyar mock up block and get ready for over 1,200 horses of LS single turbo power between these frame rails. Now we're still waiting for the torque converter to get to us but that's not going to slow us down. [ music ] This thing's really heavy, so be careful.
(Pat)>> I know, I remember how heavy it was going in.
(Mike)>> The mock up block is awesome to have. They allow you to bolt everything up in the engine bay to prep your setup. It works out great if you're waiting on your engine to be finished at the machine shop or just want something lighter to work with. [ music ]
(Pat)>> Precise fit.
(Mike)>> You want me to get your back strap?
(Pat)>> I got it.
(Mike)>> We pulled the engine off the dyno. Now we can bolt up this billet flex plate. Like the transmission and several other components going on this car, it is SFI rated. 29.2 to be exact. The SFI foundation is funded by safety equipment manufacturers to ensure that products meet or exceed recommended standards. [ music ]
(Pat)>> We're close on this. Yep, right there.
(Mike)>> Factory Five Racing supplied the motor mount plates for the engine. We're going to give them some color with VHT epoxy paint. It's a one-step epoxy coating that does not require the use of a primer. It's formulated to give the appearance and durability of a baked on finish, and it is chemical, rust, corrosion, and salt resistant. [ aerosol can hissing ] [ drill spinning ]
(Mike)>> With the mounts bolted up it's time for the glory moment. Let's get this bullet dropped in. [ music ] Alright, and hold it here.
(Pat)>> There you go. [ music ]
(Mike)>> Ready?
(Pat)>> Oooh yeah, oh yeah. A high strength eighth inch piece of steel was fabricated into a plate to secure to the transmission mount. It bolts into the original mounting location on the chassis.
(Mike)>> Alright man, it's in there on its own.
(Pat)>> Oh man. It's a long time coming right here.
(Mike)>> Look at this thing.
(Pat)>> Now the great thing is, I don't know if we've ever worked on something that has this much room everywhere.
(Mike)>> I'm already envisioning things. Turbo down low, up in that space. I mean look at the amount of room we have between the manifolds and the foot boxes.
(Pat)>> Absolutely gorgeous. Transmission went in nicely. There's more room than we thought there where the height was on the bar.
(Mike)>> We're gonna be able to plumb this thing, the transmission and everything, up to the cooler from the top. There's no getting under it.
(Pat)>> The idea is not having to work super hard on this. This is supposed to be like the dyno right? So I think that we've achieved our goal in having a mobile rolling road dyno.
(Mike)>> That's exactly what this is.
(Pat)>> If you'd like more information on anything you've seen on today's show visit Powernation TV dot com. [ music ] Recently we had turbo guru Kenny Duttweiler in our shop working on our LME 427 cubic inch LS. It featured a massive 86 millimeter Precision turbo, and it laid down 1,210 horsepower and 993 pound feet of torque on the engine dyno. [ engine revving ]
(Pat)>> Kenny shared his years of engine building knowledge with us, including a simple, effective modification to help protect the turbo piping from getting damaged.
(Mike)>> When you push a high powered turbocharged engine to high r-p-m, 7,500 in our case, the turbocharged air puts a serious strain on the piping. Sometimes the pressure is so great that the pipe breaks free from its clamp. This can really slow down a good dyno session, and that gets frustrating fast. Kenny showed us how to fab up a strap between the pipe and intercooler to keep everything in its place. Like many engine builders he learned this trick from hard experience.
(Kenny)>> We were kinda hard headed. For a long time we'd clamp them on there, we'd take a pull, and blow the pipe off. And then we'd go out there and clamp it on with two hose clamps or something, and finally we decided, you know maybe if we just got smart and we just strapped those things where they wouldn't blow off we could make more than one or two pulls in an hour.
(Pat)>> We started by making four aluminum bosses that are threaded for five-sixteenths fasteners. Two of them are tig welded to the top of the intercooler, and two will be welded to the pipes. To help keep the pipe in place we rolled a bead on the end of the cold side and attach it using a T-bolt clamp. A simple hose clamp is simply not strong enough.
(Mike)>> On the turbo side we welded on a flange and attached it to the turbo with a V-band clamp. Once the plumbing is completed we'll bolt up a couple of eighth inch steel plates to secure the pipes to the intercooler. After installing the strap we made dyno run after dyno run with no problems. [ engine revving ]
(Kenny)>> When I looked at the intercooler there I realized it would be kind of unfortunate if we we're taking a pull and it pushed the pipe off. So I thought well you know why don't we just strap them before we start, and as it turned out we had zero issues with that. So that was good. It just comes from experience. You know if you do any of this stuff long enough you're gonna go through every crazy thing that can happen. From a clamp that's too big or too small that you can make the right size, to just looking at things and saying, I remember when we did that and it didn't work, or this is how we fixed that. It's just a depth of experience. It comes with age.