In This Episode
- 0:01 Introduction to Jungle Patrol
- 0:39 Fabricating and Welding the Cage
- 1:18 Installing the Light Bar
- 5:03 Testing the Lights
- 5:33 Removing Factory Suspension
- 6:12 Designing and Installing the Front Bumper
- 7:30 Installing Long Travel Suspension
- 10:21 Interview with Michael Deardorff of CJD Racing
- 12:16 Installing Shock Tabs and Control Arms
- 13:37 Installing Fender Flares
- 15:05 Wrapping the Vehicle
- 15:56 Project Trailgator: Building a Trail-Ready Truck
- 18:40 Rapid Runner: Transforming a Truck into a Kayak Hauler
Video Transcript
You're watching Power Nation.
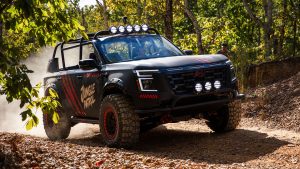
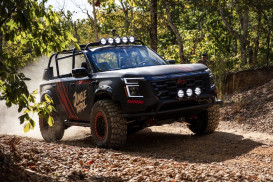
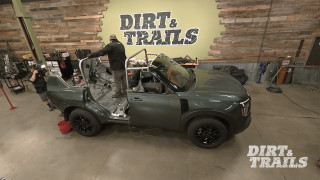
Jungle Patrol started life as a stock Nissan Armada Pro 4X, and we're turning it into an open air trail cruiser.
We have the main framework of the cage all fabricated and welded out to the truck,
the hatches locked down as well.
The last couple of things we wanna do is start working on some stuff on the top side of the vehicle,
and that's gonna include
getting our headliner closed out,
adding one more bar to this cage so that we can mount some lights,
then we're gonna move underneath and deal with our suspension.
All that and more today
on dirt and trails.
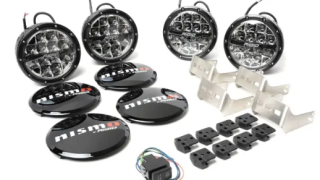
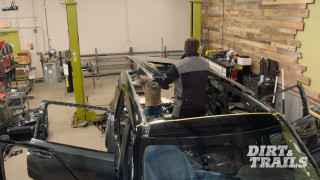
Nissan provided us with a bunch of these 6 inch round Nismo driving lights, and we're gonna make use of a few of them by adding a custom light bar onto our roll cage up here over the windshield,
but before we can get these installed and get the bar itself made,
we had to finish out getting our headliner boxed in
so you can see I've got our.
Last couple of plates already ready to go.
We've got our center plate tacked in.
Obviously it's still gonna need some bodywork and clean up once we get done,
but
with our wiring run through here, we're ready to close this off so that Brandon can get going on getting the actual bar that we're gonna mount the lights onto installed on the cage.
We have our light bar tube cut out and marked out ready to bend so we can follow a similar form factor to the rest of the cage here
as you can see we have our center line,
we have our bend lines on the edges.
After we get that all bent,
notched, and locked into place, the next thing I'm gonna do
is cut out 5 tabs
so we could locate these 6 inch
Nismo lights.
Equally spaced throughout the bar. The reason I want to do the tabs is so I don't have to drill into the tube or weld these straight to the tube,
and then at that point,
there's some flexibility for the future.
When you're working with lighting
and fabrication,
generally,
you want to plan everything out on the front end,
just so you know exactly what you're getting into.
Let's get this bar bent,
notched,
we'll get going.
Alright,
it's looking pretty good. Just gonna kick it a little bit more to get the rest of that 45, which will push us up a hair,
which is actually where we wanna be,
so I think it's working out pretty well.
You sent it.
Yeah, that actually looks really good.
I like that a lot.
And these tabs came out really nice.
They ended up like
dead even all the way across.
Yeah man, it's nice having the plasma cutter fixture table, you know, you can get everything kind of set together and
square and even.
Otherwise you're sitting there with a tape measure and
all kinds of stuff, you know.
That and I like the angle they ended up at I think that's
probably exactly where these lights needed to be.
Kind of split the difference on
height with the main portion of the cage,
yeah, plus I wanted to get him over the windscreen a little bit,
you know,
push them a little bit more forward instead of just having them stick up in the air like you were saying.
It's coming together though.
Just kind of wired up and.
And flip everything on, right?
Yeah, and that shouldn't take too long because it's one of the nice things about these Nismo kits is they actually come with harnesses that are
set up to be plugged right in.
Just gotta trim back some of that wire and.
Should be good to go.
Close enough.
Yeah, we do have a little bit of adjustment side to side, so
yeah,
we'll, we'll have to
play with them a little again later. I mean, eventually they're gonna have to come off to paint all this,
so I'm not super concerned with them being perfect right now, of course.
All right.
All right, well now we gotta take a step back and see how this looks.
There's a lot of light
I think that looks pretty good though.
No, I think it's good.
Yeah,
it's gonna do exactly what we want it,
yeah,
so I guess all that's left now is I got a little bit of wiring to do and then
we test them out,
yeah,
keep moving on.
Sounds good to me.
Up next on Dirt and Trails,
it's finally time to install the long travel suspension,
and Jungle Patrol gets a facelift for the new custom front bumper.
We've got pretty much everything on the top side of this Armada finished up,
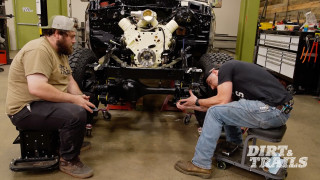
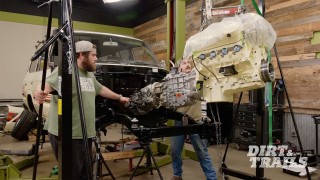
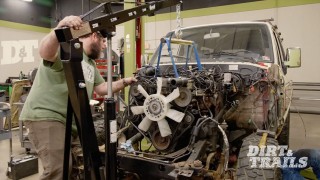
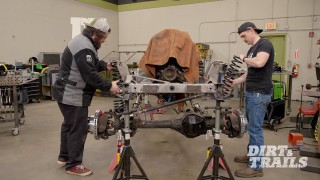
so we've thrown it up on the lift, and I'm gonna get started removing all of our factory suspension so we can throw our long travel kit on that's gonna allow us to fit 37 inch tires.
While Eric's taking care of that,
I'm gonna get started on the front bumper for this thing, and the first thing we need to do
is get this original one out of the way so we can see what we're working with underneath.
All right.
Watch your head.
So now that we have everything out of the way here,
we have an idea of exactly how we want to make this front bumper,
and the first thing I wanna do
is start to get some of this stuff out of the way because we got a lot of bulges, a lot of big material here we're not gonna do our final cut right now,
but
we just need some space to make sure everything's gonna go in there.
We have the main bar of the bumper all bent up
sitting pretty much exactly where we want it to be.
It'll be some small little modifications to make sure everything's square and level,
but as you can see,
we got a little extra length on the backside to fit everything in the bender.
So what I'm gonna do now is I'm gonna mark out where I need to cut this back.
We're gonna cap off the tube,
get everything situated again
squared up, and then we'll be able to tack on our uprights, get everything mounted and connected to the truck.
So let's get to it.
All right,
we've got all of our actual suspension components removed.
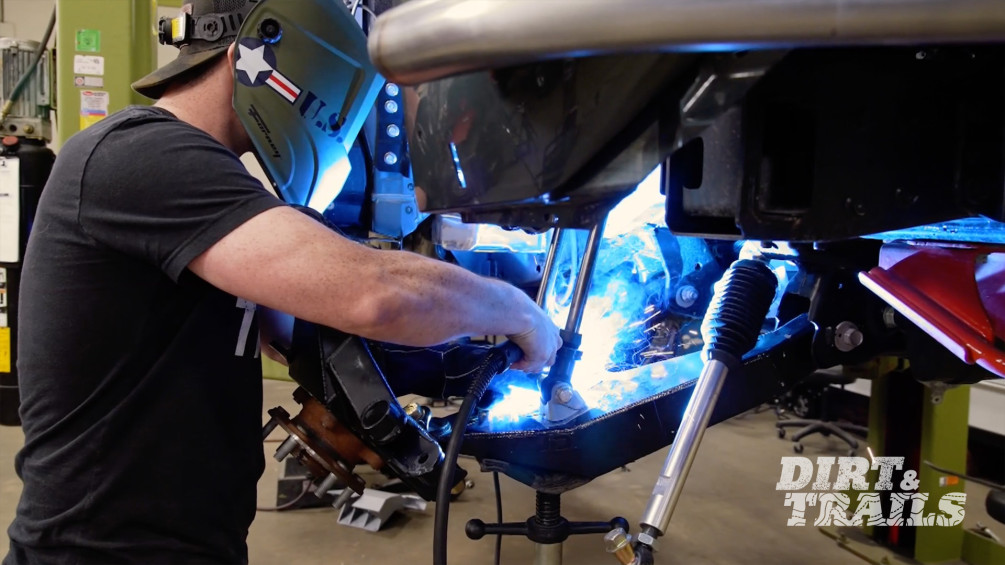
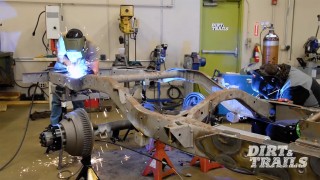
Now it's time to get a little bit deeper with our tear down and remove this entire bucket and bracket section out of here
and obviously that is, uh, it's gonna be a lot of work because
this thing is welded inside and outside
all. The way around
both sides it's welded on the inside of the frame rail there.
I mean this thing is
definitely not meant to ever be removed,
but we need it out of the way so that we can start installing our long travel kit components
so we're gonna grab some saws and some grinders and uh
see if we can do some damage to this thing.
The bumper's getting pretty close to being completely finished.
We threw this little light bar section on the front, kicked it out a little bit so we could fit the light pods up top.
We're gonna make some skid plates and then this thing should be fully ready to be welded out, painted,
and slapped back onto the truck.
It is so close.
Ah,
there we go.
OK,
well.
Let's out of the way.
So now that I've got a mark made there, that's gonna help me locate this side shock tower to match up with the other side and with the measurements we were given from CJD.
Now, once that's in, we're gonna have it tacked in place,
then we can start installing our control arms,
get the knuckle installed,
get all that hooked up so that we can mock up our shocks
and get those tabs welded onto our lower control arm.
So I'm gonna grab our shock tower and let's get started.
To keep things easily adjustable but still sturdily in place, I'm using a heavy duty welding magnet.
After verifying the angle of our shock tower is correct with an angle cube,
I placed several tacks before moving on to start installing the super beefy control arms from CJD Racing.
Our lower slips right into place in the factory mounting position,
utilizing the original adjustable hardware so we can get everything aligned later on.
The upper control arm mounts into the new shock tower using adjustable heim joints for even more alignment flexibility.
There we go.
Coming up,
we finish out installing the suspension kit as well as buttoning up the rest of the truck to get wrapped.
While I finish up installing our front end,
we're gonna hear from Michael Deardorff of CJD Racing, and he's gonna give us some insight on these parts that we're using.
We start off obviously with a stock brand new setup.
Um,
we
took all kinds of measurements, scans,
did everything.
Um, good friend of mine, Brad,
Helped us with the
design aspect, it's a little above,
so he stepped in
and
we basically took and cut all
the
top mounts off,
lowered it,
dropped the spindle,
and then we.
We stuck it out 4 inches,
moved it forward 1 inch,
allowed it to do a bypass and a coil over, which allows us to have up to 16 inches of wheel travel,
and it retains the 4-wheel drive,
or on this vehicle, all-wheel drive.
I think you'll get a lot of versatility
out of this for the jungle patrol.
You'll get a little bit more wheel travel, you'll get a lot of weight,
um,
specifications that you can change,
and I think you guys will get a very, very nice ride out of it.
Well, we're excited to see how this thing rides.
Now, how about you tell us a little bit more about what you do?
We are a Nissan-based suspension business. We do everything from obviously patrols, Nissan,
the Armada,
Titans, uh,
we do Frontiers, Xterras,
Pathfinders.
We do a lot of suspension,
anything from stock replacement, we do lifting, we actually do a little bit of lowering.
Uh, our main focus being in California is the pre-runner guys,
so we do a lot of long travel.
We have different
long travel kits that
range anywhere from 14 inches all the way up to 19 inches of wheel travel.
Um,
that package works on both the Titans, the Frontiers, XTerras.
Even,
we even have a couple of armadas out there with them.
So,
that's our biggest thing. We do a handful of different little things, grab handles,
steering kits,
even EFA kits.
As long as we can get this rod end into here,
that'll guarantee
that we can get everything nice and lined up.
And put the bolt back in our rack side.
Yeah.
I give that just a little adjustment out.
Go grab a bolt
like that.
There she is.
Now that all that's mocked up,
we need to figure out where our shocks need to go.
So
we're gonna take these shock tabs,
we're gonna mount our shocks on them,
connect them to the top side,
then we're gonna place them on our control arm, get everything measured and dialed in,
weld these on, and keep moving.
With the lower control arm set roughly in place, I'm getting our shock tabs installed so I can mark out the area I'll need to clear the paint off of,
so they can be welded on.
Using a dye grinder with a scuffing pad,
the paint gets removed quickly
and precisely.
And just to get a rough idea of where this needed to go back in after the marks were gone,
I went ahead and punched
all four of the corners just to give an idea of where this thing needs to land.
This trick may not produce perfect results every time,
but it'll save you the time it would take to have to reposition everything from scratch.
After I got the tabs fully welded out,
Brandon jumped in to install the support tubes that he made for the shock towers so that we can call our front end finished.
While Eric's finishing out back on the rear suspension,
we're gonna come up front and take a look at these fenders.
Since we're adding 37 inch tires and long travel suspension,
we're gonna need to make some room for the tire to go up into the fender well without hitting the body.
For that,
we grabbed some flares.
Now, unfortunately, there's nothing on the market for the 2026 or 2025 Armada body style,
so we took some measurements and we got something that
looked the closest,
seemed like it was gonna be the closest to working out with what we needed.
So, I went ahead and laid it out on the body,
drew a line of where we wanted the flare to be,
we laid some 2 inch tape out,
so we know we can leave ourselves a good bit of material to land all of our hardware on.
So, let's get to cutting.
I went ahead and cut everything out of the way and got everything cleared out,
so we took our fender flare after that, laid it out on the fender where we wanted it to be and kind of traced the lines out of the edges of a flare
and made a center line reference mark
so now we can come back in,
we can lay our flare out on our marks.
And we can start to go ahead and mark out our holes,
so we could drill them all out
and get this whole flare set up and bolt it onto the actual vehicle.
With the flares all fit,
it's time to get our friends at Graphic Effects down here to get this thing wrapped.
Let's see what it takes to build a stock Nissan Frontier from mild
to wild.
It started back in 2024 when Nissan challenged Music City trucks to take a brand new bone stock Pro 4X Frontier
and turn it into the ultimate trail-ready party machine to be shown off at that year's CEA show in Las Vegas.
We called it Project Trailgator.
First up,
we address stance and capability.
The front suspension was removed.
Come on,
big guy.
Here we go.
And we upgraded it with the front half of our Nizmo lift kit.
Then we moved to the rear and pulled the old shocks out.
There
we go.
Let's get them installed.
And installed their replacements along with the rest of the lift kit, giving this truck the clearance and control for any terrain.
All right,
call that good.
After that,
we gave it a voice.
The stock exhaust was replaced with a NISM performance system that delivered the aggressive sound that this build deserved.
Next,
we set it up to haul anything a party might need,
starting with a full roof rack
and a bed rack that gave us storage space and some accessory mounting options.
For when the sun goes down,
Niismo off-road lighting was added up top.
All these upgrades wouldn't get us anywhere without the right rubber.
And you might notice that the tires aren't the only upgrade that we're making here.
These are brand new wheels from Nismo that are freshly designed and new on the market,
that can be run as regular wheels or
as a true bead lock like we've got them set up here.
We wrap those with upsized Yokohama Geolander MT GOO3 tires.
With that covered,
the entertainment came next.
So we went big with a 45 inch TV mounted on either side of the bed rack.
Whether it's game day or movie night,
this truck had you covered.
Uh,
look at that,
all right.
Add even more storage with a deck drawer system,
all our inclusions added up to more space for gear,
tools,
food, and anything else you'd need for a weekend off the grid.
Oh.
Oh, that's smooth, yeah.
They got topped off with 2 slide-out platforms to make that truck bed as functional as possible.
But Project Trailgator wasn't just about getting there.
It was about living large when you arrive.
On a custom-built rear seat delete platform,
we mounted a refrigerator behind the front passenger and installed all the power we would ever need to run everything.
With the truck complete,
we hit the trail,
set up camp, and kicked back.
Project Trailgator wasn't just a truck,
it was an experience.
Then,
in 2025,
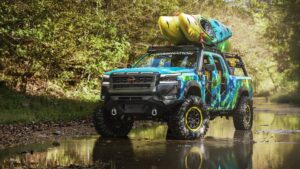
Nissan asked us to take that same truck and turn it into the ultimate river running kayak hauler that we named Rapid Runner.
And
we had to get it done for the CEA show in just one month.
With no time to lose, we got straight to work on this transformation.
First, the cab got closed up by welding the doors shut,
then we cut them back open.
After that,
we tore down the rear suspension and yanked the axle out.
We brought in a Nissan Titan to use the front differential and suspension because it's a straight across swap with the frontier,
as well as the rear axle assembly to match the track with.
With a little bit of work,
the rear axle went right in,
almost like it belonged.
See what's cool is Nissan actually used the same flange
on the Titan axle
and the frontier axle.
The front suspension was removed.
And the steering knuckles rebuilt with new hub assemblies before being reinstalled.
Next,
with the original brakes out of the way,
we upgraded to a set of performance pads and rotors from EBC brakes,
shorter stopping distances,
and less dust dirtying up the set of brand new 17 by 9 Nismo wheels, which we wrapped up in 37 inch Yokohama Geolander XMTs.
To finish our welded doors,
bondo and bodywork was the key.
Then,
we built custom tube doors to give our truck a unique look and an open-air feel just like Nissan One.
We complimented the craziness of this project with a one-of a-kind wrap done by the guys at Graphic Effects that gave it a look that was impossible to ignore.
To carry our kayaks,
we refitted the Nizmo roof rack,
installed some mirrors.
And use some kayak handles to make custom door poles.
And then we stuffed the rear with all the gear we would need for a day in the great outdoors.
Once it was all done,
we took the truck out to Dirt Devil,
one of our favorite local trails.
It offers the perfect mix of water features,
ruts,
and rocky routes through hundreds of miles of Tennessee wilderness.
Most importantly,
there's plenty of cool spots to stop and drop in our kayaks.
That is beautiful.
That, yeah,
like, wow,
as we turn the corner just looking down and seeing the road and the,
the creek bed, that is gorgeous,
yeah.
Rapid Runner was a blast to drive and we could not have been happier with it out on the trail.
And once we got to our destination,
we shoved off for a kayak ride down the river
after causing some chaos, of course.
Show Full Transcript
Jungle Patrol started life as a stock Nissan Armada Pro 4X, and we're turning it into an open air trail cruiser.
We have the main framework of the cage all fabricated and welded out to the truck,
the hatches locked down as well.
The last couple of things we wanna do is start working on some stuff on the top side of the vehicle,
and that's gonna include
getting our headliner closed out,
adding one more bar to this cage so that we can mount some lights,
then we're gonna move underneath and deal with our suspension.
All that and more today
on dirt and trails.
Nissan provided us with a bunch of these 6 inch round Nismo driving lights, and we're gonna make use of a few of them by adding a custom light bar onto our roll cage up here over the windshield,
but before we can get these installed and get the bar itself made,
we had to finish out getting our headliner boxed in
so you can see I've got our.
Last couple of plates already ready to go.
We've got our center plate tacked in.
Obviously it's still gonna need some bodywork and clean up once we get done,
but
with our wiring run through here, we're ready to close this off so that Brandon can get going on getting the actual bar that we're gonna mount the lights onto installed on the cage.
We have our light bar tube cut out and marked out ready to bend so we can follow a similar form factor to the rest of the cage here
as you can see we have our center line,
we have our bend lines on the edges.
After we get that all bent,
notched, and locked into place, the next thing I'm gonna do
is cut out 5 tabs
so we could locate these 6 inch
Nismo lights.
Equally spaced throughout the bar. The reason I want to do the tabs is so I don't have to drill into the tube or weld these straight to the tube,
and then at that point,
there's some flexibility for the future.
When you're working with lighting
and fabrication,
generally,
you want to plan everything out on the front end,
just so you know exactly what you're getting into.
Let's get this bar bent,
notched,
we'll get going.
Alright,
it's looking pretty good. Just gonna kick it a little bit more to get the rest of that 45, which will push us up a hair,
which is actually where we wanna be,
so I think it's working out pretty well.
You sent it.
Yeah, that actually looks really good.
I like that a lot.
And these tabs came out really nice.
They ended up like
dead even all the way across.
Yeah man, it's nice having the plasma cutter fixture table, you know, you can get everything kind of set together and
square and even.
Otherwise you're sitting there with a tape measure and
all kinds of stuff, you know.
That and I like the angle they ended up at I think that's
probably exactly where these lights needed to be.
Kind of split the difference on
height with the main portion of the cage,
yeah, plus I wanted to get him over the windscreen a little bit,
you know,
push them a little bit more forward instead of just having them stick up in the air like you were saying.
It's coming together though.
Just kind of wired up and.
And flip everything on, right?
Yeah, and that shouldn't take too long because it's one of the nice things about these Nismo kits is they actually come with harnesses that are
set up to be plugged right in.
Just gotta trim back some of that wire and.
Should be good to go.
Close enough.
Yeah, we do have a little bit of adjustment side to side, so
yeah,
we'll, we'll have to
play with them a little again later. I mean, eventually they're gonna have to come off to paint all this,
so I'm not super concerned with them being perfect right now, of course.
All right.
All right, well now we gotta take a step back and see how this looks.
There's a lot of light
I think that looks pretty good though.
No, I think it's good.
Yeah,
it's gonna do exactly what we want it,
yeah,
so I guess all that's left now is I got a little bit of wiring to do and then
we test them out,
yeah,
keep moving on.
Sounds good to me.
Up next on Dirt and Trails,
it's finally time to install the long travel suspension,
and Jungle Patrol gets a facelift for the new custom front bumper.
We've got pretty much everything on the top side of this Armada finished up,
so we've thrown it up on the lift, and I'm gonna get started removing all of our factory suspension so we can throw our long travel kit on that's gonna allow us to fit 37 inch tires.
While Eric's taking care of that,
I'm gonna get started on the front bumper for this thing, and the first thing we need to do
is get this original one out of the way so we can see what we're working with underneath.
All right.
Watch your head.
So now that we have everything out of the way here,
we have an idea of exactly how we want to make this front bumper,
and the first thing I wanna do
is start to get some of this stuff out of the way because we got a lot of bulges, a lot of big material here we're not gonna do our final cut right now,
but
we just need some space to make sure everything's gonna go in there.
We have the main bar of the bumper all bent up
sitting pretty much exactly where we want it to be.
It'll be some small little modifications to make sure everything's square and level,
but as you can see,
we got a little extra length on the backside to fit everything in the bender.
So what I'm gonna do now is I'm gonna mark out where I need to cut this back.
We're gonna cap off the tube,
get everything situated again
squared up, and then we'll be able to tack on our uprights, get everything mounted and connected to the truck.
So let's get to it.
All right,
we've got all of our actual suspension components removed.
Now it's time to get a little bit deeper with our tear down and remove this entire bucket and bracket section out of here
and obviously that is, uh, it's gonna be a lot of work because
this thing is welded inside and outside
all. The way around
both sides it's welded on the inside of the frame rail there.
I mean this thing is
definitely not meant to ever be removed,
but we need it out of the way so that we can start installing our long travel kit components
so we're gonna grab some saws and some grinders and uh
see if we can do some damage to this thing.
The bumper's getting pretty close to being completely finished.
We threw this little light bar section on the front, kicked it out a little bit so we could fit the light pods up top.
We're gonna make some skid plates and then this thing should be fully ready to be welded out, painted,
and slapped back onto the truck.
It is so close.
Ah,
there we go.
OK,
well.
Let's out of the way.
So now that I've got a mark made there, that's gonna help me locate this side shock tower to match up with the other side and with the measurements we were given from CJD.
Now, once that's in, we're gonna have it tacked in place,
then we can start installing our control arms,
get the knuckle installed,
get all that hooked up so that we can mock up our shocks
and get those tabs welded onto our lower control arm.
So I'm gonna grab our shock tower and let's get started.
To keep things easily adjustable but still sturdily in place, I'm using a heavy duty welding magnet.
After verifying the angle of our shock tower is correct with an angle cube,
I placed several tacks before moving on to start installing the super beefy control arms from CJD Racing.
Our lower slips right into place in the factory mounting position,
utilizing the original adjustable hardware so we can get everything aligned later on.
The upper control arm mounts into the new shock tower using adjustable heim joints for even more alignment flexibility.
There we go.
Coming up,
we finish out installing the suspension kit as well as buttoning up the rest of the truck to get wrapped.
While I finish up installing our front end,
we're gonna hear from Michael Deardorff of CJD Racing, and he's gonna give us some insight on these parts that we're using.
We start off obviously with a stock brand new setup.
Um,
we
took all kinds of measurements, scans,
did everything.
Um, good friend of mine, Brad,
Helped us with the
design aspect, it's a little above,
so he stepped in
and
we basically took and cut all
the
top mounts off,
lowered it,
dropped the spindle,
and then we.
We stuck it out 4 inches,
moved it forward 1 inch,
allowed it to do a bypass and a coil over, which allows us to have up to 16 inches of wheel travel,
and it retains the 4-wheel drive,
or on this vehicle, all-wheel drive.
I think you'll get a lot of versatility
out of this for the jungle patrol.
You'll get a little bit more wheel travel, you'll get a lot of weight,
um,
specifications that you can change,
and I think you guys will get a very, very nice ride out of it.
Well, we're excited to see how this thing rides.
Now, how about you tell us a little bit more about what you do?
We are a Nissan-based suspension business. We do everything from obviously patrols, Nissan,
the Armada,
Titans, uh,
we do Frontiers, Xterras,
Pathfinders.
We do a lot of suspension,
anything from stock replacement, we do lifting, we actually do a little bit of lowering.
Uh, our main focus being in California is the pre-runner guys,
so we do a lot of long travel.
We have different
long travel kits that
range anywhere from 14 inches all the way up to 19 inches of wheel travel.
Um,
that package works on both the Titans, the Frontiers, XTerras.
Even,
we even have a couple of armadas out there with them.
So,
that's our biggest thing. We do a handful of different little things, grab handles,
steering kits,
even EFA kits.
As long as we can get this rod end into here,
that'll guarantee
that we can get everything nice and lined up.
And put the bolt back in our rack side.
Yeah.
I give that just a little adjustment out.
Go grab a bolt
like that.
There she is.
Now that all that's mocked up,
we need to figure out where our shocks need to go.
So
we're gonna take these shock tabs,
we're gonna mount our shocks on them,
connect them to the top side,
then we're gonna place them on our control arm, get everything measured and dialed in,
weld these on, and keep moving.
With the lower control arm set roughly in place, I'm getting our shock tabs installed so I can mark out the area I'll need to clear the paint off of,
so they can be welded on.
Using a dye grinder with a scuffing pad,
the paint gets removed quickly
and precisely.
And just to get a rough idea of where this needed to go back in after the marks were gone,
I went ahead and punched
all four of the corners just to give an idea of where this thing needs to land.
This trick may not produce perfect results every time,
but it'll save you the time it would take to have to reposition everything from scratch.
After I got the tabs fully welded out,
Brandon jumped in to install the support tubes that he made for the shock towers so that we can call our front end finished.
While Eric's finishing out back on the rear suspension,
we're gonna come up front and take a look at these fenders.
Since we're adding 37 inch tires and long travel suspension,
we're gonna need to make some room for the tire to go up into the fender well without hitting the body.
For that,
we grabbed some flares.
Now, unfortunately, there's nothing on the market for the 2026 or 2025 Armada body style,
so we took some measurements and we got something that
looked the closest,
seemed like it was gonna be the closest to working out with what we needed.
So, I went ahead and laid it out on the body,
drew a line of where we wanted the flare to be,
we laid some 2 inch tape out,
so we know we can leave ourselves a good bit of material to land all of our hardware on.
So, let's get to cutting.
I went ahead and cut everything out of the way and got everything cleared out,
so we took our fender flare after that, laid it out on the fender where we wanted it to be and kind of traced the lines out of the edges of a flare
and made a center line reference mark
so now we can come back in,
we can lay our flare out on our marks.
And we can start to go ahead and mark out our holes,
so we could drill them all out
and get this whole flare set up and bolt it onto the actual vehicle.
With the flares all fit,
it's time to get our friends at Graphic Effects down here to get this thing wrapped.
Let's see what it takes to build a stock Nissan Frontier from mild
to wild.
It started back in 2024 when Nissan challenged Music City trucks to take a brand new bone stock Pro 4X Frontier
and turn it into the ultimate trail-ready party machine to be shown off at that year's CEA show in Las Vegas.
We called it Project Trailgator.
First up,
we address stance and capability.
The front suspension was removed.
Come on,
big guy.
Here we go.
And we upgraded it with the front half of our Nizmo lift kit.
Then we moved to the rear and pulled the old shocks out.
There
we go.
Let's get them installed.
And installed their replacements along with the rest of the lift kit, giving this truck the clearance and control for any terrain.
All right,
call that good.
After that,
we gave it a voice.
The stock exhaust was replaced with a NISM performance system that delivered the aggressive sound that this build deserved.
Next,
we set it up to haul anything a party might need,
starting with a full roof rack
and a bed rack that gave us storage space and some accessory mounting options.
For when the sun goes down,
Niismo off-road lighting was added up top.
All these upgrades wouldn't get us anywhere without the right rubber.
And you might notice that the tires aren't the only upgrade that we're making here.
These are brand new wheels from Nismo that are freshly designed and new on the market,
that can be run as regular wheels or
as a true bead lock like we've got them set up here.
We wrap those with upsized Yokohama Geolander MT GOO3 tires.
With that covered,
the entertainment came next.
So we went big with a 45 inch TV mounted on either side of the bed rack.
Whether it's game day or movie night,
this truck had you covered.
Uh,
look at that,
all right.
Add even more storage with a deck drawer system,
all our inclusions added up to more space for gear,
tools,
food, and anything else you'd need for a weekend off the grid.
Oh.
Oh, that's smooth, yeah.
They got topped off with 2 slide-out platforms to make that truck bed as functional as possible.
But Project Trailgator wasn't just about getting there.
It was about living large when you arrive.
On a custom-built rear seat delete platform,
we mounted a refrigerator behind the front passenger and installed all the power we would ever need to run everything.
With the truck complete,
we hit the trail,
set up camp, and kicked back.
Project Trailgator wasn't just a truck,
it was an experience.
Then,
in 2025,
Nissan asked us to take that same truck and turn it into the ultimate river running kayak hauler that we named Rapid Runner.
And
we had to get it done for the CEA show in just one month.
With no time to lose, we got straight to work on this transformation.
First, the cab got closed up by welding the doors shut,
then we cut them back open.
After that,
we tore down the rear suspension and yanked the axle out.
We brought in a Nissan Titan to use the front differential and suspension because it's a straight across swap with the frontier,
as well as the rear axle assembly to match the track with.
With a little bit of work,
the rear axle went right in,
almost like it belonged.
See what's cool is Nissan actually used the same flange
on the Titan axle
and the frontier axle.
The front suspension was removed.
And the steering knuckles rebuilt with new hub assemblies before being reinstalled.
Next,
with the original brakes out of the way,
we upgraded to a set of performance pads and rotors from EBC brakes,
shorter stopping distances,
and less dust dirtying up the set of brand new 17 by 9 Nismo wheels, which we wrapped up in 37 inch Yokohama Geolander XMTs.
To finish our welded doors,
bondo and bodywork was the key.
Then,
we built custom tube doors to give our truck a unique look and an open-air feel just like Nissan One.
We complimented the craziness of this project with a one-of a-kind wrap done by the guys at Graphic Effects that gave it a look that was impossible to ignore.
To carry our kayaks,
we refitted the Nizmo roof rack,
installed some mirrors.
And use some kayak handles to make custom door poles.
And then we stuffed the rear with all the gear we would need for a day in the great outdoors.
Once it was all done,
we took the truck out to Dirt Devil,
one of our favorite local trails.
It offers the perfect mix of water features,
ruts,
and rocky routes through hundreds of miles of Tennessee wilderness.
Most importantly,
there's plenty of cool spots to stop and drop in our kayaks.
That is beautiful.
That, yeah,
like, wow,
as we turn the corner just looking down and seeing the road and the,
the creek bed, that is gorgeous,
yeah.
Rapid Runner was a blast to drive and we could not have been happier with it out on the trail.
And once we got to our destination,
we shoved off for a kayak ride down the river
after causing some chaos, of course.