

In This Episode
- 0:01 Introduction to the '96 Tahoe build
- 0:39 Preparing the chassis for paint
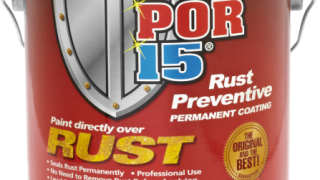
- 3:03 Applying rust preventative and topcoat
- 6:03 Finalizing the paintwork on the chassis
- 6:58 Installing the engine and transmission
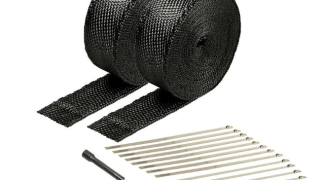
- 7:45 Wrapping the exhaust crossover
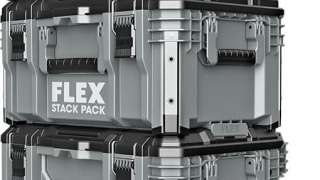
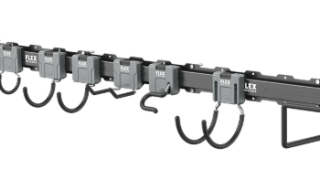
- 11:06 Organizing the shop with modular tool storage
- 13:15 Installing front brakes
- 17:15 Repairing dents on the Tahoe
Video Transcript
You are watching Power Nation.
All right, now let your rear down a little bit.
Good.
NASCAR
today on Blacktop Speed Shop,
we finally scratching the surface on our '96 Tahoe build.
We're going all out on our chassis for Sima.
This is very, very
bright.
It's red.
We're throwing 650 horse under the hood,
so we have a few upgrades to address.
This is the one thing I never make an exception for. We're also making sure this body's straight so we can get it ready for paint.
I really think this is probably gonna be the greatest thing that we've ever built.
You know, back in the 90s,
GM used this common chassis
for
Suburbans,
Tahoes, trucks,
and honestly,
just depending on what length you wanted. The GMT 400 series is a pretty sought after chassis,
and the one on our '96 Chevy Tahoe project that's headed for CEA is a prime candidate for a custom paint job.
We're gonna do something a little different with this frame. Instead of painting it silver or black like most people do,
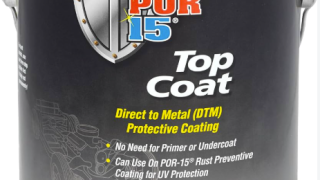
we're gonna take some POR 15,
we're gonna brush some red paint on instead for the CEA show.
30 years old,
minor surface rust and overall in outstanding shape.
I've never seen a nineties frame like this before.
Usually like right about here,
if I were to do this,
my foot would go through it.
It's kind of impressive to see one that I can do this too
and nothing happens.
No compressor,
no lines,
no air filtration system other than obviously open some windows or something or do it in your driveway.
This is something that you or anybody else can literally do in your garage,
guys.
But we're gonna prove how to do it, right?
That's right.
I can't wait, man. It's gonna be awesome.
First step,
pre-treat though. We're gonna pre-treat it, so let's go ahead and get that done.
Don't forget the key to this is to keep it wet. Don't let it dry for 15 minutes.
You know what would be awesome?
A garden sprayer.
So for anybody who wants to do this at home,
go spend $10 at
Home Depot and get one of those pressurized garden sprayers that'll make this a lot easier.
Put that on our Christmas list for Santa Claus.
We just got done degreasing the frame.
Now we got to spray some metal prep on it. We gotta let it sit for 15 minutes, and then we got to spray it off and it's ready for a topcoat.
Now we got our chassis all prepped. We degreased it.
We've also put on our metal conversion coating,
let it dry.
It also says that it will look chalky in some places, and that's normal
as it's converting our metal
to an acceptable coating for
our rust preventative.
So that's the next step.
We're gonna brush it on two light coats,
then it's ready for the red top coat.
Nothing but to do but to do it.
You like that?
Yeah.
More,
more southern light,
man.
Put on light.
Dude, it's like painting with
molasses. I think you'll be OK.
We've been over this. Have you met me?
Smells terrific.
There's something seriously wrong with you.
We jacked this up and put it on jack stands so it'll be a little easier to reach,
but this is so we can get all the way around the frame, get a nice even coat everywhere without laying on our backs.
I'm glad we have the widest paintbrush that we could possibly have and use.
I've never brushed on any sort of paint on the car other than the caliper paint on the Cadillac.
I,
I would definitely rather spray.
So it's recommended we do 2,
light coats
after that 2 to 4 hour recoat window,
uh, as far as topcoat.
So
we are doing a bright red topcoat, so being a light gray like this should help our color really stand out and pop.
So PR's top coat line
you have to have some type
of ground coat
uh to put it over you can't just
apply it by itself so
we picked, like I said, a light gray
uh for our ground coat
but in the rust preventative
super thin though,
so it looks fantastic
and then.
Uh, it looks a little iffy
and then it goes right back to being
good. I don't know,
it's a cool product,
crazy application.
One more coat will do it.
It's almost like trying to paint something with milk.
It's like super thin, you know what?
I bet the second coat that will tack and stick to the first coat,
you know,
now that it's got some tooth or something to stick to,
right.
So our rust preventative coat or ground coat if you will is already dry to the touch,
so it's time to start recoating. So we mixed our red POR 15 top coat
uh with this with this activator
and, uh, so we're just ready to go.
Let's see how far we can get.
This is very,
very bright.
It's red
and it's already getting
like sticky in the cup.
So,
oh yeah, dude,
is sticking in the cup not a good thing?
Uh, it just means it's starting to settle.
Rough time guesstimate and until this becomes a solid chunk of paint,
uh,
just paint.
And we'll see.
I really don't know.
So when it does become a solid chunk, we know we have a problem.
We know we should have bought more.
It's like painting on lipstick.
You ever put lipstick on a pig, Jason?
No, but I've heard that expression a few times.
Oh, that's good.
Never been kicked by a pig before, but I'm sure that would probably,
that would probably happen.
This is very bright red.
This is a lot brighter red than I was expecting.
Are you still doing a light coat, or are you laying it on there?
I'm just putting it on before it all gets, uh,
hardened.
OK.
So we chose to use the POR 15 system,
number one for ease of use,
number 2 for corrosion protection,
uh, for now and, you know,
future owners
to get the vehicle and not have to worry about that. It also converts
the existing rust uh and stops the growth,
you know,
uh, we can't say enough about this product. We use it quite a bit
and we want to brush it on to demonstrate that
you too
at home could do this
without a compressor.
That you paint both handed,
that means you're uh amnodextrous, right?
Yeah.
Yes,
coming up.
All right, now let your rear down a little bit.
We're dropping in 650 horse,
good
NASCAR.
We finally finished the paintwork on our chassis.
Uh, we do still have some touchup stuff to do.
However, all the bulk is done.
I still think it looks pretty badass. What do you think? I think
this is gonna match that nice,
especially with the engine baby in black,
which is the reverse of what most people do, right?
Usually their car is red.
They got black accessories on their engine and a black frame.
We'll do the opposite,
something a little different.
Why not?
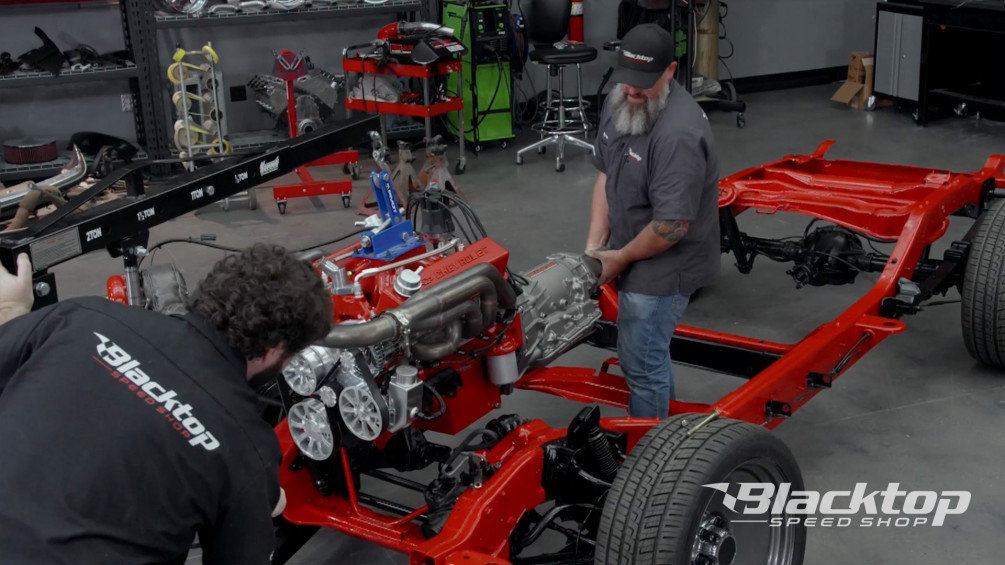
So next we're gonna sit the engine and transmission over in our chassis.
You're turning.
He named our stand Stan
Stan the stand,
stand the stand, stand the hoist,
I guess this isn't a stand.
That ain't gonna work right there.
All right, now let your rear down a little bit.
OK,
whatever he said.
Good,
NASCAR.
Dude, it literally went right in there
like a hair in a biscuit, dude is in there.
I mean, dude, it went, it went perfect.
Yeah,
it went perfect.
We could do that again if we tried.
poking out.
I really think this is probably gonna be the greatest thing that we've ever built.
We set the bar super high.
It's gonna be
pretty awesome.
So on most factory vehicles, your crossover for your exhaust runs underneath the truck or behind the truck,
but for this turbo setup we have here, it goes in front,
and that can pose some issues with heat.
Turbos on any engine make extra heat.
So,
engine power already gave us a turbo blanket.
What I'm gonna do
for the crossover.
And I'm gonna wrap it with some DEI header wrap.
The reason I'm gonna wrap this crossover is because it comes right in front of the alternator and the compressor,
and you don't wanna overheat those. If your alternator gets too hot, it'll melt and it'll go bad, and your compressor won't kick on anymore if that gets too hot. So I'm gonna wrap it with this header wrap
to reduce the heat that this crossover
creates.
So DEI includes instructions with all their products.
It does say in big bold letters to use a quarter inch overlap,
and it also says right underneath that,
that wrapping a pipe takes time and concentration.
So we're gonna see how this goes.
The hardest part of doing this is getting it started.
After you get it started, it's pretty easy because you want it to look nice.
And you want it to be functional as well.
Also, make sure you wear gloves when you mess with this stuff.
If you're one of those kids that just played in the fiberglass insulation for fun,
you might like it.
I don't.
I don't wanna itch all day.
Another thing in their instructions
is they mention that you wanna get this stuff wrapped as tight as you can.
Now, it's not gonna be perfect,
but the tighter you wrap it, the better it stays,
and the better it looks too.
Before I get too far along, I'm gonna lock this end down cause I like how it looks.
And if I need to redo anything beyond this,
this is fine.
It'll all be from here back.
All you gotta do is
wrap it around by hand first.
It's automatic, kind of like a zip tie,
a lot stronger, and it won't melt.
I like to try to hide
the buckle part of it itself so you just see the strap. I think it looks a little cleaner.
Everybody has their own preference though,
and I'm not
looking to cinch it down super tight right now, so this is just by hand to keep this from unraveling and keep it
where it's at.
Hold the buckle with your thumb,
pull the opposite way.
Let the extra hang for a minute. You don't wanna cut that off yet. You need to use this extra to tighten it down.
So I'm gonna pick this back up.
I'm gonna keep wrapping.
Make sure to keep it tight,
roughly 1/4 inch overlap.
I'm probably doing a little more than a quarter inch overlap,
but
that seems to be what's laying best.
So when you get to the end, make sure you cut off just a little extra so you can make sure you can still pull it tight.
Wrap it around nice and tight.
Go ahead and just give it one more little tight,
a little tug on it.
I'm gonna pull these back down on the backside where you kind of can't see them, but you can still get to them.
And then how you guys are seeing it is how it'll look in the engine bay just like that
minus the excess hanging off. I had to tighten them still.
I'm gonna do that before we move on,
but I just wanna give you a look at what it'll look like.
I like how header wraps look.
I think they
break it up a little bit.
It's just something different.
Up next,
superb talent we get organized and upgraded so this is the one thing I never make an exception for.
Well, you know, no matter what size shop you have at home or garage, it's never big enough.
There's always clutter sitting everywhere,
and something I always learned even starting as a young guy
was a clean shop
as a performance shop,
so we reached out to our friends over at Flex. They sent us their new track lock system. This is gonna help us organize all of this,
um, make it easy to get to look impressive,
and we got the stack pack kit as well so it'll allow us to move around the shop with tools
and keep everything out of the floor.
See that button right there?
You can connect two of these together.
Let's go,
let's go over to Music City and just steal the radio.
For Road.
We're on this disarray right now. I'm pushing the whole thing,
yeah, you are, you're strong.
Superb talent.
This modular flex tool storage system is gonna let us customize this however we want,
and if we need more storage we can add what we need.
We got everything installed, all the track systems up,
guys. This is a fully modular system.
We put all of our most commonly used tools up here now that Flex has
helped us out with this stuff,
man. It's pretty awesome.
I love how you can move everything everywhere.
I could sit here for 45 minutes
just reorganizing this to make it look better or make it more functional.
That's a big thing for me that you can move things
where you want it and somebody doesn't decide that for you.
Something else we haven't done yet though,
we can also take these off one finger click
to get to come off the track,
and we also have the metal bars that go on our packs and we could click these to our stack packs as well.
We just haven't decided what we want on what yet,
so that's why we haven't installed them,
but it's as simple as 12 click, man.
It really is.
There's a lot to mess with here,
so we got a good start on it.
I'm happy with it.
Are you happy with it?
I'm always happy.
We're gonna switch gears here. I'm gonna go ahead, I'm gonna put the front brakes together on this.
Power Stop sent us a whole brake kit. They're Evolution Pro
pad and rotor set for the front and for the rear.
So the first thing I'm gonna do
before I even put this onto the truck,
is I'm gonna grease up the
anti-rattle clips that the brake pad itself rides on.
And the reason I'm doing that now is so I don't get it all over my rotor.
You don't typically want
lube on your rotors. That's,
that stops it from doing its job. That's not good. You don't want that. So this one's passenger side.
It's kind of hard to tell with no body on, but this is the passenger side.
Some people also.
I'd like to take
a lug nut,
spin it on by hand.
And
that holds your rotor from wiggling around on you while you're trying to put your caliper bracket on.
So Power Stop's evolution series are drilled and slotted rotors along with carbon fiber ceramic pads.
The carbon fiber ceramic is there for
lower brake dust,
lower noise,
better heat dissipation.
Some of the organic
materials, they'll fade when they get hot.
Carbon fiber. Ceramic doesn't do that.
It has a lot higher heat tolerance and a lot better performance while it's hot for
heavy braking loads.
Also,
a drilled and slotted rotor does the same thing.
The holes in the slots on this are there to let gasses escape under heavy braking
because when these pads get hot up against your rotor.
It creates a little film of gas in there
and
you get your stopping power from two materials rubbing against each other.
You don't get that if there's a layer of gas in between it,
so the slots
and the holes are there to get rid of that.
The slots are also there
to help scrape off a layer of the pad if the pads do end up getting glazed.
It's just, it just scrapes it off,
gives you a fresh layer of friction material
to keep it fresh.
For heavy
braking.
Also,
Pop puts their screamers on both pads.
Some of them don't have it on both, and if you don't have it on both, you put the ones with the indicators on it
on the backside of the rotor.
Typically on a floating caliper, your back pad will wear out faster.
Not always,
I don't wanna say always, but typically.
OK,
before I get too carried away,
we are gonna tighten the
bracket bolts
to the knuckle.
Some people don't believe in torch specs. This is the one thing I never make an exception for.
Cause this stuff is what stops you.
And if this doesn't stop you,
that tree at the end of the road will.
Calipers are directional, your bleeder always goes up.
Some other, uh, brake styles have multiple bleeders on them like our, the
calipers on our Cadillac.
Those are fixed calipers that have pistons on both sides,
so the fluid needs to get to both sides, so it has a bleeder
on each side of the caliper,
and that's
still self-explanatory. It has to go up.
If you remember one thing from this install here.
Your bleeder has to go up
every time.
Pull off your lug nut and you're ready for your wheel to go on
just like that.
One more thing,
when you're doing this on your own vehicle,
if you're doing this in your driveway
before you take off after doing brakes all the way around,
pump up your pedal.
Your
caliper pistons are pushed away from the rotor.
And just
hitting the brake like you normally do,
won't push them in enough to hit the brakes.
So you'll just keep on moving.
So before you even start the vehicle,
always pump up your brake pedal before you move.
That saves you from any sort of headache
financially
or physically.
Other than that,
there's your brakes.
Coming up,
sparks and paint are gonna fly.
You can go have fun doing that. I'm gonna do what I know how to do
go have fun.
Well, finally we got our Tahoe ready to start the bodywork
and the paint process. However, we still got a few dents that we gotta take care of,
and I feel like this is a great time for yours Summit tech tip.
So there are multiple ways to repair dents, uh, today compared to before.
Used to we would drill a hole in the middle of the dent.
We would physically screw in a slide hammer or a dent puller at the time,
pull it,
but
we reached out to our friends at Summit and got this Linco
230
weld on dent puller
and. It's gonna make the job a lot easier.
So instead of being intrusive
into my factory substrate
now I'm gonna be, uh, very light with it
and just weld the tip to it. I'll be able to slide, pull it out.
So anything from door dings
to this pretty large crease dent that we have over here,
all with the same tool.
Also,
multiple tip attachments we can heat shrink with this tool as well,
and that's when the metal itself expands after a collision or a dent happens
so we can
bring it back to shape,
heat it up, and get it to shrink,
uh, so it will hold its shape and not oil can,
and that's where the metal is flimsy and flexible.
So
first thing we gotta do though is grind a couple spots and put our ground clamp on.
I've already got the machine plugged in and
here we go.
I've got it set on the 1 to 2 2nd interval,
um, and we'll see if that's enough.
We could turn it up or down depending on how big or how hard we need to pull the dent,
but you should just be able to touch the tip
to the middle of it
and just push the trigger on.
And you can pull it
twist it to remove it
if you notice there's no hole left here
or anything,
you don't have to use the slide hammer option you can just pull on it,
but either way it's uh super fast and easy.
Only very little what he needed there.
Let's go something a little bit bigger now.
This is a pretty good size dent over here. Let's see how that's gonna work.
Alright, so I'm using a 60 grit,
uh, 3M flat disk just because it's on my flex, uh, variable speed grinder
that way it's mobile,
easy to use, and
it's quick,
so I don't wanna heat up this metal a whole lot.
So I want something pretty aggressive to get it to bear steel.
So our particular Linco machine is a 230 volt machine, so you have to have 220 service
to use this particular one. However, they make them in 110 as well.
We chose this one,
come with a mobile cart as well,
so it's easy to roll around the shop.
But this tool works even better than I really thought it would.
Uh, it's super nice having one all inclusive unit instead of having multiple tools,
also having to drill holes and panels,
weld individual studs or pins.
So all in all this tool is phenomenal. So we got everything roughed out for the most part.
Uh, there is a little bit more work to still be done before we apply filler to these areas, but
overall
super impressed.
And well worth the money.
This chassis looks way different
than it did when we started today.
New paint,
engine transmission mounted,
upgraded brake system.
And the body's already primed and ready for us to start blocking,
so
the next time you see this ride,
it'll be back together
with new paint,
new wheels, new tires,
and a new stance.
Now while we got this apart, we still got a bunch of work to do. I'm gonna try to run the exhaust,
some of the brake lines, some of the fuel lines, and the trans lines
while he's in there blocking the body and getting it ready for paint.
When I get done with that,
I may even go in there and help him,
but until then
you can go have fun doing that. I'm gonna do what I know how to do.
Go have fun.
Show Full Transcript
All right, now let your rear down a little bit.
Good.
NASCAR
today on Blacktop Speed Shop,
we finally scratching the surface on our '96 Tahoe build.
We're going all out on our chassis for Sima.
This is very, very
bright.
It's red.
We're throwing 650 horse under the hood,
so we have a few upgrades to address.
This is the one thing I never make an exception for. We're also making sure this body's straight so we can get it ready for paint.
I really think this is probably gonna be the greatest thing that we've ever built.
You know, back in the 90s,
GM used this common chassis
for
Suburbans,
Tahoes, trucks,
and honestly,
just depending on what length you wanted. The GMT 400 series is a pretty sought after chassis,
and the one on our '96 Chevy Tahoe project that's headed for CEA is a prime candidate for a custom paint job.
We're gonna do something a little different with this frame. Instead of painting it silver or black like most people do,
we're gonna take some POR 15,
we're gonna brush some red paint on instead for the CEA show.
30 years old,
minor surface rust and overall in outstanding shape.
I've never seen a nineties frame like this before.
Usually like right about here,
if I were to do this,
my foot would go through it.
It's kind of impressive to see one that I can do this too
and nothing happens.
No compressor,
no lines,
no air filtration system other than obviously open some windows or something or do it in your driveway.
This is something that you or anybody else can literally do in your garage,
guys.
But we're gonna prove how to do it, right?
That's right.
I can't wait, man. It's gonna be awesome.
First step,
pre-treat though. We're gonna pre-treat it, so let's go ahead and get that done.
Don't forget the key to this is to keep it wet. Don't let it dry for 15 minutes.
You know what would be awesome?
A garden sprayer.
So for anybody who wants to do this at home,
go spend $10 at
Home Depot and get one of those pressurized garden sprayers that'll make this a lot easier.
Put that on our Christmas list for Santa Claus.
We just got done degreasing the frame.
Now we got to spray some metal prep on it. We gotta let it sit for 15 minutes, and then we got to spray it off and it's ready for a topcoat.
Now we got our chassis all prepped. We degreased it.
We've also put on our metal conversion coating,
let it dry.
It also says that it will look chalky in some places, and that's normal
as it's converting our metal
to an acceptable coating for
our rust preventative.
So that's the next step.
We're gonna brush it on two light coats,
then it's ready for the red top coat.
Nothing but to do but to do it.
You like that?
Yeah.
More,
more southern light,
man.
Put on light.
Dude, it's like painting with
molasses. I think you'll be OK.
We've been over this. Have you met me?
Smells terrific.
There's something seriously wrong with you.
We jacked this up and put it on jack stands so it'll be a little easier to reach,
but this is so we can get all the way around the frame, get a nice even coat everywhere without laying on our backs.
I'm glad we have the widest paintbrush that we could possibly have and use.
I've never brushed on any sort of paint on the car other than the caliper paint on the Cadillac.
I,
I would definitely rather spray.
So it's recommended we do 2,
light coats
after that 2 to 4 hour recoat window,
uh, as far as topcoat.
So
we are doing a bright red topcoat, so being a light gray like this should help our color really stand out and pop.
So PR's top coat line
you have to have some type
of ground coat
uh to put it over you can't just
apply it by itself so
we picked, like I said, a light gray
uh for our ground coat
but in the rust preventative
super thin though,
so it looks fantastic
and then.
Uh, it looks a little iffy
and then it goes right back to being
good. I don't know,
it's a cool product,
crazy application.
One more coat will do it.
It's almost like trying to paint something with milk.
It's like super thin, you know what?
I bet the second coat that will tack and stick to the first coat,
you know,
now that it's got some tooth or something to stick to,
right.
So our rust preventative coat or ground coat if you will is already dry to the touch,
so it's time to start recoating. So we mixed our red POR 15 top coat
uh with this with this activator
and, uh, so we're just ready to go.
Let's see how far we can get.
This is very,
very bright.
It's red
and it's already getting
like sticky in the cup.
So,
oh yeah, dude,
is sticking in the cup not a good thing?
Uh, it just means it's starting to settle.
Rough time guesstimate and until this becomes a solid chunk of paint,
uh,
just paint.
And we'll see.
I really don't know.
So when it does become a solid chunk, we know we have a problem.
We know we should have bought more.
It's like painting on lipstick.
You ever put lipstick on a pig, Jason?
No, but I've heard that expression a few times.
Oh, that's good.
Never been kicked by a pig before, but I'm sure that would probably,
that would probably happen.
This is very bright red.
This is a lot brighter red than I was expecting.
Are you still doing a light coat, or are you laying it on there?
I'm just putting it on before it all gets, uh,
hardened.
OK.
So we chose to use the POR 15 system,
number one for ease of use,
number 2 for corrosion protection,
uh, for now and, you know,
future owners
to get the vehicle and not have to worry about that. It also converts
the existing rust uh and stops the growth,
you know,
uh, we can't say enough about this product. We use it quite a bit
and we want to brush it on to demonstrate that
you too
at home could do this
without a compressor.
That you paint both handed,
that means you're uh amnodextrous, right?
Yeah.
Yes,
coming up.
All right, now let your rear down a little bit.
We're dropping in 650 horse,
good
NASCAR.
We finally finished the paintwork on our chassis.
Uh, we do still have some touchup stuff to do.
However, all the bulk is done.
I still think it looks pretty badass. What do you think? I think
this is gonna match that nice,
especially with the engine baby in black,
which is the reverse of what most people do, right?
Usually their car is red.
They got black accessories on their engine and a black frame.
We'll do the opposite,
something a little different.
Why not?
So next we're gonna sit the engine and transmission over in our chassis.
You're turning.
He named our stand Stan
Stan the stand,
stand the stand, stand the hoist,
I guess this isn't a stand.
That ain't gonna work right there.
All right, now let your rear down a little bit.
OK,
whatever he said.
Good,
NASCAR.
Dude, it literally went right in there
like a hair in a biscuit, dude is in there.
I mean, dude, it went, it went perfect.
Yeah,
it went perfect.
We could do that again if we tried.
poking out.
I really think this is probably gonna be the greatest thing that we've ever built.
We set the bar super high.
It's gonna be
pretty awesome.
So on most factory vehicles, your crossover for your exhaust runs underneath the truck or behind the truck,
but for this turbo setup we have here, it goes in front,
and that can pose some issues with heat.
Turbos on any engine make extra heat.
So,
engine power already gave us a turbo blanket.
What I'm gonna do
for the crossover.
And I'm gonna wrap it with some DEI header wrap.
The reason I'm gonna wrap this crossover is because it comes right in front of the alternator and the compressor,
and you don't wanna overheat those. If your alternator gets too hot, it'll melt and it'll go bad, and your compressor won't kick on anymore if that gets too hot. So I'm gonna wrap it with this header wrap
to reduce the heat that this crossover
creates.
So DEI includes instructions with all their products.
It does say in big bold letters to use a quarter inch overlap,
and it also says right underneath that,
that wrapping a pipe takes time and concentration.
So we're gonna see how this goes.
The hardest part of doing this is getting it started.
After you get it started, it's pretty easy because you want it to look nice.
And you want it to be functional as well.
Also, make sure you wear gloves when you mess with this stuff.
If you're one of those kids that just played in the fiberglass insulation for fun,
you might like it.
I don't.
I don't wanna itch all day.
Another thing in their instructions
is they mention that you wanna get this stuff wrapped as tight as you can.
Now, it's not gonna be perfect,
but the tighter you wrap it, the better it stays,
and the better it looks too.
Before I get too far along, I'm gonna lock this end down cause I like how it looks.
And if I need to redo anything beyond this,
this is fine.
It'll all be from here back.
All you gotta do is
wrap it around by hand first.
It's automatic, kind of like a zip tie,
a lot stronger, and it won't melt.
I like to try to hide
the buckle part of it itself so you just see the strap. I think it looks a little cleaner.
Everybody has their own preference though,
and I'm not
looking to cinch it down super tight right now, so this is just by hand to keep this from unraveling and keep it
where it's at.
Hold the buckle with your thumb,
pull the opposite way.
Let the extra hang for a minute. You don't wanna cut that off yet. You need to use this extra to tighten it down.
So I'm gonna pick this back up.
I'm gonna keep wrapping.
Make sure to keep it tight,
roughly 1/4 inch overlap.
I'm probably doing a little more than a quarter inch overlap,
but
that seems to be what's laying best.
So when you get to the end, make sure you cut off just a little extra so you can make sure you can still pull it tight.
Wrap it around nice and tight.
Go ahead and just give it one more little tight,
a little tug on it.
I'm gonna pull these back down on the backside where you kind of can't see them, but you can still get to them.
And then how you guys are seeing it is how it'll look in the engine bay just like that
minus the excess hanging off. I had to tighten them still.
I'm gonna do that before we move on,
but I just wanna give you a look at what it'll look like.
I like how header wraps look.
I think they
break it up a little bit.
It's just something different.
Up next,
superb talent we get organized and upgraded so this is the one thing I never make an exception for.
Well, you know, no matter what size shop you have at home or garage, it's never big enough.
There's always clutter sitting everywhere,
and something I always learned even starting as a young guy
was a clean shop
as a performance shop,
so we reached out to our friends over at Flex. They sent us their new track lock system. This is gonna help us organize all of this,
um, make it easy to get to look impressive,
and we got the stack pack kit as well so it'll allow us to move around the shop with tools
and keep everything out of the floor.
See that button right there?
You can connect two of these together.
Let's go,
let's go over to Music City and just steal the radio.
For Road.
We're on this disarray right now. I'm pushing the whole thing,
yeah, you are, you're strong.
Superb talent.
This modular flex tool storage system is gonna let us customize this however we want,
and if we need more storage we can add what we need.
We got everything installed, all the track systems up,
guys. This is a fully modular system.
We put all of our most commonly used tools up here now that Flex has
helped us out with this stuff,
man. It's pretty awesome.
I love how you can move everything everywhere.
I could sit here for 45 minutes
just reorganizing this to make it look better or make it more functional.
That's a big thing for me that you can move things
where you want it and somebody doesn't decide that for you.
Something else we haven't done yet though,
we can also take these off one finger click
to get to come off the track,
and we also have the metal bars that go on our packs and we could click these to our stack packs as well.
We just haven't decided what we want on what yet,
so that's why we haven't installed them,
but it's as simple as 12 click, man.
It really is.
There's a lot to mess with here,
so we got a good start on it.
I'm happy with it.
Are you happy with it?
I'm always happy.
We're gonna switch gears here. I'm gonna go ahead, I'm gonna put the front brakes together on this.
Power Stop sent us a whole brake kit. They're Evolution Pro
pad and rotor set for the front and for the rear.
So the first thing I'm gonna do
before I even put this onto the truck,
is I'm gonna grease up the
anti-rattle clips that the brake pad itself rides on.
And the reason I'm doing that now is so I don't get it all over my rotor.
You don't typically want
lube on your rotors. That's,
that stops it from doing its job. That's not good. You don't want that. So this one's passenger side.
It's kind of hard to tell with no body on, but this is the passenger side.
Some people also.
I'd like to take
a lug nut,
spin it on by hand.
And
that holds your rotor from wiggling around on you while you're trying to put your caliper bracket on.
So Power Stop's evolution series are drilled and slotted rotors along with carbon fiber ceramic pads.
The carbon fiber ceramic is there for
lower brake dust,
lower noise,
better heat dissipation.
Some of the organic
materials, they'll fade when they get hot.
Carbon fiber. Ceramic doesn't do that.
It has a lot higher heat tolerance and a lot better performance while it's hot for
heavy braking loads.
Also,
a drilled and slotted rotor does the same thing.
The holes in the slots on this are there to let gasses escape under heavy braking
because when these pads get hot up against your rotor.
It creates a little film of gas in there
and
you get your stopping power from two materials rubbing against each other.
You don't get that if there's a layer of gas in between it,
so the slots
and the holes are there to get rid of that.
The slots are also there
to help scrape off a layer of the pad if the pads do end up getting glazed.
It's just, it just scrapes it off,
gives you a fresh layer of friction material
to keep it fresh.
For heavy
braking.
Also,
Pop puts their screamers on both pads.
Some of them don't have it on both, and if you don't have it on both, you put the ones with the indicators on it
on the backside of the rotor.
Typically on a floating caliper, your back pad will wear out faster.
Not always,
I don't wanna say always, but typically.
OK,
before I get too carried away,
we are gonna tighten the
bracket bolts
to the knuckle.
Some people don't believe in torch specs. This is the one thing I never make an exception for.
Cause this stuff is what stops you.
And if this doesn't stop you,
that tree at the end of the road will.
Calipers are directional, your bleeder always goes up.
Some other, uh, brake styles have multiple bleeders on them like our, the
calipers on our Cadillac.
Those are fixed calipers that have pistons on both sides,
so the fluid needs to get to both sides, so it has a bleeder
on each side of the caliper,
and that's
still self-explanatory. It has to go up.
If you remember one thing from this install here.
Your bleeder has to go up
every time.
Pull off your lug nut and you're ready for your wheel to go on
just like that.
One more thing,
when you're doing this on your own vehicle,
if you're doing this in your driveway
before you take off after doing brakes all the way around,
pump up your pedal.
Your
caliper pistons are pushed away from the rotor.
And just
hitting the brake like you normally do,
won't push them in enough to hit the brakes.
So you'll just keep on moving.
So before you even start the vehicle,
always pump up your brake pedal before you move.
That saves you from any sort of headache
financially
or physically.
Other than that,
there's your brakes.
Coming up,
sparks and paint are gonna fly.
You can go have fun doing that. I'm gonna do what I know how to do
go have fun.
Well, finally we got our Tahoe ready to start the bodywork
and the paint process. However, we still got a few dents that we gotta take care of,
and I feel like this is a great time for yours Summit tech tip.
So there are multiple ways to repair dents, uh, today compared to before.
Used to we would drill a hole in the middle of the dent.
We would physically screw in a slide hammer or a dent puller at the time,
pull it,
but
we reached out to our friends at Summit and got this Linco
230
weld on dent puller
and. It's gonna make the job a lot easier.
So instead of being intrusive
into my factory substrate
now I'm gonna be, uh, very light with it
and just weld the tip to it. I'll be able to slide, pull it out.
So anything from door dings
to this pretty large crease dent that we have over here,
all with the same tool.
Also,
multiple tip attachments we can heat shrink with this tool as well,
and that's when the metal itself expands after a collision or a dent happens
so we can
bring it back to shape,
heat it up, and get it to shrink,
uh, so it will hold its shape and not oil can,
and that's where the metal is flimsy and flexible.
So
first thing we gotta do though is grind a couple spots and put our ground clamp on.
I've already got the machine plugged in and
here we go.
I've got it set on the 1 to 2 2nd interval,
um, and we'll see if that's enough.
We could turn it up or down depending on how big or how hard we need to pull the dent,
but you should just be able to touch the tip
to the middle of it
and just push the trigger on.
And you can pull it
twist it to remove it
if you notice there's no hole left here
or anything,
you don't have to use the slide hammer option you can just pull on it,
but either way it's uh super fast and easy.
Only very little what he needed there.
Let's go something a little bit bigger now.
This is a pretty good size dent over here. Let's see how that's gonna work.
Alright, so I'm using a 60 grit,
uh, 3M flat disk just because it's on my flex, uh, variable speed grinder
that way it's mobile,
easy to use, and
it's quick,
so I don't wanna heat up this metal a whole lot.
So I want something pretty aggressive to get it to bear steel.
So our particular Linco machine is a 230 volt machine, so you have to have 220 service
to use this particular one. However, they make them in 110 as well.
We chose this one,
come with a mobile cart as well,
so it's easy to roll around the shop.
But this tool works even better than I really thought it would.
Uh, it's super nice having one all inclusive unit instead of having multiple tools,
also having to drill holes and panels,
weld individual studs or pins.
So all in all this tool is phenomenal. So we got everything roughed out for the most part.
Uh, there is a little bit more work to still be done before we apply filler to these areas, but
overall
super impressed.
And well worth the money.
This chassis looks way different
than it did when we started today.
New paint,
engine transmission mounted,
upgraded brake system.
And the body's already primed and ready for us to start blocking,
so
the next time you see this ride,
it'll be back together
with new paint,
new wheels, new tires,
and a new stance.
Now while we got this apart, we still got a bunch of work to do. I'm gonna try to run the exhaust,
some of the brake lines, some of the fuel lines, and the trans lines
while he's in there blocking the body and getting it ready for paint.
When I get done with that,
I may even go in there and help him,
but until then
you can go have fun doing that. I'm gonna do what I know how to do.
Go have fun.