Trucks! Builds

Parts Used In This Episode

Spidertrax
Wheel Spacers.

Video Transcript

Today, we're getting you caught up on our recent projects from our daily driver seat 10 to the cheap Cherokee class six to super duly. Then we'll take a close look at an awesome 48 Willies built on a 79 Dodge four by four frame.

And lastly, we'll show you what we've got in mind for some of our up and coming builds. It's all today here on trucks.

Hey, welcome to trucks. Well, we've been working really hard on these project vehicles, getting them to the point to where we can finally take them out, drive them and test them, see how they perform. Heck, we've even finished a couple of them up, but we also realize that not every detail of what we do here is put on to a TV show. So one of the things we want to do today is get you guys up to speed on some of the progress that gets made between TV shows on some of our more recent projects. Yeah, we've got trucks in various states of completion. Our second chance Silverado is finished and it's being used like a truck is supposed to be our cheap Cherokee and our 66 C 10, they're just about to cross the finish line. We can't wait for that to happen. A class six and our super duly,

well, there's enough work here to keep us busy for a while. Now, later on in the show, we got a friend stopping by who took an approach to putting his project together. Similar to the one we're taking with our super duly and he ended up with a cool custom truck you're gonna wanna stick around for. And after that, we're gonna roll a couple of more trucks in here and give you a glimpse of what we're gonna be working on in the near future.

Now, one of the most ambitious builds that we've done recently is our 66 Chevy C 10 here, which started on the assembly line as a factory long bed truck. It came to us with typical wear and tear, typical rust, but we saw huge potential with this truck. So we took it upon ourselves to section 20 inches out of the frame and the body and create a factory spec short wheel base truck from there. We set to work on the chassis and the body bringing them up to speed.

Now, this truck was actually in pretty good condition with minimal rust, especially considering its age,

but it did have its faults. Those will all be corrected during the restoration

after welding and some bracing, we Z cut the frame in half and definitely reached the point of no return. Now, unlike the frame, we took the section

we needed out of either end of the bed. That way we could keep the factory contour in shape and minimize the amount of body work we had to do.

Then, with our newly converted short bath, we set to the task of removing the original paint with an interesting mix of sodium bicarbonate, air and water. Then we replaced the rusty metal with aftermarket patch panels.

Now there's plenty of options for suspensions on these trucks. We chose an air adjustable suspension and bolted it on to our freshly powder coated frame with very few modifications.

Then we installed our freshly rebuilt and pumped up small block that the horsepower shop took care of along with some disc brakes for the rear axle and to keep the fumes out of the cab, we relocated the gas tank underneath the bed, followed that with the installation of a new drive shaft.

Now we love the original two tone color on this truck, but we

wanted to upgrade to a modern technology paint. So we use state of the art Waterborne base code and followed that with a high solid clear code with a beautiful gloss.

After the paint was done, we assembled the body panels rather carefully and showed you guys how to do it, step by step without messing up your paint job.

The part of the fun of restoring an old vehicle is trying to refurbish and salvage some of the original parts.

Plus you can save a few bucks doing that too.

And we were able to save the factory cluster and the glass. Then we simply recovered the factory bench seat.

And last but not least was a stainless steel dual exhaust system with an X pipe,

very ghost.

Now, it's great to be down to the last couple of details on a project, things like weather stripping, finishing the wiring and a little bit of plumbing. Now, with our stock replacement radiator installed, we've got our electric fan mounted up, eliminating the mechanical fan, picking up a few free horsepower. Now to route the cooling from the engine to the new radiator, we're using some exhaust tubing for a nice neat solution for that. Thanks to Chris

Halewood, his handiwork. Now, a while ago when we dragged the Silverado into the shop, it obviously burned through its entire first life as a result of a fairly major sideswipe that totaled the truck, but we didn't want to give up on it. We wanted to give this thing a second chance so we fixed the damage and hit it with some fresh paint, but then we were left with a plain Jane stock truck. We just couldn't resist the temptation to throw a few parts at it.

Now, a total loss to the insurance company does not mean totally destroyed and a detailed inspection showed us that this had just superficial sheet metal damage. It's not often that you get to look inside the inner workings of an auto body shop. But we showed you that along with state of the art panel bonding and

hisses as an alternative to welding.

Now, repairing this truck wasn't all just replacing sheet metal. We showed you standard body shop techniques like applying filler and blocking and sanding to get it ready for paint.

Now, the first step in painting it was to jam it out or paint the door jams and then finally reassemble the body

with the truck prepped and in the booth fully assembled, we showed you how to step down your paint and create the illusion of a perfect color match

with the appearance taken care of. It was time to kick it up a notch in the performance with intake exhaust and brakes, lifting it up a little bit

and making it right a whole lot better, including new wheels and tires and color match fender players.

And what we ended up with was a good solid usable truck still stands out from the crowd a little bit and with just over 100,000 miles on the ticker. Well, this truck ought to have another 100 K in it easy. And as long as we can keep it from getting t boned again. Well, this thing should live out its life. It's a good solid work truck.

Now, our Chief Cherokee is a rolling experiment to see if we could take a clapped out, crashed out mild up piece of automotive garbage that was frankly worth more dead than alive and create a respectable rig out of it. And we think it's a rousing success. Here's why

when we picked up our X shape, it was a piece of beat up driveway trash, took a pretty good hit in the right front. So after doing some unibody frame repair, we replaced the sagging hinges with some custom made pieces. Then we hung a 97 and up front end on it for a fresher look

and we threw it in the booth, scuffed it down and gave it a couple of splash coats of industrial enamel for 80 bucks worth of beautiful

down in Orlando. We had a couple of buddies pitch in and help us put new fender players on and homemade powder coated bumpers.

Now, like every project we do, we wanted to see if it performed as good as it looked and it took everything we threw at it despite being a little down on power

and back of the shop, we strapped it to Horsepower's chassis dyno

to see what the engine still had left in it.

That was making a little bit more noise. Each and every run and each subsequent run showed a little bit less power. But me now at a moped

like 35 horses

and since we can only improve from there, well, we decided to increase the displacement of our Jeeps engine by installing 4.2 L crank and rods and 4 L pistons.

We followed that with a performance camp chef and some work to the combustion chamber and the intake manifold

and with the engine just about taken care of, we followed that with the installation of a Slip Yoke Eliminator kit as well as an upgrade to long arm suspension

and that got us back out on the trail and having a whole load of fun.

Hey, welcome back to the truck shop. Well, today we've got most of the tools put away. We're just taking some time to get everybody caught up on all these different trucks we're working on now, we picked up this 49 Chevy just a little while ago and we're already making pretty good progress towards our end goal and that goal is a fun hot rodded pick up on a reasonable budget

and we couldn't resist taking this 49 Chevy out for a little test drive.

It was pretty clear that there's been some advancements in suspension technology and we ought to take advantage of them.

So we started out with a welding Diy Mustang two cross member,

then added some stamp steel control arms and other budget Mustang, two parts.

Now, the wheels we picked out are 15 inch wheels. So we don't want this truck to have too modern of a look.

The steering rack from our local part store finished out the front end,

the rear suspension installation started with boxing the frame rails so we could have a mounting point for our triangulated four link

and that'll locate our swapped in rear axle and some adjustable coil overs to keep it off the bone stops

and to do some old school custom tricks. Kevin went to work ring in the front headlights

and for a modern twist, we threw in some really, really bright led lights

on the back of the truck. It was more of the same old and new. We tunneled the tail lights like they did back in the day and hit them with some new led Cadillac style lights

and for a paint job, well, Kevin had the idea to make this old truck look

even older or at least like it's been sitting outside for 50 years.

And after he threw the painter's rule book out the window,

he broke out the rollers, brushes and spray paint to get the look he was after.

And that gave it depth and texture that he was able to sand through and create a look that would have taken Mother Nature years and years.

Yeah.

Yeah, we're done

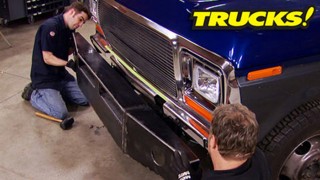
now with our 4 to 88 and our new tires and wheels installed. Well, we were already a half inch wider than the factory track width, but we still have some room between the wheel well and the tire. So to fill that gap, we're gonna install these spider tracks wheel spacers. Now, these are actually designed for Jeeps. So if you're gonna use them on a ford axle, like we are need to make sure the wheel studs are the correct length.

We just gotta grind ours down a little bit and we'll be in good shape with these installed. Well, the tires will fill out the wheel wells, the truck will have a better look.

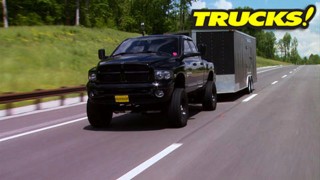
Now, project super duly was born out of necessity. We really needed a diesel tow rig to pull our power block projects around. We wanted the versatility and tunable of a cummins turbo diesel and quite frankly, we just like the looks of these old Ford quad cab trucks. So you throw all of that together in a bag, add in a few adult beverages, shake it up boom. Project super duly.

The seventies crew cab Ford body came from the same graveyard. We rescued dust Bronco from

and the Dodge diesel chassis came from a late model auto recycling

and a quick trip to the frame shop got our tweaked and wreck dodge frame straightened out.

Then it was time for a Dooley swap and that meant new hubs and rotors up front and a gigantic Dooley axle out back

after a quick break job and upgrade, it was on the bigger and better things like fitting the body to the frame. We started with the bed and worked our way forward using a combination of mounts cut off the old Ford frame and just repositioning some of the dodge mounts

and speaking of repositioning, but we had to move our engine and transmission back about five inches, the radiator and fan clearance

and to support the transmission. Well, we just cut up the factory cross member into three pieces and joined it back together using some flat stock

and that gave us the clearance

need to mount the front end. Then we flipped the exhaust manifold over. So our turbo charger wouldn't interfere with our heater box housing.

Then it was time to address the common problem of the killer do

did.

But the fix is simple, just drive it back into the recess where he belongs.

And once he's happy, cover him up with a retain tab to lock him into place,

we swapped in a governor spring kit, Android, fuel control spring kit and a fuel plate to unlock some of this 59 diesel's potential.

And with more power on tap, we installed a heavy duty clutch and took care of the fifth gear retaining nut problem.

So now with the drive train pretty much buttoned up. Well, at least until we start talking about compound turbos and exhaust upgrades. Well, now we can focus on body fitment, maybe getting some of this rust fixed and then think about a paint scheme. But don't worry, we'll walk you through all of those projects including,

well, an interior

and a steering linkage and a stereo system

and hooking up that dodges hydro boost and

thinking about some pedal placement,

some of the stuff.

Hey guys, welcome back to the shop now, Kevin and I have definitely made a ton of work for ourselves on projects super duly here. We're trying to retrofit this classic body onto a late model chassis. You get the benefits of all the modern drive train and running gear that's certainly going to be a lot of work, but we're not the first ones to tackle such an ambitious project. Check this out.

This unique truck is Tony Ashburn, 48 Willie body that he has merged with a 79 Dodge four wheel drive chassis and he's done most of the work himself. He started with a rusty $1000.48 willies and the bed was just about gone and the only thing salvageable was from the cab forward.

Now, this thing is no show truck. He actually drives it all the time. In fact, he put over 6000 miles on it since the project was completed. And its main purpose is to get Tony to his favorite fishing hole. Now, he's got to take interstate to get there and he says it cruises down the highway, no vibrations, no problem. Obviously, he's not gonna have any problem on a dirt road or trail, but since he's driving this thing on the street, well, he grafted on some late model jeep bumpers

and look right at home

now under the hood is the 318 that came in the 79 Dodge chassis. Now, the owner rebuilt it himself and it's nothing fancy but it's more than enough to get the job done. Now, the factory had installed a two barrel carburetor but Tony swapped it for a four barrel because according to him,

every V8 needs a four barrel carburetor

for suspension. There are solid and reliable leaf springs all the way around. Behind the overhauled engine is a rebuilt transmission in the factory full time 203 transfer case

and as far as axles go well, he's running the Dodge eight and a quarter rear end and a data to 44 front.

Now, one quick look inside this polyurethane line bed. It's obvious Tony's not afraid to use this truck. Now out here, he got creative and turned two trailer fenders into one

to cover up his 33 inch tall tires.

Now inside the cab, it's tight quarters, but it's pretty clean on the floor. He threw down a black carpet for the 87 Dodge Dakota bench seat. Well, he recovered that in tweet. He also did a tweet headliner.

Now, Tony made his own instrument panel utilizing some classic looking auto meter gauges.

Now, Tony did a pretty bang up job of getting this old body to work with a newer chassis, gives us a glimmer of hope and a little bit of inspiration that we can do the same on projects super duly Now, if you guys are wondering, well, this isn't trucks yellow. This is actually a late model dodge color to us. Looks pretty good. You're certainly not gonna miss it coming on the highway.

Hey, welcome back.

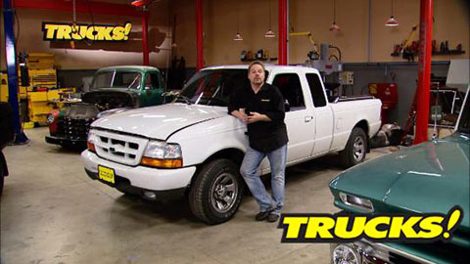
Well, aside from showing you guys some of the stuff that we've done between TV shows, we also wanted to give you a glimpse of some of the things that are coming up on trucks. Now, we've done S tens before we did a va conversion a couple of seasons ago and we even took it a step further, did a pro street conversion on top of that. But you know, we've never really paid attention to Ford Rangers and all that is about to change.

Now, the Ford Ranger came with a couple of different engine sizes and in line four and a V6 like this 4 L here. Now, if there's an engine bay that's big enough to house a V6. Well, in my mind anyways, they can move things around enough to stuff a V8 in there just like the S 10

on top of that. Well,

let's just say there's room for improvement on a stock V8. You guys are the ranger station

dot com. You know that people are stuffing va in these rangers every day. But let's think about this throwing a couple extra atmospheres, maybe 10 or 15 pounds of boost onto an engine.

It starts to get real fun real fast because after all, a ranger or any other pickup truck is a true hot rod rear drive, front engine and lots of fun.

Now, a ranger similar to that is gonna make a fast and fun street truck, but we like to do a street of a four wheel drive every now and then as well.

In the past, we've reached for a full size Bronco and a few Jeeps to get that done.

But short of the single show build, we did on a late model Toyota Tundra where we just haven't given much love to the Toyota crowd. So that's gonna change as well.

You guys that drive these little Tacoma know how tough and durable these trucks

are.

Now, this truck's obviously a two wheel drive with no CV axle to drive the front wheels and the one we're going to buy is definitely gonna be a four wheel drive, but it uses the same type independent front suspension. Now, it's great for going fast in the desert and for daily driving, but it's not the most durable set up for serious trail use. Now, if you just take a look at the distance between the bump stop and the frame, it's pretty obvious it's not going to allow for much wheel travel. Now, we haven't completely committed to doing a solid axle swap. We might just keep the ifs lifted up and deal with the problems as they arise.

So maybe we can lean on some of you Toyota owners who have done the conversion or at least done the research and thought about it to give us your opinion. Send us an email. Let us know what you think. Now the rest of the truck is bulletproof. The drive train seem to last forever. The truck's just the right size should make a pretty good long term project.

We want to say thanks to Mark and Mo for letting us use their trucks to give you guys a glimpse of some future projects here in the show. And if you have an opinion on our for Tina paint job and I know you have one, check us out on power block tv.com. By the way, these wheels, spacers, they did the trick, didn't they?

Thanks for watching. See you next time.
Show Full Transcript