MuscleCar Builds
Want more content like this?
Join the PowerNation Email NewsletterParts Used In This Episode
YearOne
"Mustang" Trunk Letter Kit
YearOne
Front and Rear Bumper Set
YearOne
Front Spoiler
YearOne
Grille Emblem
YearOne
Ignition and Door Lock Set
YearOne
LH Front Marker Light Chrome Bezel
YearOne
LH Rear Marker Light Chrome Bezel
YearOne
Outside Door Handle Set
YearOne
Racing LH Remote-Control Outside Mirror
YearOne
Rear Bumper Bracket
YearOne
Rear Spoiler Kit
YearOne
RH Front Marker Light Chrome Bezel
YearOne
RH Rear Marker Light Chrome Bezel
YearOne
Taillight Bezel Set
YearOne
Trunk Lock Set
Video Transcript
Today on Muscle car. How to take your ride from Sad to Rad in one weekend, Tommy and Chris team up to make it happen with some do it yourself, custom mixed paint, hot, new trim and bolt on beauties. Plus all systems are go in this 71 Javelin A MS.
Hey, welcome to Muscle Car.
Today's show is all about pulling a rabbit out of your hat trying to keep it from looking like a possum. We all know the car we're talking about.
It may go fast but it don't look good doing it.
Look.
This Mustang is a perfect example. The owner gave up washing this faded old paint some time back and now there's even mold growing on it.
It's missing a ton of trim. The wheels and tires are in pretty bad shape
and all the lenses have seen their better days,
but it's not a lost cause. This thing runs like a scalded dog. So all it really needs is a little elbow grease, splash of color and some easy to swap out parts.
Rick's out beating the bushes today to find our next big project. So Chris is gonna lend us a hand here on most car today. Hey, I'm just happy to help out. I may be used to working on four by fours, but I still know my way around the car
and I don't mind getting dirty, good deal brother because we got a lot of work to do before we can throw some color on this guy. Let's get to it. Sweet.
The beauty of this car is that tear down is pretty easy because there's not a lot of shiny parts on it. All of the glass trim was off when we started. So it was already down to the fair essential.
We're not doing any body work because it's in pretty good shape.
But it does still need a quick buzz down to prep the surface for paint and get rid of all the crud.
Now that we got all the rust spots knocked off the surface, we need to seal it all up. So we're gonna use some primer, which will also fill in all those small imperfections san and always makes a mess. So before the primer goes on, we need to wipe the whole thing down with some pre cleaner and then we can mask it up.
This is an important step you don't wanna skip because the cleaner, the surface, the better the paint job. We know this thing didn't have any wax on it, but it's probably been touched a few times with some greasy hands
either way. Dla
colors wax. And grease remover got us covered.
I'm asking for this project will be a breeze. All we really need to cover up is a few holes when the glass and the tires
I wasn't done yet. I'm sorry, don't yell at me. I understand you're used to working on a four wheel drive.
It's cool, man.
You gotta start somewhere.
What's the best way to tape up this windshield or this window? I mean, pull you a piece of tape, this wide stuff across the bottom first.
If you pull this back
like that
and then run that piece across here,
then all you gotta do is touch it to that and then cut off the excess top and bottom mass. It's like you've done that before.
I've seen it done once,
but it was overseas and it was weird. So
I finished the windshield you did
here. I'll get that for you.
Thanks to,
hey, I'm a giver, man. I'm a giver.
Stupid colors primer is step one in their three step paint shop finish system.
It will give us a uniform canvas to lay the color on
when spray primer that's not gonna be sanded before it's painted.
Make sure it goes on as smooth as possible. Any roughness in the texture will show through the base coat.
I'm just putting on one coat and making sure it's even and gives full coverage
coming up, paint your car to match your personality. Tommy shows you how easy it is to mix your own hot rod hue.
Hey, welcome back. The primer. I just shot on the mustang came from Duple colors. Paint shop finish system. If you haven't seen this stuff in your local parts store, you need to check it out. It's a full line of products including primer base coats, mid coats, candies and clear. And the co
the
thing about it is you can mix your own custom colors. They've got formulas you can follow to get power blocks hot shades like overdrive orange and red line red or you can experiment and come up with your own.
I'm gonna bench mix some deep blue jet black and a touch of silver candy.
This stuff is ready to spray straight out of the can with no reducer. Just mix up a color you like and it can go straight into the gun.
Here's a little Tommy Tip to keep her making a mess when pouring from a can use some masking tape to make a spout. Voila. No more spills.
Make sure to measure and keep track of what you're pouring together because once you get a color you like, you need to be able to make more.
Remember when you're doing this that you can always add more of a color, but you can't take it back out. So start with a small amount and go from there
and last but not least stir it up real good.
That's it
when applying a metallic color. I like to spray with a 75% overlap. This decreases the chances of tiger stripes or streaks with a solid color. A 50% overlap will be fine.
I'm putting on three coats. This is pretty average, but you may need more or even less depending on the color you choose. Just make sure it's even and looks good
while I've been busy hanging out in the booth, Chris had been trying his hand at painting spray
can style.
He wanted to paint it camo, but that's just not muscle car style. So we're going with satin black.
The clear goes on just as easy as the base coat. I'm putting on three coats. But if you want more depth, add a few more, just be sure to increase the flash time between each coat
with a new coat of color. This old pony is looking a lot better but some new trend will make a big difference. Year one hooked us up with a whole lot of bling from bumpers to bezels. And the best part is it's a whole lot of flash for not much cash. Even the bumpers are right around 100 bucks.
This is the fun part because you get to see the results of all the hard work
man.
That looks a whole lot better, but you know,
it's missing something, you know, something round, shiny wrapped in rubber. I think I got what you need over here. You help me out real quick brother
up next meet a hamster that avoided the dumpster.
Today's flashback, a 1971 Javelin AM X
in 1968 A MC fought its way into the muscle car market with a two fisted approach.
The mighty little AM X and its big brother. The javelin
both were a hit but by 1970 the era of performance was coming to an end and
MC would have to let one go.
Sales of the two seater AM X had dwindled to just 4000. So sadly, it got the ax but the name lived on as AM C's top performance option. Joining forces with its big bro to become
the Javelin AM X for 71 the javelin was all new inside and out gone were the tighter squared off features of the original, it was now longer lower and wider with a flowing Coke bottle shape. A MC went with a more
European and flare, adding a twin canopy roof up top and sculpted fenders, front and rear.
Thanks to these humps. This generation, the javelins wound up with a nickname
HS.
The AM X option carried over many of the features of Mark Donahue's trans AM Javelin.
A stainless steel grill was flush mounted in front of the standard init grill for better airflow. Plus there was a Donohue design rear spoiler.
All Javelin's got a newly styled interior in 71 with an unusual wrap around cockpit style dash
instead of a wood grain finish though. The AM X got an engine turned look, a 360 V8 was standard with the AM X or you get upside to the brand new +401.
It was basically just a stroke version of the 390. But with lower compression
still, it bumped up the horsepower to 330.
The 3200 pound car managed to make mid fourteens on the quarter mile at a top speed of 98.8
MPH. A blacked out tail pan on T strip tells you this. Javelin was outfitted with the go pack
AM C's Goody bag of performance features. A front air spoiler was included along with a functional rear facing
cow
induction hood
that fed air into the ram induction system that set on top of the air cleaning.
The heavy duty cooling system was also included,
the hurst for speeding
and rarely pack gauges were also part of the package. Plus you got a twin grip dip and upgraded suspension
that all rolled on fatter E 6015 poly glass wrapped around slotted steel seven inch wheels. Ever since the new look debuted. Some folks have grumbled over the loss of the original stuff
but not owner Mike Gray. I
got attracted to Javelins when I was a kid, Bill Johann models and I always love the styling of the little spoiler on the roof and the big hump fenders and the spoiler on the back. The 71 Javelin took first place on the Trans AM circuit but wasn't as successful in the showroom. Only about 2000 got the AM X treatment and less than 800 came with the 401 and not too many of those have survived. We're glad this hum
got saved from the dumpster
after the break. Our mustang's makeover is not done yet. Pop the hood and see why this pony could use some polished performance parts.
You're watching muscle car for a DVD copy of this episode, just go to Power Block tv.com and order your copy for just 595 plus shipping and handling. Start your own muscle car collection delivered right to your door from the power block.
Hey, welcome back. We've got the wheels and tires mounted up and man, do they look great? Our goal is to refresh that stock look. So Coker tire hooked us up with a set of their magnum fifteens complete with a set of their pony centers.
They wrapped them in a set of BFG radio tas. Perfect for everyday driving. Or if you get a little
auto happy, you can put the power to the ground if you're going for more of the traditional look and still want the performance of a radio. Coker's BFG. Silver Towns are the way to go. Red lines, gold lines, pin stripes, they've got you covered or if you want authentic muscle car rubber. Coker offers the Firestone wide oval by supply. This thing is popped from the original mold. So it's the real deal.
Oh,
this thing can do some cleaning up.
Yeah, I think you're right, man. A bath, new coat of paint and some new parts. It looked like three stages beyond awesome. Strip the firewall down and,
uh, give a good coat of paint and then dress it up.
Yeah, pretty much that, man. I thought we'd do some cleaning. Put some wire loom on maybe some valve covers, intake air cleaners. You know what I'm talking about? Grab some clearing, let's get started.
All right, I'll get some tools.
It'll make things a lot easier with this hood off. So it's out of here.
We wanna make sure to protect the fresh paint while we're doing our cleaning. So a little masking is in order
compressed air will get rid of all the big chunks. Chris is used to working with a lot of hot air so he can handle this job.
We'll follow it up with some break cleaner and racks brake cleaner will eat paint though. So be careful where you shoot it.
Some of the parts we're reusing can be moved out of the way or just taken off the ones we're replacing. Like the valve covers and intake can be left on until we're done painting since it won't really matter if we get overspray on it.
Some aerosol love will have this engine bay looking a whole lot better in no time.
Other than the parts we're replacing, we only have to remove what's in the way that means the distributor can stay in place and we won't have to worry about setting the timing later.
We're replacing the Top Empires. We just removed with all new ones from Edelbrock, their RPM air gap intake and Thunder Series car, both feature the Endura shine finish. So they're not only gonna perform well, but they're gonna look great doing it.
The air cleaner and valve covers are both from the Victor Series. This satin black cast aluminum complements that muscle car look. We're after
we're also giving performance a boost with a set of ere
spark plugs. This patented electrode configuration not only increases power and fuel economy, it even reduces emissions.
Chris cleaned the head surfaces and got the gaskets ready to go. So the intake can drop right on.
These super strong intake boats from a RP are precision machine to ensure tight gasket seal. So we'll never have to worry about intake leaks.
One of the cool features on the Edelbrock Thunder Series carb is the quick tune secondaries. They can easily be adjusted to kick in early or late with no extra springs.
This car is running headers and a common problem with them is melting the spark plug boot. But these boot protectors by D I keep that from happening
with the air cleaner to complete the picture. This engine bay has a whole lot more appeal than the tired dirty mess we started with. Now, we don't have to be embarrassed to pop the hood and show it off.
And one last thing, we can't run with the herd without a shiny pony on the grill. Remember what we started with?
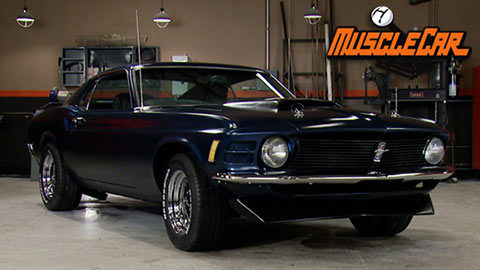
Now, it looks like a completely different car
and it can all be done with a couple of buddies over a weekend.
It was already pretty fast
now. It's pretty well pretty. Hey, watch what you're calling pretty. I think this thing looks as mean as it runs. That's why I'm calling this color bruiser blue. All right, then let's go see how many eyeballs we catching it. All right. Then
since you're new around here, you get to say bye bye to everybody. You got some kind of cool catchphrase. Uh How about keep the wheels spinning and the ladies grinning.
It's all right. That's the way I like it.
Show Full Transcript
Hey, welcome to Muscle Car.
Today's show is all about pulling a rabbit out of your hat trying to keep it from looking like a possum. We all know the car we're talking about.
It may go fast but it don't look good doing it.
Look.
This Mustang is a perfect example. The owner gave up washing this faded old paint some time back and now there's even mold growing on it.
It's missing a ton of trim. The wheels and tires are in pretty bad shape
and all the lenses have seen their better days,
but it's not a lost cause. This thing runs like a scalded dog. So all it really needs is a little elbow grease, splash of color and some easy to swap out parts.
Rick's out beating the bushes today to find our next big project. So Chris is gonna lend us a hand here on most car today. Hey, I'm just happy to help out. I may be used to working on four by fours, but I still know my way around the car
and I don't mind getting dirty, good deal brother because we got a lot of work to do before we can throw some color on this guy. Let's get to it. Sweet.
The beauty of this car is that tear down is pretty easy because there's not a lot of shiny parts on it. All of the glass trim was off when we started. So it was already down to the fair essential.
We're not doing any body work because it's in pretty good shape.
But it does still need a quick buzz down to prep the surface for paint and get rid of all the crud.
Now that we got all the rust spots knocked off the surface, we need to seal it all up. So we're gonna use some primer, which will also fill in all those small imperfections san and always makes a mess. So before the primer goes on, we need to wipe the whole thing down with some pre cleaner and then we can mask it up.
This is an important step you don't wanna skip because the cleaner, the surface, the better the paint job. We know this thing didn't have any wax on it, but it's probably been touched a few times with some greasy hands
either way. Dla
colors wax. And grease remover got us covered.
I'm asking for this project will be a breeze. All we really need to cover up is a few holes when the glass and the tires
I wasn't done yet. I'm sorry, don't yell at me. I understand you're used to working on a four wheel drive.
It's cool, man.
You gotta start somewhere.
What's the best way to tape up this windshield or this window? I mean, pull you a piece of tape, this wide stuff across the bottom first.
If you pull this back
like that
and then run that piece across here,
then all you gotta do is touch it to that and then cut off the excess top and bottom mass. It's like you've done that before.
I've seen it done once,
but it was overseas and it was weird. So
I finished the windshield you did
here. I'll get that for you.
Thanks to,
hey, I'm a giver, man. I'm a giver.
Stupid colors primer is step one in their three step paint shop finish system.
It will give us a uniform canvas to lay the color on
when spray primer that's not gonna be sanded before it's painted.
Make sure it goes on as smooth as possible. Any roughness in the texture will show through the base coat.
I'm just putting on one coat and making sure it's even and gives full coverage
coming up, paint your car to match your personality. Tommy shows you how easy it is to mix your own hot rod hue.
Hey, welcome back. The primer. I just shot on the mustang came from Duple colors. Paint shop finish system. If you haven't seen this stuff in your local parts store, you need to check it out. It's a full line of products including primer base coats, mid coats, candies and clear. And the co
the
thing about it is you can mix your own custom colors. They've got formulas you can follow to get power blocks hot shades like overdrive orange and red line red or you can experiment and come up with your own.
I'm gonna bench mix some deep blue jet black and a touch of silver candy.
This stuff is ready to spray straight out of the can with no reducer. Just mix up a color you like and it can go straight into the gun.
Here's a little Tommy Tip to keep her making a mess when pouring from a can use some masking tape to make a spout. Voila. No more spills.
Make sure to measure and keep track of what you're pouring together because once you get a color you like, you need to be able to make more.
Remember when you're doing this that you can always add more of a color, but you can't take it back out. So start with a small amount and go from there
and last but not least stir it up real good.
That's it
when applying a metallic color. I like to spray with a 75% overlap. This decreases the chances of tiger stripes or streaks with a solid color. A 50% overlap will be fine.
I'm putting on three coats. This is pretty average, but you may need more or even less depending on the color you choose. Just make sure it's even and looks good
while I've been busy hanging out in the booth, Chris had been trying his hand at painting spray
can style.
He wanted to paint it camo, but that's just not muscle car style. So we're going with satin black.
The clear goes on just as easy as the base coat. I'm putting on three coats. But if you want more depth, add a few more, just be sure to increase the flash time between each coat
with a new coat of color. This old pony is looking a lot better but some new trend will make a big difference. Year one hooked us up with a whole lot of bling from bumpers to bezels. And the best part is it's a whole lot of flash for not much cash. Even the bumpers are right around 100 bucks.
This is the fun part because you get to see the results of all the hard work
man.
That looks a whole lot better, but you know,
it's missing something, you know, something round, shiny wrapped in rubber. I think I got what you need over here. You help me out real quick brother
up next meet a hamster that avoided the dumpster.
Today's flashback, a 1971 Javelin AM X
in 1968 A MC fought its way into the muscle car market with a two fisted approach.
The mighty little AM X and its big brother. The javelin
both were a hit but by 1970 the era of performance was coming to an end and
MC would have to let one go.
Sales of the two seater AM X had dwindled to just 4000. So sadly, it got the ax but the name lived on as AM C's top performance option. Joining forces with its big bro to become
the Javelin AM X for 71 the javelin was all new inside and out gone were the tighter squared off features of the original, it was now longer lower and wider with a flowing Coke bottle shape. A MC went with a more
European and flare, adding a twin canopy roof up top and sculpted fenders, front and rear.
Thanks to these humps. This generation, the javelins wound up with a nickname
HS.
The AM X option carried over many of the features of Mark Donahue's trans AM Javelin.
A stainless steel grill was flush mounted in front of the standard init grill for better airflow. Plus there was a Donohue design rear spoiler.
All Javelin's got a newly styled interior in 71 with an unusual wrap around cockpit style dash
instead of a wood grain finish though. The AM X got an engine turned look, a 360 V8 was standard with the AM X or you get upside to the brand new +401.
It was basically just a stroke version of the 390. But with lower compression
still, it bumped up the horsepower to 330.
The 3200 pound car managed to make mid fourteens on the quarter mile at a top speed of 98.8
MPH. A blacked out tail pan on T strip tells you this. Javelin was outfitted with the go pack
AM C's Goody bag of performance features. A front air spoiler was included along with a functional rear facing
cow
induction hood
that fed air into the ram induction system that set on top of the air cleaning.
The heavy duty cooling system was also included,
the hurst for speeding
and rarely pack gauges were also part of the package. Plus you got a twin grip dip and upgraded suspension
that all rolled on fatter E 6015 poly glass wrapped around slotted steel seven inch wheels. Ever since the new look debuted. Some folks have grumbled over the loss of the original stuff
but not owner Mike Gray. I
got attracted to Javelins when I was a kid, Bill Johann models and I always love the styling of the little spoiler on the roof and the big hump fenders and the spoiler on the back. The 71 Javelin took first place on the Trans AM circuit but wasn't as successful in the showroom. Only about 2000 got the AM X treatment and less than 800 came with the 401 and not too many of those have survived. We're glad this hum
got saved from the dumpster
after the break. Our mustang's makeover is not done yet. Pop the hood and see why this pony could use some polished performance parts.
You're watching muscle car for a DVD copy of this episode, just go to Power Block tv.com and order your copy for just 595 plus shipping and handling. Start your own muscle car collection delivered right to your door from the power block.
Hey, welcome back. We've got the wheels and tires mounted up and man, do they look great? Our goal is to refresh that stock look. So Coker tire hooked us up with a set of their magnum fifteens complete with a set of their pony centers.
They wrapped them in a set of BFG radio tas. Perfect for everyday driving. Or if you get a little
auto happy, you can put the power to the ground if you're going for more of the traditional look and still want the performance of a radio. Coker's BFG. Silver Towns are the way to go. Red lines, gold lines, pin stripes, they've got you covered or if you want authentic muscle car rubber. Coker offers the Firestone wide oval by supply. This thing is popped from the original mold. So it's the real deal.
Oh,
this thing can do some cleaning up.
Yeah, I think you're right, man. A bath, new coat of paint and some new parts. It looked like three stages beyond awesome. Strip the firewall down and,
uh, give a good coat of paint and then dress it up.
Yeah, pretty much that, man. I thought we'd do some cleaning. Put some wire loom on maybe some valve covers, intake air cleaners. You know what I'm talking about? Grab some clearing, let's get started.
All right, I'll get some tools.
It'll make things a lot easier with this hood off. So it's out of here.
We wanna make sure to protect the fresh paint while we're doing our cleaning. So a little masking is in order
compressed air will get rid of all the big chunks. Chris is used to working with a lot of hot air so he can handle this job.
We'll follow it up with some break cleaner and racks brake cleaner will eat paint though. So be careful where you shoot it.
Some of the parts we're reusing can be moved out of the way or just taken off the ones we're replacing. Like the valve covers and intake can be left on until we're done painting since it won't really matter if we get overspray on it.
Some aerosol love will have this engine bay looking a whole lot better in no time.
Other than the parts we're replacing, we only have to remove what's in the way that means the distributor can stay in place and we won't have to worry about setting the timing later.
We're replacing the Top Empires. We just removed with all new ones from Edelbrock, their RPM air gap intake and Thunder Series car, both feature the Endura shine finish. So they're not only gonna perform well, but they're gonna look great doing it.
The air cleaner and valve covers are both from the Victor Series. This satin black cast aluminum complements that muscle car look. We're after
we're also giving performance a boost with a set of ere
spark plugs. This patented electrode configuration not only increases power and fuel economy, it even reduces emissions.
Chris cleaned the head surfaces and got the gaskets ready to go. So the intake can drop right on.
These super strong intake boats from a RP are precision machine to ensure tight gasket seal. So we'll never have to worry about intake leaks.
One of the cool features on the Edelbrock Thunder Series carb is the quick tune secondaries. They can easily be adjusted to kick in early or late with no extra springs.
This car is running headers and a common problem with them is melting the spark plug boot. But these boot protectors by D I keep that from happening
with the air cleaner to complete the picture. This engine bay has a whole lot more appeal than the tired dirty mess we started with. Now, we don't have to be embarrassed to pop the hood and show it off.
And one last thing, we can't run with the herd without a shiny pony on the grill. Remember what we started with?
Now, it looks like a completely different car
and it can all be done with a couple of buddies over a weekend.
It was already pretty fast
now. It's pretty well pretty. Hey, watch what you're calling pretty. I think this thing looks as mean as it runs. That's why I'm calling this color bruiser blue. All right, then let's go see how many eyeballs we catching it. All right. Then
since you're new around here, you get to say bye bye to everybody. You got some kind of cool catchphrase. Uh How about keep the wheels spinning and the ladies grinning.
It's all right. That's the way I like it.