HorsePower Builds
Want more content like this?
Join the PowerNation Email NewsletterVideo Transcript
Hey, welcome to the horsepower shop for almost four decades. People have been modifying Mustangs to suit their taste.
Well, here's an example of taking an old friend to a whole new level. It's called the GB Mustang roster and it starts with a stock chassis and power train, but that's about where the similarity is. That's right now. They strengthen the chassis and add a plethora of performance parts under the hood, then they bolt on one piece, front and rear body sections.
They're engineered to enhance the chassis structural improvements and make this thing handle like it's on rails.
And as you can see,
the styling borrows heavily from the best Mustang designs through the years.
These are kit cars. Mind you, they hand build them to the tune of about 20 a year and well, like the famous hamburger joint, you can have it your way with the engine output to suit your taste and budget.
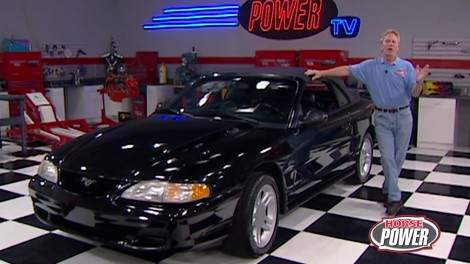
Well, meanwhile, I just blew my budget on this 96 drop top here. What do you think?
Well, don't worry about that. Joe doesn't change Mustangs as often as he changes his socks.
Now, why don't you tell him what happened to the old Scarlett stallion that we were working on last year. It almost hurts after we improved the looks and performance of our 94 GT. Well, apparently we weren't the only ones that found it attractive. This is what it looked like after it was stolen and stripped. Pretty sad sight. Huh?
Man,
I can't believe someone would actually steal a Ford,
but we got something later in the show that's gonna deter those car thieves. It's a do it yourself alarm system
right now though. We're gonna get to work on the suspension system. Now, we've got a bunch of boltons
that are gonna make this new Mustang
handle
every bit as good as that yellow Thoroughbred right there.
Yeah. Well, even stock Mustangs handled pretty well right from the factory problem is with the convertible though.
You give up some of that chassis stiffness when you give up the roof. Well, we're gonna solve that problem today for my 96 with the Subra connectors we ordered from Edelbrock.
What they do is tie together the front suspension cradle here with the rear suspension trailing arm outs
and they do it with heavy wall, one and 58 diameter tubing
that's uh contoured to fit the floor pan.
That way you don't give up ground clearance or good looks.
Of course, those connectors welded in for a really solid foundation. Then we're gonna build on that foundation with a set of their lower control arms
is shocks. Of course, these I box springs. Now, what that's gonna do is keep our suspension really solid and centered up under the car, plus it's gonna lower our center of gravity to improve handling.
Now, speaking of that, I guess we need to get our hands on some tools here that is after we get the Mustang in the air
to prevent chassis preload, the weight of the vehicle has to be supported on all four wheels with the tires inflated to normal driving pressures.
After disconnecting the battery,
pull the carpet away from the floor pans, foot wells on both sides,
then remove the two rear retaining boats from each of the front seats
underneath. Test fit the Subra connector
and reposition any wiring brake or fuel lines that are near where it connects
with a Subra
connector back in place mark all around its mounting pads
and clean the area
it'll be welded.
Now we're gonna go ahead and weld all these factory floor pan plates
that are gonna be covered by the Subra connector. Now that's gonna help keep the factory spot welds from breaking. It's also gonna strengthen the floor pan substantially.
Now, we can loosely attach the
Subra pad
to the rear spring perch area using the hardware that's supplied in the kit.
Now we're gonna install the seat reinforcement bracket using the factory nut plates right here on the floor pan
packwell, the connector to the seat reinforcement bracket.
Now we can go ahead and tighten up the seat reinforcement bracket and that'll draw this whole connector tube right up into place.
Then we can check our pad position. And well, if we like what we see, we can go ahead and weld this Subra
connector back here and up front.
The last thing to weld up is this little brace here that fits inside the transmission cross member and welds to the tube.
Then you can paint the wells to keep them from rusting reinstall the carpet and both the backs of the seats back down.
And while Chuck does that on both sides, of course, you and I will take a little break and we'll be right back
coming up, we'll spring into action with more suspension upgrades. Some rather shocking and we'll show you how to take control of your ride with new rear control arms. Stay tuned.
Welcome back to the shop where we've just finished installing a set of Edelbrock Subra connectors on Joe's latest project, Pony.
Of course, those Subra connectors would work a whole lot better if the rest of the suspension is up to the task. And that's why for the second part of our build up, we're gonna go ahead and install a new set of shocks, springs and control arms. And the first step is to get this Mustang up on a set of jack stands
that way we can easily get to the wheels and suspension pieces and do this job right.
All right.
Now the wheels out of the way we can get started on the rear suspension and, oh, remember, work on one side of the car at a time. So you keep the rear end properly located.
Now, the first parts to go
are these stock shocks.
Once the rear shocks are out of the way, remove the rear sway bar
to support the rear of the lower control arms for the floor jack and remove the rear control arm bolt,
then lower the floor jack to take the tension off the springs.
And with that spring out of the way,
we can remove this front bolt
and
the control arm itself. Now, let me show you something.
As you can see. Our Edelbrock replacements are engineered from rectangular steel tubing
with 120,000 small thickness. These stalkers on the other hand are open at the bottom
and they're stamped from thinner gauge steel. Oh, and these bushings here, well, they'll compress under high loads and well, that can make for mushy handling and, uh, even wheel hop. Well, we don't want any of that.
Here's something that I really like about these control arms though.
They use Grez
fluted urethane bushings on each end.
What that's gonna do is really help keep the suspension centered up under the car and you check out these mounts here. Now, those are going to allow us to retain the use of the stock sway bar.
Of course, we're using I box springs and they're progressively wound. What that means is for the most part, we're gonna get a nice comfortable ride. But when we get aggressive with our driving, the spring rate goes up and of course, that's gonna improve handling.
These things are also gonna lower the ride height of the mustang about an inch and a half, which is gonna give us a great stance, improved aerodynamics and a lower center of gravity. Well, let's say we uh lower our centers of gravity and get our butts busy over here.
Ok. Start by installing the front control arm bolt,
then support the rear of the control arm with the jack while you position the spring,
then raise the jack to compress it.
Now you can install and tighten the rear control arm bolt.
You know, I had a set of these shocks on my last Mustang
while it lasted
and I really like the way it made it right and handle. And what makes it possible is their inertia active design or IAS what it is is a variable rate valve that adjust instantly and automatically all kinds of driving and road conditions.
Now, these shocks have a high pressure gas design and well, that helps eliminate oil foaming and also helps dissipate heat. Of course, this shield is here to keep debris away from the shaft and keep our seals from getting damaged. Uh You know, I'm kind of shocked you don't have those things bolted up. Can I give you hands,
man?
Hey, great job on that rear sway bar.
Well, that takes care of the rear suspension. Now, we can turn our attention to the front. You know, even though the mustang is supported by jack sands, we still need this floor jack.
We're gonna put it right under this front control arm and take some of that tension off the front strut
inside the engine compartment, remove three upper mount retaining nuts,
then remove the caliper, but don't let it hang by the hose. A piece of wire helps keep it supported,
remove the two lower bolts that attach the strut to the spindle
and remove the strut.
Next, you have to disconnect the A BS sensor,
separate the tie rod end from the spindle
and disconnect the sway bar link.
Perfect.
At this point, we can carefully lower the floor jack and remove that front screen.
You'll notice we also added this safety chain as a precaution to help keep the spring from jumping out of place.
Now, before we swap struts, we need to transfer this upper mound here from the stocker to our new one
and to do that, we just remove this nut.
Hm.
And the whole thing comes out as an assembly, by the way, this replacement may be black but it too is an Ed bro like the rear shocks.
You know, besides lowering your car, I discovered you had another benefit of these springs. They go up in there a whole lot easier than the old ones. Well, great. I hope this truck goes in easy as well.
We're gonna reverse the disassembly process now and here's how it goes.
We raised the lower control arm with the jack to compress the spring.
Then line up the two lower strut mount bolts and torque them to about 100 and 50 ft pounds.
Reconnect the sway bar link,
then the tie rod end
and now you can reinstall the A BS sensor.
Well, now we need to raise that suspicion just a little bit more, put some tension on the struts and that way we can Twerk the top mount boats to 50 ft pounds
after reinstalling the brake caliper torque the tie rod nut to 35 ft pounds before installing the cotter pin.
Great. I think you've got a real future as a Mustang mechanic. Uh Just wait till you get my bill.
We'll top off this upgrade with some cool wheels and tires, then bolt on some protection for our pony and take her for a ride right after this
next no more stolen ponies. In fact, we'll show you how to wire up protection for your rod right after the break.
Welcome back to the shop and the suspension upgrade on Joe's 96 Mustang GT
to complete our handling package. We're also gonna upgrade the wheels and tires for rubber
using a brand new design from Yokohama. The A Vses 100.
Their tread design includes these two center channels to help force water out
and,
and hydroplaning. In fact, this tire carries a aa traction rating. The highest you can get.
They're available in 14 to 18 inch sizes with three different speed ratings. In fact, we pop for these 18 inches with the W speed rating. Now we're using 245 forties up front to 7530 fives out back.
Well, massive meat you got there. Chuck. Nice of you to notice.
Uh Well, we hope you notice we got some pretty radical rims with our new rubber too. Now, these are GTX polished billet wheels from Budnick 18 by eights up front, 18 by nines out back with a 4.5 inch back space all the way around.
Now they feature forged billet centers, open lugs, of course. And we got ours with this new fat lip profile for even better looks,
man.
I can't wait to see if this thing handles as good as it looks. Now, let's take it for a ride.
Oh, no way. This pony ain't hitting the pavement until we make it safe from unwanted guest. Now, as I told you earlier, the last Mustang was a victim of horse rustlers and taught me two things. One have good insurance, which I did
two have a good alarm system, which I didn't until now. But we're gonna show you how easy it is to install an affordable system. For under 50 bucks on your rod.
The system we chose is this first defense alarm from design tech.
Of course, they make several different models and we chose the base one that goes for under 50 bucks
and installs in less than an hour. Now, for your money, you're gonna get a three button transmitter, this siren module and of course enough wiring to complete the job.
Now, the first order of business is to find a suitable location under the hood here to mount this siren module.
You want to mount it as far forward as possible and make sure it's on a structural member,
secure this ground wire and the bracket with a self tapping screw that's included in the kit,
then connect the red wire to the positive side of the battery.
If your engine has an electric fan that keeps running after the engines shut off, well, connect this blue wire to it,
it'll disable the alarm until the fan quits running.
Use this self tapping connector to attach the yellow wire to either the car's headlights or parking lights.
After slipping the connector into place, use some pliers to press the metal blade into the wires
and close the plastic cover until it clicks.
Well, the last thing is the antenna
mounted in front of the grill, but away from metal, making sure this end is exposed. Now, you can zip tie it to the grill, but
like ours will tuck right in here. Under the facia,
using this transmitter, you can set the alarm to eight levels of sensitivity from heavy
to light.
It's also triggered by voltage draw. So somebody opens the car door, the dome light comes on and
man, that's one heck of a cricket you've got under the hood there.
I'm impressed. Now, can we go for a ride? Well, sure. Right after the break that is stay tuned, we'll be right back.
What's hot from the high performance aftermarket? Chuck and I take a look after we take the new project, Pony to the driving range. Stay tuned.
I
can't believe the way this thing handles now.
Well, not to mention with his lowered stance and those cool wheels and this thing looks like a real show. Pony. Got that right. You know what?
We haven't named this project yet. Oh, I got that covered black mustang. How about the nightmare?
Perfect. You know what? Every time I work on a Ford, I have 10 man, you're cold.
We got something hot for you right now.
Horsepower TV S hot parts is brought to you by jags. One call gets it all. One click. Gets it quick
if you like heavy metal. Well, these elite headers from head metal make some sweet music in your street machine.
Now, they're engineered from heavy duty 14 gauge steel tubing for extra long life with an extra thick, 38 inch mounting flange for a leak proof seal. Now
they come in all the standard links plus shorty designs for more ground clearance. Either way you get Hedman's thermal coating for heat resistance and good looks.
Pricing looks pretty good too. Starting at about 260 bucks.
Here's a new spin on an old classic. The Krager Ss Wheel has been around for well as long as the muscle car and now you can get it in a larger 17 inch diameter that gives you that classic look. And let you take advantage of today's high tech rubber.
They feature a cast center section that's welded to a steel outer rim before the whole deal is doused in a show chrome finish.
Now you can get them in eight and nine inch width
with backspacing and bolt circles for most popular applications. Now with a price starting at about 200 bucks a wheel,
they're bound to be a pretty popular bolt on for your latest ride.
Well, if your ride has the performance blues, we may have the cure for you. Axel's new cool blue air filters flow more air than standard paper and filter more efficiently to boot. Now, the secret is four layers of oil, cotton gauze pleaded in plastic coated steel mesh. Now, these things are reusable.
They come in a variety of shapes and sizes with a lifetime guarantee and we could just about guarantee you like the price starting at about 30 bucks. Well, that's about it for hot parts and today's show Yeah, it sure is. But in coming weeks we'll bring back the project nightmare for more upgrades. And I know that makes you happy.
Well, at any rate, thanks for stopping by the shop today. We'll see you next time.
I hope that alarm's not still on there
and check out these rubber bushings here. These things will compress under high loads and, well, that could mean
nothing
heling
walk
mushes up
your mouth.
Now, here's something else that I really like about these control arms. They use fluted
that
rock, rock, rock rock.
Great. You got a real future Mustang mechanic. Just wait until I get my bill.
Now we'll finish.
Wait until I get my bill.
Yeah. In fact, we're using a 2 45 40 up front here. 2 35 35.
Well, Madison Beach, you got there, Chuck.
Thank you Jones.
No,
I
can't do that.
I bet you want to have fun with it.
Is he still rolling,
man?
I can't wait to see if this thing handles as good as it looks. Let's take it for a ride. Oh, no way, man.
That's
you, Jack. This, it's this time.
Oh, no, man.
Here's a sneak peek at some of what you'll see on horsepower TV. In coming weeks,
we'll find our, a body project car and head to a one of a kind Mopar muscle car junkyard
to find a K member for our new 360.
We're gonna show you an easy way to make your automatic shifter, a solid performer with a shift improver kit.
You'll go trackside and in the pits at the Super Bowl of street car drag racing.
It's the annual World Street Nationals in Orlando, Florida.
Plus we'll even show you how to tune your street machine for better performance and of course more horsepower.
Show Full Transcript
Well, here's an example of taking an old friend to a whole new level. It's called the GB Mustang roster and it starts with a stock chassis and power train, but that's about where the similarity is. That's right now. They strengthen the chassis and add a plethora of performance parts under the hood, then they bolt on one piece, front and rear body sections.
They're engineered to enhance the chassis structural improvements and make this thing handle like it's on rails.
And as you can see,
the styling borrows heavily from the best Mustang designs through the years.
These are kit cars. Mind you, they hand build them to the tune of about 20 a year and well, like the famous hamburger joint, you can have it your way with the engine output to suit your taste and budget.
Well, meanwhile, I just blew my budget on this 96 drop top here. What do you think?
Well, don't worry about that. Joe doesn't change Mustangs as often as he changes his socks.
Now, why don't you tell him what happened to the old Scarlett stallion that we were working on last year. It almost hurts after we improved the looks and performance of our 94 GT. Well, apparently we weren't the only ones that found it attractive. This is what it looked like after it was stolen and stripped. Pretty sad sight. Huh?
Man,
I can't believe someone would actually steal a Ford,
but we got something later in the show that's gonna deter those car thieves. It's a do it yourself alarm system
right now though. We're gonna get to work on the suspension system. Now, we've got a bunch of boltons
that are gonna make this new Mustang
handle
every bit as good as that yellow Thoroughbred right there.
Yeah. Well, even stock Mustangs handled pretty well right from the factory problem is with the convertible though.
You give up some of that chassis stiffness when you give up the roof. Well, we're gonna solve that problem today for my 96 with the Subra connectors we ordered from Edelbrock.
What they do is tie together the front suspension cradle here with the rear suspension trailing arm outs
and they do it with heavy wall, one and 58 diameter tubing
that's uh contoured to fit the floor pan.
That way you don't give up ground clearance or good looks.
Of course, those connectors welded in for a really solid foundation. Then we're gonna build on that foundation with a set of their lower control arms
is shocks. Of course, these I box springs. Now, what that's gonna do is keep our suspension really solid and centered up under the car, plus it's gonna lower our center of gravity to improve handling.
Now, speaking of that, I guess we need to get our hands on some tools here that is after we get the Mustang in the air
to prevent chassis preload, the weight of the vehicle has to be supported on all four wheels with the tires inflated to normal driving pressures.
After disconnecting the battery,
pull the carpet away from the floor pans, foot wells on both sides,
then remove the two rear retaining boats from each of the front seats
underneath. Test fit the Subra connector
and reposition any wiring brake or fuel lines that are near where it connects
with a Subra
connector back in place mark all around its mounting pads
and clean the area
it'll be welded.
Now we're gonna go ahead and weld all these factory floor pan plates
that are gonna be covered by the Subra connector. Now that's gonna help keep the factory spot welds from breaking. It's also gonna strengthen the floor pan substantially.
Now, we can loosely attach the
Subra pad
to the rear spring perch area using the hardware that's supplied in the kit.
Now we're gonna install the seat reinforcement bracket using the factory nut plates right here on the floor pan
packwell, the connector to the seat reinforcement bracket.
Now we can go ahead and tighten up the seat reinforcement bracket and that'll draw this whole connector tube right up into place.
Then we can check our pad position. And well, if we like what we see, we can go ahead and weld this Subra
connector back here and up front.
The last thing to weld up is this little brace here that fits inside the transmission cross member and welds to the tube.
Then you can paint the wells to keep them from rusting reinstall the carpet and both the backs of the seats back down.
And while Chuck does that on both sides, of course, you and I will take a little break and we'll be right back
coming up, we'll spring into action with more suspension upgrades. Some rather shocking and we'll show you how to take control of your ride with new rear control arms. Stay tuned.
Welcome back to the shop where we've just finished installing a set of Edelbrock Subra connectors on Joe's latest project, Pony.
Of course, those Subra connectors would work a whole lot better if the rest of the suspension is up to the task. And that's why for the second part of our build up, we're gonna go ahead and install a new set of shocks, springs and control arms. And the first step is to get this Mustang up on a set of jack stands
that way we can easily get to the wheels and suspension pieces and do this job right.
All right.
Now the wheels out of the way we can get started on the rear suspension and, oh, remember, work on one side of the car at a time. So you keep the rear end properly located.
Now, the first parts to go
are these stock shocks.
Once the rear shocks are out of the way, remove the rear sway bar
to support the rear of the lower control arms for the floor jack and remove the rear control arm bolt,
then lower the floor jack to take the tension off the springs.
And with that spring out of the way,
we can remove this front bolt
and
the control arm itself. Now, let me show you something.
As you can see. Our Edelbrock replacements are engineered from rectangular steel tubing
with 120,000 small thickness. These stalkers on the other hand are open at the bottom
and they're stamped from thinner gauge steel. Oh, and these bushings here, well, they'll compress under high loads and well, that can make for mushy handling and, uh, even wheel hop. Well, we don't want any of that.
Here's something that I really like about these control arms though.
They use Grez
fluted urethane bushings on each end.
What that's gonna do is really help keep the suspension centered up under the car and you check out these mounts here. Now, those are going to allow us to retain the use of the stock sway bar.
Of course, we're using I box springs and they're progressively wound. What that means is for the most part, we're gonna get a nice comfortable ride. But when we get aggressive with our driving, the spring rate goes up and of course, that's gonna improve handling.
These things are also gonna lower the ride height of the mustang about an inch and a half, which is gonna give us a great stance, improved aerodynamics and a lower center of gravity. Well, let's say we uh lower our centers of gravity and get our butts busy over here.
Ok. Start by installing the front control arm bolt,
then support the rear of the control arm with the jack while you position the spring,
then raise the jack to compress it.
Now you can install and tighten the rear control arm bolt.
You know, I had a set of these shocks on my last Mustang
while it lasted
and I really like the way it made it right and handle. And what makes it possible is their inertia active design or IAS what it is is a variable rate valve that adjust instantly and automatically all kinds of driving and road conditions.
Now, these shocks have a high pressure gas design and well, that helps eliminate oil foaming and also helps dissipate heat. Of course, this shield is here to keep debris away from the shaft and keep our seals from getting damaged. Uh You know, I'm kind of shocked you don't have those things bolted up. Can I give you hands,
man?
Hey, great job on that rear sway bar.
Well, that takes care of the rear suspension. Now, we can turn our attention to the front. You know, even though the mustang is supported by jack sands, we still need this floor jack.
We're gonna put it right under this front control arm and take some of that tension off the front strut
inside the engine compartment, remove three upper mount retaining nuts,
then remove the caliper, but don't let it hang by the hose. A piece of wire helps keep it supported,
remove the two lower bolts that attach the strut to the spindle
and remove the strut.
Next, you have to disconnect the A BS sensor,
separate the tie rod end from the spindle
and disconnect the sway bar link.
Perfect.
At this point, we can carefully lower the floor jack and remove that front screen.
You'll notice we also added this safety chain as a precaution to help keep the spring from jumping out of place.
Now, before we swap struts, we need to transfer this upper mound here from the stocker to our new one
and to do that, we just remove this nut.
Hm.
And the whole thing comes out as an assembly, by the way, this replacement may be black but it too is an Ed bro like the rear shocks.
You know, besides lowering your car, I discovered you had another benefit of these springs. They go up in there a whole lot easier than the old ones. Well, great. I hope this truck goes in easy as well.
We're gonna reverse the disassembly process now and here's how it goes.
We raised the lower control arm with the jack to compress the spring.
Then line up the two lower strut mount bolts and torque them to about 100 and 50 ft pounds.
Reconnect the sway bar link,
then the tie rod end
and now you can reinstall the A BS sensor.
Well, now we need to raise that suspicion just a little bit more, put some tension on the struts and that way we can Twerk the top mount boats to 50 ft pounds
after reinstalling the brake caliper torque the tie rod nut to 35 ft pounds before installing the cotter pin.
Great. I think you've got a real future as a Mustang mechanic. Uh Just wait till you get my bill.
We'll top off this upgrade with some cool wheels and tires, then bolt on some protection for our pony and take her for a ride right after this
next no more stolen ponies. In fact, we'll show you how to wire up protection for your rod right after the break.
Welcome back to the shop and the suspension upgrade on Joe's 96 Mustang GT
to complete our handling package. We're also gonna upgrade the wheels and tires for rubber
using a brand new design from Yokohama. The A Vses 100.
Their tread design includes these two center channels to help force water out
and,
and hydroplaning. In fact, this tire carries a aa traction rating. The highest you can get.
They're available in 14 to 18 inch sizes with three different speed ratings. In fact, we pop for these 18 inches with the W speed rating. Now we're using 245 forties up front to 7530 fives out back.
Well, massive meat you got there. Chuck. Nice of you to notice.
Uh Well, we hope you notice we got some pretty radical rims with our new rubber too. Now, these are GTX polished billet wheels from Budnick 18 by eights up front, 18 by nines out back with a 4.5 inch back space all the way around.
Now they feature forged billet centers, open lugs, of course. And we got ours with this new fat lip profile for even better looks,
man.
I can't wait to see if this thing handles as good as it looks. Now, let's take it for a ride.
Oh, no way. This pony ain't hitting the pavement until we make it safe from unwanted guest. Now, as I told you earlier, the last Mustang was a victim of horse rustlers and taught me two things. One have good insurance, which I did
two have a good alarm system, which I didn't until now. But we're gonna show you how easy it is to install an affordable system. For under 50 bucks on your rod.
The system we chose is this first defense alarm from design tech.
Of course, they make several different models and we chose the base one that goes for under 50 bucks
and installs in less than an hour. Now, for your money, you're gonna get a three button transmitter, this siren module and of course enough wiring to complete the job.
Now, the first order of business is to find a suitable location under the hood here to mount this siren module.
You want to mount it as far forward as possible and make sure it's on a structural member,
secure this ground wire and the bracket with a self tapping screw that's included in the kit,
then connect the red wire to the positive side of the battery.
If your engine has an electric fan that keeps running after the engines shut off, well, connect this blue wire to it,
it'll disable the alarm until the fan quits running.
Use this self tapping connector to attach the yellow wire to either the car's headlights or parking lights.
After slipping the connector into place, use some pliers to press the metal blade into the wires
and close the plastic cover until it clicks.
Well, the last thing is the antenna
mounted in front of the grill, but away from metal, making sure this end is exposed. Now, you can zip tie it to the grill, but
like ours will tuck right in here. Under the facia,
using this transmitter, you can set the alarm to eight levels of sensitivity from heavy
to light.
It's also triggered by voltage draw. So somebody opens the car door, the dome light comes on and
man, that's one heck of a cricket you've got under the hood there.
I'm impressed. Now, can we go for a ride? Well, sure. Right after the break that is stay tuned, we'll be right back.
What's hot from the high performance aftermarket? Chuck and I take a look after we take the new project, Pony to the driving range. Stay tuned.
I
can't believe the way this thing handles now.
Well, not to mention with his lowered stance and those cool wheels and this thing looks like a real show. Pony. Got that right. You know what?
We haven't named this project yet. Oh, I got that covered black mustang. How about the nightmare?
Perfect. You know what? Every time I work on a Ford, I have 10 man, you're cold.
We got something hot for you right now.
Horsepower TV S hot parts is brought to you by jags. One call gets it all. One click. Gets it quick
if you like heavy metal. Well, these elite headers from head metal make some sweet music in your street machine.
Now, they're engineered from heavy duty 14 gauge steel tubing for extra long life with an extra thick, 38 inch mounting flange for a leak proof seal. Now
they come in all the standard links plus shorty designs for more ground clearance. Either way you get Hedman's thermal coating for heat resistance and good looks.
Pricing looks pretty good too. Starting at about 260 bucks.
Here's a new spin on an old classic. The Krager Ss Wheel has been around for well as long as the muscle car and now you can get it in a larger 17 inch diameter that gives you that classic look. And let you take advantage of today's high tech rubber.
They feature a cast center section that's welded to a steel outer rim before the whole deal is doused in a show chrome finish.
Now you can get them in eight and nine inch width
with backspacing and bolt circles for most popular applications. Now with a price starting at about 200 bucks a wheel,
they're bound to be a pretty popular bolt on for your latest ride.
Well, if your ride has the performance blues, we may have the cure for you. Axel's new cool blue air filters flow more air than standard paper and filter more efficiently to boot. Now, the secret is four layers of oil, cotton gauze pleaded in plastic coated steel mesh. Now, these things are reusable.
They come in a variety of shapes and sizes with a lifetime guarantee and we could just about guarantee you like the price starting at about 30 bucks. Well, that's about it for hot parts and today's show Yeah, it sure is. But in coming weeks we'll bring back the project nightmare for more upgrades. And I know that makes you happy.
Well, at any rate, thanks for stopping by the shop today. We'll see you next time.
I hope that alarm's not still on there
and check out these rubber bushings here. These things will compress under high loads and, well, that could mean
nothing
heling
walk
mushes up
your mouth.
Now, here's something else that I really like about these control arms. They use fluted
that
rock, rock, rock rock.
Great. You got a real future Mustang mechanic. Just wait until I get my bill.
Now we'll finish.
Wait until I get my bill.
Yeah. In fact, we're using a 2 45 40 up front here. 2 35 35.
Well, Madison Beach, you got there, Chuck.
Thank you Jones.
No,
I
can't do that.
I bet you want to have fun with it.
Is he still rolling,
man?
I can't wait to see if this thing handles as good as it looks. Let's take it for a ride. Oh, no way, man.
That's
you, Jack. This, it's this time.
Oh, no, man.
Here's a sneak peek at some of what you'll see on horsepower TV. In coming weeks,
we'll find our, a body project car and head to a one of a kind Mopar muscle car junkyard
to find a K member for our new 360.
We're gonna show you an easy way to make your automatic shifter, a solid performer with a shift improver kit.
You'll go trackside and in the pits at the Super Bowl of street car drag racing.
It's the annual World Street Nationals in Orlando, Florida.
Plus we'll even show you how to tune your street machine for better performance and of course more horsepower.