HorsePower Builds
Want more content like this?
Join the PowerNation Email NewsletterVideo Transcript
We've got the power, we just need the planet. We'll show you how, so stick with us
today on horsepower TV.
It's a tale of two traction bar upgrades. First leaf springs on this Camaro and coil overs for a classic Chevelle.
It's a Kentucky Bluegrass street car shootout in our race of the week
and choosing the right rims and rubber in our quick tech
segment.
So hang on for horsepower TV.
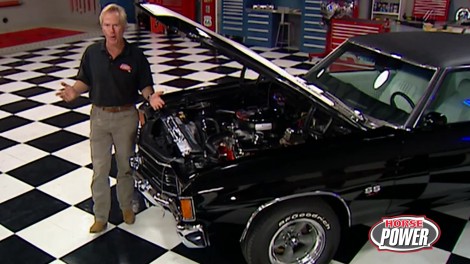
Hi, welcome to the horsepower shop.
You know, I guess all of us love to focus our attention under the hood. That way we can brag to our buddies about how much horsepower we're making.
Mr
Bell here has been punched out to 460 cubic inches.
It makes over 500 horsepower,
but you know, something, all that power won't do you any good unless you can plant it to the pavement. That's right. Now, today, we're gonna pay a little bit of attention to the suspension. We're gonna show you a couple of boltons
that'll not only help you plant your power, but they're also gonna help you lower your et
when it comes to traction devices, there are basically two types of suspensions, the kind that use leaf springs and the kind that use coils. Now, they both work differently and require different hardware to get the job done. Now, today we're gonna bolt up both of them
first, the leaf spring
you might recall a few months ago, we added a 440 horse Z Zour engine to Chuck's Camaro
and adding all that horsepower just made the traction problems worse.
The Z 28 has a stock leaf spring suspension that tends to wrap up during acceleration
that can cause wheel hop, not only is it hard to get down the track, but it's hard on parts too.
U joints, clutch and transmission to name a few.
Most traction devices do a couple of things to help you get off the line. First of all, they help reduce unwanted suspension deflection or movement. And second of all, they help with the weight transfer to the rear wheels where it'll do the most good. Now, not surprisingly, the sophistication of the setup also helps determine how efficiently that traction device is gonna work.
Most basic of all is this simple bolt on slapper bar here, it's inexpensive,
easy to install and well, it has no adjustments. Consequently, it's also the least effective of the bunch and should probably only be used on mild street machines. Good point. Now, the next step up though is what's commonly referred to as the J Boat traction bar
attaches to the rear end with these J boats that allow you to tune the bar by adjusting the snub air gap. By the way, it's engineered to position the snub directly beneath the front spring eye for improved weight transfer and to prevent spring wrap up. By the way, this type of traction bar was used in some of the earliest Pro Stockers.
It will harness up to 450 horsepower.
Now, the one that we'll be installing on the Camaro represents the latest in leaf spring technology. It's called a slide link from competition engineering.
Now, the rear mount replaces the stock shock plate while the front mount bolts right up to that front spring eye bracket giving us two solid points for torque transfer. Of course, the free play and preload adjustments are made right here on these two adjusting screws and I'll tell you what we're gonna get going by supporting the rear end and removing those leaf springs
for
show
with the springs removed on both the front spring hangers.
Well, now we're ready to press out the stock rubber bushing so we can replace them with these aluminum ones that came in the kit. Now, of course, unless you have a press at home that makes a trip to the machine shop. Come on, I'll drive. Oh
man, I got a ride in your Mustang.
Ok. Now we're ready to reassemble our front spring hangar.
We get started by sliding on our new spring eye bracket,
making sure that the clamp in here points away from the spring eye,
then we can install the sleeve
and the spring clamp over the leaf spring,
the air is tight.
Well, next, the original spring hanger can go back on
like that followed by the through bolt. Now, once you finish on the other side,
you'll be ready to reinstall the leaf springs
with the rear end resting back on the springs. We can go ahead and bolt up the new rear mount.
Now it's held in place with some new U bolts.
And once we get everything cinched down, we can torque those U bolts to 75 ft pounds.
We've preassembled the sliding link to show you how everything goes together. Now, here are a couple of tips for you, make sure that you use an I CS on all your threads and that the rod ends, thread a minimum of one inch into the body here. Now, back here,
the adjusting screw, this part right here needs to be threaded into the body at least two inches.
01 final thing,
we're gonna put some wheel bearing grease right here on the sliding tube
to make sure nothing binds up.
Well, you got 75 there.
All right. Ok.
Now this link assembly boats up to the spring eye bracket. First,
there's the bolt. Okey doke,
adjust the length of the link until the hose line up,
slide the bolt through
and torque it to 75 ft pounds.
Rotate the tube until there's a half inch gap between the urethane shock pad and the stop,
then tighten the front five eights bolt till the nut just barely touches the bracket.
Then give it another half turn.
Be careful not to over, tighten it or you'll bind up your suspension.
Now, check all your bolts one last time, make sure they're all tight and that you have a half inch gap at
the shock pad. Then we go ahead and lower the car down
with the car's weight back on the wheels, that half inch gap disappears. But you should still be able to rotate the rear bar by hand.
So if you can't turn it, what does that mean? You got preload? Oh, you are so right. Snub Beth. Now you only need to shorten that link until it goes away. Well, we've got to go away too, but just for a minute now we'll be back with a coil spring. No,
hop, hop up after this. Keep it planted
at my age. It's more rushed than anything I do.
If it goes straight, it's fun and if it doesn't go straight, it's exciting.
Hang
on for an exciting brand of drag racing on a budget when we take you to the track later on horsepower TV.
Also chuck shows you some winning ways to plant the power on this weekend's quick.
Hey, welcome back to the shop and the second phase of our traction bar tech
in case you just joined us, we just bolted it up. A competition engineering slider link to the leaf springs of Chuck's Camaro.
Well, now it's a 72 Chevelle turn.
That's right. Now. Earlier, we gave you a quick look at this 500 horsepower 4, 60 cubic inch monster.
Now on the outside, it's basically stock, except for those five spoke Americans underneath, there's an M 22 4 speed that spins a set of 355 gears and a 12 volt rear end that's hung from a pair of coil springs. Now it's a killer combination, but it really shocks the drive train every time it launches
the suspension on that Chevelle is basically a non adjustable four link, which is pretty efficient, but we can help it with this quill spring traction bar from competition engineering.
Here's how it works.
The rear of the bar attaches to the car's controlling our mount,
this radius rod here attaches to a rear end bracket. Now, the snub contacts the frame and the radius rod controls the snub to frame clearance. Well, the idea again is to reduce deflection and improve weight transfer.
Well, I've got the car in the air and supported by jack stands right here on the frame. Plus I'm also supporting the rear end with our floor jack. Now we're gonna get started by removing this rear control arm bolt first.
The kit comes with both left and right traction bars and each one is angled differently
to make sure the snub will come in contact with the frame. Now, before you bolt them up, you wanna test for them first to determine which one goes where
after removing the car's rubber snub, you can attach the upper radius rod to the outside of the housing bracket.
Make sure there's at least one inch of threat engagement on the rod ends,
lower the jack stands, but keep the car supported on the floor jack at the rear end to simulate ride height,
then you can raise the bar so you can insert the rod end into the bracket.
Finally
adjust the radius rod to give an eight inch air gap between the snub
and the frame.
Well, hey man, you've already done all the work. Well, what's so surprising about that? But you know what, I still need to get the wheels and tires on and get it back on the ground. Hey, while you're doing that, I wanna show you something else that'll help you keep your rear end planted. Now, that's something you're an expert on
swapping your shocks is a way to improve traction even further, especially when they're tunable like these. We got from how
these are externally adjustable with 12 settings for easy tuning. Now, out back, you want to tighten compression and rebound for a stiffer ride and to keep the suspension under control
up front. However, you want to loosen the setting on the extension
to let the front end rise and to transfer weight.
By the way, the new shocks boat right up in place of the stalkers.
Well, that ought to take care of our wheel hop problems and help us get down the track a little bit quicker. Now, the traction bars are a pretty quick bolt on to the Camaro over there took us about four hours to complete in the Chevelle. About two. Yeah, the price ain't too bad either.
The slide, a link
for the Camaro set us back. About 300 bucks paid about 175 for the adjustable T bars and about 140 a piece for the shocks. Now, it should come as no shock to you that we need to take a little bit of a break right now, but there's a whole lot more yet to come, you bet. So stay with us
next. When the Christmas tree lights turn green, you can bet on a red hot time in Kentucky.
It's the NC A bluegrass shootout and we ain't just horsing around
TV. S race of the week, trackside reports from America's best grass roots drag racing events.
It's a national streetcar bluegrass shootout here in the real heart of horse racing, Kentucky. So get your bluegrass on, get your hay stacked up and get ready to go.
These NSC A races are an eye full for Spectators and the ultimate thrill for street car racing rivals.
The coolest thing about this series is the fact there's a class for every contender with a need for speed. There's a good mix, big blocks, uh, small blocks, Turbo V Sixes,
the whole Gamba
on, uh, technology, uh, runs from carburetors all the way to laptops and fuel injection.
If you're running in the top class Pro Street, this is the competitor you want to copy
winning runs in the high sixes make him and his Camaro, a virtual shoe in, for another championship.
Yeah, I, I'd like to have the title, you know, I guess nothing sewed up yet, but I'm gonna try to sew it up here this weekend.
Let's say you don't quite have the funds for these big 17 inch racing slicks or a big trailer tricked out with all the tools, technology and crew that you gotta have to go pro street.
Now, let's say you don't quite have the budget for one of these big monster Muy
Motors. Well, in that case, limited street, it could be. Your kind of class
street is basically for small block cars that weigh 8.5 pounds per cubic inch of engine
modifications are limited, which is great for limited budgets.
It was a class that attracted two former Georgia rivals, the driver of this Nova Ss Kevin Scott
and his crew chief and Pal Danny.
I had won a championship last year and we just felt like together as a team, we could, uh,
uh, do a better job together. It's a symmetrical Port Buick kid is small block.
It's old Comp eliminator style motor. The first couple passes was unique. Watching the car go down the track and me still standing there.
But uh I've come, I mean,
I like the niche of working on one. I mean, I don't mind driving. I drove for years
and, uh, but I like it's just like two heads are better than one. Let him sit in the car. He can tell me what the car is doing and I can go back and read everything else
while Fords and Chevys dominate the class. Virginia veterinarian. Alan Witter makes his bid for a championship in this 87 Turbo V6 buick. The turbo charger is the most efficient way to make horsepower.
The hard part is when you're running races is handicapping them. So the class is a fair and that means Allen has to carry a lot more weight than Nis
car,
but he still managed to make a strong bid for the title.
Meanwhile, qualifying in all classes was well underway Saturday when suddenly a Nitrous fire broke out in the Chevelle driven by Nostalgia Pro street leader John Cervantes.
Thanks God upstairs. I mean, he's, he's with us. So we'll, we'll, we'll get it together and,
and uh hopefully we'll be here tomorrow, you know, on race day,
here on Sunday eliminations day after thrashing most of the night. The
Chavannes
crew hopes to recover from the Nitrous fire fire up the Chevelle and well, go on to win.
Looks pretty good. But now the moment of truth,
yeah.
Incredible.
What's more John made it through round one of eliminations with a win before losing here in round two.
But hey, hey, there's a reason, you know, we'll go home, we'll fix it up and come back again and get it, you know,
can't give off that easy. Meanwhile, it was Buick versus Nova. As Winter went over Scott at limited streets round two with an 875 to an 884. It was a good race so it was close. We didn't get him to 1000 ft. It was eve until then and then Turbo car. He used to pull over
on the big end.
So good race
in the finals though. It was Mustang Mike Modes
from Brooklyn who took the win light and the class lead with this 865 run safe to say it'll be a happy trip back to Brooklyn for the Brooklyn Warriors. Right?
Our next meet is in Michigan. So
I guess everybody would be gunning for us. A freak red light from UC paved the way for Ross Scott to win Pro Street for the 708 at 199 miles an hour. This weekend, we just decided we'll run a good safe race, put a safe tune up in it and be consistent
and that happened to win consistency wins.
It sure does. And even at limited street, there are consistent challenges and thrills whenever the street fighters of NSC A gather to do battle
next. Looking for the ultimate power planner. Well, stay tuned for Chuck and this week's quick tech right after this.
Mhm
Welcome back to the shop. No matter how much horsepower you're making. The last link in transmitting that power is the rubber that meets the road. So today we're gonna take a look at some of your options when it comes to choosing the right rubber for your street machine.
Now, an all out drag slick is probably the ultimate power planter,
but they don't have the tread or the side wall to be used legally on the street. Now, your first option would be a tire like this Mickey Thompson et Street, which isn't a whole lot more than a thinly disguised drag slick. It does however, have a rudimentary tread pattern
and enough side wall to get that dot Approval. You can run them on the street but you better find a place to park them as soon as the rain starts falling.
Now, an even more treatable choice would be their sportsman pro.
It has a full tread
and even stiffer side wall and that all important dot Approval.
The tread is made from a soft and sticky compound for maximum traction, but I gotta tell you it shortens the life expectancy considerably.
Switching brands Hoosier has their quick time. That's a good compromise between traction
and treadwear. Now, it's got a full face tread and a compound that's just a little bit harder. Plus a side wall that'll wrinkle when you run it under low pressure at the track. Now, when you run them on the street, make sure that you inflate them though to the manufacturer's recommended. Specs. Now, Hoosier also has this new Pro Street radio
that's designed to
fill your wheel wells, give you a radial ride and let you run in the rain.
This tread design provides an easy exit path for water to give you stability and traction.
And as you might expect, they also get the nod of approval from dot
Of course, all these tires come in sizes ranging from huge to humongous, but you forgot to tell them the part that wheels play in all this I did, didn't I? So why don't you tell them about it? Ok.
We simply put the lighter the wheel, the less rotating mass and quicker you get off the line. For example, these aluminum warriors here from center line each weigh about 14 pounds less than the steel rims.
That could mean a couple of hundreds off your starting line time, maybe enough to win at the finish line. You bet and don't forget how cool they'll make you look too.
Now, don't go away. We've got some cool hot parts right after this
horsepower TV S hot parts. A close up. Look at the latest in high performance hardware.
First, there's a trick tranny pan for moroso with a billet aluminum pan rail, a deep sump for extra capacity and magnetic drain plugs for easy servicing.
Now, the whole assembly is fully heli arc welded for strength and cool looks.
And hey, you can look for pricing to start at about 100 and 70 bucks.
Now, if you're looking for something on the cutting edge, what about this roto zip spiral saw with the included zip bits, you can now make free hand cuts through plastic, fiberglass wood, even metal and with the optional zip made here it becomes a circular saw cut off tool, even a grinder polisher. So now you can zip through the toughest of projects for about 90 bucks for the basic kit.
Well, here's a new spin on a Americans torque thrust wheel.
The traditional gray spoke is now available in 16 and 17 inch diameter. So you can use high tech rubber and still keep that classic look. Now, the two piece construction is considerably lighter than their cast counterparts. And hey, these things will lighten your wallet a little bit too. Prices start at about 100 and 90 bucks a piece. Ok. Well, we've got a heavyweight horsepower TV show for you next week. Here's a preview.
It made over 400 horsepower on our engine
dyno.
Now we'll get ready to drop the 351 Windsor into our project Pro touring pony
and we'll give you some engine swapping tips along the way.
Our race of the week takes you to Norwalk for an historic I hr a top stock shootout plus a quick tech on the latest in horsepower enhancing laughing gas.
No joke.
And remember, high performance fun is what this show is all about
for information about the products used in today's show and more. Check us out online at horsepower tv.com
Horsepower TV is an RTM production.
Show Full Transcript
today on horsepower TV.
It's a tale of two traction bar upgrades. First leaf springs on this Camaro and coil overs for a classic Chevelle.
It's a Kentucky Bluegrass street car shootout in our race of the week
and choosing the right rims and rubber in our quick tech
segment.
So hang on for horsepower TV.
Hi, welcome to the horsepower shop.
You know, I guess all of us love to focus our attention under the hood. That way we can brag to our buddies about how much horsepower we're making.
Mr
Bell here has been punched out to 460 cubic inches.
It makes over 500 horsepower,
but you know, something, all that power won't do you any good unless you can plant it to the pavement. That's right. Now, today, we're gonna pay a little bit of attention to the suspension. We're gonna show you a couple of boltons
that'll not only help you plant your power, but they're also gonna help you lower your et
when it comes to traction devices, there are basically two types of suspensions, the kind that use leaf springs and the kind that use coils. Now, they both work differently and require different hardware to get the job done. Now, today we're gonna bolt up both of them
first, the leaf spring
you might recall a few months ago, we added a 440 horse Z Zour engine to Chuck's Camaro
and adding all that horsepower just made the traction problems worse.
The Z 28 has a stock leaf spring suspension that tends to wrap up during acceleration
that can cause wheel hop, not only is it hard to get down the track, but it's hard on parts too.
U joints, clutch and transmission to name a few.
Most traction devices do a couple of things to help you get off the line. First of all, they help reduce unwanted suspension deflection or movement. And second of all, they help with the weight transfer to the rear wheels where it'll do the most good. Now, not surprisingly, the sophistication of the setup also helps determine how efficiently that traction device is gonna work.
Most basic of all is this simple bolt on slapper bar here, it's inexpensive,
easy to install and well, it has no adjustments. Consequently, it's also the least effective of the bunch and should probably only be used on mild street machines. Good point. Now, the next step up though is what's commonly referred to as the J Boat traction bar
attaches to the rear end with these J boats that allow you to tune the bar by adjusting the snub air gap. By the way, it's engineered to position the snub directly beneath the front spring eye for improved weight transfer and to prevent spring wrap up. By the way, this type of traction bar was used in some of the earliest Pro Stockers.
It will harness up to 450 horsepower.
Now, the one that we'll be installing on the Camaro represents the latest in leaf spring technology. It's called a slide link from competition engineering.
Now, the rear mount replaces the stock shock plate while the front mount bolts right up to that front spring eye bracket giving us two solid points for torque transfer. Of course, the free play and preload adjustments are made right here on these two adjusting screws and I'll tell you what we're gonna get going by supporting the rear end and removing those leaf springs
for
show
with the springs removed on both the front spring hangers.
Well, now we're ready to press out the stock rubber bushing so we can replace them with these aluminum ones that came in the kit. Now, of course, unless you have a press at home that makes a trip to the machine shop. Come on, I'll drive. Oh
man, I got a ride in your Mustang.
Ok. Now we're ready to reassemble our front spring hangar.
We get started by sliding on our new spring eye bracket,
making sure that the clamp in here points away from the spring eye,
then we can install the sleeve
and the spring clamp over the leaf spring,
the air is tight.
Well, next, the original spring hanger can go back on
like that followed by the through bolt. Now, once you finish on the other side,
you'll be ready to reinstall the leaf springs
with the rear end resting back on the springs. We can go ahead and bolt up the new rear mount.
Now it's held in place with some new U bolts.
And once we get everything cinched down, we can torque those U bolts to 75 ft pounds.
We've preassembled the sliding link to show you how everything goes together. Now, here are a couple of tips for you, make sure that you use an I CS on all your threads and that the rod ends, thread a minimum of one inch into the body here. Now, back here,
the adjusting screw, this part right here needs to be threaded into the body at least two inches.
01 final thing,
we're gonna put some wheel bearing grease right here on the sliding tube
to make sure nothing binds up.
Well, you got 75 there.
All right. Ok.
Now this link assembly boats up to the spring eye bracket. First,
there's the bolt. Okey doke,
adjust the length of the link until the hose line up,
slide the bolt through
and torque it to 75 ft pounds.
Rotate the tube until there's a half inch gap between the urethane shock pad and the stop,
then tighten the front five eights bolt till the nut just barely touches the bracket.
Then give it another half turn.
Be careful not to over, tighten it or you'll bind up your suspension.
Now, check all your bolts one last time, make sure they're all tight and that you have a half inch gap at
the shock pad. Then we go ahead and lower the car down
with the car's weight back on the wheels, that half inch gap disappears. But you should still be able to rotate the rear bar by hand.
So if you can't turn it, what does that mean? You got preload? Oh, you are so right. Snub Beth. Now you only need to shorten that link until it goes away. Well, we've got to go away too, but just for a minute now we'll be back with a coil spring. No,
hop, hop up after this. Keep it planted
at my age. It's more rushed than anything I do.
If it goes straight, it's fun and if it doesn't go straight, it's exciting.
Hang
on for an exciting brand of drag racing on a budget when we take you to the track later on horsepower TV.
Also chuck shows you some winning ways to plant the power on this weekend's quick.
Hey, welcome back to the shop and the second phase of our traction bar tech
in case you just joined us, we just bolted it up. A competition engineering slider link to the leaf springs of Chuck's Camaro.
Well, now it's a 72 Chevelle turn.
That's right. Now. Earlier, we gave you a quick look at this 500 horsepower 4, 60 cubic inch monster.
Now on the outside, it's basically stock, except for those five spoke Americans underneath, there's an M 22 4 speed that spins a set of 355 gears and a 12 volt rear end that's hung from a pair of coil springs. Now it's a killer combination, but it really shocks the drive train every time it launches
the suspension on that Chevelle is basically a non adjustable four link, which is pretty efficient, but we can help it with this quill spring traction bar from competition engineering.
Here's how it works.
The rear of the bar attaches to the car's controlling our mount,
this radius rod here attaches to a rear end bracket. Now, the snub contacts the frame and the radius rod controls the snub to frame clearance. Well, the idea again is to reduce deflection and improve weight transfer.
Well, I've got the car in the air and supported by jack stands right here on the frame. Plus I'm also supporting the rear end with our floor jack. Now we're gonna get started by removing this rear control arm bolt first.
The kit comes with both left and right traction bars and each one is angled differently
to make sure the snub will come in contact with the frame. Now, before you bolt them up, you wanna test for them first to determine which one goes where
after removing the car's rubber snub, you can attach the upper radius rod to the outside of the housing bracket.
Make sure there's at least one inch of threat engagement on the rod ends,
lower the jack stands, but keep the car supported on the floor jack at the rear end to simulate ride height,
then you can raise the bar so you can insert the rod end into the bracket.
Finally
adjust the radius rod to give an eight inch air gap between the snub
and the frame.
Well, hey man, you've already done all the work. Well, what's so surprising about that? But you know what, I still need to get the wheels and tires on and get it back on the ground. Hey, while you're doing that, I wanna show you something else that'll help you keep your rear end planted. Now, that's something you're an expert on
swapping your shocks is a way to improve traction even further, especially when they're tunable like these. We got from how
these are externally adjustable with 12 settings for easy tuning. Now, out back, you want to tighten compression and rebound for a stiffer ride and to keep the suspension under control
up front. However, you want to loosen the setting on the extension
to let the front end rise and to transfer weight.
By the way, the new shocks boat right up in place of the stalkers.
Well, that ought to take care of our wheel hop problems and help us get down the track a little bit quicker. Now, the traction bars are a pretty quick bolt on to the Camaro over there took us about four hours to complete in the Chevelle. About two. Yeah, the price ain't too bad either.
The slide, a link
for the Camaro set us back. About 300 bucks paid about 175 for the adjustable T bars and about 140 a piece for the shocks. Now, it should come as no shock to you that we need to take a little bit of a break right now, but there's a whole lot more yet to come, you bet. So stay with us
next. When the Christmas tree lights turn green, you can bet on a red hot time in Kentucky.
It's the NC A bluegrass shootout and we ain't just horsing around
TV. S race of the week, trackside reports from America's best grass roots drag racing events.
It's a national streetcar bluegrass shootout here in the real heart of horse racing, Kentucky. So get your bluegrass on, get your hay stacked up and get ready to go.
These NSC A races are an eye full for Spectators and the ultimate thrill for street car racing rivals.
The coolest thing about this series is the fact there's a class for every contender with a need for speed. There's a good mix, big blocks, uh, small blocks, Turbo V Sixes,
the whole Gamba
on, uh, technology, uh, runs from carburetors all the way to laptops and fuel injection.
If you're running in the top class Pro Street, this is the competitor you want to copy
winning runs in the high sixes make him and his Camaro, a virtual shoe in, for another championship.
Yeah, I, I'd like to have the title, you know, I guess nothing sewed up yet, but I'm gonna try to sew it up here this weekend.
Let's say you don't quite have the funds for these big 17 inch racing slicks or a big trailer tricked out with all the tools, technology and crew that you gotta have to go pro street.
Now, let's say you don't quite have the budget for one of these big monster Muy
Motors. Well, in that case, limited street, it could be. Your kind of class
street is basically for small block cars that weigh 8.5 pounds per cubic inch of engine
modifications are limited, which is great for limited budgets.
It was a class that attracted two former Georgia rivals, the driver of this Nova Ss Kevin Scott
and his crew chief and Pal Danny.
I had won a championship last year and we just felt like together as a team, we could, uh,
uh, do a better job together. It's a symmetrical Port Buick kid is small block.
It's old Comp eliminator style motor. The first couple passes was unique. Watching the car go down the track and me still standing there.
But uh I've come, I mean,
I like the niche of working on one. I mean, I don't mind driving. I drove for years
and, uh, but I like it's just like two heads are better than one. Let him sit in the car. He can tell me what the car is doing and I can go back and read everything else
while Fords and Chevys dominate the class. Virginia veterinarian. Alan Witter makes his bid for a championship in this 87 Turbo V6 buick. The turbo charger is the most efficient way to make horsepower.
The hard part is when you're running races is handicapping them. So the class is a fair and that means Allen has to carry a lot more weight than Nis
car,
but he still managed to make a strong bid for the title.
Meanwhile, qualifying in all classes was well underway Saturday when suddenly a Nitrous fire broke out in the Chevelle driven by Nostalgia Pro street leader John Cervantes.
Thanks God upstairs. I mean, he's, he's with us. So we'll, we'll, we'll get it together and,
and uh hopefully we'll be here tomorrow, you know, on race day,
here on Sunday eliminations day after thrashing most of the night. The
Chavannes
crew hopes to recover from the Nitrous fire fire up the Chevelle and well, go on to win.
Looks pretty good. But now the moment of truth,
yeah.
Incredible.
What's more John made it through round one of eliminations with a win before losing here in round two.
But hey, hey, there's a reason, you know, we'll go home, we'll fix it up and come back again and get it, you know,
can't give off that easy. Meanwhile, it was Buick versus Nova. As Winter went over Scott at limited streets round two with an 875 to an 884. It was a good race so it was close. We didn't get him to 1000 ft. It was eve until then and then Turbo car. He used to pull over
on the big end.
So good race
in the finals though. It was Mustang Mike Modes
from Brooklyn who took the win light and the class lead with this 865 run safe to say it'll be a happy trip back to Brooklyn for the Brooklyn Warriors. Right?
Our next meet is in Michigan. So
I guess everybody would be gunning for us. A freak red light from UC paved the way for Ross Scott to win Pro Street for the 708 at 199 miles an hour. This weekend, we just decided we'll run a good safe race, put a safe tune up in it and be consistent
and that happened to win consistency wins.
It sure does. And even at limited street, there are consistent challenges and thrills whenever the street fighters of NSC A gather to do battle
next. Looking for the ultimate power planner. Well, stay tuned for Chuck and this week's quick tech right after this.
Mhm
Welcome back to the shop. No matter how much horsepower you're making. The last link in transmitting that power is the rubber that meets the road. So today we're gonna take a look at some of your options when it comes to choosing the right rubber for your street machine.
Now, an all out drag slick is probably the ultimate power planter,
but they don't have the tread or the side wall to be used legally on the street. Now, your first option would be a tire like this Mickey Thompson et Street, which isn't a whole lot more than a thinly disguised drag slick. It does however, have a rudimentary tread pattern
and enough side wall to get that dot Approval. You can run them on the street but you better find a place to park them as soon as the rain starts falling.
Now, an even more treatable choice would be their sportsman pro.
It has a full tread
and even stiffer side wall and that all important dot Approval.
The tread is made from a soft and sticky compound for maximum traction, but I gotta tell you it shortens the life expectancy considerably.
Switching brands Hoosier has their quick time. That's a good compromise between traction
and treadwear. Now, it's got a full face tread and a compound that's just a little bit harder. Plus a side wall that'll wrinkle when you run it under low pressure at the track. Now, when you run them on the street, make sure that you inflate them though to the manufacturer's recommended. Specs. Now, Hoosier also has this new Pro Street radio
that's designed to
fill your wheel wells, give you a radial ride and let you run in the rain.
This tread design provides an easy exit path for water to give you stability and traction.
And as you might expect, they also get the nod of approval from dot
Of course, all these tires come in sizes ranging from huge to humongous, but you forgot to tell them the part that wheels play in all this I did, didn't I? So why don't you tell them about it? Ok.
We simply put the lighter the wheel, the less rotating mass and quicker you get off the line. For example, these aluminum warriors here from center line each weigh about 14 pounds less than the steel rims.
That could mean a couple of hundreds off your starting line time, maybe enough to win at the finish line. You bet and don't forget how cool they'll make you look too.
Now, don't go away. We've got some cool hot parts right after this
horsepower TV S hot parts. A close up. Look at the latest in high performance hardware.
First, there's a trick tranny pan for moroso with a billet aluminum pan rail, a deep sump for extra capacity and magnetic drain plugs for easy servicing.
Now, the whole assembly is fully heli arc welded for strength and cool looks.
And hey, you can look for pricing to start at about 100 and 70 bucks.
Now, if you're looking for something on the cutting edge, what about this roto zip spiral saw with the included zip bits, you can now make free hand cuts through plastic, fiberglass wood, even metal and with the optional zip made here it becomes a circular saw cut off tool, even a grinder polisher. So now you can zip through the toughest of projects for about 90 bucks for the basic kit.
Well, here's a new spin on a Americans torque thrust wheel.
The traditional gray spoke is now available in 16 and 17 inch diameter. So you can use high tech rubber and still keep that classic look. Now, the two piece construction is considerably lighter than their cast counterparts. And hey, these things will lighten your wallet a little bit too. Prices start at about 100 and 90 bucks a piece. Ok. Well, we've got a heavyweight horsepower TV show for you next week. Here's a preview.
It made over 400 horsepower on our engine
dyno.
Now we'll get ready to drop the 351 Windsor into our project Pro touring pony
and we'll give you some engine swapping tips along the way.
Our race of the week takes you to Norwalk for an historic I hr a top stock shootout plus a quick tech on the latest in horsepower enhancing laughing gas.
No joke.
And remember, high performance fun is what this show is all about
for information about the products used in today's show and more. Check us out online at horsepower tv.com
Horsepower TV is an RTM production.