How To Install Plumbing For A 2nd Gen Swap Kit
Mar 1st, 2019
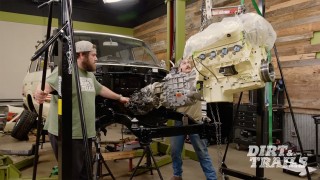
On Truck Tech’s Ram 3500 Diesel project, the 1 ton dually got a bigger, badder turbo setup with more airflow for more horsepower. Thanks to Fleece Performance, LT was able do a 2nd gen swap. What that means is moving the placement of the turbo from the lower rear of the engine to the center using an exhaust manifold designed around second gen Dodge Ram trucks from ’94 to ’02. There are a few benefits to doing this. The main one is being able to use a divided exhaust manifold to better capture the exhaust pulses from the engine which reduces spool up time and allows you to fit a larger and more durable S400 frame turbo.
The 2nd gen swap kit we used is actually one of the more complete kits you can buy. What sets it apart is the fittings and plumbing that come with it. It saves you a ton of time from having to run back and forth to the parts shop.
It comes equipped with a turbo oil feed and drain line, coolant fittings, and new A/C lines that keep everything out of the way of the manifold. The turbo with this unit will provide just shy of 800 HP at the wheels. However, if you want to get crazy with your Cummins, this kit will work with an S400 style charger as long as it has a 5″ intake and a T4 flange. You also get a charge air cooler tube and a 5″ air intake with provisions for your mass airflow and temperature sensors. You also get a 4″ stainless steel exhaust downpipe.
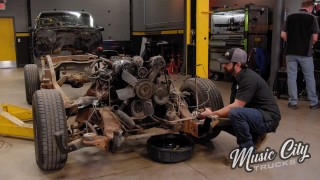
To get started on installation, there are a few ports that have to get blocked off since the new turbo isn’t water cooled. The cylinder head gets an MPT plug and the block gets an 18mm O-ring fitting. Next, remove the stock A/C lines to make room for the new position of the turbo. The coolant standpipe then gets removed from the water pump and replaced by the provided AN adapter. Next up, remove the passenger side battery and loosen the tray to gain access to the coolant tank. With the battery box on the bench, you’ll need to grind down the two boxes flush with the surface to allow the mount tabs on the Fleece tank to engage.
Then, install the A/C fittings onto the firewall, remove the studs, and install fitting adapters onto the condenser and the same thing on the compressor. The new lines can then be routed, keeping the hoses as far away as possible from any sources of heat. The new heater hose attaches to the block adapter and the other end onto the heater core. The stock turbo drain line is removed from the block and with the new adapter lubed up, the drain line slides right into the original hole.
Finally, the turbo feed fitting gets swapped to the AN adapter. The battery tray and coolant tank slides back place and the new lines are protected from heat with the provided insulation.
Want to read more articles like this?
Join the PowerNation Email NewsletterRead More from PowerNation