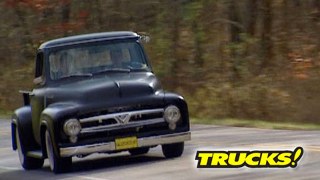
More '53 Ford F-100 "Old Skool" Episodes

More Project Old Skool Episodes

Trucks! Builds

Parts Used In This Episode

Afco Performance
Polyurethane radiator mounts, isolaters for brackets.
B&B Auto Trim Shop
upholstery for bench seat w/ embroidered "Old Skool" logo
Borgeson
Polished u-joint, double D shaft.
California Metal Supply
Asst. steel.
Gardner-Westcott Company
Chrome plated button head fasteners, fastener kits.
Glide Engineering
Split back bench seat - ready to upholster.
Grant
Heritage Banjo style steering wheel.
Hushmat
Adhesive sound deadening and thermal insulation panels.
ididit Inc.
Polished tilt steering column, billet drop bracket, swivel ball mount.
LMC Truck
Stainless steel inner fenders and firewall, interior firewall insulation panel, headliner, carpet kit, sun visors, carpeted kick panels, door panels, seat frame side covers.
Lokar
Gas pedal, throttle and transmission cables, trans shifter assembly, e-brake handle and cables, engine and transmission dipsticks.
O'Reilly Auto Parts
Radiator hoses.
Old Air Products
"Hurricane" heating and A/C system.
Old Air Products
A/C lines and uncrimped fittings.
Sanderson
Ceramic coated and uncoated cast headers for SBC.
Zero Rust
Rust inhibiting primer.
Video Transcript

Today class is back in session

and it's another lesson from project old school.

We'll add a custom radiator and some modern comforts

like air conditioning and a really slick interior worthy of our fat fender F 100.

It's all today here on trucks.

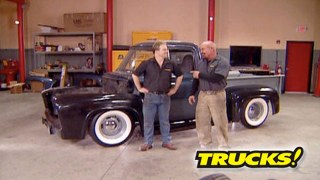
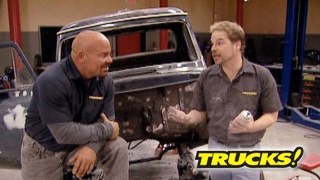
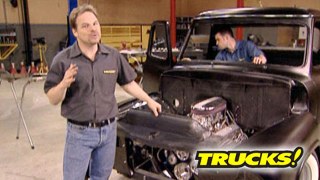
Hey, welcome to trucks. Today we go back to school project old school. When we found our 53 F 100 it was a worn out but solid truck that had already been hot rotted about 20 years ago.

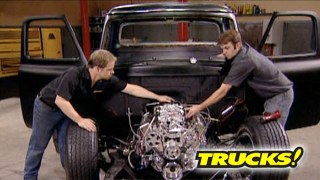
Most of the work is respectable, but we saw way more potential in this truck. So we stripped it completely down and went through everything. Now, we're almost ready to hit the streets with our moon eyes air cleaner, feeding our dual quad Edelbrock top end that exhales through these cast Sanderson headers and it's all dr

by the Zoop serpentine front belt system. Our 350 is hooked to a bulletproof bowler, 700 R four tranny.

We also added a frame mounted master cylinder and booster and beefed up the factory battery box. All of it now rides on an air ride suspension driven by a rebuilt

Posi rear end and it has a classic sound of a true dual exhaust and to top it all off, our massage, sheet metal and new fiberglass panels are all coated in our own special mix of a hot rod, flat black paint job that's gonna stay looking this good for years.

But there's a few necessities. We have got to install like windows and steering column and pedals, some sort of temperature control system. But before we get started on the interior,

there's a few details under the hood, we need to pay some attention to.

We wanted a clean look from the start. So we smoothed the firewall a while back as well as did some creative routing of our electrical harnesses to keep things tidy under the hood.

Now, these old original inner fenders have been hacked up by the previous owner trying to make them fit around the new Nova suspension and the way the rest of this truck now looks, these are definitely not going to cut

it.

So we called up L MC truck and had him send us a set of these trick looking stainless steel inter fenders and a stainless steel firewall insert. Now we've got a bit more work to do on our firewall before that goes in place. And since these inter fenders are made for a stock truck, we also had to do a little trimming to clear in our Nova's suspension, but look what a difference this makes,

but that still leaves us with a question of finding a cooling

for our new 350 NAFCO performance has been making racing systems for years and they've proven themselves on the track over and over again. But they've also got some great looking custom stuff. So we're using their stainless hot rod radiator with an aluminum core and integrated electric fan

with all the room we've got under the hood for airflow, combined with this setup will be nice and cool. Cruising the strip.

Well, that radiator looks great but it's not stock and well, neither is this

and that's the radiator support that came in the truck when we got it. So this is going to require a little bit of modification.

Making your own radiator sport is not that hard.

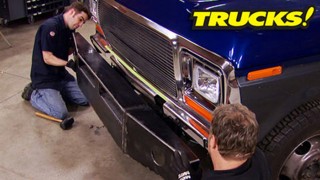
We just worked off the center point of our opening and made two frame mounted brackets that cradle the bottom of our radiator.

Oh, yeah, that'll work. Yeah, I'm good on this side. Cool.

That's sweet

with our brackets painted. We drilled and tapped a hole in the front frame, cross member to mount our left and right supports.

We used urethane isolators from prone to dampen any chassis or engine vibration.

One of my favorite parts of any project is detailing it out. So when it came time for reassembly on old school, we decided to go with, well, what else? These chrome button head fasters we got from Gardner Westcott. They sent us a complete set for the front and rear fenders as well as the door latches. And when it comes right down to it, hey, it's all about the details

with the bottom of our radiator secure. We fabricated an upper mount using two inch angle and three sixteen's cold rolled steel. We got from California metal supply.

The purpose of the propane isolators on top and bottom of the tank is to prevent any metal to metal contact that could eventually damage your radiator

that fits good.

Now for our cooling hoses, this was actually pretty easy. We went down to our local o'reilly's and picked up some preformed rubber hose for GM applications.

And since we've got a 350 with a Chevy style radiator,

we'll just trim these to fit and pop them on.

We knew we wanted an air conditioning system for old school and there's tons of options in the aftermarket for these vintage vehicles, but we wanted a system that incorporates the original defroster vents as well as one that sits under the dash like the original heater box. And we found the perfect system for our F 100

it starts here with this condenser. But you're going to have to wait until after the break to see the rest of it stick around

when we come back. We'll add an option. Our truck didn't get at the factory

air conditioning.

Hey, welcome back to trucks

and project old school where we have really turned a corner since the last show.

Now, we wanna concentrate on adding a few creature features

for those Friday night cruises.

Yeah, like air conditioning. So we got our system from old air products and it starts with this heater box that's designed

to fit right in at the factory dash location.

It's got its own control panel, valves, it comes with fittings lines, duct work dash fans, a wiring harness and these cool kick panels that have a event incorporated in them. That way, we don't sacrifice any leg room.

Now, Paul's already installed LM C's firewall insulation pad here behind the AC box.

There we are.

Our bulkhead garment needs a little help stretching over these copper lines. So we're going to use this glass cleaner as a lubricant. That way, it doesn't leave an oily residue and won't damage the rubber.

Now, here in front of the firewall, we still got a Ford Truck, a Chevy engine and AC compressor. So we're going to have to do a little Macgyver

to connect our ac lines.

So just like we did when we ran our brake lines, we bent up some coat hanger wire and used it as a template.

Then we had old air products, send us some ac lines and unprimed fittings so we could follow our wire template and route things where we wanted.

Then we took them to a local auto parts store and had them crimped

whenever you custom route your ac lines. Be sure to keep them away from moving suspension parts or engine exhaust systems.

We've gotten a lot of email from people asking us what type of paint we used on the frame of the F 100. Well, actually it was this rust inhibited primer called zero rust. It forms a barrier on the metal and starves. The rust of oxygen, stopping it surface prep is easy. Just knock the scale off with a wire brush, clean it down, throw a couple of coats of ZR on. You're good to go.

Zero rust was formulated to keep railroad cars from rusting and it's perfect for vintage vehicles.

It can be sprayed on or brushed on and requires two wet coats for proper protection.

Part of any air conditioning system has to be insulation. Your truck is no exception.

So we're using hush mat insulating pads to keep the cool stuff inside.

It also adds to the sound quality of your stereo system by effectively stopping any panel, drumming or acoustic bounce inside your cab.

Plus it makes the door sound great when you shut them.

One of the main generators of heat in any vehicle is an automatic transmission

and hush mat reduces firewall and tunnel heat by 20%.

Now, even though we cleaned prep and painted our interior, you don't have to be quite so thorough with your vehicle.

A hush mat is super easy to install. It's got a self adhesive vacuum, just put it where you want it

go over it with some sort of scraper or putty knife to make sure it conforms to the surface. You're working with

hush mat also makes a thermal insulator and high frequency sound absorber. We put on our roof,

ok. With old school's cab completely insulated. Now, we can put in something that's going to look a heck of a lot better than that original rubber floor mat ever did.

But we can do that after the break. Stick around

next up. This truck's going to be as cool inside as it is outside. Stick around.

Welcome back to trucks like we said before. Old school here is a survivor. It's been through several reincarnations and over the years, many different parts and pieces have been added to it to make it a better vehicle. In short,

it's been customized and now we've finally got our interior to the point where we could start adding things like a steering column,

but we're definitely not going to throw in this old mercury column that was in the truck when we got it. Not that there's anything wrong with this combo, but

like everything else on the truck, this is beat and we can do better. So we called, I did it and had them send us one of their chrome tilt GM style steering columns along with this billet aluminum drop bracket and the swivel ball mount to put it through the floorboards. But what tops this all off is this grant heritage banjo steering wheel

now to connect it to the Nova steering box. Borgeson said it's his polished stainless U joint along with some of their double D shaft.

Now, you may have to grind a flat into your steering box shaft for alignment and a safe connection.

This is the tow board plate that the previous owner had fabricated for a steering column to go through. It's not pretty, but it gets the job done. The problem with reusing this is that now our brake arm comes from the frame rail instead of from an upper bracket. So we use this as a template

made our own plate mounted our swivel ball in and this will drop right into place.

You've got a lot of room to play with in a vintage vehicle. So make sure you got a comfortable driving position when you're mounting your steering column.

So now we can steer, but we've got no other controls. We're definitely too far modified to go back with original stuff and we're not using what the previous owner had in this truck. So we turned to low car for their throttle controls, brake controls, new emergency brake cables, engine and transmission dipsticks. Now, not only is this stuff extremely well engineered, but it just flat out, looks cool too.

The bottom first,

got it.

I'll try it out.

Perfect, good.

One of the fun things about customizing an old truck like this is doing the research and finding the parts

unless of course, you can't find any of the stuff that you need.

And that's why L MC Truck has been so nice to have around while we're building old school

in their catalog. We also found a complete interior kit with a new headliner replacement sun visors door trim panels, carpeted kick panels, and

these carpeted side skirts, if you're reusing your original seat as well as this complete molded carpet set.

Well, our padded firewall insert has this nice finished edge. So what we're going to do is turn our carpet back a couple of inches and tuck it up underneath for a finished look. So while we install the rest of this carpet, you guys take a break. When we come back, we'll finish out the rest of this interior. Stick around.

Now stay in your seat because after the break, we'll show you old school's new one.

Hey, welcome back to trucks. If you're just joining us, we're detailing out project, old school, getting things like the AC system, installed control systems and interior.

Well, we got the carpet in anyway. Now we're gonna move on to something a little more difficult. Putting a headliner in this truck

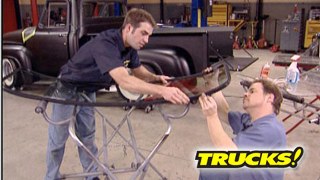
with our tax strips already in place. We'll mount the rear bow supports first and work our way forward.

Suspended headliners have been around for a long, long time, but that's not what came in our F 100 from the factory. And since this kit covers more than just our year model. It's definitely not a super bolton. So take your time and measure each piece before you install

with the rest of the headliner in place. The last step is to take this welding, put it all the way around the outside edge and cover up our staple marks.

Now, the cool thing about these door panels from L MC truck, you can reuse the factory door or window crank hardware or you've got yourself a clean slate.

You can put power window switches anywhere you want.

As you can see, we relocated our fuse panel to make room for our hand brake here.

We've also painted the kick panel to match the rest of the interior.

Right. That looks good, man.

Yeah, it turned out pretty good.

Now, I know some of you guys have been in the same situation where you keep putting new part after new part, after new part on a project and pretty soon the pieces that you thought you were gonna be able to reuse. Well, they just don't cut it anymore. Like these seats, they're not worn out and they're not torn. But hey,

they're not old school either.

So I made a couple of phone calls and found a company called Glide Engineering that specializes in vintage retrofit and wild custom seats. And we found this cool 5050 split back bench seat, that's perfect for our truck. In fact, it's a direct bolt in for 53 through 56 F one hundreds features this cool up seat bottom, lots of storage space underneath a fully powder coated frame, seat latches on both sides, even a shock on the driver's side to hold it up. The only thing is that it doesn't come upholstered. So you guys at home are going to have to do what we did and find a good upholstery shop to do you a nice job. And boy, did we check this out

BNB upholstery at Shelbyville, Tennessee has been around since the 19 sixties and specialized in high end Rods and Customs. And they did a great job of matching the color of our L MC truck panels and an even better job of matching the stitch pattern. But by far, the best thing they did was to stitch in the old school logo in the seat backs. I don't care who you are. That is cool.

You good. Yeah.

And I think it looks great.

That looks incredible, man. Look at that.

Well, all the big chunks are finally done and old school is really starting to pull together, but we're still not done yet. We've got some excellent projects coming your way that you can do at home. But for now, we're gonna give you a sneak peek at what's coming next time

we're going to the chrome shop.

Now, I know you guys remember these Sanderson headers that we put on old school when we installed our exhaust and everybody that sees them makes a comment on how great they look, but that's not the whole story. Take a look at this. These cast pieces fit all popular Chevy small block heads, including ho heads, their half inch thick flange virtually eliminates warpage and allows for a gasket less installation on the inside. They have anti

reversion steps cast into the primary tubes that minimize exhaust backflow and the D shaped port enhances scavenging.

You can pick up a set of these headers directly from Sanderson's website. A set of uncoded will cost you about 320 bucks or just add 100 and $60 for the silver ceramic coating. Thanks for watching trucks. We'll see you next week.
Show Full Transcript