Trucks! Builds

Parts Used In This Episode

Chevrolet Performance
350 Performance Crate Engine.
Edelbrock
Diesel Exhaust System.
Fabtech
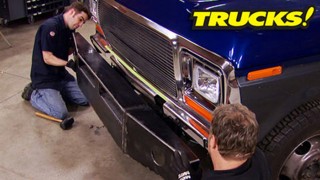
Spacer kit for '07 Tahoe or Yukon that corrects the slight rake of the stock chassis.
Holley
Performance throttle body.
Hypertech
Computer chip that lengthens injector time and changes the spark current.
LMC Truck
Cold Induction hood.
O'Reilly Auto Parts
Double 12" fan.
Quick Muffler
Flame-Thrower H-E-I distributor.
Video Transcript

Today, it's part three of project S

10-K.

We'll button up our budget V8 engine swap with a bigger fuel injection,

hotter computer electric fans and a fabricated exhaust

all on the.

Hey, welcome to trucks. And you guess it over the next couple of weeks we're gonna finish project S

10-K and turn this boring 95 S 10 into the truck. GM should have built. Yeah, but before we do that,

we want to tell you about what we've already done,

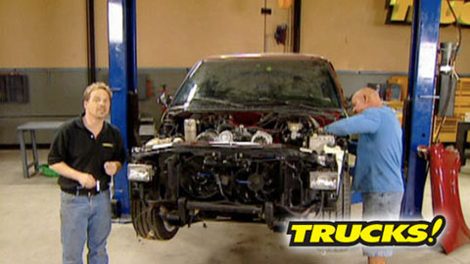
we removed the V6 from underneath the hood.

We beefed up the tranny with the shift kit,

upgraded the brakes

and then we drop this thing to the ground with a lowering kit.

Then

we stepped a GM performance crate 350 in it. That's right. And if everything goes well, today, you're gonna hear this sucker roar. But first, let's talk about our budget.

We bought our S 10 with a hatched engine for 950 bucks.

It had some serious issues, some body rust and it looks like red gravy, but it was a solid enough truck.

So far we've spent more than half of our 10 grand to get where we are today, but we're still on track to turn this plain Jane truck into a ground pounding street machine.

We're building our project end to end one step. Now, if money's tight, you do one project at a time

when the S 11th appeared like most of the vehicles of the day, it was carbureted. Now, if you got an older truck, you can throw your V8 in, toss on an aftermarket intake carburetor

and you're ready to rock and roll. But if your truck is fuel injected, like ours was from the factory, you wanna really consider upgrading to a system that can better suit the demands of that V8. Now don't be intimidated by fuel injection because once you understand it

ef I is actually easier to work on than a carburetor.

The carburetor has a float bow

which is fed from the tank with a fuel pump.

Now, the level is controlled by a float that opens the needle and the seat

when the level drops, the float lowers

and allows more fuel to enter

the air that's drawn into the engine through the intake stroke, passes through the carburetor body.

That is what we call a ventura,

a

ventura creates a low pressure that draws a fuel from the flow bowl and atomizes it in the air.

Now, that is basically what a carburetor does. Now, even though a carburetor is a pretty complicated device, it's an economical way to make big power, but when you consider that a fuel injector is nothing more than a spray nozzle that's controlled by a computer. That's a pretty simple solution.

Now, our S 10 ECM measures exhaust and oxygen content and lets us know whether the trucks are in rich or lean

the manifold. Absolute pressure sensor or map sensor determines what kind of load the trucks under

the throttle position sensor measures the throttle blade angles

and the coolant temperature sensor tells the computer how cool the truck's running. Colder temperatures mean more fuel for cold running and starting

all this information is monitored

and the injector pulse width is lengthened or shortened.

The PWM or pulse with modulation is the amount of on time the injector sees measured as a duty cycle. So

a 90% duty cycle means that for every second that injector is spraying 90% of the time. So more fuel means more power, fuel injection automatically adjusts for changes in temperature. It's not affected by severe angles or even hard breaking E I is great to have. And if you know your options, you can keep it on your vehicle easily.

Our original 4.3 V6 is a TB I

throttle body injection system.

Now GM used a lot of these injection systems on their motors,

including their V8, which is exactly why we stuck with EF I

all the wiring.

It's already here

with all the wiring in place under the hood. Here's where you got to make a choice. You could take the original TB I unit, replace these injectors with some new V8 injectors adapted to your manifold. You'd be good to go. But

the cost of these replacement V8 injectors cost almost as much as this complete new throttle body assembly.

You could go to a junkyard and pick up one of these units off of a V8, but it's a used part. You got used answers. So you run the risk of getting a dud for Rs 10. We chose this brand new performance throttle body from Holly.

Holly basically uses the design of G MST B I units to build the projection EF I kits.

Not only will this 670 CFM unit feed the small block of fuel it needs.

All we have to do is swap out some connector ends but everything our truck's computer needs is on the throttle body

making this the perfect bolton

for this knee swap.

Now with an aftermarket cable bracket in place,

the throttle cable connects to the throttle control.

Then the map sensor,

idle, air control valve,

throttle position sensor

and cool and temp sensor drop right into place

with the flamethrower. He I distributor and coil, throwing sparks out through an eight millimeter plug wire.

We'll have no trouble burning up the fuel going into the throttle body

up. Next, we're building a twin fan cooling system

makes

you pushes more pullers. So we've got them wired.

Hey guys, welcome back to trucks and our S

10-K project where 10 grand recycles, an old tire pickup into a ground pounding mean street machine. That's right. We got a small block stuff between the frame rails, plenty of spark, plenty of fuel. Thanks to the new EF I system we got on here that works with our truck's computer.

During the break, we installed the last part to make our truck run

and that was the computer chip. This chip from hypertech piggybacks onto our stock chip and is a performance upgrade for a 95 V8 pickup.

It simply replaces the factory chip to trick our V6 computer into running our V8 plus, it'll lengthen our injector on time and change the spark curve to give us even more power.

And now we get to start putting some of the sheet metal back on, make this thing look like a truck. Again.

These inter fenders may look new,

but they're not.

It's amazing what a little bit of elbow grease and some fresh paint can do

obviously swamping our V6 for a V8.

Our engines are gonna create more heat.

The 4.3 is commonly referred to as the V8 small block with two cylinders cut off.

Well,

we added those two cylinders back to our engines, so it's obviously longer,

that means no room for the fan,

but we plan for that and I've had good luck cooling V eights with twin pushers in front of the radiator like these 12 inches we got from o'reilly's.

We also have an aluminum core so that's going to help us dissipate heat even faster.

One thing you want to do before you hard wire your fans in is check the direction that they're blowing in. Remember, these fans are reversible. You can switch the wirings, they could be pushers or pullers. So we've got them wired

right there. These are pushing towards me. They're supposed to be pulling through the radiator. This would have caused their engine to overheat. So now we know how to wire this up

with the accessories on the front of the V8. This old radiator strap is not gonna work and that's what holds the radiator in place. So we gotta come up with something different.

I got a piece of cardboard and made a template. It's gonna hold the radiator in place and saddle the top of the core support.

Then I hunted around the shop and found this stainless steel molding

just kicking around in a corner, took a piece of it on my metal break

and ended up with something that cost us nothing. This was free and it looks fantastic. It's gonna do the job. You can be on a budget and still have some cool stuff on your truck.

The one thing you want to keep track of is where all that hot air from the front end of your truck's going.

Now, if it's slammed like ours, all that hot air in the engine compartment.

It's got nowhere to go,

but

we just so happen to have a plan for that

right after the break.

Next, it's ac

hood cool down

and later check out our low buck two into one exhaust.

Hey, thanks for hanging with us at trucks. We're getting ready to fire up

10-K and prove that you could put together an awesome street truck for less than 10 grand.

Yeah.

And we haven't even spent all our money yet, but

we're not done yet.

Do you guys remember when we tore this thing down?

I told you to keep these shims in place.

Well, this is where that tip pays off.

This thing's gonna line up Mason Street

and since the front of our truck is in great shape, we're reusing the stock benders

and I know you're looking at the color of this thing and the last thing you're thinking is cool, but Paul and I got a plan, but first the truck needs to be bolted together.

All our fender bolts are in place, but you don't want to tighten them down with the truck still on the lip. The reason is the way it's supported here, the engine weight could actually make the front end droop and when it sits down on the ground under chassis load could close this panel gap up. So let it sit on the ground and do your final tweaks. Besides, we've got to put the hood on and set a fender gap as well.

Now, you guys can really see what we were talking about

with all that heat coming off our radiator and into our engine compartment,

that hot air's got nowhere to go. Not around the tires or under the fenders

and that'll make your truck overheat. Yeah, but we've got 212 inch pusher fans in front of our factory aluminum radiator and we're betting that's going to keep our engine cool. Plus we're using ceramic coated headers that are going to pass more exhaust heat through them instead of radiating it into the engine compartment. As a matter of fact, some exhaust

manufacturers claim at least a 300 degree temperature reduction under hood to help get the remaining hot air out of our engine compartment. We're going to install this cow induction hood from LNC truck made from 22 gauge stamp steel.

This hood is a direct fit for Rs 10

and a two inch cow

vent

will help our va get some fresh air and get rid of that hot air.

The hood bolts up to the factory hinges and the quality of the sheet metal piece is so good. It's what we body guys call a scuff and shoot.

This is where all your hard work could be for nothing.

Check everything twice before turning that key

oil levels, electrical connections, belts and hoses.

Once you're sure everything looks good,

turn the key

and let it roar.

Ok.

You ready? Hit it, man.

Hey guys, welcome back to trucks. As you can see, our S

10-K project is near completion

and it looks a heck of a lot better than it did when it rolled in in our shop. That's right. This 95 S 10 is getting a complete transformation from its humble beginnings and we're doing it on the cheap, but it's not just a parts budget. Everything we've done so far can be done with basic tools.

Not once have we had to use the plasma cutter or the mig welder. Now, keeping with that theme, we're on our way to the local muffler shop and we're gonna get that brand new exhaust.

We could have bought a universal exhaust kit for a couple of 100 bucks, but we made a few calls and talked to the guys at the local Quick Muffler got a reasonable estimate of about 250 bucks. Muffler and all.

Yeah. The best thing about it is

they got us in and out of there in 30 minutes. Start to finish.

All right, we're on the cheap. So we're gonna go two to a one out back dump right in front of the axle. It's gonna sound great and

it's gonna meet her budget

even though this is single exhaust. It's got a performance muffler, a high flow cat and it's short. So we're not sacrificing performance here at all.

Jim and Wayne started off taking a few measurements and they got it right to work

making a down pipe from the right bank collector. The ECM requires data from the 02 sensor. So they welded in a bung then bolted the down pipe onto the collector.

Then they added the Y joint that will hook with the left down pipe and torched out the middle for flow.

We're using two and a quarter inch pipe which will flow plenty of volume to our 350

still sounds great

after the cat goes in

the two chamber, Flowmaster follows

and a turn down is added to that ahead of the axle.

Yeah, look at these welds. Oh yeah, real nice.

Perfect.

With the main muffler and pipe section in place.

The wide pipe on the left side is fabricated

and then welded into the joint on the right bank down pipe,

man. A truck sounds great with a new exhaust on it. It's got tons of power thanks to the va conversion. Now, all that's left to do is a paint and body.

If you've got about as much patience as I do and hands like mits body works. Probably not your forte,

but Kevin assures me that he's got some big plans for this truck.

So you're gonna wanna stick around and see the finish of the S

10-K.

You got an Ose

Tahoe or Yukon

and you wanna give it that aggressive race front. Look. Well, fab

tech has just come out with this spacer kit that corrects the slight rake of the stock chassis.

It sits on top of the factory strut

and the supply bolts replace the factory studs that are cut off.

The best thing about this kit is that it just takes a few basic tools like jack stands

your basic wrenches,

a cut off tool or a hacksaw

in just a few hours of your time.

Now,

you can get this fab tech kit for about 100 and 50 bucks.

This is B and M's Task Master diesel converter. These are ideal for stock to modified diesel engines.

They're made with multiple disc lockup clutches, one way clutch components, furnace bras, turbine and impeller and a new turbine hub.

And these are intended to maximize the efficiency of a vehicle's engine and torque converter combination to improve acceleration and pulling power in light trucks.

B and M's Task master converters start at about 1500 bucks. Now, here's something else that will help your diesel truck. This is Edelbrock diesel exhaust system.

It's made from four inch diameter ma

band aluminized steel tubing.

The new Edelbrock Muffler is all aluminized steel and has a patent pending chamber design that has no filler material to deteriorate.

All the hardware is zinc plated for maximum corrosion protection and the tail pipes are polished three or four stainless steel. You can have an Edelbrock diesel exhaust system on your truck for about 500 bucks.

Thanks for watching. We'll see you guys next week.
Show Full Transcript