Trucks! Builds
Want more content like this?
Join the PowerNation Email NewsletterVideo Transcript
Hey, everybody. Welcome to trucks
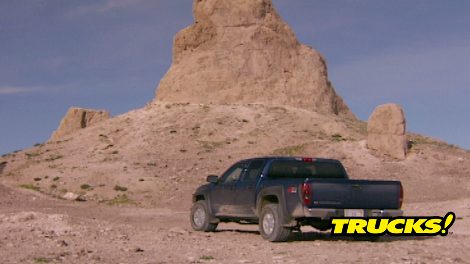
by now. I'm sure you've all seen the Cool 2005 Chevy Colorado.
This is the one that replaced the old Chevy S 10.
It's a great looking new truck and it's got a really torque 3.5 L in line five.
But
like all new stock trucks,
it needs a little attitude
and the aftermarket's all over it.
So, we're installing the first lifted design for this truck.
That's right. We're going to upsize this mid size.
Yeah.
Pretty cool paint, huh?
I like it.
We're doing this trick build up for this Colorado for the Skyjacker company. When we get through with it. It's going out on the show circuit now, show trucks have got to catch the eye and this one's already been shot with a marbleized blue, lower third red scallop graphics with a droplet effect and it's all topped off with cool airbrush accents and drop shadows.
Now, if you think my buddy Kevin sounds like he knows what he's talking about. That's because he does. As a matter of fact,
you've already seen some of the work he's done on our previous shows. That's right. I got to do the paint and body work on project Big Blaze project. Copperhead and Stacy featured a 67 Ranchero that I customized.
That was a sweet ride. You bet. But that's all in the past. You are not gonna wanna miss what we got coming up.
That's right. Our
Star
Colorado's only got about seven inches of ground clearance. So our new lift kit will give us a much better stance. We've got 32 inch tires and wheels coming in and finally we'll let it breathe better for more horsepower.
Now, the first thing we're gonna do is give this truck a little bit extra stance. That's gonna give us two things. Number one, it's gonna make the truck look bigger than it actually is. And number two, it's gonna give us tons more suspension travel.
That's right, Kev.
And to get that done, we're gonna put on this Skyjacker four inch lift kit
comes with the knuckles
cross members, drop brackets, leaf springs and all the nuts and bolts to put this thing together.
Let's get busy.
The first thing we need to do before we take anything apart is to measure this torsion bar adjustment bolt. That way after the kit's installed, we put this back to the same measurement and retain our factory alignment specs.
Next, we're gonna remove the tie rod ends
and the break calipers
with the sway bar and links out.
Next, we remove the CV, axle retaining nut,
followed by the knuckles,
then we remove the lower a arm
and the drive shaft
support the front differential,
remove the bolts and lower it away.
All right, we're down to the last piece of the stock system to come out of here. And that's this A r bushing.
It's going to be replaced by this heavy duty aluminum bushing. This skyjacker provides with their kid to make this happen. We use this ball joint press,
this now actually becomes a stationary mount for the new rear cross member.
All right, let's get serious.
All right, we're gonna speed things up right now.
Kevin's gonna work the driver side.
I'm working the passenger side.
As you can see, I've already got my bushing installed and now it's time to put in the drop bracket that goes between the frame and the front axle.
I love it when a plan comes together.
Now it's time to put the differential back in place.
I'll give me a half a pound.
Ok. All right. Let's make some noise.
Now to get the power back to the front wheels, we need to insert this aluminum space or into the drive line at the transfer case
while Kevin's back there, reinstalling the drive shaft.
I'm gonna give you a few tips on installing these cross members. Guys, don't forget your crushed sleeves. They fit right inside these factory mounts.
You've got your bushings
a little bit of grease.
You set them,
you tap them.
Hey, we're ready to go
check this out. My washer has to say here, I only got two hands. Here's what I'm gonna do.
I've got some rope adhesive goes on the back side of my washer. Now I put this up in place,
jam it down where it needs to be and I've got both hands free. Set my cross member.
Well, you talk about a knuckle buster
but in a good way,
what we've done is we've ground down the factory a arm so the new cross members will fit.
I've made a mark at the end. We're gonna go four and a quarter inches off this mark.
That way when we grind down the upper layer, it'll be flushed with the lower layer.
One of the cool things about this lift kit is this torsion bar relocation bracket. What this allows us to do is keep our torsion bars in the stock location, keep our factory alignment specs and it keeps our torsion bars tucked safely away behind the frame rail.
You in.
I'm in
cool
with our A arm installed. Now, we can tell where our new bump stop goes.
Yep. Right there.
Now, what we gotta do is drill it, tap it, screw it into place.
All right, we've got our A arm in place. Time to knuckle down.
We're gonna replace this factory knuckle with this new skyjacker piece.
This skyjacker knuckle is not only longer,
but it's beefier
and it's CNC machine for a better fit
be careful with your A B Ss line when you're doing a reassembly,
this is where it's not graceful anymore.
We got the front part of the lift kit assembled. It looks fantastic. Remember that measurement we took on the torsion bar adjustment bolt. Here's where it comes into play.
I need to see 2.5 inches of thread as I run this bolt up,
we blew through this pretty quick.
But you and your buddy could probably knock this out in about four or five hours. Yeah, that's assuming that both buddies are actually working. Oh,
come on, calm down. When we come back from the break, we're gonna jack up the back end of this Colorado stick around. You need to break.
Welcome back to trucks where we're upsizing this mid-sized Chevy Colorado giving us some more show and some more go. We finished the installation, the front half of our skyjacker four inch lift kit outside to jack up this rear
first. The oe shocks need to come out
and we make these leaf springs disappear
in order to get our four inch lift in the rear. We're gonna install these new re arc leaf springs,
these new leaf springs fit into the original factory mounts.
They also come with their own new U bolts.
Now, even though the truck and its bolts are new, it's still a good idea to replace the U bolts. When you're replacing the springs,
we're gonna be replacing all the shocks in our Colorado with the Skyjacker Nitro eight thousands. These shocks have twin tube design and velocity sensitive valving. What that means is that the valving inside actually senses the terrain you're driving on and the demands that you put on the shocks,
they also have 100 and 50 p si nitrogen charge that's gonna eliminate any oil pumping.
Hey, you're
that gut. Will you hold your horses?
All right. It's just like Christmas.
I told you these meats were coming in.
But before I show you what we got, I gotta tell you, adding these bad boys is gonna give you a heavier rotating mass
and with a truck like our Colorado, that's gonna see more asphalt than dirt.
We gotta upgrade those brakes.
So we're gonna start with these Bear dec seller rotors. Now, the biggest difference between these rotors and the stock ones is that they're cross drilled, invented.
This helps without gassing during hard breaking situations. But the best thing is that these are a direct bolt on
to work hand in hand with these rotors. We're gonna use their sport touring pads. This is a ceramic pad that's gonna give us up to 15% better braking and it's a low dust pad. So that's gonna keep our wheels looking sharp
brake line on the rear of this trunk needs this spacer block in order for it to work.
This is easy. But up front, all different animals.
Yeah, you're not kidding. Because now this original brake line is fairly long enough. But Skyjacker was thinking ahead and has included these braided stainless steel dot approved lines in with the kit.
Not only do these lines look great, they're less prone to being damaged off road and they won't swell during hard braking.
Oh, yeah.
What do you got cab back? Just got in. Cool. Let me get this finished up. I'll give you a hand. All right. Hey, now that the breaks are almost done. Let's go to a break. But when we get back,
we're gonna make this thing sound as good as it looks.
Hey,
Paul, grab that little piece of pipe. Little.
Hey, welcome back to trucks and the upsizing of our Chevy Colorado for Skyjacker.
Now we've already done a four inch lift. We've got new shocks and better brakes. Now, we're gonna increase the performance.
We're gonna get rid of the old stock pipe and put in a cap back exhaust system.
We got this great kid from Gibson that comes with a high flow muffler and splits off into dual outlets. Now, this is not only gonna make our Colorado sound great, but it also enhances exhaust gas scavenging in plain English. It's gonna sound better while we go faster.
First, we'll install the head pipe onto the oe flame
and with our clamp on the muffler goes into place.
Next, we'll install the driver's side tailpipe,
followed by the passenger side.
Add a little bear and grease to the factory mount
makes hanging a lot easier.
The pasture side uses this factory mount for the last gromit.
The kit comes with this hangar that mounts to a convenient location under the bed to secure the driver's side.
Now, the main purpose of lifting this truck was so we could get bigger tires and wheels on there for better ground clearance.
Now, just get in here and take a look at this aggressive tread pattern of this DX CPAC
tire made by Mickey Thompson.
Not only will you get high performance off the road,
but you're gonna get a sweet ride on the road.
Wow, these things are heavy.
Quit complaining, you know, they're strong when they're heavy.
Now we've got them wrapped around these Fords 10 by 16 inch DC. One wheels.
Don't let this shiny Polish fool you
that are a lot stronger than those oes we took off earlier.
Let her down.
Wow,
man, that thing sounds good. It does sound good, doesn't it? Oh,
yeah.
All right.
So what's next? Well, you said it, let's get some horsepower to this thing.
Now, with the exhaust opened up, we've got to get this thing to breathe a little better. We're gonna do that with this air a intake system and this power
a throttle body spacer. These parts are dyno
proven bolt on horsepower, check this out
power.
It's one inch throttle body spacer improves the low end torque and horsepower by utilizing this Helix style bore which creates a vortex for better fuel atomization. What all that means is is that we get a better burning fuel charge
you ready over there
today,
remove the stock air box,
then the throttle body
and just install the spacer with the supply bolts
and then reassemble.
So
for our cold air kit first replace the factory filter with the high flow reusable filter.
H on the new cool air dam where the old cover fit
and install the weather seal.
Now, the really cool thing about that air filter is it really is a one time buy,
but
you gotta keep it clean.
That's right.
When we come back, we're gonna dress this thing up with some cool body armor. Then
we take this thing out and treat it like a redheaded stepchild.
Welcome back to trucks. Check out our Colorado show truck. We've upgraded our brakes, installed a four inch lift kit to clear these awesome new wheels and tires. Then we added a cat back exhaust and a cold air intake up front to pump up the horsepower.
Yeah,
but not so fast lick. Before we can take this beast out on the road, we gotta finish it up. We're gonna put a little chrome on here. We got a bed liner to put in
that ought to do it.
Well, we're burning daylight. Well, then get your butt back to work.
Ok? You guys all know the drill with a typical bed liner. If your cargo is not locked down, your stuff's going everywhere, you're gonna get a corrosion underneath it and your paint is gonna get rubbed off. Well, D A comp is come up with a system that takes care of all of that. Hey,
give me that.
It's a five piece system that comes with these hard polyethylene sides that offer incredible dent resistance, this thick rubber mat, make sure your cargo is gonna stay where you put
it.
These liners fit mostly model trucks. First thing you want to do is slide the bulk head in place.
Next step beside the side walls in tap until the tie downs come through.
X is the tail.
But the cool thing is we're using the factory hardware.
Now we play the bed mat in place, lock it in
all one big piece.
That looks awesome.
Sure does.
But I know what you guys wanna see. You wanna see what this thing can do. So
let's take it out.
I'm all over that and I'm driving,
I'm driving,
I'm driving.
I thinks he's driving. I'm driving. Hey, who's in the drive? I'll
you for it.
Well,
I guess he's driving.
Of course, I'm driving,
man. This thing feels good. It just rides smooth
those tires. You would never even think that. No, no,
it's a good tire. The looks are deceiving and it's got good road manners. It just behaves.
Oh God, that was awesome.
That was awesome.
Oh, poor chad. You the help. Chad.
Who
the tree?
Where did that come from?
The ground
about 200 years ago
to come back here with a chainsaw and cut that sucker down.
I
want
it.
All right. Who's gonna call skyjacker? I don't know. I'm not getting a signal on my phone,
so obviously an A B
Bye.
Wow,
that was awesome,
man.
Well, as you can see our show truck, it's not so pretty anymore. Yeah, neither is chad. Yeah,
but we did prove this is a real truck and not just some trailer queen. That's right. And you could take all these stock parts, put it back on the Colorado, make it a sock truck again. But after fun like that, why would you wanna do it? Hey, poor chad.
I'm gonna go look for a bumper.
Hey, hold on before we go. I just wanna show you one last thing.
It's this flashback tuna from Super Chips, man. I'll tell you
this thing is really cool because not only can you get more horsepower, more torque and better fuel economy out of your truck.
This flashback can actually be updated from the internet. So when Super Chips does an update, you can download it for free by using this USB cable and plugging it into your PC. How cool is that?
Show Full Transcript
by now. I'm sure you've all seen the Cool 2005 Chevy Colorado.
This is the one that replaced the old Chevy S 10.
It's a great looking new truck and it's got a really torque 3.5 L in line five.
But
like all new stock trucks,
it needs a little attitude
and the aftermarket's all over it.
So, we're installing the first lifted design for this truck.
That's right. We're going to upsize this mid size.
Yeah.
Pretty cool paint, huh?
I like it.
We're doing this trick build up for this Colorado for the Skyjacker company. When we get through with it. It's going out on the show circuit now, show trucks have got to catch the eye and this one's already been shot with a marbleized blue, lower third red scallop graphics with a droplet effect and it's all topped off with cool airbrush accents and drop shadows.
Now, if you think my buddy Kevin sounds like he knows what he's talking about. That's because he does. As a matter of fact,
you've already seen some of the work he's done on our previous shows. That's right. I got to do the paint and body work on project Big Blaze project. Copperhead and Stacy featured a 67 Ranchero that I customized.
That was a sweet ride. You bet. But that's all in the past. You are not gonna wanna miss what we got coming up.
That's right. Our
Star
Colorado's only got about seven inches of ground clearance. So our new lift kit will give us a much better stance. We've got 32 inch tires and wheels coming in and finally we'll let it breathe better for more horsepower.
Now, the first thing we're gonna do is give this truck a little bit extra stance. That's gonna give us two things. Number one, it's gonna make the truck look bigger than it actually is. And number two, it's gonna give us tons more suspension travel.
That's right, Kev.
And to get that done, we're gonna put on this Skyjacker four inch lift kit
comes with the knuckles
cross members, drop brackets, leaf springs and all the nuts and bolts to put this thing together.
Let's get busy.
The first thing we need to do before we take anything apart is to measure this torsion bar adjustment bolt. That way after the kit's installed, we put this back to the same measurement and retain our factory alignment specs.
Next, we're gonna remove the tie rod ends
and the break calipers
with the sway bar and links out.
Next, we remove the CV, axle retaining nut,
followed by the knuckles,
then we remove the lower a arm
and the drive shaft
support the front differential,
remove the bolts and lower it away.
All right, we're down to the last piece of the stock system to come out of here. And that's this A r bushing.
It's going to be replaced by this heavy duty aluminum bushing. This skyjacker provides with their kid to make this happen. We use this ball joint press,
this now actually becomes a stationary mount for the new rear cross member.
All right, let's get serious.
All right, we're gonna speed things up right now.
Kevin's gonna work the driver side.
I'm working the passenger side.
As you can see, I've already got my bushing installed and now it's time to put in the drop bracket that goes between the frame and the front axle.
I love it when a plan comes together.
Now it's time to put the differential back in place.
I'll give me a half a pound.
Ok. All right. Let's make some noise.
Now to get the power back to the front wheels, we need to insert this aluminum space or into the drive line at the transfer case
while Kevin's back there, reinstalling the drive shaft.
I'm gonna give you a few tips on installing these cross members. Guys, don't forget your crushed sleeves. They fit right inside these factory mounts.
You've got your bushings
a little bit of grease.
You set them,
you tap them.
Hey, we're ready to go
check this out. My washer has to say here, I only got two hands. Here's what I'm gonna do.
I've got some rope adhesive goes on the back side of my washer. Now I put this up in place,
jam it down where it needs to be and I've got both hands free. Set my cross member.
Well, you talk about a knuckle buster
but in a good way,
what we've done is we've ground down the factory a arm so the new cross members will fit.
I've made a mark at the end. We're gonna go four and a quarter inches off this mark.
That way when we grind down the upper layer, it'll be flushed with the lower layer.
One of the cool things about this lift kit is this torsion bar relocation bracket. What this allows us to do is keep our torsion bars in the stock location, keep our factory alignment specs and it keeps our torsion bars tucked safely away behind the frame rail.
You in.
I'm in
cool
with our A arm installed. Now, we can tell where our new bump stop goes.
Yep. Right there.
Now, what we gotta do is drill it, tap it, screw it into place.
All right, we've got our A arm in place. Time to knuckle down.
We're gonna replace this factory knuckle with this new skyjacker piece.
This skyjacker knuckle is not only longer,
but it's beefier
and it's CNC machine for a better fit
be careful with your A B Ss line when you're doing a reassembly,
this is where it's not graceful anymore.
We got the front part of the lift kit assembled. It looks fantastic. Remember that measurement we took on the torsion bar adjustment bolt. Here's where it comes into play.
I need to see 2.5 inches of thread as I run this bolt up,
we blew through this pretty quick.
But you and your buddy could probably knock this out in about four or five hours. Yeah, that's assuming that both buddies are actually working. Oh,
come on, calm down. When we come back from the break, we're gonna jack up the back end of this Colorado stick around. You need to break.
Welcome back to trucks where we're upsizing this mid-sized Chevy Colorado giving us some more show and some more go. We finished the installation, the front half of our skyjacker four inch lift kit outside to jack up this rear
first. The oe shocks need to come out
and we make these leaf springs disappear
in order to get our four inch lift in the rear. We're gonna install these new re arc leaf springs,
these new leaf springs fit into the original factory mounts.
They also come with their own new U bolts.
Now, even though the truck and its bolts are new, it's still a good idea to replace the U bolts. When you're replacing the springs,
we're gonna be replacing all the shocks in our Colorado with the Skyjacker Nitro eight thousands. These shocks have twin tube design and velocity sensitive valving. What that means is that the valving inside actually senses the terrain you're driving on and the demands that you put on the shocks,
they also have 100 and 50 p si nitrogen charge that's gonna eliminate any oil pumping.
Hey, you're
that gut. Will you hold your horses?
All right. It's just like Christmas.
I told you these meats were coming in.
But before I show you what we got, I gotta tell you, adding these bad boys is gonna give you a heavier rotating mass
and with a truck like our Colorado, that's gonna see more asphalt than dirt.
We gotta upgrade those brakes.
So we're gonna start with these Bear dec seller rotors. Now, the biggest difference between these rotors and the stock ones is that they're cross drilled, invented.
This helps without gassing during hard breaking situations. But the best thing is that these are a direct bolt on
to work hand in hand with these rotors. We're gonna use their sport touring pads. This is a ceramic pad that's gonna give us up to 15% better braking and it's a low dust pad. So that's gonna keep our wheels looking sharp
brake line on the rear of this trunk needs this spacer block in order for it to work.
This is easy. But up front, all different animals.
Yeah, you're not kidding. Because now this original brake line is fairly long enough. But Skyjacker was thinking ahead and has included these braided stainless steel dot approved lines in with the kit.
Not only do these lines look great, they're less prone to being damaged off road and they won't swell during hard braking.
Oh, yeah.
What do you got cab back? Just got in. Cool. Let me get this finished up. I'll give you a hand. All right. Hey, now that the breaks are almost done. Let's go to a break. But when we get back,
we're gonna make this thing sound as good as it looks.
Hey,
Paul, grab that little piece of pipe. Little.
Hey, welcome back to trucks and the upsizing of our Chevy Colorado for Skyjacker.
Now we've already done a four inch lift. We've got new shocks and better brakes. Now, we're gonna increase the performance.
We're gonna get rid of the old stock pipe and put in a cap back exhaust system.
We got this great kid from Gibson that comes with a high flow muffler and splits off into dual outlets. Now, this is not only gonna make our Colorado sound great, but it also enhances exhaust gas scavenging in plain English. It's gonna sound better while we go faster.
First, we'll install the head pipe onto the oe flame
and with our clamp on the muffler goes into place.
Next, we'll install the driver's side tailpipe,
followed by the passenger side.
Add a little bear and grease to the factory mount
makes hanging a lot easier.
The pasture side uses this factory mount for the last gromit.
The kit comes with this hangar that mounts to a convenient location under the bed to secure the driver's side.
Now, the main purpose of lifting this truck was so we could get bigger tires and wheels on there for better ground clearance.
Now, just get in here and take a look at this aggressive tread pattern of this DX CPAC
tire made by Mickey Thompson.
Not only will you get high performance off the road,
but you're gonna get a sweet ride on the road.
Wow, these things are heavy.
Quit complaining, you know, they're strong when they're heavy.
Now we've got them wrapped around these Fords 10 by 16 inch DC. One wheels.
Don't let this shiny Polish fool you
that are a lot stronger than those oes we took off earlier.
Let her down.
Wow,
man, that thing sounds good. It does sound good, doesn't it? Oh,
yeah.
All right.
So what's next? Well, you said it, let's get some horsepower to this thing.
Now, with the exhaust opened up, we've got to get this thing to breathe a little better. We're gonna do that with this air a intake system and this power
a throttle body spacer. These parts are dyno
proven bolt on horsepower, check this out
power.
It's one inch throttle body spacer improves the low end torque and horsepower by utilizing this Helix style bore which creates a vortex for better fuel atomization. What all that means is is that we get a better burning fuel charge
you ready over there
today,
remove the stock air box,
then the throttle body
and just install the spacer with the supply bolts
and then reassemble.
So
for our cold air kit first replace the factory filter with the high flow reusable filter.
H on the new cool air dam where the old cover fit
and install the weather seal.
Now, the really cool thing about that air filter is it really is a one time buy,
but
you gotta keep it clean.
That's right.
When we come back, we're gonna dress this thing up with some cool body armor. Then
we take this thing out and treat it like a redheaded stepchild.
Welcome back to trucks. Check out our Colorado show truck. We've upgraded our brakes, installed a four inch lift kit to clear these awesome new wheels and tires. Then we added a cat back exhaust and a cold air intake up front to pump up the horsepower.
Yeah,
but not so fast lick. Before we can take this beast out on the road, we gotta finish it up. We're gonna put a little chrome on here. We got a bed liner to put in
that ought to do it.
Well, we're burning daylight. Well, then get your butt back to work.
Ok? You guys all know the drill with a typical bed liner. If your cargo is not locked down, your stuff's going everywhere, you're gonna get a corrosion underneath it and your paint is gonna get rubbed off. Well, D A comp is come up with a system that takes care of all of that. Hey,
give me that.
It's a five piece system that comes with these hard polyethylene sides that offer incredible dent resistance, this thick rubber mat, make sure your cargo is gonna stay where you put
it.
These liners fit mostly model trucks. First thing you want to do is slide the bulk head in place.
Next step beside the side walls in tap until the tie downs come through.
X is the tail.
But the cool thing is we're using the factory hardware.
Now we play the bed mat in place, lock it in
all one big piece.
That looks awesome.
Sure does.
But I know what you guys wanna see. You wanna see what this thing can do. So
let's take it out.
I'm all over that and I'm driving,
I'm driving,
I'm driving.
I thinks he's driving. I'm driving. Hey, who's in the drive? I'll
you for it.
Well,
I guess he's driving.
Of course, I'm driving,
man. This thing feels good. It just rides smooth
those tires. You would never even think that. No, no,
it's a good tire. The looks are deceiving and it's got good road manners. It just behaves.
Oh God, that was awesome.
That was awesome.
Oh, poor chad. You the help. Chad.
Who
the tree?
Where did that come from?
The ground
about 200 years ago
to come back here with a chainsaw and cut that sucker down.
I
want
it.
All right. Who's gonna call skyjacker? I don't know. I'm not getting a signal on my phone,
so obviously an A B
Bye.
Wow,
that was awesome,
man.
Well, as you can see our show truck, it's not so pretty anymore. Yeah, neither is chad. Yeah,
but we did prove this is a real truck and not just some trailer queen. That's right. And you could take all these stock parts, put it back on the Colorado, make it a sock truck again. But after fun like that, why would you wanna do it? Hey, poor chad.
I'm gonna go look for a bumper.
Hey, hold on before we go. I just wanna show you one last thing.
It's this flashback tuna from Super Chips, man. I'll tell you
this thing is really cool because not only can you get more horsepower, more torque and better fuel economy out of your truck.
This flashback can actually be updated from the internet. So when Super Chips does an update, you can download it for free by using this USB cable and plugging it into your PC. How cool is that?