MuscleCar Builds
Want more content like this?
Join the PowerNation Email NewsletterParts Used In This Episode
Auto Body Color & Supply Co.
EHP High Performance Waterborne Basecoat and Clearcoat
Factory Five Racing,Inc.
Hand Laid Fiberglass Body
Video Transcript
Today on muscle car, learn the ins and outs of the newest in paint technology as Rick works his magic on the factory 533
plus, take a trip to the factory to see how these engineering marvels are designed and fabricated.
Hey, welcome to muscle car. This body looks familiar. That's because you just saw it on horsepower. It's a factory 533 Mike and Joe did a great job assembling the drive train and the chassis, but we think the paint made the car. Yeah. So today we're gonna take a step back and show you guys how we did that awesome
paint drop. Now, these bodies are all a hand laid fiberglass and they are just as highly engineered as the rest of the chassis.
After seeing some of these things all done, finished up and looking pretty. I knew I had to meet the dude that could make a 33 hot rod. I would handle a Corvette. So I headed out to the factory five facility up in Massachusetts.
It was like going to the coolest toy store ever. Everyone here is passionate about cars, especially the co founder and president of factory five. Dave Smith. The original design Charter was
Performance Hot Rod. That meant we had to leave the original frame behind. We don't have an original frame, but I think it still looks cool. And
more importantly though,
when you get on the gas and when you get on the brakes and you turn in, it performs, it doesn't, it doesn't get all willy on you.
I couldn't wait to try it out, but first, Dave wanted to show me around their 46,000 square foot facility.
It truly is a factory for fabrication to shipping. It's a streamlined operation.
State of the art engineering is the key to producing cars that not only look great but also perform.
Everything is designed and tested first in the Solid works C AD program before it ever goes to production.
That includes the molds for the fiberglass body.
Let me introduce
you to Nate Johnson or molding manager, Nate.
Good,
nice to meet
you.
Tell
you what man, we've been walking around here, checking out some of these cars. The fit and finish is amazing on these things. Thanks. So there's even some black cars out there that look straight as an arrow and I know it all starts with a mold. So tell us what you got going on over here. Well, we do our own shaping and our own mold making all in house. Everything's done, start to finish, plugs and everything, plugs and everything all done in house
Nate walked me through their process for making a door. Now first they cut out the fiberglass sheets on the C and C machine.
Then the mold is covered with a stable non shrinking resin. Before the first sheet is laid in
by using such a high quality resin in ensures it won't distort as it cures. A second layer is put down and once it's covered, it can be smoothed out and all the excess resin removed.
Now, curing takes about an hour, then it gets popped and taken over to a giant robot where the edges are trimmed and nice and smooth
and
robots are,
oh,
the process is repeated with the inner door skin. A three filip
putty looks just like peanut butter, but it's actually used to sandwich the two sides together,
the mold gets clamped shut
and once it's cured, it's back off to the robot for more trimming,
all the pieces come together in the chassis assembly room.
That's where we caught up with R and D engineer Jim Skank. Good to see you, man.
So uh
I take it it was a little bit of a hassle of trying to convince him to build this thing. Huh?
Well, it took, it took a little while, you know, we we went back and forth. These cars have always had a performance image to him and we wanted to just put the performance into it. So that when you drove the car, it looked,
you know, like it could handle in it and it backed it up and it actually handled.
Yeah, I was about to test that claim out.
All right, man,
seeing how you guys build these things. Let's see how they run.
It's fine.
After I finished laying down some rubber, we laid down some virtual paint to stick around.
I had a blast getting to know the 33 hot rod inside and out.
But I didn't just come here to have fun.
Ok. Actually I did,
but I did have to get some work done too. Like figure out a paint scheme for a Roadster for that. I turned to the guys at solid works.
Their software is used to design everything from toys to high tech machines like the cars, a factory five.
Hey,
it looks like you heard at it, man. What's up, man? How you doing? Good, good. That is cool right there. Like the flames. Yeah, I dig it. I dig it very old school.
That's amazing.
I like the examples you got actually this one over here. The two tone,
the vintage.
Yeah, that one right there is the closest to what I had in mind really do like almost a British racing green but with a little bit of pearl and almost metallic in it
and have the two tone come in under the nose like this and kind of break on a swoop
and I kinda get it a real ghosty kind of a flame design and tuck it up. So it's almost framed in then on the back like in between the, the trunk lid and the top, break it about midway in between there and have that curve around the back this way.
So it didn't end up with like a almost like a real long big scallop that kind of draws it back into the quarters. You know what I mean?
With the mouse as his paint gun, Jeremy was able to start laying down some color.
There we go. Now that I like, that's cool.
The darker green would come back,
you know, back into here and then swoop in
and then it would swoop off down the front.
Let's play around with it a little bit.
Yeah, it's cool.
Like follow up on the grill, like where the grill comes down, the shape, bring it up and kind of follow that and the wheel sets right here on the front. So I don't want this to be fighting any of these other shapes we got because we got this shape and this shape
to kind of come up and follow the grill and then almost follow the, the arc of the tire
coming up over the time. You know, I mean, that way when you're looking at it, nothing's fighting anything else, it all kind of flows. Sure. Not a problem.
I just need a little bit of time. Ok. Uh, well, can you get it over to me like maybe tomorrow
it would be cool piece of cake. So. All right, sweet man. Well, I'll get out of your way. Let you get to work. I appreciate everything, man. All right. Hey, we need to get out of here. I could hang out and tweak on this thing all day, but we gotta get back to the shop.
Wow, man, that place looked awesome. But how in the world did you manage? Getting out of here while I was stuck, slaving away. Well, obviously they heard about my world renowned driving skills. So they had to have me come up besides somebody had to stay here and hold down the fort while I was gone. Yeah, I heard about your driving skills and I don't think they're gonna let you drive this.
Come on, dude, someone hands you the keys to a hopped up 33 hot rod. What would you do? You gotta push the limits. But at least while I was there, I did get the rendering finished up.
Oh, yeah, man, I think looks awesome. And besides I like green a lot. Yeah, it's gonna look bad. A right there, dude. It's gonna be the first one that we've done with PPG Waterborne product.
I went ahead and laid the mint green base coat down on the panels and got a feel for how it sprays.
Now, this is the first time I've ever used Waterborne and tell you what I noticed right away. It does go on a little different than the solvent base paints. I'm used to
a waterborne paint may be new to some of you guys, but it's definitely not new to PPG. Their environment base line. Well, it's been around for a lot of years and Charlie Hutton has used it on some of the world's high end cars. He is nice enough to come by.
Give us a load on, on how to use this stuff. How's it going, man? Awesome. How are you? I'm doing fantastic. How'd it go in there?
It actually went real well. It went real well. So that was my first shot, laying the stuff down and I mean,
spray is great. It lays out nice and it's really easy to control with a gun too. Change is always hard for people, you know, and that's the biggest fear. A lot of guys, you know, painters that are used to the solvent stuff, making that transition to water. You know, it's that fear of, you know, is this gonna work like the solvent?
And it's a pretty seamless transition.
Now, I've been spraying solvent base for a lot of years, but I know there's a big push for this water board stuff and what's really the, the catalyst behind it, you know,
big thing with the water is it, it's the latest technology in paint, you know, I mean, it's environmentally friendly, you know, it's that go green,
but with the going green
you also have a lot of the plus sides of it. You know, the colors are unbelievable. It's thicker when you pour it into the gun, but it actually sprays thinner
when it comes out of the gun and wants to lay down. See it, it's almost like you're laying down medium wet coats, which would be a full wet coat for the water base. It does take a little bit longer
to flash off than what you're used to with the solvents,
you know, and that's where they make, you know, some of the, uh, the air dryers like the blow dryers. Um, a lot of the booze, they can retrofit with fans and stuff to get the air movement
to get that water out of the, out of the paint,
you know, to get to flash. Well, our booth isn't specifically set up for the Waterborne and I was actually surprised with how fast it flashed off without even having all the dryers in there.
Well, I did notice real quick in those panels there that the coverage was phenomenal. I mean, on the parts I just shot and there was two coats and it was fully covered. It was done. It does seem to cover faster than a solvent does.
And it's so much clear too that their colors are cleaner. I'm definitely digging it. Well, it's the future in the industry and this is where it's going. It is so awesome once you get used to using it, you won't go back. You know. What was the big plus side for me? Is, is the, the amount of support I get from PPG. They've tested the product,
you know, I mean, it's, it's a, it's a proven
paint line that they've had for years. You know, a lot of people think the waterborne stuff is new to the industry. Well, it's really not new. I mean, it's the latest technology PPG has been in the Waterborne game for a while now. Absolutely.
But hey, man, I sure appreciate you coming in and kind of give me the low down on how to use this stuff. I mean, you have a lot more experience than I ever had, so I really appreciate it. Hey, man, it's been my pleasure. If you got a little time, would you mind hanging out and helping me move some parts and, but not, I'll buy a sandwich. Absolutely. Anything for a free meal
at
home
after lunch. We got the body sealed up. So now it's time for some color.
I've noticed with the Waterborne, it darkens as it dries, which means you can't do a color match without spraying it out and letting it dry first.
After four coats of light green, I'll lay on some clear why clear it. Now, before the dark green, two tone and graphics, uh, you'll have to stick around to find out the answer
up next. Listen in as two of the nation's top custom painters plan their attack on the 33 start landing out tape will lead us in the direction we want to go.
Hey, welcome back. The body is all sealed up. But before the design can be laid out, it's gotta be sanded down so that the graphics and the final clear will stick. We bought Charlie
lunch. I'm serious and he ate like a lot. So
he's obligated to stick around and help us out
mental note to self no free sandwiches.
He ate a lot though.
He may be here for a week or two.
You may be wondering why we sprayed clear on just to turn around and sand it right back down. Well, it's called an Interco and while it's not a necessary step, it does provide extra protection for the base coat.
While Tommy and Charlie finish sanding the body, I'm gonna get some color on the hood and the roof. Now, this is another custom mix auto body color and supply helped me out with,
with a couple more coats and some dry time. It'll end up a nice dark green pearl.
We're almost ready to lay out the graphics. Now, since they run the entire length of the car, that means that we're gonna have to mount all the panels first. That way we know all the graphics are gonna line up when we do the final assembly. Now, I'm gonna hang out here and mix up the color that I need for the flames. While Tommy and Charlie hang all the parts,
the doors went on first. So next come the engine sides in lower balance. Now these are stationary panels so they just bolt on them.
The holes in the chassis are right on. Another result of factory five's precise engineering.
When the car is assembled for the last time, the grill shell is going to hold the side panels in place. But for now, a couple of clamps will keep them from flopping around
the hood is the last piece to go on for now. It's just being set in place while the two tone is laid out and they'll come back off before the
flames are painted.
There should line up.
We're ready to start laying out the graphics here and PPG turned us on to a little trick. You see Waterborne base coat, it has a tendency to dry a little bit tacky, but to get around that hit it with a gold scotch bright or some 1000 grip. It'll take that tackiness right off and it'll get you down the surface. It feels just like a good old solvent base coat
with the body all scuffed down and tacked off. It's time.
The fun part laying out the graphics,
a rendering is great to have, but it's really just a starting point. There are always changes to be made.
It's pretty cool for me to have another experienced custom painter to bounce ideas off of
and Charlie had some pretty good suggestions to add to what I'd already come up with.
After a few minutes of tweaking the plans, it's time to grab the tape.
Start laying it out.
Tape will lead us in the direction.
If you're gonna try shooting graphics with Waterborne, use the orange, fine line tape from F BS. It's the only thing I've tried that will guarantee a clean edge, but you still have to be able to come up with a design for me. Free handing is the quickest way to get a rough layout.
And since I'm using tape, it's easy to adjust
after the break. Rick puts the finishing touches on the hot rod and it is hot.
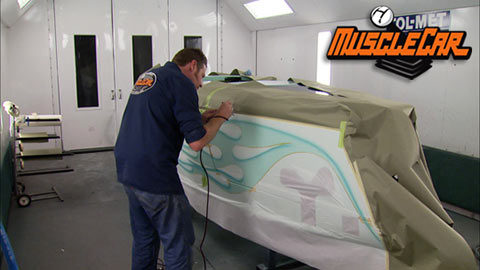
Hey, guys, welcome back. Just laying in a few drop shadows here in the flames. We got it all masked off and it's really looking nice. Once I get all this done, we're gonna unmask this re mask it for the dark green.
I'm using an IWATA Eclipse. It's a real workhorse of an airbrush. That's great for general use and it's not expensive.
The color on spraying is a mixture of the light and dark greens. I've already applied by doing it this way. I already know all the colors are going to work together.
Once it's dry, we can carefully peel off the contact paper and masking. Now these flames aren't done yet. I'll come back after the car is assembled and add pinstriping to give some definitions
the next step is laying out where the two tone colors are going to meet. My design includes a scallop on the rear of the car. It'll give the back end a modern look with a fifties flare
the panels we set in place for the layout can come off now, then we can mask the body up for the dark green
and let me have it. You were saying, oh, you take the heavy stuff. Yeah, I got you.
Even the interior is going two tone on this project. So that means the dash has to be massed up with the same care as the exterior
right on, man. I think we
got this dude sealed up
now. It looks really good.
Unfortunately, it's uh time for me to get out of here. I've got a shop to get back to. But uh, dang, there goes my labor for sandwich. There you go. That's right. The free sandwich labor, right? So, no, I think you've got the hang of it. You know, the environment base. I think it's working out pretty good for you. Picked it up really quick. It's easy. It's, it's really not that difficult once you get the basics down. So, hey, I sure appreciate all your help
buddy. Thank you for letting me come out and play. Not a problem. Anytime, anytime I'll see you
since I've already sprayed the hood and roof with the dark green. I know it's gonna take several coats to get the coverage I want.
But that's all right because once it's done, it's gonna look awesome.
Now, we can see the two greens together for the first time and it looks pretty good. If I do say so myself,
I'm gonna get the two tone finished up on these panels and seal everything up with a couple of coats of clear. Then we'll run it down to horsepower for final assembly. We'll see you back here when it's ready to hit the road for sa
Well, guys, here it is. A few days later, I finished the paint laid down some pinstripes and went down and gave horsepower a hand. Put the body on the chassis after seeing the way Rick drove that other one up at the factory five, I decided I probably need to be the guy to drive this one today. Now, I wouldn't beat on this thing. I put too much time in it.
The guys down at horsepower. Really? Knock this one out of the park. It drives like a dream
with the bar set so high. I went all out. I wore my pinstriping brush down to a nut with details on everything from the headlights and wheels to the dashboard and trunk.
Hey, if the name arsonist is gonna be on it, it's got to be perfect.
Yeah, this one's gonna turn some heads,
man. This thing rides good and definitely drives good and I know it's gonna look hot. Let's see. Him in when it's on tour this next year. But we don't have to give it back till tomorrow. That means we get to play for the rest of the day, but we're all out of time for you guys. So we're out of here.
Show Full Transcript
plus, take a trip to the factory to see how these engineering marvels are designed and fabricated.
Hey, welcome to muscle car. This body looks familiar. That's because you just saw it on horsepower. It's a factory 533 Mike and Joe did a great job assembling the drive train and the chassis, but we think the paint made the car. Yeah. So today we're gonna take a step back and show you guys how we did that awesome
paint drop. Now, these bodies are all a hand laid fiberglass and they are just as highly engineered as the rest of the chassis.
After seeing some of these things all done, finished up and looking pretty. I knew I had to meet the dude that could make a 33 hot rod. I would handle a Corvette. So I headed out to the factory five facility up in Massachusetts.
It was like going to the coolest toy store ever. Everyone here is passionate about cars, especially the co founder and president of factory five. Dave Smith. The original design Charter was
Performance Hot Rod. That meant we had to leave the original frame behind. We don't have an original frame, but I think it still looks cool. And
more importantly though,
when you get on the gas and when you get on the brakes and you turn in, it performs, it doesn't, it doesn't get all willy on you.
I couldn't wait to try it out, but first, Dave wanted to show me around their 46,000 square foot facility.
It truly is a factory for fabrication to shipping. It's a streamlined operation.
State of the art engineering is the key to producing cars that not only look great but also perform.
Everything is designed and tested first in the Solid works C AD program before it ever goes to production.
That includes the molds for the fiberglass body.
Let me introduce
you to Nate Johnson or molding manager, Nate.
Good,
nice to meet
you.
Tell
you what man, we've been walking around here, checking out some of these cars. The fit and finish is amazing on these things. Thanks. So there's even some black cars out there that look straight as an arrow and I know it all starts with a mold. So tell us what you got going on over here. Well, we do our own shaping and our own mold making all in house. Everything's done, start to finish, plugs and everything, plugs and everything all done in house
Nate walked me through their process for making a door. Now first they cut out the fiberglass sheets on the C and C machine.
Then the mold is covered with a stable non shrinking resin. Before the first sheet is laid in
by using such a high quality resin in ensures it won't distort as it cures. A second layer is put down and once it's covered, it can be smoothed out and all the excess resin removed.
Now, curing takes about an hour, then it gets popped and taken over to a giant robot where the edges are trimmed and nice and smooth
and
robots are,
oh,
the process is repeated with the inner door skin. A three filip
putty looks just like peanut butter, but it's actually used to sandwich the two sides together,
the mold gets clamped shut
and once it's cured, it's back off to the robot for more trimming,
all the pieces come together in the chassis assembly room.
That's where we caught up with R and D engineer Jim Skank. Good to see you, man.
So uh
I take it it was a little bit of a hassle of trying to convince him to build this thing. Huh?
Well, it took, it took a little while, you know, we we went back and forth. These cars have always had a performance image to him and we wanted to just put the performance into it. So that when you drove the car, it looked,
you know, like it could handle in it and it backed it up and it actually handled.
Yeah, I was about to test that claim out.
All right, man,
seeing how you guys build these things. Let's see how they run.
It's fine.
After I finished laying down some rubber, we laid down some virtual paint to stick around.
I had a blast getting to know the 33 hot rod inside and out.
But I didn't just come here to have fun.
Ok. Actually I did,
but I did have to get some work done too. Like figure out a paint scheme for a Roadster for that. I turned to the guys at solid works.
Their software is used to design everything from toys to high tech machines like the cars, a factory five.
Hey,
it looks like you heard at it, man. What's up, man? How you doing? Good, good. That is cool right there. Like the flames. Yeah, I dig it. I dig it very old school.
That's amazing.
I like the examples you got actually this one over here. The two tone,
the vintage.
Yeah, that one right there is the closest to what I had in mind really do like almost a British racing green but with a little bit of pearl and almost metallic in it
and have the two tone come in under the nose like this and kind of break on a swoop
and I kinda get it a real ghosty kind of a flame design and tuck it up. So it's almost framed in then on the back like in between the, the trunk lid and the top, break it about midway in between there and have that curve around the back this way.
So it didn't end up with like a almost like a real long big scallop that kind of draws it back into the quarters. You know what I mean?
With the mouse as his paint gun, Jeremy was able to start laying down some color.
There we go. Now that I like, that's cool.
The darker green would come back,
you know, back into here and then swoop in
and then it would swoop off down the front.
Let's play around with it a little bit.
Yeah, it's cool.
Like follow up on the grill, like where the grill comes down, the shape, bring it up and kind of follow that and the wheel sets right here on the front. So I don't want this to be fighting any of these other shapes we got because we got this shape and this shape
to kind of come up and follow the grill and then almost follow the, the arc of the tire
coming up over the time. You know, I mean, that way when you're looking at it, nothing's fighting anything else, it all kind of flows. Sure. Not a problem.
I just need a little bit of time. Ok. Uh, well, can you get it over to me like maybe tomorrow
it would be cool piece of cake. So. All right, sweet man. Well, I'll get out of your way. Let you get to work. I appreciate everything, man. All right. Hey, we need to get out of here. I could hang out and tweak on this thing all day, but we gotta get back to the shop.
Wow, man, that place looked awesome. But how in the world did you manage? Getting out of here while I was stuck, slaving away. Well, obviously they heard about my world renowned driving skills. So they had to have me come up besides somebody had to stay here and hold down the fort while I was gone. Yeah, I heard about your driving skills and I don't think they're gonna let you drive this.
Come on, dude, someone hands you the keys to a hopped up 33 hot rod. What would you do? You gotta push the limits. But at least while I was there, I did get the rendering finished up.
Oh, yeah, man, I think looks awesome. And besides I like green a lot. Yeah, it's gonna look bad. A right there, dude. It's gonna be the first one that we've done with PPG Waterborne product.
I went ahead and laid the mint green base coat down on the panels and got a feel for how it sprays.
Now, this is the first time I've ever used Waterborne and tell you what I noticed right away. It does go on a little different than the solvent base paints. I'm used to
a waterborne paint may be new to some of you guys, but it's definitely not new to PPG. Their environment base line. Well, it's been around for a lot of years and Charlie Hutton has used it on some of the world's high end cars. He is nice enough to come by.
Give us a load on, on how to use this stuff. How's it going, man? Awesome. How are you? I'm doing fantastic. How'd it go in there?
It actually went real well. It went real well. So that was my first shot, laying the stuff down and I mean,
spray is great. It lays out nice and it's really easy to control with a gun too. Change is always hard for people, you know, and that's the biggest fear. A lot of guys, you know, painters that are used to the solvent stuff, making that transition to water. You know, it's that fear of, you know, is this gonna work like the solvent?
And it's a pretty seamless transition.
Now, I've been spraying solvent base for a lot of years, but I know there's a big push for this water board stuff and what's really the, the catalyst behind it, you know,
big thing with the water is it, it's the latest technology in paint, you know, I mean, it's environmentally friendly, you know, it's that go green,
but with the going green
you also have a lot of the plus sides of it. You know, the colors are unbelievable. It's thicker when you pour it into the gun, but it actually sprays thinner
when it comes out of the gun and wants to lay down. See it, it's almost like you're laying down medium wet coats, which would be a full wet coat for the water base. It does take a little bit longer
to flash off than what you're used to with the solvents,
you know, and that's where they make, you know, some of the, uh, the air dryers like the blow dryers. Um, a lot of the booze, they can retrofit with fans and stuff to get the air movement
to get that water out of the, out of the paint,
you know, to get to flash. Well, our booth isn't specifically set up for the Waterborne and I was actually surprised with how fast it flashed off without even having all the dryers in there.
Well, I did notice real quick in those panels there that the coverage was phenomenal. I mean, on the parts I just shot and there was two coats and it was fully covered. It was done. It does seem to cover faster than a solvent does.
And it's so much clear too that their colors are cleaner. I'm definitely digging it. Well, it's the future in the industry and this is where it's going. It is so awesome once you get used to using it, you won't go back. You know. What was the big plus side for me? Is, is the, the amount of support I get from PPG. They've tested the product,
you know, I mean, it's, it's a, it's a proven
paint line that they've had for years. You know, a lot of people think the waterborne stuff is new to the industry. Well, it's really not new. I mean, it's the latest technology PPG has been in the Waterborne game for a while now. Absolutely.
But hey, man, I sure appreciate you coming in and kind of give me the low down on how to use this stuff. I mean, you have a lot more experience than I ever had, so I really appreciate it. Hey, man, it's been my pleasure. If you got a little time, would you mind hanging out and helping me move some parts and, but not, I'll buy a sandwich. Absolutely. Anything for a free meal
at
home
after lunch. We got the body sealed up. So now it's time for some color.
I've noticed with the Waterborne, it darkens as it dries, which means you can't do a color match without spraying it out and letting it dry first.
After four coats of light green, I'll lay on some clear why clear it. Now, before the dark green, two tone and graphics, uh, you'll have to stick around to find out the answer
up next. Listen in as two of the nation's top custom painters plan their attack on the 33 start landing out tape will lead us in the direction we want to go.
Hey, welcome back. The body is all sealed up. But before the design can be laid out, it's gotta be sanded down so that the graphics and the final clear will stick. We bought Charlie
lunch. I'm serious and he ate like a lot. So
he's obligated to stick around and help us out
mental note to self no free sandwiches.
He ate a lot though.
He may be here for a week or two.
You may be wondering why we sprayed clear on just to turn around and sand it right back down. Well, it's called an Interco and while it's not a necessary step, it does provide extra protection for the base coat.
While Tommy and Charlie finish sanding the body, I'm gonna get some color on the hood and the roof. Now, this is another custom mix auto body color and supply helped me out with,
with a couple more coats and some dry time. It'll end up a nice dark green pearl.
We're almost ready to lay out the graphics. Now, since they run the entire length of the car, that means that we're gonna have to mount all the panels first. That way we know all the graphics are gonna line up when we do the final assembly. Now, I'm gonna hang out here and mix up the color that I need for the flames. While Tommy and Charlie hang all the parts,
the doors went on first. So next come the engine sides in lower balance. Now these are stationary panels so they just bolt on them.
The holes in the chassis are right on. Another result of factory five's precise engineering.
When the car is assembled for the last time, the grill shell is going to hold the side panels in place. But for now, a couple of clamps will keep them from flopping around
the hood is the last piece to go on for now. It's just being set in place while the two tone is laid out and they'll come back off before the
flames are painted.
There should line up.
We're ready to start laying out the graphics here and PPG turned us on to a little trick. You see Waterborne base coat, it has a tendency to dry a little bit tacky, but to get around that hit it with a gold scotch bright or some 1000 grip. It'll take that tackiness right off and it'll get you down the surface. It feels just like a good old solvent base coat
with the body all scuffed down and tacked off. It's time.
The fun part laying out the graphics,
a rendering is great to have, but it's really just a starting point. There are always changes to be made.
It's pretty cool for me to have another experienced custom painter to bounce ideas off of
and Charlie had some pretty good suggestions to add to what I'd already come up with.
After a few minutes of tweaking the plans, it's time to grab the tape.
Start laying it out.
Tape will lead us in the direction.
If you're gonna try shooting graphics with Waterborne, use the orange, fine line tape from F BS. It's the only thing I've tried that will guarantee a clean edge, but you still have to be able to come up with a design for me. Free handing is the quickest way to get a rough layout.
And since I'm using tape, it's easy to adjust
after the break. Rick puts the finishing touches on the hot rod and it is hot.
Hey, guys, welcome back. Just laying in a few drop shadows here in the flames. We got it all masked off and it's really looking nice. Once I get all this done, we're gonna unmask this re mask it for the dark green.
I'm using an IWATA Eclipse. It's a real workhorse of an airbrush. That's great for general use and it's not expensive.
The color on spraying is a mixture of the light and dark greens. I've already applied by doing it this way. I already know all the colors are going to work together.
Once it's dry, we can carefully peel off the contact paper and masking. Now these flames aren't done yet. I'll come back after the car is assembled and add pinstriping to give some definitions
the next step is laying out where the two tone colors are going to meet. My design includes a scallop on the rear of the car. It'll give the back end a modern look with a fifties flare
the panels we set in place for the layout can come off now, then we can mask the body up for the dark green
and let me have it. You were saying, oh, you take the heavy stuff. Yeah, I got you.
Even the interior is going two tone on this project. So that means the dash has to be massed up with the same care as the exterior
right on, man. I think we
got this dude sealed up
now. It looks really good.
Unfortunately, it's uh time for me to get out of here. I've got a shop to get back to. But uh, dang, there goes my labor for sandwich. There you go. That's right. The free sandwich labor, right? So, no, I think you've got the hang of it. You know, the environment base. I think it's working out pretty good for you. Picked it up really quick. It's easy. It's, it's really not that difficult once you get the basics down. So, hey, I sure appreciate all your help
buddy. Thank you for letting me come out and play. Not a problem. Anytime, anytime I'll see you
since I've already sprayed the hood and roof with the dark green. I know it's gonna take several coats to get the coverage I want.
But that's all right because once it's done, it's gonna look awesome.
Now, we can see the two greens together for the first time and it looks pretty good. If I do say so myself,
I'm gonna get the two tone finished up on these panels and seal everything up with a couple of coats of clear. Then we'll run it down to horsepower for final assembly. We'll see you back here when it's ready to hit the road for sa
Well, guys, here it is. A few days later, I finished the paint laid down some pinstripes and went down and gave horsepower a hand. Put the body on the chassis after seeing the way Rick drove that other one up at the factory five, I decided I probably need to be the guy to drive this one today. Now, I wouldn't beat on this thing. I put too much time in it.
The guys down at horsepower. Really? Knock this one out of the park. It drives like a dream
with the bar set so high. I went all out. I wore my pinstriping brush down to a nut with details on everything from the headlights and wheels to the dashboard and trunk.
Hey, if the name arsonist is gonna be on it, it's got to be perfect.
Yeah, this one's gonna turn some heads,
man. This thing rides good and definitely drives good and I know it's gonna look hot. Let's see. Him in when it's on tour this next year. But we don't have to give it back till tomorrow. That means we get to play for the rest of the day, but we're all out of time for you guys. So we're out of here.