MuscleCar Builds
Want more content like this?
Join the PowerNation Email NewsletterVideo Transcript
Today on muscle car, we're building a big block for blue collar buick. See how a machine shop rehabs are old. 455 then we're back to our shop to put it back together. Plus we'll show you how to install a shift kit in a 350 turbo.
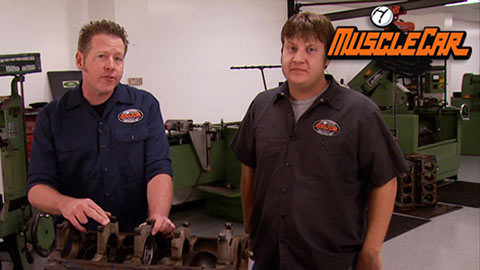
Hey, guys, welcome to Muscle car. As you can tell by looking around us, we're not in the shop today. We're at DLS Engines in Nashville and they're gonna take a look at this buick 455 that we jerked out of a wrecking yard. Let us know if it's worth building. Now, we did get to hear this thing run, but when we tore it down made us wonder if we've been wasting our time with it.
This engine will be the heart of project blue collar buick. The entire budget for this build is 10 grand. So we've been hitting at the salvage yards. Just what would you give for this car today? I give you 1515 cash money.
We spent another 300 for a Buick 455
and 150 for a better roof.
We also replaced the U joints for 40 bucks and rebuilt the starter with a $20 kit.
Well, we dropped off our engineer a few days ago so they pretty much had a chance to go through and see what all is there. This is Richard. He's one of the engine builders. How you doing, man? Hey, Rick. Cool. Why don't you give us a rundown on what you found here? Ok. Um, our block's been
hot tanked and, uh degre
it's been magna flux. Good news. We don't have any cracks. That is good news as you can see on the crank shaft, we have some bearing damage.
It looks like maybe from uh running low on oil or maybe they didn't change the oil and I wanna show you the burned oil on these caps and that's a sign of uh heat from the damage we had. You can see it over here too
and sometimes, uh what that'll do is draw the parting line of this cap inward
and the cap will be loose in the register of the block, but this one's not, it's still tight. So,
ok, that's good news you can see in this one that we've got uh in the oil galley hole, we have melted
bearing
just
totally blocked it off. We've got a couple of broken bolts up here that, that can be pretty common.
So let's torch these mains, set the dial board gauge up, see what we got? Cool. Sounds good. Get you some tools.
All right, boss. I got the Caps Tower in. What comes next? Ok, let's check the lime board and see what we got. Ok,
I'm gonna save some time and go to the back where we have the most damage.
I don't know exactly what is it that you're looking for? Ok, I've got the gauge set on, uh, factory size and I'm looking to see if this housing board is still round. Also want it to be on the correct size up and down.
It looks like it's a little under what it should be. It's a little small. We are gonna have to go to the line home machine and correct it. Uh Well, I can see the cost of this rebuild going up at a minute here. Let me check out the board, see what we got. Sure. Let me go change dial board gauges. All right. Cool.
And so what is it exactly that you're looking for?
Ok. I've got the dial board gate set up on standard size and
I'll go in here and we'll check cylinder taper, see what kind of wire we have. It
looks like we've got about, uh about five thousands taper.
So we're, we're well within the limit to re ring on the taper. Ok. Well, honestly, we're planning on just boring this thing, actually want to upgrade the pistons down the road. We may be putting some aluminum heads on it and, you know, playing around with a little bit. So we'd like to get the whole short block finished out. Nice. Ok.
So,
so what do you think on the crank? Well, the crank shaft, uh, it looks like a lot of damage, but it's mostly build up the way we measured it. It should grind. 1010, no problem. Ok. So we'll end up with a 30 over block and a 1010 crank.
That, that ain't bad at all. Let's tell you what, I'll get this stuff over to the machine, get it ready to rock and I think Tommy has the headset out somewhere if you wanna track him down.
Yeah, I've noticed you guys have started this assembly of the heads. Where are we at with them?
Well, we still got to clean them and manga lux them. So, what about the valves? Would you like to reuse these if you can if we could? But just to keep cost down. Ok. We'll need to clean them up, of course. And then we'll mic the stem and check for wear
and the margin looks good. If the, if we got a good stem, we can grind the vow.
Good deal. Well, what about the guys? Uh I would recommend since you're changing and the camshaft to just upgrade to the bronze guides, right?
We've got a few broken bolts here. Do you think you guys can take care of those? Yeah, we'll get those out for you. It's a common thing on the exhaust side. Do you think we ought to put harden exhaust seats in this thing? I would because you're gonna be running unleaded fuel.
Right. Yeah, that makes sense. Then.
Um, you might wanna go check on Rick because, you know, he's a little more of a painter than a machine. I better go check.
Hey, Rick. How's it going over here? Oh, pretty good. Peanut. Came over here to give me hands, setting it up. So I didn't hurt myself. Well, Peanut's got over 20 years experience. He'll do it right. Right on. So it's in good hands.
I couldn't help but notice all the damage on this journal right here. Now, our first thought was to just order a crank hit. Yeah, it's just build up in this case. Uh We just, we'd be better off just grinding the shaft. So this isn't actually the crank that screwed up here. Then that's actually bearing. It's just bearing. It just, it looks a lot worse than it is. So it'll clean up. All right, it'll clean up fine. Cool. Let's fire this dude up
once the crank was cleaned up. Peanut turned his attention to the block.
These 455 s already have huge pistons, but we're poking the bores out even bigger
with the boring taken care of. Normally the honing would be next. But you've got to have your pistons to do that.
And since we decided to go 30 over, we've got to order them, but we can talk about the rods,
Richard are these rods worth using? Yeah, we've got a good set of cores here. Actually, we got Ford Rods. How is this a Forage ride? Well, this has a double parting line instead of a single parting line like a cast rod. These bolts are. Ok.
What kind of RPM range you gonna run?
5500 tops? Well, you know, if Rick stays out of the throttle, ok. I see.
We don't have any spun bearings on the big ends,
but we do need to torque them up and check to see if they're still around and on size with our new pistons. Are we going to do any balancing once they get here, we'll compare the weight
and make it decision then? All right. Sounds good. Hey, Tommy, this place is cool. But we gotta get going and get back to work, man. But before we split, I gotta ask you a question. DLS engines. What does that stand for?
That's dirty, little sacred.
That's pretty good.
Well, I guess we're gonna get back to the shop and we'll get you some parts.
Sounds good.
Coming up, Rick shows you how to put some snap in your shift.
Hey, we're back. It's gonna be a day or two before our engine dread to be brought back to the shop for final assembly. But that's ok because we've got plenty to do. Our blue collar buick still has its old drive train. So we're gonna pull it and once we get it jerked out, we can inspect that turbo 350
update it with a shift kit.
Here it is.
Here we go.
All right. Now that we got this thing out and up on a bench, we can take a look and see what we have to work with. Now, remember a shift kit is not a rebuild kit. So we gotta make sure we're starting out with a good usable transmission that seemed to work, ok when we drove it into the shop, but dropping the pan will tell the tale
actually, that looks pretty doggone clean.
It's normal to have a little bit of material down there in the bottom. All that is is your clutches wearing down a little bit.
No big deal.
A shift kit allows you to change not only the shift points, taking full advantage of your engine's torque, but it also increases the firmness of the shifts, reducing slippage and wear on the clutches
with the valve body and restrictor plate. Out of the way the check balls can come out using a magnet.
I know the inside of an automatic transmission can look really intimidating, but it doesn't have to be just think of this as a circuit board. But instead of using electricity using pressurized fluid, that pressure is transferred into your valve body through very specific holes in this plate. Now your valve body controls all of your shift points and all of the internal pressure in your transmission. Now we're gonna be modifying the low control valve, the 23 shift valve and the overall pressure valve,
the valves control the shifts and the springs pushing against hydraulic pressure controls the valves by changing the spring rate, you change the point at which the valve moves, simply swap out the springs in the overall pressure. And 23 shift valves can replace the spring with a plug in the low control valve. The original retaining pins will hold the new parts in place.
The accumulator dampens the engagement of the clutches. Yeah, consider this spring deleted because we want to light up the tires when we hit second gear
next, we need to open up a new hole in the restrictor plate. Make sure to file off any birds left behind
for reassembly start by dropping in only the check balls called for in the instructions.
The number used and location varies depending on the kit pile, the parts back on the same way they came off. Use the new gaskets and plates, torque everything down the specs and top it all off with a new filter.
Adjustable modulators are only about 10 bucks. So I'm going to go ahead and swap it out. If the old one were to fail, it can cause vacuum leaks and erratic shifts.
It's also a good idea to replace the front and rear main seals while the transmission is out
they're cheap and a whole lot easier to get to with it on a bench than hanging under your car.
That's it with this shift kit in our 455 saying that our buick is gonna chirp second gear is the understatement of the year. And speaking of 455 ours is back from the machine shop. So stick around because later in the show we'll be putting it together.
Hey, guys, I'm glad you found your way back to the shop. We got our buick engine back and it almost looks as good as new. The block's been magni flux bored and
honed the crank shaft has been re ground and balanced and our heads have been totally reworked.
The main bearings go in first followed by the rear main seal
Buicks use what's called a rope seal.
Royal purple assembly lube is thicker than engine oil, so it stays in place. Don't be shy with it
like we mentioned in the tear down. Each main cap has a designated journal, so be sure to keep them matched up to the right spot.
Top the main caps off with the bearing and plenty of lube before dropping into place to make sure they're seated. Well, give them a few taps with a dead blow hammer,
a squirt of R TV in each corner will prevent leaks at the roads.
Yeah.
When you're talking down the main cap bolts, do it in several stages ending up with the factory specs,
check the inlay tolerance by moving the crank front to rear and reading the range of motion on the dial gauge.
Now there's two basic types of piston rings. There's file fit and standard. Now file fit, you set your own end gaps and that can be a better seal and better horsepower. But we're building our buick the same way that most of you guys have build one in your garage and most of you aren't gonna want to mess around with file, fit in every single ring. So we're going with the standard rings and honestly, the difference in horsepower, it's really not worth the trouble
start with the oil ring. It comes in three parts, the expansion ring and two scraper rings, take your time spinning these on. You don't want to damage the piston or the rings.
Now, the oil ring is actually the most complicated out of the three because it's a three piece ring. So that means that you have three gaps that you have to contend with.
So I usually like to space them out. I've got one gap here.
The gap on the center is right there.
So I take the gap on this one and put it over here on the far side, just make sure they're seated on there correctly and not override in the center ring.
Next come the lower and upper compression rigs again, be careful not to cause any damage by breaking the ring or gouging the piston.
Rick's got the pistons ringed up. So all they need is a few squirts of motor oil on the wrist pin and rings. A ring compressor is something you won't use every day. But it's well worth the investment. Even for one rebuild,
the rod bearing gets assembly loop like all the others, these sleeves will keep your crane shaft from getting nicked as you tap the piston in.
You don't have to flip the engine over to get the rod caps on. But it's easier to see this way,
lube them up, then torque them down in stages.
The cam goes in next coated with, you guessed it more assembly lou don't forget the freeze plugs on the front of the block before moving on to the timing set.
Unlike other GM blocks, the lower timing sprocket can be pried off, just tap the new one on with a brass hammer
clock, the crank with the alignment dot At 12 o'clock before installing the chain and upper sprocket.
Don't forget the retainer or bad things will happen.
The water pump housing goes on next with a little help from lock tights, thread ceiling,
top it off with the pump and we're ready for the top side
after the break. Tommy gets his heads on straight.
You're watching Muscle Car for a DVD copy of this episode. Just go to Power Block tv.com and order your copy for just 595 plus shipping and handling. Start your own muscle car collection delivered right to your door from the power block.
I got the short block assembled before the break. So now I can move on to installing the heads.
Don't freak out. I'm only using the impact to run the bolts down. I'll talk them down in several steps just like I did with the mans.
Next come the lifters followed by the push r
a few dabs of motor oil before the Rocker arm assembly goes on will prevent a dry start.
Once it's in place, I'll torque it to specs
the wind tray and oil pick up tube come next,
seal up the corners with some R TV. Before laying on the oil pan gasket,
here's a tip, install all the boats before tightening them down or you may have a problem getting the last ones in
Buick oil pumps are cast into the front housing. They can't be replaced but they can be rebuilt. Pack the cavity full of petroleum jelly drop in the pump gears, then install the gaskets plate, filter housing and filter.
The harmonic balancer gets a dab of oil to keep it from burning the seal on for a start up.
I'm using lock tight retaining compound on the freeze plugs for ceiling.
Some people say you need it. Some people say you don't. I look at it as cheap insurance because there's no bigger pain than finding a lea and freeze plug. Once the engine installed in the vehicle because you gotta pull all that stuff right back out.
The Valley Pan comes next, but not before some seal it in key spots.
I'm topping it all off with the stock cast iron intake which could double as a boat anchor,
a simple mechanical fuel pump bolts right on in no time and last but not least come the valve covers.
Well, that pretty much does it other than the carburetor and the distributor, which we plan to rebuild on another show. Now, this really wasn't a high performance build. It just had some of the typical upgrades. Now, this thing is built plenty strong enough so we can throw some serious parts at it later if we want to, but we're all out of time. So until next time y'all keep between the ditches.
Show Full Transcript
Hey, guys, welcome to Muscle car. As you can tell by looking around us, we're not in the shop today. We're at DLS Engines in Nashville and they're gonna take a look at this buick 455 that we jerked out of a wrecking yard. Let us know if it's worth building. Now, we did get to hear this thing run, but when we tore it down made us wonder if we've been wasting our time with it.
This engine will be the heart of project blue collar buick. The entire budget for this build is 10 grand. So we've been hitting at the salvage yards. Just what would you give for this car today? I give you 1515 cash money.
We spent another 300 for a Buick 455
and 150 for a better roof.
We also replaced the U joints for 40 bucks and rebuilt the starter with a $20 kit.
Well, we dropped off our engineer a few days ago so they pretty much had a chance to go through and see what all is there. This is Richard. He's one of the engine builders. How you doing, man? Hey, Rick. Cool. Why don't you give us a rundown on what you found here? Ok. Um, our block's been
hot tanked and, uh degre
it's been magna flux. Good news. We don't have any cracks. That is good news as you can see on the crank shaft, we have some bearing damage.
It looks like maybe from uh running low on oil or maybe they didn't change the oil and I wanna show you the burned oil on these caps and that's a sign of uh heat from the damage we had. You can see it over here too
and sometimes, uh what that'll do is draw the parting line of this cap inward
and the cap will be loose in the register of the block, but this one's not, it's still tight. So,
ok, that's good news you can see in this one that we've got uh in the oil galley hole, we have melted
bearing
just
totally blocked it off. We've got a couple of broken bolts up here that, that can be pretty common.
So let's torch these mains, set the dial board gauge up, see what we got? Cool. Sounds good. Get you some tools.
All right, boss. I got the Caps Tower in. What comes next? Ok, let's check the lime board and see what we got. Ok,
I'm gonna save some time and go to the back where we have the most damage.
I don't know exactly what is it that you're looking for? Ok, I've got the gauge set on, uh, factory size and I'm looking to see if this housing board is still round. Also want it to be on the correct size up and down.
It looks like it's a little under what it should be. It's a little small. We are gonna have to go to the line home machine and correct it. Uh Well, I can see the cost of this rebuild going up at a minute here. Let me check out the board, see what we got. Sure. Let me go change dial board gauges. All right. Cool.
And so what is it exactly that you're looking for?
Ok. I've got the dial board gate set up on standard size and
I'll go in here and we'll check cylinder taper, see what kind of wire we have. It
looks like we've got about, uh about five thousands taper.
So we're, we're well within the limit to re ring on the taper. Ok. Well, honestly, we're planning on just boring this thing, actually want to upgrade the pistons down the road. We may be putting some aluminum heads on it and, you know, playing around with a little bit. So we'd like to get the whole short block finished out. Nice. Ok.
So,
so what do you think on the crank? Well, the crank shaft, uh, it looks like a lot of damage, but it's mostly build up the way we measured it. It should grind. 1010, no problem. Ok. So we'll end up with a 30 over block and a 1010 crank.
That, that ain't bad at all. Let's tell you what, I'll get this stuff over to the machine, get it ready to rock and I think Tommy has the headset out somewhere if you wanna track him down.
Yeah, I've noticed you guys have started this assembly of the heads. Where are we at with them?
Well, we still got to clean them and manga lux them. So, what about the valves? Would you like to reuse these if you can if we could? But just to keep cost down. Ok. We'll need to clean them up, of course. And then we'll mic the stem and check for wear
and the margin looks good. If the, if we got a good stem, we can grind the vow.
Good deal. Well, what about the guys? Uh I would recommend since you're changing and the camshaft to just upgrade to the bronze guides, right?
We've got a few broken bolts here. Do you think you guys can take care of those? Yeah, we'll get those out for you. It's a common thing on the exhaust side. Do you think we ought to put harden exhaust seats in this thing? I would because you're gonna be running unleaded fuel.
Right. Yeah, that makes sense. Then.
Um, you might wanna go check on Rick because, you know, he's a little more of a painter than a machine. I better go check.
Hey, Rick. How's it going over here? Oh, pretty good. Peanut. Came over here to give me hands, setting it up. So I didn't hurt myself. Well, Peanut's got over 20 years experience. He'll do it right. Right on. So it's in good hands.
I couldn't help but notice all the damage on this journal right here. Now, our first thought was to just order a crank hit. Yeah, it's just build up in this case. Uh We just, we'd be better off just grinding the shaft. So this isn't actually the crank that screwed up here. Then that's actually bearing. It's just bearing. It just, it looks a lot worse than it is. So it'll clean up. All right, it'll clean up fine. Cool. Let's fire this dude up
once the crank was cleaned up. Peanut turned his attention to the block.
These 455 s already have huge pistons, but we're poking the bores out even bigger
with the boring taken care of. Normally the honing would be next. But you've got to have your pistons to do that.
And since we decided to go 30 over, we've got to order them, but we can talk about the rods,
Richard are these rods worth using? Yeah, we've got a good set of cores here. Actually, we got Ford Rods. How is this a Forage ride? Well, this has a double parting line instead of a single parting line like a cast rod. These bolts are. Ok.
What kind of RPM range you gonna run?
5500 tops? Well, you know, if Rick stays out of the throttle, ok. I see.
We don't have any spun bearings on the big ends,
but we do need to torque them up and check to see if they're still around and on size with our new pistons. Are we going to do any balancing once they get here, we'll compare the weight
and make it decision then? All right. Sounds good. Hey, Tommy, this place is cool. But we gotta get going and get back to work, man. But before we split, I gotta ask you a question. DLS engines. What does that stand for?
That's dirty, little sacred.
That's pretty good.
Well, I guess we're gonna get back to the shop and we'll get you some parts.
Sounds good.
Coming up, Rick shows you how to put some snap in your shift.
Hey, we're back. It's gonna be a day or two before our engine dread to be brought back to the shop for final assembly. But that's ok because we've got plenty to do. Our blue collar buick still has its old drive train. So we're gonna pull it and once we get it jerked out, we can inspect that turbo 350
update it with a shift kit.
Here it is.
Here we go.
All right. Now that we got this thing out and up on a bench, we can take a look and see what we have to work with. Now, remember a shift kit is not a rebuild kit. So we gotta make sure we're starting out with a good usable transmission that seemed to work, ok when we drove it into the shop, but dropping the pan will tell the tale
actually, that looks pretty doggone clean.
It's normal to have a little bit of material down there in the bottom. All that is is your clutches wearing down a little bit.
No big deal.
A shift kit allows you to change not only the shift points, taking full advantage of your engine's torque, but it also increases the firmness of the shifts, reducing slippage and wear on the clutches
with the valve body and restrictor plate. Out of the way the check balls can come out using a magnet.
I know the inside of an automatic transmission can look really intimidating, but it doesn't have to be just think of this as a circuit board. But instead of using electricity using pressurized fluid, that pressure is transferred into your valve body through very specific holes in this plate. Now your valve body controls all of your shift points and all of the internal pressure in your transmission. Now we're gonna be modifying the low control valve, the 23 shift valve and the overall pressure valve,
the valves control the shifts and the springs pushing against hydraulic pressure controls the valves by changing the spring rate, you change the point at which the valve moves, simply swap out the springs in the overall pressure. And 23 shift valves can replace the spring with a plug in the low control valve. The original retaining pins will hold the new parts in place.
The accumulator dampens the engagement of the clutches. Yeah, consider this spring deleted because we want to light up the tires when we hit second gear
next, we need to open up a new hole in the restrictor plate. Make sure to file off any birds left behind
for reassembly start by dropping in only the check balls called for in the instructions.
The number used and location varies depending on the kit pile, the parts back on the same way they came off. Use the new gaskets and plates, torque everything down the specs and top it all off with a new filter.
Adjustable modulators are only about 10 bucks. So I'm going to go ahead and swap it out. If the old one were to fail, it can cause vacuum leaks and erratic shifts.
It's also a good idea to replace the front and rear main seals while the transmission is out
they're cheap and a whole lot easier to get to with it on a bench than hanging under your car.
That's it with this shift kit in our 455 saying that our buick is gonna chirp second gear is the understatement of the year. And speaking of 455 ours is back from the machine shop. So stick around because later in the show we'll be putting it together.
Hey, guys, I'm glad you found your way back to the shop. We got our buick engine back and it almost looks as good as new. The block's been magni flux bored and
honed the crank shaft has been re ground and balanced and our heads have been totally reworked.
The main bearings go in first followed by the rear main seal
Buicks use what's called a rope seal.
Royal purple assembly lube is thicker than engine oil, so it stays in place. Don't be shy with it
like we mentioned in the tear down. Each main cap has a designated journal, so be sure to keep them matched up to the right spot.
Top the main caps off with the bearing and plenty of lube before dropping into place to make sure they're seated. Well, give them a few taps with a dead blow hammer,
a squirt of R TV in each corner will prevent leaks at the roads.
Yeah.
When you're talking down the main cap bolts, do it in several stages ending up with the factory specs,
check the inlay tolerance by moving the crank front to rear and reading the range of motion on the dial gauge.
Now there's two basic types of piston rings. There's file fit and standard. Now file fit, you set your own end gaps and that can be a better seal and better horsepower. But we're building our buick the same way that most of you guys have build one in your garage and most of you aren't gonna want to mess around with file, fit in every single ring. So we're going with the standard rings and honestly, the difference in horsepower, it's really not worth the trouble
start with the oil ring. It comes in three parts, the expansion ring and two scraper rings, take your time spinning these on. You don't want to damage the piston or the rings.
Now, the oil ring is actually the most complicated out of the three because it's a three piece ring. So that means that you have three gaps that you have to contend with.
So I usually like to space them out. I've got one gap here.
The gap on the center is right there.
So I take the gap on this one and put it over here on the far side, just make sure they're seated on there correctly and not override in the center ring.
Next come the lower and upper compression rigs again, be careful not to cause any damage by breaking the ring or gouging the piston.
Rick's got the pistons ringed up. So all they need is a few squirts of motor oil on the wrist pin and rings. A ring compressor is something you won't use every day. But it's well worth the investment. Even for one rebuild,
the rod bearing gets assembly loop like all the others, these sleeves will keep your crane shaft from getting nicked as you tap the piston in.
You don't have to flip the engine over to get the rod caps on. But it's easier to see this way,
lube them up, then torque them down in stages.
The cam goes in next coated with, you guessed it more assembly lou don't forget the freeze plugs on the front of the block before moving on to the timing set.
Unlike other GM blocks, the lower timing sprocket can be pried off, just tap the new one on with a brass hammer
clock, the crank with the alignment dot At 12 o'clock before installing the chain and upper sprocket.
Don't forget the retainer or bad things will happen.
The water pump housing goes on next with a little help from lock tights, thread ceiling,
top it off with the pump and we're ready for the top side
after the break. Tommy gets his heads on straight.
You're watching Muscle Car for a DVD copy of this episode. Just go to Power Block tv.com and order your copy for just 595 plus shipping and handling. Start your own muscle car collection delivered right to your door from the power block.
I got the short block assembled before the break. So now I can move on to installing the heads.
Don't freak out. I'm only using the impact to run the bolts down. I'll talk them down in several steps just like I did with the mans.
Next come the lifters followed by the push r
a few dabs of motor oil before the Rocker arm assembly goes on will prevent a dry start.
Once it's in place, I'll torque it to specs
the wind tray and oil pick up tube come next,
seal up the corners with some R TV. Before laying on the oil pan gasket,
here's a tip, install all the boats before tightening them down or you may have a problem getting the last ones in
Buick oil pumps are cast into the front housing. They can't be replaced but they can be rebuilt. Pack the cavity full of petroleum jelly drop in the pump gears, then install the gaskets plate, filter housing and filter.
The harmonic balancer gets a dab of oil to keep it from burning the seal on for a start up.
I'm using lock tight retaining compound on the freeze plugs for ceiling.
Some people say you need it. Some people say you don't. I look at it as cheap insurance because there's no bigger pain than finding a lea and freeze plug. Once the engine installed in the vehicle because you gotta pull all that stuff right back out.
The Valley Pan comes next, but not before some seal it in key spots.
I'm topping it all off with the stock cast iron intake which could double as a boat anchor,
a simple mechanical fuel pump bolts right on in no time and last but not least come the valve covers.
Well, that pretty much does it other than the carburetor and the distributor, which we plan to rebuild on another show. Now, this really wasn't a high performance build. It just had some of the typical upgrades. Now, this thing is built plenty strong enough so we can throw some serious parts at it later if we want to, but we're all out of time. So until next time y'all keep between the ditches.