MuscleCar Builds

Parts Used In This Episode

Anest-Iwata Usa Inc.
LS400 SuperNOVA Series Spray Gun
Auto Body Color & Supply Co.
PPG 1683 Black Toner
Auto Body Color & Supply Co.
PPG Concept 2021 Urethane Clear
Mittler Bros. Machine & Tool
24" Planishing Hammer w/ 9 Radius Dies
Mittler Bros. Machine & Tool
Billet Aluminum 24" Deep Throat Industrial Power Roll Bead Roller
Video Transcript

Today on muscle car, red sled is back and she's finally going to live up to her name,

Rick Flexes his airbrush skills with some F

chrome emblems. Tommy Fabs up a custom center console and we're cruising the A MC two C

Muscle.

Welcome to Muscle

Talk. Today. We're taking a break from project blue collar buick to bring back one of your favorites project red sled. Now we've been picking away at the body work in all of our free time. And by the end of the show today, red sled will be red.

This old 61 Impala two door sedan was in sad shape when it rolled in, but we braced up. The X frame gave it some air ride widened, the tubs patched up the sheet metal and smoothed out the bumper. Then we mocked up the 409 and four speed got the body work knocked out,

plumbed it up and painted the wheels black.

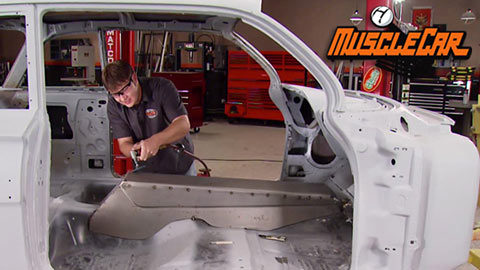
This car is gonna be grabbing a lot of eyeballs when it rolls out of the booth in bright red. But before we tackle the paint, this little detail that we need to take care of. We're putting in buckets in place of the bench seat. So we need a console, really couldn't find one for the direction we're heading with the interior. So we're gonna fab up our own.

Now, we want our console to look like it actually belongs in the car. So our design is gonna mimic the factory body lines. There's all kinds of stuff you can incorporate into a console like a shifter armrest storage gauges controls, but we're gonna keep our simple and just go with the shifter and a storage compartment.

I'm starting by finding the center of the car and estimating the right height for the console.

I'm bending some quarter inch rod to make a jig that I'll shape the rest of the console around

heating the rod. Not only makes it easier to work with, you can make tighter, more controlled bends

with two identical pieces formed, I'll tack them in place to form the general shape of the console.

Once I've got it tweaked to the perfect shape, these frost braces will keep it that way and give it some support.

After transferring the dimensions to a piece of 20 gauge steel, I'm using some electric shears to cut out the top piece and 10 snips to trim up the corner.

You might expect an expensive slip roller to get this part done.

But I'm using good old garage technology instead,

some scrap tubing clamps and the body hammer are all you need.

I'll use a template every now and then to check my progress.

Don't get too slap happy here. If you go too far, you can distort the steel which can be a pain to fix

with the top panel looking good. I can move on to the sides. This template will help me get the side panel shaped to the floor,

the sheer slices out the main shape, then I'll go back and do some fine tuning with the tin snip.

The New Midler Brothers bead roller is a pleasure to use the bead I'm forming on the side panels resembles the body lines on the cart and will give the console the matching look. We're going for

a few quick tacks working from one end to the other helps lay these panels in nice and flat.

I'm forming the corners out of flat steel using a hammer and dolly to shape them, then trimming them to fit

some tacks and a massage with a hammer. Finishes off the corner.

That's the basic shape for a console, but it's missing something, a place for the shifter. We could just cut a hole but red sled deserves something far more cool. So I'm gonna fab up a panel to help doll it up a bit.

I've been waiting on a chance to show off our planing hammer. It's not a tool we use every day,

but there's no replacement for it on a job like this.

It's used to create complex curves and with the help of a bag and hammer, an unlimited number of shapes can be achieved.

I'm welding the shifter panel to the underside of my metal masterpiece. Then slicing out the top section to reveal the results of several hours of work.

A

few passes with the grinder, dresses up the edges.

All it needs now is a hole in it for the shifter and it'll be ready for some paint. Speaking of some paint, while I'm finishing up the welding on this thing, Rick's gonna get the body in the booth and spray on some color to help old red sled live up to its name

and Paul has been through a lot since we body worked. It. It's been primed blocked, re primed blocked again,

undercoated, masked up and sealed. The time has finally come to get some color down on this dude

and we're using G MS toward red. It's a color seen on late model GT Os. So hang on to your eyeballs because we're about ready to go from white to out of sight.

I'm using a Nest. I

Wada's latest gun, the Ls 400. It's a pen and

Farina design. So it's not only Ergonomic, she's sexy.

The fluid tip is a 1.3 but it is available in different sizes.

The first thing I noticed when I cracked the throttle is the consistency of the pattern, no matter what width you have it set at. So this thing would be perfect for spraying pearls candies or just about any high end finish.

Imagine that red sled red

after three coats of base with flash time in between. I'll make the whole thing shiny with PPGS 2021 clear sent over from auto body color and supply.

I'm starting with a medium wet coat. Then after letting it flash, I'll come back for two full wet

coats.

Later in the show, Rick uses some custom paint techniques to give red sled some Blair

restore your classic pick up SUV or suburban at shop, classic truck parts.com. We stock anything and everything for Ford Chevy GM and Dodge trucks, complete bodies, complete interiors, fuel systems, hard parts, chrome trim accessories and more. Log on now and save

the all new power block directory.com. Your source for everything. Automotive, find all the parts and brands. Thousands of racetracks from Daytona to Long Beach, plus events, clubs and more. Find the stuff you're looking for. The all new power block directory.com, your source for everything. Automotive,

today's flashback. A 1968 AM X

1967 was a bad year for American Motors. The big three had beaten its new lineup to A P and it hit the mat 75 million in the red, but the little car company wasn't going down without a fight. It came back swinging in 68 with a 12 punch first the javelin and then the mighty little AM X.

It was a two seater Hellion with a Corvette squarely in sight. Rolled out as the Javelin's hairy little brother. It shared much of the same skin but had a foot hacked out of it with a wheelbase of just 97 inches and a wide track stance. It begged to be hammered through the curves which had handled with ease.

A MC pushed the car as budget minded muscle that pulled no punches and they delivered the goods

at a base price of just 3200 bucks. It was a full grand less than the vet

and came loaded with bucket seats,

heavy duty suspension,

high performance rubber, dual exhaust and 3 V8. To choose from the heavyweight was the brand spanking new AM X 390.

The new block shared heads with a 343 but featured a crank shaft connecting rods made of forged steel.

It pumped out 315 horses get you to 60 in just seven seconds.

One of the good things about driving, Miam X is I get to

hear the roar of the engine. You can feel the road. You're part of the road. Unlike today's cars,

this baby earned its stripes with a gold package which added higher rated shocks and springs along with power disc brakes and a twin grip rear end.

The optional three speed shift command linked up with a set of 354 gears to deliver maximum go

on the road.

A MC threw itself full bore into the muscle car arena even offering special dealer installed performance parts known as Group 19, like this Edelbrock R four B intake.

It's also wearing a set of Krager wheels just like it did the day. It rolled off the car lot.

The inside is a cockpit with just enough room for you and a copilot stylish features like wood grain steering wheel, deep set gauges and chevrons on the door giving a look and feel of true. Blue muscle designers went through several experiments to arrive at the AM X. That X is for experimental. Its roots can be seen in the 65 tarp and prototype, a sporty compact that grew into the mud,

Berlin Behemoth

and the 66 AM X Viali

concept, which to get this featured a rumble seat

to help promote their new car. A MC got famed racer Craig Breed love to drive a specially equipped AM X and ended up breaking over 100 world speed records.

They also touted the car as a limited production run going so far as putting numbered plates on the dash, which in all honesty,

we have no relation at all to the production order.

It's almost more fun to drive now than it was back then because it's just such a unique and rare vehicle.

Just 6725 AM XS were sold which wasn't bad for a car introduced mid year.

It helped revive American Motors and forever alter its images. Just a maker of family cars. A MC was back in the ring and it was just getting started

up next. Who needs chrome? We've got Rick and his airbrush.

You're watching muscle car for a DVD copy of this episode. Just go to Power Block tv.com and order your copy for just 595 plus shipping and handling. Start your own muscle car collection delivered right to your door from the power block,

restore your classic pickup SUV or suburban at shop classic truck, parts.com. We stock anything and everything for Ford Chevy GM and Dodge trucks, complete bodies, complete interiors, fuel systems, hard parts, chrome trim accessories and more log on now and save.

My power block is fueled by you. Join groups, post build pics

and share videos.

You are the star

at

my power block.com.

Hey guys, welcome back from the factory. The accent stripes from these Impalas were white but hey, this isn't exactly a numbers matching restoration. It's a resto mod. So we're going black. I got it all prepped out and masked up. So let's do this.

This is GS 1683 black toner. It can be tricky to get good coverage with black, especially over red or bright colors, but three coats will make sure no base color shows through.

Now with the car is unique as red sled. Well, custom little details like that center console really helped crank up the cool factor. We're gonna continue along with that theme and add some custom graphics to those black inserts.

Now, you probably noticed we welded up all the holes for the factory emblems. There's a reason for that. I'm gonna paint them back on using a series of custom techniques that's gonna make the new logos pure red sled.

The process starts with a vinyl stencil. We had this one made at a local sign shop using an image designed by our graphic artist.

Once the stencil is carefully laid in place, I'll mask off the surrounding area.

After analyzing the design, I start removing the pieces of the stencil where the first color is gonna go.

I'm putting a small amount of white in the airbrush first, I've premixed and reduced all the colors beforehand just to save time. Once I get rolling,

keeping the spray pattern light and tight and slowly building up the color. Well, what makes it a lot easier to find the edges of the stencil as things progress

with the checkers completely covered? I can unmask a little more for the next layer.

Since this is a gravity feed airbrush, I can clean it between colors with nothing more than a cup of lacquer thinner and a paper towel.

This next layer is the same white just with a drop of black mixed in for a subtle gray.

I'm being careful not to cover up the white. I've already laid down or I'll lose the contrast

and some areas of the stencil need to be recovered between coats, mask and tape and a steady hand to get the job done

with the first colors protected. I can move on to the center of the logo and the lettering

when planning out a graphic, it's really important to have a game plan in your head before you start or you could end up with a big old mess.

Now, this is a relatively simple design but they can get pretty complicated.

It's a good idea to do a test panel before you tackle

the real thing.

That way you have an idea of what works and what doesn't

to recreate the look of chrome. I want a slightly uneven break in the color along the center of the emblem. Now to get this done, I'm tearing a sheet of contact paper to make a mask with a rough edge.

After a 10 minute dry time, I can carefully unmask it

a few strategically placed shadows, add some realistic detail

and that's it. No one's gonna mistake red sled for just any old 61 Impala, not with our custom faux chrome emblems on the side. Now, all I have to do is clear it and unmask it. But for this week we're out of time. So until next time

we're out of here.
Show Full Transcript