MuscleCar Builds
Want more content like this?
Join the PowerNation Email NewsletterParts Used In This Episode
Matco Tools
Sheet Metal Trimmer Chisel.
YearOne
1968 Mustang fastback pre-welded reproduction body shell from Dynacorn.
YearOne
Reproduction roof panel
Video Transcript
Today on muscle car. Rick and Tommy take Horsepower's
Rock tribute track car to the next level with a new roof skin and Tritone paint job. Plus we're taking it to the street in a 66 tornado.
Hey, guys, welcome to muscle car. We're heading down here to Horsepower to pick up a project that they've taken about as far as they can for now.
Yeah, they've helped us add muscle to a lot of our projects and we're gonna return the favor by doing some metal work body work and paint on their 68 mustang track car.
Well, here it is guys ready for elbow grease and paint guns. What the heck happened? Front of the roof, man. Well, Rick, I think the guys who delivered it took the term drop ship a little too literally.
Yeah,
it looks like they rolled it to you. Well, you guys know how it goes. One hand washes the other and ours are pretty clean. We build that fine 409 for the red sled
and that 446 pack for the
Ka. That's true. Runs good
called payback.
All right,
you boys go do something. We'll take care of that.
Get this thing out of here. All right,
this is a freshly minted mustang. Year one sent us this dyno
Corn steel body and asked us to make it into a tribute to Motorsports Maven Vic Edelbrock
and just like the Edelbrock family's own family
backs. It'll be designed to provide plenty of thrills as a road course track car and the best part we're giving it away to a lucky winner. Horsepower got the performance goodies taken care of including a Ford 347 small block that pulled 518 horses at the
dyno.
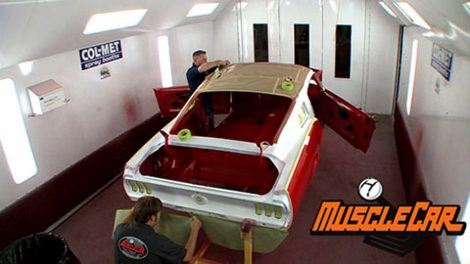
Now it's our turn to work some muscle car magic on this pony. But before we can do any body work and paint, there's one issue, we need to take care of the roof. This thing was mangled when it come out of the crate and it take a lot of time and filler to reshape it.
Yeah, it could chew up easily eight or 10 hours. So if you're looking to keep your labor costs down or if you're just looking to save yourself some time replacing the whole skin is the way to do it.
Build on a budget muscle car projects that save you time and money.
Now, you can get a replacement roof panel from year one for about 400 bucks and it shouldn't take more than four or five hours to install it. Plus you won't have a roof full of plastic that could crack out on you later.
The first step is to find the edges of the panel from looking at our new skin, we know about where the seams are. So it's just a matter of uncovering them and drilling out the welds tom is using a spot weld cutter bit in the drill, which is great for areas in the middle of a panel for pinch welds and air powered spot weld cutter gets the job done in a hurry.
Now the air chisel is gonna help me get the center section of the roof cut out,
but Matco slotted panel cutter is gonna be doing most of the work. Now, if you notice it's only gonna cut in a quarter of an inch, that way you're not gonna get into your inner structure and do a lot of damage.
Hey, try these on what?
Now, you may only be cut in a quarter inch deep, but you still need to be careful not to damage the inner structure
cut just inboard of the body line. That way the sheet metal can be easily rolled up once the spot welds are cut loose.
Now, that's a moon roof.
A hammer and chisel can be used to pry off what's left of the original roof,
just don't get too aggressive where you'll end up distorting the remaining structure.
Can you pinstripe that
in order to ensure tight seams, we're using grinders to smooth out the edges and get rid of the rest of the filler.
There's always gonna be one or two areas that need a little touching up. But the hammer and Dolly will get you back on track.
The new skin put needs some prep too. A 40 grit disk will get the edges ready to bond with the rest of the car.
Now, the roof panel is ready to go and you're probably expecting us to drag out the old welders. That's not our plan for this one.
Metal bonding is common in manufacturing and body shops these days.
Adhesives are quick, don't require much clean up are rushed and leak proof and plenty strong for this type of application.
Some sem weld bond adhesive applied to both services and this roof skin won't be going anywhere.
You gotta get it clamp in place quick even with
slow active glue because the time factor, this is really a two person job and be sure to wipe off the excess glue before it hardens. So you'll be doing it with a grinder. This adhesive is plenty strong enough to keep the panel in place, but the corners are the weak spot. So manufacturers recommend a tack at each corner to keep them from wanting to pull up during the collision.
The original Ford bodies use lead filler in these seas and dyno Corn uses plastic. We're gonna use metal filler. It's almost as stable as lead, but it's a lot stronger than plastic
with the area cleaned and prepped with 40 grit. You can commence to smearing it on
once it dries, you can treat it like plastic, but it dries a little harder. So try to work it before it hardens completely.
Next comes a couple of layers of good old plastic fillers.
A
final coat of some finishing buddy will prep it for primer.
That's a good idea to let the glue set up for a couple hours before pulling the clamps. Now, we got all of our seas body worked out while we were waiting. So these are ready to come off and since there's no spot welds to grind down, we're ready to prep out for some primer
up next. The painful process of panel alignment,
the whole,
hey, welcome back to muscle car. We got our 68 mustang track car ready for some primer, but we're not gonna shoot the whole thing. This thing isn't gonna be a show car or even a street car. So it doesn't have to be perfect. So we're gonna save ourselves a lot of time and effort and just spot prime it.
Spot priming is just what it sounds like covering a spot within a larger panel. Three coats should do the trick but make sure to cover a slightly larger area with each coat. So you don't build up an edge.
Now, when Mike and Joe hung these fenders down on horsepower, they didn't have to worry about panel alignment yet. They pretty much just hung them in place. But as you can see a little attention here is gonna be necessary.
Normally you'd wait till the cars on the ground before you set the gaps. But with a track car, we're really not worried about gaps. All we're after is everything set to function.
Listen that up. See if you can knock the whole thing straight back,
go back,
go back, all
you can slide the whole thing back.
There you go.
Yeah. Tryin from the top. We'll see if we can touch the bottom in.
That's not bad. How's the gap for the cow? But
it's not bad. It's even
all we need some more room on this side, dude. Oh yeah, right there. Slide the whole thing back forward, back, forward,
back, forward,
forward, back.
Damn it.
Tell you what, let me slide this
in there. Push it forward, try essentially
down up there for a second.
Well, the rocker is still out, but we're already sitting too far in against the door.
We can't bring the door in anymore because we're already against the rocker.
So basically the shape of this fender is off
the
brace right there is not gonna let this fender move where we need it to.
I think we had something said in there
and kind of pinch in there and then push that fender down. Ok, let's try this
and we can try it right there to see what it does.
All we can do is fix it. Right?
Ok.
I heard cracking
and we did something.
Here we go.
Slide that top and forward just a little bit more. Actually, that's not bad at all.
All right. See what
I'm happy with that.
Good deal. Sweet.
Terrible.
Let's dig down and see if we're even in the ballpark, you got it.
Yeah,
I'm looking at the fact that it's
touching there and we got
about three of an inch up here.
This one's pretty close. If the fender would come in
and tighten
it down
and this, I need you to come forward by the corner right there.
Yep.
No,
that'll work
once you bring it over a little bit.
Ok. Pull it right there
if you want to just try to get in
from the bottom and just
lift.
Oh, that's a thought.
How is that there? Tighten that dude down right there.
I think it looks pretty good.
Good deal. I guess we can take this dude apart.
Yeah.
Knock it apart and put some shining on it
after the break and olds that might make you rethink the definition of muscle car.
Restore your classic pick up SUV or suburban at shop, classic truck, parts.com. We stock anything and everything for Ford Chevy GM and Dodge trucks, complete bodies, complete interiors, fuel systems, hard parts, chrome trim accessories and more log on now and save
the all new power block directory. Your source for everything. Automotive, find all the brand and parts thousands of racetracks from Daytona to Long Beach, plus events, clubs and more. The all new power block directory. Your source for everything. Automotive only at Power Block tv.com.
Today's muscle car flashback. A 1966 olds,
Toran
NATO.
When you think of a muscle car, the Toron
Auto ain't usually a car that comes to mind.
It flies in the face of all the textbook definitions for starters. It's got front wheel drive. It only came in an automatic
and it was way too expensive for Joe's six pack
almost twice as much as a Chevy Nova.
But hey,
since when did a muscle car have to follow the rules, the 66 tornado had enough attitude, wicked styling and Motown Mojo to run with the best muscle cars of its day
for one thing. It was fast. It could cruise to 60 in 7.5 seconds and hit the quarter mile in the mid 16th.
That was as good as a 383 charger.
All that muscle came from a performance enhanced 425 cubic inch rocket V8.
A redesigned carbon intake along with free flowing dual exhaust helped it churn out 385 horses,
475 ft pounds of torque. Got this two ton beast of
sweeping body lines with bat wing fenders and a fast back roof turned it into a predator on the open road.
The sleek thrown in concealed trick pop up headlights
inside you were riding in style with a one of a kind dash and more leg room.
Thanks to the front wheel drive.
Nowadays, front wheel drive is nothing special. But when the
tornado debuted in 66 it was the first car out of Detroit since the 30 s to feature it.
Old, spent seven years designing the car and testing it over 1.5 million miles to make sure it was tough.
The drive train proved to be so sturdy. In fact, they used it in GMC motor homes. In the seventies,
the revolutionary design split the tranny into two parts with the torque converters sitting behind the engine and the gearbox flung under the left cylinder bank.
They were linked by a hard and steel chain called the high vote.
The whole setup took up no more room than a conventional engine and gave the car great weight distribution
suspension was unique too including front torsion bars and quad rear shocks mounted horizontally and vertically to keep the wheels on the road. Designers wound up with a well balanced machine that got high marks for handling.
Tom Train spent summers as a kid washing his car, but now he's cleaning up the road with it.
It drives like a drain, it drives like a newer car. It just kind of floats down the highway
out of over 40,000 produced in 66. This beauty is number 6, 95.
The only one older than this that's known to exist is Job One in G MS Heritage Collection.
It's also one of the few that didn't get the deluxe trim package making it even more rare
today. The tornado stands out as a landmark in Detroit. Engineering.
A smoking hot blend of style and performance and a full-fledged muscle car in our books. It's got a big engine, it's got D exhaust and it runs like crazy.
Coming up. A tritone paint job turns the track car into a tribute to Vic Edelbrock.
You're watching muscle car for a DVD copy of this episode. Just go to Power Block tv.com and order your copy for just 595 plus shipping and handling. Start your own muscle car collection delivered right to your door from the power block,
restore your classic pickup SUV or suburban at shop, classic truck, parts.com. We stock anything and everything for Ford, Chevy GM and Dodge trucks, complete bodies, complete interiors, fuel systems, hard parts, chrome trim accessories and more log on now and save.
Hey guys, welcome back after we got the panels all lined up on our 68 mustang track car. We blew it back apart, knocked out a few dings scuffed it up and now we're ready to lay down some sealer. This car is gonna be a Trone,
but we wanna make sure that we keep the tape lines to a minimum. So we're gonna seal the entire car with some light DP and then lay out. Our design
using white sealer means our red will cover in one coat so we won't have to crawl all over the wet paint trying to lay down a second.
Red has a tendency to bleed through anything you put over it. So we're masking off everything that will be black or white
and we're not going with our usual base coat, clear coat on this car. Now, we need something that's gonna hold up to the abuse of life on the track. It's not gonna be getting any fancy pants, undercoating or carpeting either. So we're putting down a single stage high solids, polyurethane that'll give us a thicker, more durable coating.
This type of paint is really sensitive to mixing ratios. If you're off more than just a little, it's not going to dry. You can use an accelerator to speed up flash time. But with this much surface area, you could end up with some dry spots
after letting it cure overnight. We can unmask and re mask for the black
one more day and we can do it again. Unmasking and re masking for the white.
It's a good idea to keep a copy of your rendering on hand. We didn't and forgot about the stripes on the quarters but nothing from razor blades and tape won't fix.
Now, the last graphic we have to put on here is the white stripe that runs right down the center of it,
but we're not exactly going to be able to do that and have them line up without the hood in place. So we'll set this on there, get our white laid down.
We'll be good to go.
Three quarter inch tape works great for layouts with long relatively straight lines. Just make sure the design is symmetrical.
After masking, we need to prep the surface. This paint is so thick. A red scotch bright can be used to scuff the area without scratches even showing through.
Once the stripes are painted. We'll wait one more night before we unveil our creation.
This thing looks fast already. The final decals go on the car once it's finished. So our work here is done and now it's all up to horsepower. We could give them a hand,
but we're not. We hear altered eagle and red sled screaming for attention. Besides for this week, we're out of time. So until next time we're out of here.
Show Full Transcript
Rock tribute track car to the next level with a new roof skin and Tritone paint job. Plus we're taking it to the street in a 66 tornado.
Hey, guys, welcome to muscle car. We're heading down here to Horsepower to pick up a project that they've taken about as far as they can for now.
Yeah, they've helped us add muscle to a lot of our projects and we're gonna return the favor by doing some metal work body work and paint on their 68 mustang track car.
Well, here it is guys ready for elbow grease and paint guns. What the heck happened? Front of the roof, man. Well, Rick, I think the guys who delivered it took the term drop ship a little too literally.
Yeah,
it looks like they rolled it to you. Well, you guys know how it goes. One hand washes the other and ours are pretty clean. We build that fine 409 for the red sled
and that 446 pack for the
Ka. That's true. Runs good
called payback.
All right,
you boys go do something. We'll take care of that.
Get this thing out of here. All right,
this is a freshly minted mustang. Year one sent us this dyno
Corn steel body and asked us to make it into a tribute to Motorsports Maven Vic Edelbrock
and just like the Edelbrock family's own family
backs. It'll be designed to provide plenty of thrills as a road course track car and the best part we're giving it away to a lucky winner. Horsepower got the performance goodies taken care of including a Ford 347 small block that pulled 518 horses at the
dyno.
Now it's our turn to work some muscle car magic on this pony. But before we can do any body work and paint, there's one issue, we need to take care of the roof. This thing was mangled when it come out of the crate and it take a lot of time and filler to reshape it.
Yeah, it could chew up easily eight or 10 hours. So if you're looking to keep your labor costs down or if you're just looking to save yourself some time replacing the whole skin is the way to do it.
Build on a budget muscle car projects that save you time and money.
Now, you can get a replacement roof panel from year one for about 400 bucks and it shouldn't take more than four or five hours to install it. Plus you won't have a roof full of plastic that could crack out on you later.
The first step is to find the edges of the panel from looking at our new skin, we know about where the seams are. So it's just a matter of uncovering them and drilling out the welds tom is using a spot weld cutter bit in the drill, which is great for areas in the middle of a panel for pinch welds and air powered spot weld cutter gets the job done in a hurry.
Now the air chisel is gonna help me get the center section of the roof cut out,
but Matco slotted panel cutter is gonna be doing most of the work. Now, if you notice it's only gonna cut in a quarter of an inch, that way you're not gonna get into your inner structure and do a lot of damage.
Hey, try these on what?
Now, you may only be cut in a quarter inch deep, but you still need to be careful not to damage the inner structure
cut just inboard of the body line. That way the sheet metal can be easily rolled up once the spot welds are cut loose.
Now, that's a moon roof.
A hammer and chisel can be used to pry off what's left of the original roof,
just don't get too aggressive where you'll end up distorting the remaining structure.
Can you pinstripe that
in order to ensure tight seams, we're using grinders to smooth out the edges and get rid of the rest of the filler.
There's always gonna be one or two areas that need a little touching up. But the hammer and Dolly will get you back on track.
The new skin put needs some prep too. A 40 grit disk will get the edges ready to bond with the rest of the car.
Now, the roof panel is ready to go and you're probably expecting us to drag out the old welders. That's not our plan for this one.
Metal bonding is common in manufacturing and body shops these days.
Adhesives are quick, don't require much clean up are rushed and leak proof and plenty strong for this type of application.
Some sem weld bond adhesive applied to both services and this roof skin won't be going anywhere.
You gotta get it clamp in place quick even with
slow active glue because the time factor, this is really a two person job and be sure to wipe off the excess glue before it hardens. So you'll be doing it with a grinder. This adhesive is plenty strong enough to keep the panel in place, but the corners are the weak spot. So manufacturers recommend a tack at each corner to keep them from wanting to pull up during the collision.
The original Ford bodies use lead filler in these seas and dyno Corn uses plastic. We're gonna use metal filler. It's almost as stable as lead, but it's a lot stronger than plastic
with the area cleaned and prepped with 40 grit. You can commence to smearing it on
once it dries, you can treat it like plastic, but it dries a little harder. So try to work it before it hardens completely.
Next comes a couple of layers of good old plastic fillers.
A
final coat of some finishing buddy will prep it for primer.
That's a good idea to let the glue set up for a couple hours before pulling the clamps. Now, we got all of our seas body worked out while we were waiting. So these are ready to come off and since there's no spot welds to grind down, we're ready to prep out for some primer
up next. The painful process of panel alignment,
the whole,
hey, welcome back to muscle car. We got our 68 mustang track car ready for some primer, but we're not gonna shoot the whole thing. This thing isn't gonna be a show car or even a street car. So it doesn't have to be perfect. So we're gonna save ourselves a lot of time and effort and just spot prime it.
Spot priming is just what it sounds like covering a spot within a larger panel. Three coats should do the trick but make sure to cover a slightly larger area with each coat. So you don't build up an edge.
Now, when Mike and Joe hung these fenders down on horsepower, they didn't have to worry about panel alignment yet. They pretty much just hung them in place. But as you can see a little attention here is gonna be necessary.
Normally you'd wait till the cars on the ground before you set the gaps. But with a track car, we're really not worried about gaps. All we're after is everything set to function.
Listen that up. See if you can knock the whole thing straight back,
go back,
go back, all
you can slide the whole thing back.
There you go.
Yeah. Tryin from the top. We'll see if we can touch the bottom in.
That's not bad. How's the gap for the cow? But
it's not bad. It's even
all we need some more room on this side, dude. Oh yeah, right there. Slide the whole thing back forward, back, forward,
back, forward,
forward, back.
Damn it.
Tell you what, let me slide this
in there. Push it forward, try essentially
down up there for a second.
Well, the rocker is still out, but we're already sitting too far in against the door.
We can't bring the door in anymore because we're already against the rocker.
So basically the shape of this fender is off
the
brace right there is not gonna let this fender move where we need it to.
I think we had something said in there
and kind of pinch in there and then push that fender down. Ok, let's try this
and we can try it right there to see what it does.
All we can do is fix it. Right?
Ok.
I heard cracking
and we did something.
Here we go.
Slide that top and forward just a little bit more. Actually, that's not bad at all.
All right. See what
I'm happy with that.
Good deal. Sweet.
Terrible.
Let's dig down and see if we're even in the ballpark, you got it.
Yeah,
I'm looking at the fact that it's
touching there and we got
about three of an inch up here.
This one's pretty close. If the fender would come in
and tighten
it down
and this, I need you to come forward by the corner right there.
Yep.
No,
that'll work
once you bring it over a little bit.
Ok. Pull it right there
if you want to just try to get in
from the bottom and just
lift.
Oh, that's a thought.
How is that there? Tighten that dude down right there.
I think it looks pretty good.
Good deal. I guess we can take this dude apart.
Yeah.
Knock it apart and put some shining on it
after the break and olds that might make you rethink the definition of muscle car.
Restore your classic pick up SUV or suburban at shop, classic truck, parts.com. We stock anything and everything for Ford Chevy GM and Dodge trucks, complete bodies, complete interiors, fuel systems, hard parts, chrome trim accessories and more log on now and save
the all new power block directory. Your source for everything. Automotive, find all the brand and parts thousands of racetracks from Daytona to Long Beach, plus events, clubs and more. The all new power block directory. Your source for everything. Automotive only at Power Block tv.com.
Today's muscle car flashback. A 1966 olds,
Toran
NATO.
When you think of a muscle car, the Toron
Auto ain't usually a car that comes to mind.
It flies in the face of all the textbook definitions for starters. It's got front wheel drive. It only came in an automatic
and it was way too expensive for Joe's six pack
almost twice as much as a Chevy Nova.
But hey,
since when did a muscle car have to follow the rules, the 66 tornado had enough attitude, wicked styling and Motown Mojo to run with the best muscle cars of its day
for one thing. It was fast. It could cruise to 60 in 7.5 seconds and hit the quarter mile in the mid 16th.
That was as good as a 383 charger.
All that muscle came from a performance enhanced 425 cubic inch rocket V8.
A redesigned carbon intake along with free flowing dual exhaust helped it churn out 385 horses,
475 ft pounds of torque. Got this two ton beast of
sweeping body lines with bat wing fenders and a fast back roof turned it into a predator on the open road.
The sleek thrown in concealed trick pop up headlights
inside you were riding in style with a one of a kind dash and more leg room.
Thanks to the front wheel drive.
Nowadays, front wheel drive is nothing special. But when the
tornado debuted in 66 it was the first car out of Detroit since the 30 s to feature it.
Old, spent seven years designing the car and testing it over 1.5 million miles to make sure it was tough.
The drive train proved to be so sturdy. In fact, they used it in GMC motor homes. In the seventies,
the revolutionary design split the tranny into two parts with the torque converters sitting behind the engine and the gearbox flung under the left cylinder bank.
They were linked by a hard and steel chain called the high vote.
The whole setup took up no more room than a conventional engine and gave the car great weight distribution
suspension was unique too including front torsion bars and quad rear shocks mounted horizontally and vertically to keep the wheels on the road. Designers wound up with a well balanced machine that got high marks for handling.
Tom Train spent summers as a kid washing his car, but now he's cleaning up the road with it.
It drives like a drain, it drives like a newer car. It just kind of floats down the highway
out of over 40,000 produced in 66. This beauty is number 6, 95.
The only one older than this that's known to exist is Job One in G MS Heritage Collection.
It's also one of the few that didn't get the deluxe trim package making it even more rare
today. The tornado stands out as a landmark in Detroit. Engineering.
A smoking hot blend of style and performance and a full-fledged muscle car in our books. It's got a big engine, it's got D exhaust and it runs like crazy.
Coming up. A tritone paint job turns the track car into a tribute to Vic Edelbrock.
You're watching muscle car for a DVD copy of this episode. Just go to Power Block tv.com and order your copy for just 595 plus shipping and handling. Start your own muscle car collection delivered right to your door from the power block,
restore your classic pickup SUV or suburban at shop, classic truck, parts.com. We stock anything and everything for Ford, Chevy GM and Dodge trucks, complete bodies, complete interiors, fuel systems, hard parts, chrome trim accessories and more log on now and save.
Hey guys, welcome back after we got the panels all lined up on our 68 mustang track car. We blew it back apart, knocked out a few dings scuffed it up and now we're ready to lay down some sealer. This car is gonna be a Trone,
but we wanna make sure that we keep the tape lines to a minimum. So we're gonna seal the entire car with some light DP and then lay out. Our design
using white sealer means our red will cover in one coat so we won't have to crawl all over the wet paint trying to lay down a second.
Red has a tendency to bleed through anything you put over it. So we're masking off everything that will be black or white
and we're not going with our usual base coat, clear coat on this car. Now, we need something that's gonna hold up to the abuse of life on the track. It's not gonna be getting any fancy pants, undercoating or carpeting either. So we're putting down a single stage high solids, polyurethane that'll give us a thicker, more durable coating.
This type of paint is really sensitive to mixing ratios. If you're off more than just a little, it's not going to dry. You can use an accelerator to speed up flash time. But with this much surface area, you could end up with some dry spots
after letting it cure overnight. We can unmask and re mask for the black
one more day and we can do it again. Unmasking and re masking for the white.
It's a good idea to keep a copy of your rendering on hand. We didn't and forgot about the stripes on the quarters but nothing from razor blades and tape won't fix.
Now, the last graphic we have to put on here is the white stripe that runs right down the center of it,
but we're not exactly going to be able to do that and have them line up without the hood in place. So we'll set this on there, get our white laid down.
We'll be good to go.
Three quarter inch tape works great for layouts with long relatively straight lines. Just make sure the design is symmetrical.
After masking, we need to prep the surface. This paint is so thick. A red scotch bright can be used to scuff the area without scratches even showing through.
Once the stripes are painted. We'll wait one more night before we unveil our creation.
This thing looks fast already. The final decals go on the car once it's finished. So our work here is done and now it's all up to horsepower. We could give them a hand,
but we're not. We hear altered eagle and red sled screaming for attention. Besides for this week, we're out of time. So until next time we're out of here.