MuscleCar Builds

Parts Used In This Episode

Air-Ride Technologies
Triangular 4 bar suspension with shockwaves (shock and air spring all-in-one).
Amercian Torque
17 x 7 Wheels.
Amercian Torque
18 x 10 wheels.
BF Goodrich
215/45 ZR 17-G Force T/A Tires.
BF Goodrich
295/35 18G-Force Drag Radial Tire.
Currie Enterprises
3.73 Dana 60.
Dake
Welders glasses, Belt sander and band saw.
Flowmaster
3" Universal dual kit.
Matco Tools
Tool press, rollaway and gloves.
Pattons Inc.
Col-Met-paint booth.
Scotch-Brite
Red scrub pads.
YearOne
High flow cast iron exhasut manifolds.
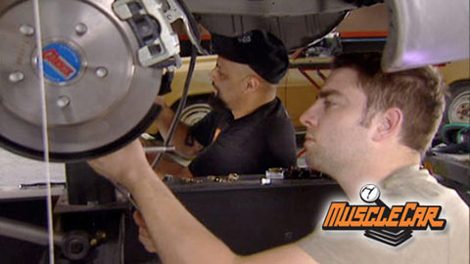
Video Transcript

Today, it's heavy how to on our hemi

installing a Dana 60 rear with four bar shock wave suspension babb, a three inch exhaust and hanging panels plus blocking in the year one crate Camaro.

Today on muscle car, we're gonna put a data 60 rear end in our challenging project along with a four bar airbag set up

before we can get our data dialed in. We need to make sure our engine and transmission are at the correct angle to the rear end and to do that, we're gonna make sure that our car base on our intake manifold is level

a little bit more.

Keep going,

keep it coming.

Oh, that's perfect.

The most important thing is is when you're setting up your engine and transmission to make sure that the carburetor is level. So the floats work properly.

The drive train alignment for our challenger started at the engine and it continues back here with the rear axle. Now we pitched the engine down three degrees at a negative angle and we're gonna bring the nose of our rear end up to a three degree positive angle and this will keep everything aligned during normal driving

what we did was we made the extensions and that way it holds the rear end center and it's locked down, we'll put some tack on it, so the rear end doesn't move at all. So when we put it off, four bar, everything is square,

we're gonna use this new triangulated four bar set up from air ride technologies. And this is a really sweet kit because it's completely bolt in and it's gonna allow us to get rid of those leaf springs because we're gonna use these the shock waves. This is the shock and air spring all together in one frees up a lot of room and I can't wait to get this thing stuck on the car.

The thing that's cool about using these stenches to set up our rear end. We can actually put the wheel anywhere we want inside the wheel. Well, so we're putting a dead center. So it looks really cool. And to do that, we use the Plumb Bob.

That's how it would go with them.

It glues on like that

clear out here.

This is a 31.5

doing this one.

That one's lovely

level.

I block them down and

we them in place.

Remember you want to tack all your work in place, then double check everything before laying down your permanent wells.

You always wanna make sure that you measure your center hole to center hole. So you get your distance proper for your air bag that way you get the right amount of travel and it looks good.

Yeah, because this bend here

and it actually, it's like at an angle. So it leans this bracket where it needs to be.

So that won't work.

Mamas. Don't let your babies grow up to be fabricated.

Since we moved our Dana 60 forward from its stock location.

The upper bag mounts will need to be modified,

putting it on.

Yeah, it fit up there real nice.

Cool. Yeah, so

we modified this thing so heavily that it pretty much took us right past the bolt

on stage. Not that that's a bad thing because this bolt

on kit was a really good starting point for us. So we just gotta do some modifications next mods, we gotta do

upper bag mountain and we got a good keep tweaking. Tell us perfect.

Cutting the wells will let us use heat to change the angle of the top bag. Mo

Liar.

Oh yeah.

The other one was after you were like, yeah,

yeah.

How's dad? Is that pain?

Much

good.

Good. Go

on

now. Something's wrong

there.

Lou knows you and the nuts.

No.

Alright. That looks good.

It'd be nice and swoopy

moving the rear forward means we need to make templates and fab up brackets that tie the top bar to the axle tube.

Do you wanna just keep holding

when you're building a custom drive train and trick suspension, you need to plan on making brackets like these to get everything dialed in.

Who do

it

p

then I'm happy

later building the

hemi of custom exhaust from scratch. But next, it's final body work tips on the crate. Camaro.

Awesome.

Hey, guys, you're back in the shop with the crate Camaro. And today we're talking primers. These break down into three basic groups and each one of them has a specific purpose. The first one you're gonna apply is gonna be a primer for adhesion. Now, that's pretty self explanatory. So move on to the next one, which is a primer surface like you see behind me here it works like a sprayable body filler. It's gonna allow you to body work the car as one giant panel. Then last but not least before paint is your primer sealer.

I'm using tape here to establish my body line

and it also gives me a nice stopping point when I'm block sanding.

This helps you create a visual guide for subtle body lines, just block to both sides of the line

and not sanding the edge lets you build a sharp crisp line.

Keep in mind you can always make your own standing block. I needed this one to fit a specific shape.

So my broom handle is a little bit shorter now, but that's OK.

You can always find something that'll work in your shop.

An area that I'm always getting asked about is reverse contours in the body. I like to use a round block in a crisscross motion to prevent from cutting any low spots. If you take your time and pay attention areas like this, it'll really set your paint job off.

Mhm.

On tight areas where we have complex curves and you can't get a sanding block in there. I like to use the red scotch bright. Just remember to fold it in half. So you don't get those finger waves and you're good to go.

Well, we're ready for the last stage of our standing process. When we do this, you don't wanna finish with anything rougher than 320 because it's gonna map through your base code, especially if it's metallic

tape is great for masking off areas that you don't wanna see in.

I'm sorry. Did I run this here?

Excuse me? This is my beach. Yeah.

Ha ha.

Something to keep in mind is that not throw out those old scotch brights? They're great for cleaning off sandpaper.

It's dirty, it's dusty

and it takes a lot of elbow grease.

But if you take your time and block every surfing,

you'll end up with one killer paint job.

Well, it's been a ton of work, but we've really refined the shape of the 69 Camaro and now it's finally ready for paint

up. Next, heavy breathing, heavy exhaust.

We wanted to go old school with our

hemi. So we decided to go with these high flow cast iron exhaust manifolds from year one under hood temperature will drop because of the cast iron. Not to mention ground clearance isn't an issue.

I think I got it.

Oh, you just moved it on. It.

Got it.

All right. Just like everything else in our challenger. We're gonna have to make our own exhaust system. And your best bet when you do something like that is to just get a universal dual exhaust kit. And then it's gonna come with X bins U bins S bins J bins. I mean, you'll have most of the alphabet to work with.

First. We'll burn out some more of the old floor pans so we can lay out our exhaust tubes.

That is one of the coolest waste of time I have ever seen in my life. That is awesome.

But

that muscle car Mike.

Awesome.

That's going home on the trophy.

Yeah.

Oh

man,

this is what we started with for our collectors, but we want to transition to a three inch pipe real quick right off the manifold.

So this is what we're going to end up with after some modifications.

Well, this works exhausting.

You know. That's funny.

You're my good man.

Yeah, I think 45 will work out real good. Like just do be put us in this neighborhood and then we'll

take back

what we did was we took a piece of three inch aluminum tubing and taped, just taped it in place to mock up a drive shaft. So we know where it's at, when we lay out our exhaust

and we're gonna steal it from extreme.

If you wanna get your line straight, when you make your cut, make it perpendicular. All you do is take your combination square, lay it down, your bubble level is straight

and mark it.

Well, the next step is to bolt these collectors on and just start adding pipe as we go back. Eventually we'll reach the rear end and

sounds good.

Start

laying out and fabing the tubes from the header's back. Takes patience and planning to get it right.

Hell boy.

Ok. How much clearance do we have?

We got plenty.

I mean, we got enough. We're gonna have, we're definitely gonna have to put them out there though.

Yeah.

Watch

your,

the reason why we're turning all these pipes and everything, not just for ground clearance is so when we fire this baby up, it's not banging on everything. That's the last thing you want to hear when you fire up a new engine.

Here we go.

We rolled some angle iron in place to hold our flow masters up above the lowest point in the car. And it's also going to give us somewhere to build our pipe back to.

You don't need no stinking instructions.

What do you think?

I like this? Yeah, we're good.

I like that

now that we've got the exhaust pretty much where we want it. We're gonna sit down and decide whether or not we wanna run it out in front of the rear wheels all the way out the back.

And while we're taking a break from that, we already got our suspension on. I think we should throw the wheels and panels on to see what this thing is gonna look like.

Oh,

all right. Welcome back to muscle car. We're dying to see what this thing looks like on its wheels and tires. But before we pop it off the jig, the easiest thing for us to do is put the panels on it to get an accurate look

for a guy from a modeling agency. You're so strong.

I

got

to. All right, let's

Oh, wow,

I got it started.

All right. You ready?

Yeah, tell me when you get real close to tight.

I'll tell you what I'm putting.

All right. Lou let her rip bottom, bottom, bottom

four.

Don't tell me I got it on the first try. 00 Ya.

All right,

Ders. Yes, sir,

man. I am like

totally stoked.

I'm told

we're hung up on something so we need to come back with it.

You know, these hang up on that plan.

We put the fender too close to the door on this car

so that all we have to do

is grind back. Ideally, you don't wanna add, it's so much easier to just grind a gap and then, you know, weld where the seam splits than it is to add to it. So

when you're building a car to this level. It's a lot easier to just go ahead and you know, take care of that ahead of time.

That's why I got one extra so I could lose the others.

Ok? Let me help you

for car builders. Getting to see how your car sits for the first time is truly gratifying.

Come on, get back under here ready. Get

ready.

A

where you going?

Well, well, this is, uh,

NASCAR pit stop blue.

Oh, I am so fired.

Oh,

that thing is heavy with you.

Oh, my God. Lou, this thing looks so bad.

I mean, it is so deep in the quarter panel. When the air is dumped out of this, it's gonna look sick

but, and it looks awesome enough at ride height. I can't wait to see it from the back. Am I in the middle of the tires? Yeah, I'm coming down

whether you're a pro builder or a weekend spectator. It's all about first impressions and with cars it's in the stance and our challenge, it looks like it's going 100 miles an hour when it's sitting still. It looks like it wants to jump off this frame jig. So, you know what, we're out of here later? Audios.
Show Full Transcript