MuscleCar Builds

Parts Used In This Episode

Grant
Signature Series Club Sport wheel with install kit.
Honest Charley
Restoration Parts which include carpet, vinal seat covers, upper and lower door panels with arm rests.
Matco Tools
Engine sling, tool cart, creeper and lift.
Pattons Inc.
Air compressor and Col-Met paint booth.
Street Wires
High performance wiring w/ connectors.
Video Transcript

Today, the guys roll in their new Shelby clone project last day of prep on the Camaro before primer and we flash back to one of the baddest Buicks of all time.

Hey, guys, welcome to Muscle car. You know, the term muscle car defines an era where the big three were shoehorn and big engines into mid size cars like

Kass

and

Chevelle

and we've been busting our butt on our hemi

Challenger and our crate Camaro, but Jared just couldn't hold out any longer. So he went out and got a new project

and I got two questions.

What do you got for me?

You didn't drive this all the way from where you said you're gonna pick it up at, did you? No,

I straight off the trailer and into the building.

Why is it not to believe in?

It's four time baby? I thought it was time to add some balance to this here. Muscle car shop, don't we have enough stuff going on? Yeah, but I mean, we,

you know, get this thing under way at least. All right. So give me some particulars about this thing.

Well, you're looking at a 65 Mustang fast back that the previous owner started to turn into a beat production racing phone, which is totally cool.

Anybody can restore a car. But it takes a real man to cut one up.

This car isn't originally a Shelby car. It's by no means rare. There was 71,000 and change fastbacks in 65. These cars had problems from the start.

So we're gonna go ahead and go through all that stuff and make this thing better than new. Yeah, but it's what I see is like a 350

clone. But underneath

it's gonna have all the modern conveniences of a real race car,

pure race.

I'm talking

the sheep exterior with the wolf interior

beauty and the beast

all

in one pack. I'm liking it.

Yeah,

and that's gonna start right here.

And what's really cool about this is Joe and Mike from the Horsepower Show have been all over us. They're dying to get under the hood of one of our cars and see if they can build a power plant worthy of the muscle car show and we're gonna give them that chance. But first there's some things that we need to show you guys when you take on a project this big.

Yeah, some things to pay attention to that might save you a lot of work in the long run. Like

like this when you're searching for that project car, keep your eyes open for areas like these clumps of welds around these screw holes. Why is it there? I don't know, but it obviously wasn't done. Right. Another thing to look for is blisters in the paint. We went after this area with a grinder to show you that rust was causing those blisters

and a floor pan repair. Like this is something to definitely keep your eyes open for. This is just a hack job.

Now, you must thank purest guys. Don't go getting your women's undergarment all in a wad because you know what, this is the kind of job that a guy who's trying this for the first time, it could be overwhelming for him and there's plenty of these around so you can find one that's in really good shape to start out with if you're a first timer.

Yeah, and a car with a lot of problem areas may not be a perfect candidate for a restoration, but it's a great car to turn into a race car because you're not gonna lose any sleep if this thing hits the wall. So start by pulling the engine out, brother. Cool.

We're pulling out the 351 Windsor that the previous owner had in his pony.

But originally this fast back came with a 289 that made 270 horses

and now I'll get the engine out B

in

65 Shelby built 516 GT three F for the street,

36 for the track. Our

car will be a clone of the red 350 yard

gas to

one.

It's my turn to get dirty.

I can get dirty

here. How you get dirty?

This is the technical way

to get your engine separated from a manual transmission.

This may look crazy, but

I have pulled so many engines out and fought with these rusty bolts on nasty old headers. We're not gonna use any of this junk anyway. And it's just not worth the time to keep the things. So we're just gonna cut them off,

please.

No,

there

nice and straight

tired of fighting those pesky header bolts, just cut them off

two.

Since we're gonna rewire the whole car, I'm just gonna cut all the old wires out.

When we get this thing back from horsepower, it's gonna be fuel injected and full of rouse racing components and anything that Jack Rush has got his name on. I guarantee you'll be n than

what this thing was 40 years ago.

Yeah.

All right. Let's go put it on the stand

up next. A great paint job is all in the prep work tips and tricks to turn your project into a showstopper.

Welcome back to the shop. Everybody. Something used to drive me crazy when I worked at Rad rides is when people would come up after we finished the car and say, man, that thing looks perfect. Who painted it? And I'd wanna say

the same guys that did the prep work, you know, the body work because a good paint job comes from underneath

and we're gonna show you some things today that really turn your project into a winner.

Something that's really important when you're sanding down your car, you never wanna use just a plain piece of sandpaper in your hand because what happens is you'll get waves in your paint.

So what you wanna do is get sanding blocks, nice flat surface. They're relatively inexpensive. So when you go to sand your car,

you've got good coverage and it's nice and smooth.

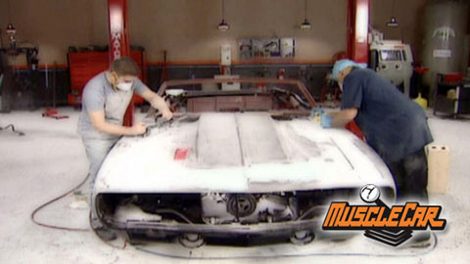
It's pretty obvious that our crate Camaro fits good up front. So what we're gonna focus on is called panel to panel alignment.

You can see here where our header panel and fender don't have the same shape

light is gonna stop on these areas the same way the ruler does. So what we're gonna do is use a small amount of filler to build these areas up and that'll make the light and reflections just flow across our crate. Camaro. After it's painted, it's gonna make a huge difference in how this thing looks. First thing we're gonna do is get rid of some holes that held nimble up front that said Camaro by Chevrolet and cursive.

We're gonna get rid of that clean the front end of the car up a lot. Let's do it.

It's important to go back over all the seams with a grinder that has 36 grid or 50 grid on it. Something rough. So you can get down on those areas that D A didn't get, make sure the filler has something to hang on to

th good because it pulls all the oils out of the metal to

make sure that there's no reactions with the paint and the fillers or anything else. Later,

it's gonna make your life a lot easier if you go back right before the hardener sets up all the way

to kind of dig it out of the cracks.

Otherwise you're gonna have a big sanding job that you don't need ahead of you.

Spreading filler is like anything else. It takes practice and with time you'll get better at, it takes at least 23 or even four applications before you get the coverage that you need.

The first time you lay out filler, you're gonna wanna spread it even. And it's gonna seem like with each pass that you're fighting, the last pass you just made something that'll help you is to get all the mud off before you smooth out the next area. This helps keep it all even. There's rock.

Something that's really important to me sanding down this mud. You can see here where the mud's not scratched and here it is, you need to make sure that this low spot is scratched up. So you get good mechanical adhesion. It's just like the metal. It's gotta be prepped before you can put that mud up.

I love to keep an aluminum ruler handy because these things will really show you,

you know where your panel is supposed to be. And you can see that the hood and the header panel kind of have a dip where they meet

when we apply filler. We're, what we're doing is getting rid of that. So this will have a smooth transition right into the hood.

I like to go over the panels with wax and grease remover in between coats. It just helps to keep impurities out of the body filler.

Look at all the trash. I picked up

a lot of times guys will worry about getting filler down in the seam. I just spread right over it because then I know I'm at one true level and then I'll go back later with a cut off wheel and just zip right through there and then I'll make sure everything's like perfect.

I

like to only use the air sander when I'm in the 36 grid stage before I go to the finer parts. Usually just the first layer because it'll knock everything into shape real quick,

but it's not the tool to use to fine tune anything. So I'll come back later with hand tools to do the rest of it.

Oh,

gosh,

see how it just floats over that.

You can get it to about there without being able to see

or, you know, without being able to see that.

But still,

yeah,

So you see where your filler is gonna be down here,

you're going to get a nice restoration. You don't have to go this far with it. I mean, most people are going to use filler to just fix the small dents

and then carry on.

But this is really going to take this car into the next, next level.

Oh, yeah, that's looking better. We're definitely getting closer.

You know, there is a lot of different ways to do body work. A lot of right ways. And we showed you one but our Camaro, the bottom line is this thing is gonna look sweet. So grab your favorite beverage because when we come back, we're on the El Camino. Let's do it.

But before that, when people finally figured out what it was, it was off the assembly line. A flashback to a sleeper, the 70 Buick Gsx stage one.

You want to talk about torque, I'm talking next, snapping bladder busting. You can't snatch the dollar bill off the dashboard kind of torque. A goat didn't have it. A

coo

didn't have it.

You know what?

It was? A buick

muscle car flashback this week, the 70 Buick Gsx stage one

400 inch Skylark, tell Buick to shed its conservative image tuning is what makes a Buick

66 Skylark one of the tune cars from Buick. After four more years of tuning, it would become arguably the baddest muscle car in history

based on the restyled skylark, the 70 GSX stage one looked the part with a low fiberglass chin spoiler, quad headlights, wide hood stripes, functional scoops and a hood mount

t,

a simple painted stripe

and seven inch chrome steel rims accent the profile beneath the belt line, front disc brakes and heavy duty suspension. The stripe compliments

the sports

coop sloping roof line and kicks up and over the rear spoiler with GSX bands.

It was a beautiful muscle car but the word Buick was almost invisible but the big news is under the hood.

The stage one option was a bargain. You got the 455 inch big block twin ram air snorkels floor barrel hot cam stiff springs, high compression pistons and a 12 volt posi

rear all for only 100 99 bucks

for insurance purposes. It was advertised at 360 horse,

but the actual output was well over 400 plus it generated a wreckage setting 510 pounds of torque

just over 2800 RPM.

That's more torque than any muscle car period. That fact, plus low production makes the GSX very desirable by collectors.

Only the 1966 Ford

27 Culverts and Corvettes could beat it not too bad for a two ton for passenger buick,

but a gallon of leaded gas would only take you 10 to 12 miles.

And the Gsx cockpit was loaded,

full instrumentation, rally wheel, black vinyl buckets and a harsh

four speed shifter.

They were available in only two colors, either Apollo white or the more popular option. Saturn yellow.

But despite its stunning performance and awesome looks,

the factory only sold 400 gsxs with the hot stage one engine option

today. Correctly restored stage one, GSXS command prices beginning in the low six figures, nearly 20 times more than they sold for back in 19 7.

Well, it was only around for a year. The mighty stage one, Gsx gave Buick fans bragging rights. They'll savor forever. Nobody really knew what they were and they think a buick shoot that should be easy. Pickens. And uh generally speaking, that is not the case

we're back on muscle car. Does this look like every guy's shop or what?

And with four projects underway, it's time to put the wraps on one of them and get it the hell out of here today. I'm talking about our part shagging El Camino

and we got a few loose ends to tie up on

a ki and then she'll be ready to roll.

We're gonna be filling our Chevy's interior with some restoration parts from honest Charlie's Speed Shop. I wanna start with this carpet that is made from the same tools and dyes as the original. Plus it features this heavy 36 ounce J on the back. This stuff's great for killing Sound, by the way,

then we're gonna move into these vinyl seat covers for our split bench

and upper and lower door panels. These are made as a direct fit and they come with armrests,

be careful with tearing your old seat covers off. You don't want to mangle the foam padding underneath.

And another thing

I've seen guys recover seats by fitting the new vinyl over to old, don't do it.

It's sloppy and you won't be happy with the results.

Bottom line is do the job right. Turn the new piece inside out and place it in front of the seat,

the new vinyl over each front corner, working each side toward the back until they're even

install the hog rings one at a time working from the center to either side.

There we go,

the side with the J channel simply snaps into place.

Next, we'll scrap this raggedy old carpet.

Oh,

ok.

Jared's already put the carpet in and he's already told me don't get the carpet dirty or else you're gonna have to clean it. So I'm gonna kick off my shoes. Thank you, Lou

for a new steering wheel. We chose the grant signature series club sport wheel and this install kit is gonna allow us to adapt it to any 69 3, 87 El Camino. First thing I'll pull up the old steering wheel,

the aluminum adapter from our conversion kit goes on first followed by the adapter cover,

then simply follow the instructions in the kit to finish the installation of the wheel.

Oh, yeah.

Most cars came with several different trim options

like our El Camino, for example, was a Con GSA,

which meant it was at the top of the food chain. Now, lesser El Camino didn't have carpet down here, but since we kinda wanna restore it to original, we're gonna go ahead and put this piece of carpet on here. So the first thing we did was wash this with soap and water to get all the contaminants off and we picked up some contact cement from the local auto parts store. So let's get the spray and that stuff on

with a contact glue like this. You're gonna wanna spray both

the door panel and the carpet.

Now, wait a second. This is real important. Give it a minute to get tacky before you apply the two pieces because if you try and do it when it's too wet, it just won't stick.

Here's an area that all too often gets overlooked. High performance components deserve high performance wiring like this stuff from street wires. I mean, it features lower resistance. It's way better looking and it comes all these trick connectors so you can do a lot with it

next time you're wiring your car. This is something I would definitely not ignore,

man. Look at all these new interior parts. I'm gonna have to break down and get me a bottle of that new car smelly stuff. Don't get used to that driver's seat Santiago

and I guess that's it for this. Week guys. I hope you tune in next week because we wanna break the seals on that new paint booth with our Craig Camaro Audios.
Show Full Transcript