HorsePower Builds
Want more content like this?
Join the PowerNation Email NewsletterParts Used In This Episode
Aerospace Components
2 Piston Floater Mustang Kits For 79-93 Mustangs. Aerospace Components 2 Piston Floater Mustang Kit's are designed for hub mount style wheels. This unique design allowes the front tires to be tucked under the car's fenders by an additional 1/4" over stock. But still provide adequate clampling forces to tame your speeding horse.
Aerospace Components
Aerospace Components offers a variety of high quality rear brake kits that provide maximum stopping power for virtually any car. Our brakes are 100% CNC machined from 6061 T-6 Billet Aluminum. These CNC machined brakes can withstand more pressure than any cast brake kit. All of our brake kits come with drilled heat-treated steel rotors, and everything you need for an easy installation.
Auto Meter
Boost-vacuum guage, oil pressure gauge, water temperature gauge, brake pressure gauge.
EBC Brakes
EBC Yellowstuff is an aramid fibre based brake compound with high brake effect form cold and is possibly one of the first ever compounds that can be used for street and track driving., Designed for premium street driving offering better brake effect up to 600°C (1100°F). Manufactured using premium disc blanks mentioned above, the unique wide aperture slots in the EBC sport rotor actually draw cool air under the pad during heavy braking and reduce brake temperatures whilst also helping r
Hughes Performance
Enhanced P/G case assembly, with bolt-on bell housing for small block Ford applications and Ford bolt pattern., PRO-IV Series convertor, block safety plate and flexplate.
Painless Performance
Race Car Kit/Competition/8 Circuit Wiring Kit, Kit Includes: Start, ignition, electric water pump, electric fan, electric fuel pump #1, electric fuel pump #2, lights, & accessories. Comes with 18 feet of wire per circuit, terminals, wire ties, fusible link, rubber grommet, and easy to follow instructions. 8 Switch Panel/Non-Fused/Dash Mount.
QA1
Mustang Pro-Active system includes tubular K-member, caster/camber plates, Mustang struts, coil-over kits with springs, tubular control arms, bump steer kit.
Roush Performance
This kit comes with a 2.3L TVS supercharger with black finish, upper and lower intake manifolds, an intercooler, a low temp radiator, a cold air intake system, a dual 60mm electronic throttle body, a unique fuel rail with 52 lb/hr fuel injectors.
Russell Performance
Billet Aluminum Y-Block w/ -10 AN inlet & -8 AN outlet (Blue finish), Russell ProRace hoses, Russell Full Flow Hose Ends, Russell Full Flow Swivel Hose Ends, Russell Cushion Clamps.
Summit Racing
CHEETAH SCS shifter with Black Gate Plate, Control Switch and Park/Neutral Start Switch. CHEETAH SCS shifter cover.
Dynotech Engineering Services
ChromeMoly 3.5" diameter custom length driveshaft with 1350 joints and weld yoke.
Hellion Power Systems
Turbonetics Turbocharger (88mm), 16 gauge Stainless Steel hot and cold parts (Mild Steel Headers), Spearco high flow air to air intercooler, High flow Turbonetics wastegate, Silicone hose kit, Stainless T-bolt clamp kit, 45 mm Blow-off valve, Oil feed and drain lines. All other necessary hardware to install kit.
High Performance Controls
The MFI system was designed from the ground up to provide a very simple and easy to understand tuning interface specifically for race only applications requiring very high fuel flow rates.
Holley
Form-A-Flex Radiator Hose Kit.
KGS Steel
1" X 1.5" 14 Gauge Rect. Tubing
Moroso
Front motor plate, mid-motor plate and engine limiter.
Napa Auto Parts
Tubing clamps (5)(5)
O'Reilly Auto Parts
Hayden electric fan.
O'Reilly Auto Parts
Hayden electric fan.
O'Reilly Auto Parts
Radiator Insulators
O'Reilly Auto Parts
Upper and lower radiator hoses
Performance Rod and Custom, Inc.
Extreme Duty Oil Cooler with -10AN fittings.
VFN Fiberglass
'87-'93 Ford Mustang fiberglass dash replacement.
Weldon Pumps
DB2025-A (-12 Inlet and -10 Outlet) Fuel Pump Controller Designed for EFI and Carb. applications, Billet Fuel Filter -- 40 Micron Filter with 12 AN O-ring ports, A2040 Series, Bypass Regulator
Video Transcript
There it is horsepower's hottest small block. Now at home in our 93 LX today, our mission is to get this little power pony one step away from a date with a drag strip. Now, it's been a while since we thrashed on it. So here's the love date for you.
We started our turbos staying project with a 382 cubic in small block. And after we added the turbo kit from Hellion, it made 1100 horsepower at the fly wheel.
Then we built a complete roll cage for safety.
Followed up with T
work to enclose the cockpit,
reinforced the sub frame and replace the floorboard.
Next, we bolted up a Q A one system up front that included a tubular K member,
some control arms and the coil over conversion kit
for brakes and aerospace pro street kit, especially made for street strip driving and stopping.
Finally a front engine plate from competition engineering that let us both the motor right to our sub frame to keep it from moving around.
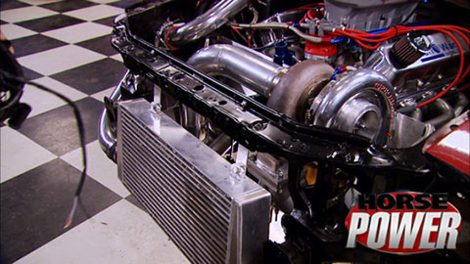
By the end of the day, we plan to have this thing fired up. Now, the first thing we're gonna tackle is the inter cooler and all the piping that goes with it. Now, for the inter cooler to mount it, nobody makes an installation kit. So you're on your own.
All right.
Come on down. Just a hair more.
That looks good right there.
Now measure the distance between the mounting tabs and transfer that to the core support.
Measure for the height of the bracket. We need to make
drill holes in the core support and mount the cooler with the aluminum brackets, buddy made.
All right. This thing fits nice.
Ok. Now we're not gonna do any brackets on the bottom of the inner cooler because the turbo piping is actually gonna support it and keep it in place.
Now, we can go underneath to start our plumbing first from the turbo
to the inner cooler.
Although piping from the Hellion kit is custom made for the car. The silicone sleeves provide a little flexibility to make it all fit.
This kick comes with a blow off valve and lets excess boost escape.
Now, take your time on this
and make sure that the air has a smooth path.
Not like this.
I can live with that
back here. Mike's welding up a bracket to hold. Our racing pump comes from Weldon and it blows up to 100 80 gallons a minute,
up to 80 P. Si that's got a dash 12 inlet dash 10 going out of it and it'll feed motors up to 1400 horsepower.
Now to protect the pump and the engine from contaminants.
We're using a pair of 40 micron cellulose filters
to feed it. We're using this RC I cell that's designed for fuel injected applications. Now, it has a dash 8 ft and return fitting. But the cool features down here in the vent,
it has a check ball that in case the car rolls over, that ball will close and prevent any fuel from spilling. Now, I really want you guys to see this but don't try this at home
pretty cool. Huh?
The back half was built with that cell in mind
and I'm going to use some cheap angle iron to make a basket to hang it
before running our lines. We need to install this weld and bypass fuel regulator. Now, this thing increases fuel pressure on a 1 to 1 ratio as it sees a reference for boost. It's designed to work with any kind of race fuel and it's adjustable from 4 to 200 P si
all that fuel gets fed to this Russell Y block for a smoother transition than the standard T.
Now, this is a standard return system and since the regulator is positioned after the rails, it'll allow us to maintain 60 P si whether we're at idle or making a 5.5 2nd pass.
Ok. There's yet one more part to our fuel system
and it's this fuel pump controller that's gonna mount on a bracket here under the dash. Now, this thing
allows you to adjust the volume of fuel while you maintain that constant P si level.
And it controls the pump with pulse width modulation. Now, that means electrical current to the pump is interrupted over 12,000 times a second to reduce the speed.
On the other end of the big gray wires, a switch from race to street mode
and this little dial that controls that rate of fuel pump interruption. We'll mount these in the dash later. And
while I'm in here might as well get started on the painless wiring harness. First thing to go in is this fuse block that has 30 amp relays and a separate fuse rec circuit.
As far as the wires go, these color coded wires are for everything behind the firewall.
These wrapped in power braid
get routed up to the engine
while we've still got the room without the dash. Let me show you how we're gonna finish up the brake system. We're using a lightweight aluminum pedal assembly from will wood and we got ours with dual aluminum master cylinders. Now, it also comes with an adjustable bias bar and non slip foot pad.
Now, this little blue thing tied into the brake.
Well, it's a two pound residual valve that won't let fluid come back into the master cylinder.
Hey, we're getting pretty streamlined and racy with this dash, it's a fiberglass rep pop from VFN.
All we had to do was cut four holes for these auto meter gauges
and yet another one for our control panels.
We're using some mounting hardware from Moroso to hold the dash in place.
So first I'll drill some holes to bolt up the brackets.
Well, I guess drilling close to the windshields, not all it's cracked up to be.
So I'm gonna weld the brackets in. Instead,
the new dash goes right in place after just a little trimming for the roll cage
looks pretty good. That was pretty easy. The wiring will be a different story but hey, stay with us. We're not too far away from firing this thing up.
Well, we're back and now ready to turn our attention to how to steer this turbo pony.
You know, with all the modifications we made under the hood,
there's no way the stock set up would fit even if we wanted it to
this Flaming River direct replacement kit is a lot more streamlined and by losing things like the power rack and pump, we lose about 30 pounds.
It's pretty easy deal. The hem
joint first goes into this boss, we've already welded to the frame rail,
this U joint threads in next,
followed by the short shaft,
then we slip the universal joint on to the top of the shaft.
Now, earlier before installing the dash, Mike welded up a special bracket
and it's there to support the longer shaft that goes through the firewall
and into the other end of the universal joint.
However, be careful not to bottom it out.
Then with everything cinched down, we're ready to go inside the car again and weld the spl
adapter to the chat with the wheel straight. We're ready to install our steering wheel using this quick release adapter. Now, another cool feature about the steering wheel is that's made out of build aluminum wrapped in leather and it's D shaped. So you get a little extra clearance down low.
There's not a lot of
room
for a cooling system with that turbo in there. So we're going with this ultra low profile Hayden fan that's designed to push or pull air depending on how you mount it up.
It's also got wiring for high and low speeds. Now, we're installing ours on a high performance fluid iron radiator.
That's a direct fit for our particular mustang.
So with the fan mounted offset like this
clear, the turbo just fine,
everything fits. But one small problem you see, we've misplaced the clamps that go right here. So time to improvise
after cutting some slits in the core assembly and the radiator itself slide in this piece of scrap billet we have
with a couple of bolt holes
there that's not going anywhere.
Next. A rubber hose will work just fine up top, but down here, 1 may get melted by the waist gate or the exhaust. So we're gonna use this form of flex hose from Earls. Now, the stainless steel hose is flexible and to seal it up, it uses silicone sleeves and a billet, aluminum warm gear clamp.
All right now to finish up the cooling system. And these GM factory weather packs make a pretty easy job of connecting the harness to the fan
and to the electric water pump.
We're mounting the packs on this engine plate to keep them away from heat
couple grounds. And that's done.
What's next? Well, you want to hear it fire up by the end. You
bet, you bet. All right. Well, the next thing up is the fuel injection system and we'll show you where we're gonna mount the box right after the break.
We'll
start
up in no time.
This all looks real nice.
We kicked off the day in the horsepower shop by plumbing up our turbo
stinks inner cooler.
Then to feed this hungry horse, we installed the fuel delivery system,
we installed a new trig dash loaded with gauges
and assemble the lightweight steering set up, including, of course a new wheel. Yeah, that looks good.
Next was the cooling systems, low profile fan radiator
hoses and of course wiring.
All right. Now, this is the same system we ran on the motor when it was on the
dyno.
Now, here's the easy way to look at it. This whole section here goes to the engine side and all this stays inside the car. Now we'll mount the MF I box, the wide band controller and the relays on the inside of the firewall. You got it. I hope so. Let's go.
The MF I controller that was made for our Mustang turbo system mounts inside the car to protect it from the elements.
In addition to several sensors, it connects to the main harness and to a switch 12 volt source
and it uses a pair of relays to complete the circuit
out back. The wiring winds up with positive and negative wires to the fuel pump.
Ain't no way to fire up this Mustang today without a battery.
And we got just enough room for this Taylor battery relocation kit
for racing. It has to be mounted on the frame
and the kit comes with all the hardware and cable we needed for a quick install
in racing. Sometimes the best battery is one with no power. This moroso kill switch connected to ours shuts the fuel pump down in the unlikely event of a fire.
It's required by ra
and sanctioning bodies and we're using an optional pool handle with ours for faster, easier shut off.
Well, back under the Mustang, it's time to make way for the trans first for the starter block plate now because we installed our engine plate,
we're gonna need to use this piece to keep the spacing. Correct.
Well, now we can vote up the Flex plate
and by the way, all these parts came from Hughes performance,
believe it or not, chances are good. You've already seen this transmission before
in a different wrapper that is,
you see, it's the same two speed Hughes power glide. We used a few years ago in our popular 69 project car, we call supernova.
Since it saw little use. We decided to keep the tranny. Even after the Nova changed hands, we had used performance transplant all the internals into this new dead and bear case for about 1500 bucks.
It also changes the boat pattern from a Chevy to a Ford.
Now, erasers will love the fact that this thing now meets or exceeds the SF I specs of a blanket,
buy a blanket.
It also has thickened oil pan plans
and adjustable trans brake release
and redesigned oil passages for a longer lasting glide
with the trans bolted up. I can install the drive shaft. Dyno
tech built for us to our specs. Now it's a 3.5 inch chrome Molly steel shaft with 1350 joints and it's been balanced to 8000 RPM s before shipping
the power glides in the stay cool with a little help from this unit. Now, we got this thing from Performance rods and customs and what it is is an oil cooler that can also be used as a transmission cooler. Now, we got ours with dash 10 fittings, but they're also available in twelves or sixteens. And this bung here is for a temp sensor and plus we got ours wrapped with a set of small fans,
we're mounting ours onto the frame
using a plate that we
fed up.
Then we run our lines to and from the tranny
now with the ground and a positive 12 volt source. That's that. Now, make sure you stay with us because we're gonna wind up our work and fire up our turbos. Stay coming up.
And let's see this. 92 Mustang started TV, live with a budget in car cam swap. Then we used it to test some high performance boltons
and even gave it a mile shot of squeeze.
Years later, it was used to show you how to back half a car and build a road cage.
Then last year we went wild building a turbo
charge 382 small block for it.
And finally today it got all the goodies. It needs to run down the drag strip. Now, in its newest and last incarnation, it's just a couple of shifts away from firing up.
So you see a slew of shifters like this one at the racetrack and sportsman race cars. It's a Cheetah turbo action that we got from summit racing,
got a lot of cool features and you racers will love the fact that it's got a
one hand reverse lockout lever. Pretty cool.
Let's do it.
Fuel ignition and
awesome a whole bunch of wiring and everything worked. You ought to be happy.
Light off of my back. Cool.
We'll see how cool during a test and
on the
dyno
Jet.
But that's next week.
Build on a budget horsepower projects that save you time and money.
I don't know about you, but to me the best budget tips are the ones that don't cost anything at all. We got a couple of simple ones that fit the bill. Let's pretend you're in a tight quarters here. You only got room for one hand
and you gotta send this fastener in with a screwdriver that's not magnetic. Well, don't go buy a new set. Just find something that is magnetic like this tray,
rub the tip of the screwdriver on it for a few seconds
and
voila
it stays magnetized long enough to send the screw home
and you don't blow a head gasket in your cranium.
Next, you've just got your cylinder heads back from the machine shop and no matter how much you clean on them, you're still gonna have some of that debris stuck in the water jackets.
And then when you go to put the cylinder head onto the block, some of that debris can fall in the cylinders. So what are you gonna do?
The answers in your medicine cabinet? Shaving cream. Just spray it right into the jacket core holes and wipe away the excess with a piece of cardboard.
Then when you bolt on the heads, nothing's gonna fall into the cylinders
and the shaving cream, it dissolves into the coolant harmlessly. By the way, when you fire and warm up your engine. You
for
one thing
nice. Are you trying to say I need a shave? No,
I can't wait till the weather gets right and we take this Mustang out for some tests and tune at the strip.
But as we all know Mustang guys like horsepower dedicated to the street as well. Now you can enjoy up to 700 horse power in your 05 to 09 model with this T Bs 2300 Rouse charger for ro
performance.
Now, this is the heart of a complete kit that comes with a one year warranty
and with just a little tuning, uh you'll be watching those Chevys in your rear view mirror for a price of about 5900.
I don't have to tell you that a car with a lot of horsepower and great handling needs good quality, depend what brakes. Well, Eb C's new yellow stuff pads are among the first to provide great braking for both the highway and at the race track. Now,
they are made with Kevlar fibers and other ingredients to provide great breaking right from cold to higher race temperatures, especially when they're used with a set of their grooved rotors with wider slots. Now the prices will rotors go from 159 to 299 A set pads, 100 and 25 A set. Well, that's it for horsepower. We'll see you next time.
Show Full Transcript
We started our turbos staying project with a 382 cubic in small block. And after we added the turbo kit from Hellion, it made 1100 horsepower at the fly wheel.
Then we built a complete roll cage for safety.
Followed up with T
work to enclose the cockpit,
reinforced the sub frame and replace the floorboard.
Next, we bolted up a Q A one system up front that included a tubular K member,
some control arms and the coil over conversion kit
for brakes and aerospace pro street kit, especially made for street strip driving and stopping.
Finally a front engine plate from competition engineering that let us both the motor right to our sub frame to keep it from moving around.
By the end of the day, we plan to have this thing fired up. Now, the first thing we're gonna tackle is the inter cooler and all the piping that goes with it. Now, for the inter cooler to mount it, nobody makes an installation kit. So you're on your own.
All right.
Come on down. Just a hair more.
That looks good right there.
Now measure the distance between the mounting tabs and transfer that to the core support.
Measure for the height of the bracket. We need to make
drill holes in the core support and mount the cooler with the aluminum brackets, buddy made.
All right. This thing fits nice.
Ok. Now we're not gonna do any brackets on the bottom of the inner cooler because the turbo piping is actually gonna support it and keep it in place.
Now, we can go underneath to start our plumbing first from the turbo
to the inner cooler.
Although piping from the Hellion kit is custom made for the car. The silicone sleeves provide a little flexibility to make it all fit.
This kick comes with a blow off valve and lets excess boost escape.
Now, take your time on this
and make sure that the air has a smooth path.
Not like this.
I can live with that
back here. Mike's welding up a bracket to hold. Our racing pump comes from Weldon and it blows up to 100 80 gallons a minute,
up to 80 P. Si that's got a dash 12 inlet dash 10 going out of it and it'll feed motors up to 1400 horsepower.
Now to protect the pump and the engine from contaminants.
We're using a pair of 40 micron cellulose filters
to feed it. We're using this RC I cell that's designed for fuel injected applications. Now, it has a dash 8 ft and return fitting. But the cool features down here in the vent,
it has a check ball that in case the car rolls over, that ball will close and prevent any fuel from spilling. Now, I really want you guys to see this but don't try this at home
pretty cool. Huh?
The back half was built with that cell in mind
and I'm going to use some cheap angle iron to make a basket to hang it
before running our lines. We need to install this weld and bypass fuel regulator. Now, this thing increases fuel pressure on a 1 to 1 ratio as it sees a reference for boost. It's designed to work with any kind of race fuel and it's adjustable from 4 to 200 P si
all that fuel gets fed to this Russell Y block for a smoother transition than the standard T.
Now, this is a standard return system and since the regulator is positioned after the rails, it'll allow us to maintain 60 P si whether we're at idle or making a 5.5 2nd pass.
Ok. There's yet one more part to our fuel system
and it's this fuel pump controller that's gonna mount on a bracket here under the dash. Now, this thing
allows you to adjust the volume of fuel while you maintain that constant P si level.
And it controls the pump with pulse width modulation. Now, that means electrical current to the pump is interrupted over 12,000 times a second to reduce the speed.
On the other end of the big gray wires, a switch from race to street mode
and this little dial that controls that rate of fuel pump interruption. We'll mount these in the dash later. And
while I'm in here might as well get started on the painless wiring harness. First thing to go in is this fuse block that has 30 amp relays and a separate fuse rec circuit.
As far as the wires go, these color coded wires are for everything behind the firewall.
These wrapped in power braid
get routed up to the engine
while we've still got the room without the dash. Let me show you how we're gonna finish up the brake system. We're using a lightweight aluminum pedal assembly from will wood and we got ours with dual aluminum master cylinders. Now, it also comes with an adjustable bias bar and non slip foot pad.
Now, this little blue thing tied into the brake.
Well, it's a two pound residual valve that won't let fluid come back into the master cylinder.
Hey, we're getting pretty streamlined and racy with this dash, it's a fiberglass rep pop from VFN.
All we had to do was cut four holes for these auto meter gauges
and yet another one for our control panels.
We're using some mounting hardware from Moroso to hold the dash in place.
So first I'll drill some holes to bolt up the brackets.
Well, I guess drilling close to the windshields, not all it's cracked up to be.
So I'm gonna weld the brackets in. Instead,
the new dash goes right in place after just a little trimming for the roll cage
looks pretty good. That was pretty easy. The wiring will be a different story but hey, stay with us. We're not too far away from firing this thing up.
Well, we're back and now ready to turn our attention to how to steer this turbo pony.
You know, with all the modifications we made under the hood,
there's no way the stock set up would fit even if we wanted it to
this Flaming River direct replacement kit is a lot more streamlined and by losing things like the power rack and pump, we lose about 30 pounds.
It's pretty easy deal. The hem
joint first goes into this boss, we've already welded to the frame rail,
this U joint threads in next,
followed by the short shaft,
then we slip the universal joint on to the top of the shaft.
Now, earlier before installing the dash, Mike welded up a special bracket
and it's there to support the longer shaft that goes through the firewall
and into the other end of the universal joint.
However, be careful not to bottom it out.
Then with everything cinched down, we're ready to go inside the car again and weld the spl
adapter to the chat with the wheel straight. We're ready to install our steering wheel using this quick release adapter. Now, another cool feature about the steering wheel is that's made out of build aluminum wrapped in leather and it's D shaped. So you get a little extra clearance down low.
There's not a lot of
room
for a cooling system with that turbo in there. So we're going with this ultra low profile Hayden fan that's designed to push or pull air depending on how you mount it up.
It's also got wiring for high and low speeds. Now, we're installing ours on a high performance fluid iron radiator.
That's a direct fit for our particular mustang.
So with the fan mounted offset like this
clear, the turbo just fine,
everything fits. But one small problem you see, we've misplaced the clamps that go right here. So time to improvise
after cutting some slits in the core assembly and the radiator itself slide in this piece of scrap billet we have
with a couple of bolt holes
there that's not going anywhere.
Next. A rubber hose will work just fine up top, but down here, 1 may get melted by the waist gate or the exhaust. So we're gonna use this form of flex hose from Earls. Now, the stainless steel hose is flexible and to seal it up, it uses silicone sleeves and a billet, aluminum warm gear clamp.
All right now to finish up the cooling system. And these GM factory weather packs make a pretty easy job of connecting the harness to the fan
and to the electric water pump.
We're mounting the packs on this engine plate to keep them away from heat
couple grounds. And that's done.
What's next? Well, you want to hear it fire up by the end. You
bet, you bet. All right. Well, the next thing up is the fuel injection system and we'll show you where we're gonna mount the box right after the break.
We'll
start
up in no time.
This all looks real nice.
We kicked off the day in the horsepower shop by plumbing up our turbo
stinks inner cooler.
Then to feed this hungry horse, we installed the fuel delivery system,
we installed a new trig dash loaded with gauges
and assemble the lightweight steering set up, including, of course a new wheel. Yeah, that looks good.
Next was the cooling systems, low profile fan radiator
hoses and of course wiring.
All right. Now, this is the same system we ran on the motor when it was on the
dyno.
Now, here's the easy way to look at it. This whole section here goes to the engine side and all this stays inside the car. Now we'll mount the MF I box, the wide band controller and the relays on the inside of the firewall. You got it. I hope so. Let's go.
The MF I controller that was made for our Mustang turbo system mounts inside the car to protect it from the elements.
In addition to several sensors, it connects to the main harness and to a switch 12 volt source
and it uses a pair of relays to complete the circuit
out back. The wiring winds up with positive and negative wires to the fuel pump.
Ain't no way to fire up this Mustang today without a battery.
And we got just enough room for this Taylor battery relocation kit
for racing. It has to be mounted on the frame
and the kit comes with all the hardware and cable we needed for a quick install
in racing. Sometimes the best battery is one with no power. This moroso kill switch connected to ours shuts the fuel pump down in the unlikely event of a fire.
It's required by ra
and sanctioning bodies and we're using an optional pool handle with ours for faster, easier shut off.
Well, back under the Mustang, it's time to make way for the trans first for the starter block plate now because we installed our engine plate,
we're gonna need to use this piece to keep the spacing. Correct.
Well, now we can vote up the Flex plate
and by the way, all these parts came from Hughes performance,
believe it or not, chances are good. You've already seen this transmission before
in a different wrapper that is,
you see, it's the same two speed Hughes power glide. We used a few years ago in our popular 69 project car, we call supernova.
Since it saw little use. We decided to keep the tranny. Even after the Nova changed hands, we had used performance transplant all the internals into this new dead and bear case for about 1500 bucks.
It also changes the boat pattern from a Chevy to a Ford.
Now, erasers will love the fact that this thing now meets or exceeds the SF I specs of a blanket,
buy a blanket.
It also has thickened oil pan plans
and adjustable trans brake release
and redesigned oil passages for a longer lasting glide
with the trans bolted up. I can install the drive shaft. Dyno
tech built for us to our specs. Now it's a 3.5 inch chrome Molly steel shaft with 1350 joints and it's been balanced to 8000 RPM s before shipping
the power glides in the stay cool with a little help from this unit. Now, we got this thing from Performance rods and customs and what it is is an oil cooler that can also be used as a transmission cooler. Now, we got ours with dash 10 fittings, but they're also available in twelves or sixteens. And this bung here is for a temp sensor and plus we got ours wrapped with a set of small fans,
we're mounting ours onto the frame
using a plate that we
fed up.
Then we run our lines to and from the tranny
now with the ground and a positive 12 volt source. That's that. Now, make sure you stay with us because we're gonna wind up our work and fire up our turbos. Stay coming up.
And let's see this. 92 Mustang started TV, live with a budget in car cam swap. Then we used it to test some high performance boltons
and even gave it a mile shot of squeeze.
Years later, it was used to show you how to back half a car and build a road cage.
Then last year we went wild building a turbo
charge 382 small block for it.
And finally today it got all the goodies. It needs to run down the drag strip. Now, in its newest and last incarnation, it's just a couple of shifts away from firing up.
So you see a slew of shifters like this one at the racetrack and sportsman race cars. It's a Cheetah turbo action that we got from summit racing,
got a lot of cool features and you racers will love the fact that it's got a
one hand reverse lockout lever. Pretty cool.
Let's do it.
Fuel ignition and
awesome a whole bunch of wiring and everything worked. You ought to be happy.
Light off of my back. Cool.
We'll see how cool during a test and
on the
dyno
Jet.
But that's next week.
Build on a budget horsepower projects that save you time and money.
I don't know about you, but to me the best budget tips are the ones that don't cost anything at all. We got a couple of simple ones that fit the bill. Let's pretend you're in a tight quarters here. You only got room for one hand
and you gotta send this fastener in with a screwdriver that's not magnetic. Well, don't go buy a new set. Just find something that is magnetic like this tray,
rub the tip of the screwdriver on it for a few seconds
and
voila
it stays magnetized long enough to send the screw home
and you don't blow a head gasket in your cranium.
Next, you've just got your cylinder heads back from the machine shop and no matter how much you clean on them, you're still gonna have some of that debris stuck in the water jackets.
And then when you go to put the cylinder head onto the block, some of that debris can fall in the cylinders. So what are you gonna do?
The answers in your medicine cabinet? Shaving cream. Just spray it right into the jacket core holes and wipe away the excess with a piece of cardboard.
Then when you bolt on the heads, nothing's gonna fall into the cylinders
and the shaving cream, it dissolves into the coolant harmlessly. By the way, when you fire and warm up your engine. You
for
one thing
nice. Are you trying to say I need a shave? No,
I can't wait till the weather gets right and we take this Mustang out for some tests and tune at the strip.
But as we all know Mustang guys like horsepower dedicated to the street as well. Now you can enjoy up to 700 horse power in your 05 to 09 model with this T Bs 2300 Rouse charger for ro
performance.
Now, this is the heart of a complete kit that comes with a one year warranty
and with just a little tuning, uh you'll be watching those Chevys in your rear view mirror for a price of about 5900.
I don't have to tell you that a car with a lot of horsepower and great handling needs good quality, depend what brakes. Well, Eb C's new yellow stuff pads are among the first to provide great braking for both the highway and at the race track. Now,
they are made with Kevlar fibers and other ingredients to provide great breaking right from cold to higher race temperatures, especially when they're used with a set of their grooved rotors with wider slots. Now the prices will rotors go from 159 to 299 A set pads, 100 and 25 A set. Well, that's it for horsepower. We'll see you next time.