HorsePower Builds

Parts Used In This Episode

Accel
HEI Distributor, HEI Supercoil, ignition module, spark plug wires.
ARP
Harmonic balancer bolt, head bolts, accessory bolt kit, rod bolts.
Butler Performance
Cleaning, prepping and machining of short block, bored .030, align honed, machined crankshaft, resized connecting rods, installed cam bearings, installed freeze plug kit, aluminum fabricated valley pan.
Denso
Denso Iridium tip spark plugs.
Edelbrock
Performer aluminum intake manifold.
Federal-Mogul Corporation
Cam Bearings, Rod bearings, Main bearings.
Federal-Mogul Corporation
Sealed Power pistons and rings.
Gold Eagle Co.
104+ Octane booster and Maximum 104+ Octane booster.
Halibrand Engineering Inc.
15x10 Halibrand Sprint cast polished aluminum wheels, 15x4.5 Halibrand Sprint cast polished aluminum wheels.
Hays
Steel flywheel.
Hedman Hedders
Ceramic coated long tube headers.
Howards Cams,Inc.
Hydraulic cam and lifters, timing set, valve springs, retainers and locks.
Loctite
Loctite 598 Black High performance RTV silicone gasket maker.
Mothers Polish
Mother's Tire Shine.
Mr. Gasket
Overhaul gasket set, exhaust gaskets, intake gaskets, chrome water neck, fuel pump mounting plate.
O'Reilly Auto Parts
Quadrajet OE replacement carburetor.
Pioneer Inc.
Rocker arm studs, rocker arm nuts, woodruff key, rocker arm balls, oil pan bolts, timing gear bolts, dowel pin kit, push rod, valve springs, freeze plug kit, oil filter adapter bolts.
Summit Racing
Harmonic balancer, FlowKooler water pump.
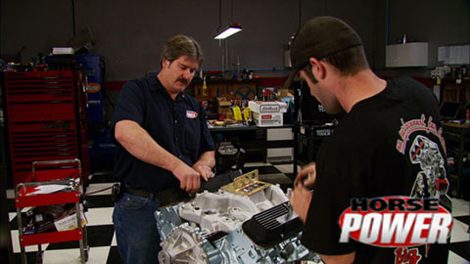
Video Transcript

And we're kicking off horsepower this time with a little ride in the country.

Not a pleasure ride. Mind you. I'm on a mission to find a motor

right down here on the lower 40.

You see by word of mouth, I heard a good candidate for our next engine bill project might be right out here.

Something that's out of the ordinary, not another 350 Chevy,

something cheap

and something we can turn into a decent daily driver.

And I think it might be waiting under the hood of that wagon.

Yeah. 73 Catalina that used to be powered

by a Pontiac 400 engine.

One of those unsung heroes of the muscle car day,

it was overshadowed by its bigger cousin the 455.

But during its production life from 1967 to 1979

the 400 provided power to everything from the Le

Mans to the Trans

AM.

Plus it was a solid foundation that could handle some pretty serious performance upgrades.

I think this 400 is gonna do just fine for what we're looking for. Oil looks good. It doesn't look like chocolate milk. Thank goodness. Oh, and since the car's been sitting up all winter. I

wanna make sure it's got antifreeze in it.

That means the block is probably pretty good.

Now, you can usually negotiate a better price if you pull the motor yourself, which means lots of tools

and a friend. Hey, Tommy, where's the tools? I thought you grabbed me,

Tommy.

Uh, come

back at the shop. Sorry,

he's having fun.

The Rees off and the paint,

no, a V8 powered forklift around.

Why bother with a Pontiac 400. Well, first of all, just like the 409 we built last week. This is a cool part of American muscle car history. And to tell you the truth, I love small block Chevrolets, but it's gonna be nice to work on something a little different.

Plus they powered everything from GT Os to Trans Ams

Firebirds to Catalina. Like the one this engine came out of now, since these motors had such a long production run of 13 years, you can still find them all over salvage yards.

Now, our goal with this 400 is to rebuild it at a few performance parts and wind up with a fresh one for two grand or less.

If you're going shopping for one of these yourself. Here's how you can tell what you're looking at on Pontiac engines. They stamp the displacement on the side of the block and that's on 70

newer models. And as you can see, this one is clearly marked a 400. Here's how to tell what date it was made.

The letter D is for the fourth letter of the alphabet. So it stands for the fourth month, April

next is the day of the month. The 11th, the last digit is a year three for 1973.

We'll get started tearing down this motor up front and with the belts out of the way. But to remove the pulleys,

then the power steering pump,

the alternator

and one

time

next, let's get this nasty old fuel pump off the motor.

Although we will need to replace the harmonic balancer. That wasn't too bad.

We plan to reuse the timing cover.

Definitely not that shame.

I think I heard Mike say something about a few performance upgrades and well, here's where we got to have one, the factory two barrel carburetors gotta go in favor of a better performing but not expensive four barrel, which also means of course,

an intake manifold swap.

Yeah.

All right. Less than one kids change your oil. Often

the distributor can come out next

and then the Valley Pan.

Oh, that's beautiful too.

And we'll do a low budget swap on our rockers push rods and guide plates.

There

we go

nice and dirty.

Now, here's a little trick. Push the lifters up and out of the way to remove the cam,

then just knock them out through the bottom

before we pull the heads off. Here's something else. I wanna show you, Pontiac puts casting numbers on their cylinder heads located on the center exhaust ports and on the casting boss. Now, let's let you know what head you're looking at plus the valve and combustion chamber sizes.

Ours is a four X head

with a 48 which lets us know that we have a 196 intake and 166 exhaust valve with a 98 cc combustion chamber.

Ok. Professor Pontiac, are you done? I'm, I'm done, by the way. He found that uh fancy ID info by doing an internet search and after we get the heads off, we'll attack the bottom end and maybe keep our date with the machine shot. Now we got the mechanic mime over here wearing gloves and not doing any work.

Yeah, we can reuse this.

Mm. Anybody for soup.

Since we're using these rods over again, we're gonna go ahead and stamp them. So we know what cylinders they came out of.

Ok. As soon as we get some of these things cleaned up, we'll be ready to take them the machine shop.

Now, we weren't kidding about pension pennies on this project in addition to the block, crank the heads. Look at all this stuff we're reusing.

Well, the real fun starts in just a few minutes. Stay with us.

Hey, our Pontiac 400 block is back from the machine shop and ready to be filled with a rotating assembly.

Now, the guys down at Butler performance did all the machining and they started out by going 30 over on the Boars line honing the mains, installing new cam bearings and finishing it off with brand new freeze plugs.

As we told you earlier, we're on a stingy

budget with this project. So we're reusing the stock crank shaft.

We just had the guys that butler turn it and balance it for us.

We're also reusing the stock connecting rods, however, they did resize them and add these A RP bolts.

The pistons are from seal power. They are new

and their size 30 over.

Now for bearings, a set from federal mogul and no cutting corners with the gaskets. A complete set for Mr gasket. Now, the stock oil pad was way too trash to reuse. So we're using this basic stock replacement

in case this is your first trip around the block, so to speak. Here's what this bearing design is all about. Well, it gets pumped up through the block through one of these holes into the slot and the groove here in turn, feeding the crank shaft which has holes in it

and it in turn lubricates the rods. Next is a rope seal. These have a tendency to leak all the time. So we want to try to prepare it

so it doesn't.

So what you want to do is go ahead and smash it down into its groove

and carefully remove it

some silicone in the groove

put the seal back in

till it squeezes out

and wipe off the excess.

Now, you want to trim the seal down flush with the block, either with a razor blade or a pair of wire cutters.

You push one side down to its flush and then come over here and trim the other side.

Then just prior to putting the main cap on, you want to put a couple of dabs of silicon on each end of the rope seal

and then put them on.

After installing a crank, do not spin it because it will move the rope seal.

Next comes the main caps,

ok. Now it's time to put the silicone on the tips of the rope seal and bring them out to the end of the cap

to help seal it

smear just a little bit,

move up the bearing

and install it,

ok. Now we'll torque all the mains. So 100 ft pounds

except for the rear maine which goes 100 and 20

start from the middle and work your way out.

Next, we'll finish up the pistons and rods

and then install them in the block

to move oil through the block. We're going to use a standard volume oil pump for melling, which also comes with a pickup and a drive shaft.

Now, the clearance between the pickup and the pan is critical. So we're going to show you how to install this on the pump and then make the proper adjustments to get the proper clearance.

Ok. The easiest way to install this is to get a wrench that fits the tube and set it right here on this little rib, get a hammer

and just whack them all

with the pump bolted to the block.

We drop the pan on and gently tap it to make contact with the pan rail.

The pickup hit the pump. So we positioned it just beneath the pump plate.

Then we marked the location of the pickup.

Yeah.

Now we can measure the pickup height and pan depth to check for proper clearance.

Finally, we can weld the pick up to the pot.

Next, we can bolt up the oil filter adapter that we are reusing and we'll fasten it down with some pioneer hardware.

Hey, here's something you wanna make sure not to forget when you're putting together a Pontiac V8 on air conditioned models. They used a three piece dipstick on ours. We're using a two piece. The first one gets pressed into the block, the second one gets bolted to the third main cap. Now, if you get everything together, the oil pan and everything and you forget that you're gonna be cussing in your garage. Well, stay tuned because we're gonna add some color to this Pontiac V8 right after this break.

Yeah.

Hey, we're back with our Pontiac 400 building and ready to drop on the heads. Now, the ones that came off of that engine, they had a small valve and push in studs. Not to mention they were little on the rough side. So the guys down at Butler swapped us out for the six X heads. They have a larger intake valve and screw in studs. Now, they went ahead and did a valve job and put on new springs. Now, these heads are pretty readily available. They come on all 75 to 79 3 fifties and four hundreds

with the heads in place, no reason to cut corners on the head bolts. These are a rps and we're gonna a torque them to 85 ft pounds.

Our CAM shaft specs out at 214 on the intake 224 on the exhaust and that's at 50,000 s lift. Now, it's a hydraulic flat tap it and came from Howard's CAMS

as did the stock replacement timing chain.

And next, we can replace the factory fuel pump, acentric

and original oil slinger.

The old timing cover looks like new with fresh paint.

Then we can drop on the new oil pan and get it ready for some fresh Pontiac blue paint.

After our paint is dry, we can start installing our valve train

which consists of flat tap and hydraulic lifters

and push rods from Howard's

and a set of 1.6 rock arms for pioneer.

Then we'll loop the fulcrum ball,

drop them into place and adjust the rock arms.

These inserts need to go in before the water pump to maintain pressure.

Then the flow cooler water pump can be installed

with a bead of silicone to seal it. We can drop on the valet pan supplied by butler.

Next up is the intake that we got from Edelbrock. Now, it's a dual plane performer that fits Pontiacs from 326 to 455 cubic inches.

We can slide on the stock replacement balance that we got from pioneer and lightly tap it with a hammer since it's not a press fit,

we're using some old Mickey Thompson valve covers from a past Pontiac project. Now being this is a budget bill that will save us some money.

So after the break, we'll put this on

a dyno, see what kind of numbers we have

horsepower is back and now it's time to give our Pontiac 400 a ride into the

dyno room for finishing touches before we let it make some noise.

It was a budget bill that started in the bow

yard

and ended up in the horsepower shop with a complete tear down.

And after machining the block, a rebuild using some old parts like the crank and rods

upgrades like a new street cam,

a little paint for Cosmetics

and then finishing up the top end

which included a new intake so we could feed our 400 with the

and four barrel carburetor finally getting it ready to fire up. But for that to happen, it's gotta have spark so no cutting corners here. We're gonna load it up with a set of these dens

iridium plugs

and fire it off an HE I distributor from Excel with a built in super coil.

Now to deliver juice to the plugs, we got a set of their 8.8 millimeter wires

in keeping with our low budget theme. However, we went to our local o'reilly auto parts store for a remanufactured 750 quadrajet.

Hey, a little paint did wondrous for the factory pulleys.

Now it's time to watch

spin.

All right. After doing an RPM sweep to 5400 RPM, we made 310 horsepower at 4600 and 411 ft pounds of torque at 3300 RPM. Now, that's a lot of torque down low, making this thing a really cool street motor.

Yeah, to think this motor was only rated at two 100 horsepower from the factory. All we really did was a basic rebuild with a couple of performance parts like the cam and intake. And of course, we stepped up to a four barrel. Best part is

we brought it in for a little bit over $2000. Are we good or what? We're good? We're good.

It's hard to believe that America's first octane booster hit the market in 1975

and 104 is still helping engines live longer, get better fuel mileage and make more horsepower. Well, now they have maximum 104, which is double the octane boost. Now, this helps the fuel system stay cleaner and get rid of detonation. You know, those annoying knocks and pings.

It's pretty easy to get a hold of this stuff. Just visit your local o'reilly Auto parts store. It's amazing how many wheel designs are available out there these days. And if you like the Timeless

classics, well, you got to give it up for the ever popular Halliburton Sprint, probably the most imitated wheel design in recent history.

Now, these aluminum babies have found a home on the drag strip road course, as well as downtown main street prices start at around 300 bucks. Well, here's something to give the tires around your wheels a high gloss and long lasting protection.

Its mother's tire shine and it protects against the ravages of brake dust and oxidation. Let's give it a shot.

You just spray it on

and distribute it evenly,

then just wipe away the excess after a few minutes

and enjoy a long lasting shine.

Well, it looks like we've polished off another edition of horsepower this time.

We'll be back next week. So why don't you join us?
Show Full Transcript