More Raunchy Rat Rod Episodes

HorsePower Builds

Parts Used In This Episode

ARP
Main bolts.
Edelbrock
49-53 Aluminum Cylinder heads (pair).
Edelbrock
600 CFM manual choke.
Gollers Hot Rods
Starter plate, oil slinger, crank keyway, oil filler neck, PCV kit, gaskets, dowel pins, distributor gear, spark plugs, dowel pins, cam and crank gears, camshaft, oil pan, bell housing, water pumps(2).
Hardcore Racing
Machine work.
Honest Charley
Finned air cleaner and matching coil cover.
Honest Charley
Scat rotating assembly 4 1/8 stroke.
Magnuson Superchargers
Supercharger.
Midway Industries
Dual friction assembly for T-5 application, aluminum flywheel for flathead and throw-out bearing.
MSD Ignition
Cut to fit universal V-8.
MSD Ignition
Flathead FORD distributor.
Pete and Jakes
Frame.
Powermaster
75A black 49-53 Powergen.
Powermaster
CS130D 150A GM Alternator.
Powermaster
XSTorque starter.
Shadow Rods
Aluminum engine block.
Shadow Rods
World class T-5, transmission adaptor, main strap kit, oil pump and filter kit.
Video Transcript

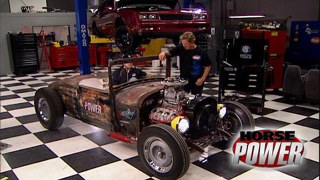
Hey, our Rat Rods back in the shop today to get some classic American horsepower. Now we kicked off the build of this thing. We call the raunchy rat several months ago catching a wave of a fun new and old rat rod craze. In fact, here's how it all went down.

We first found a topless two seater body to start our project.

Then headed to the street Rod Nationals where we found a frame we like from Pete and Jake's Hot Rod parts.

After getting our bear frame powder coated in natural rust, we started building it up

first with a nine inch rear end equipped with 11 inch drum brakes and a 300 gear.

We hung it under the frame using ladder bars and coil over shocks

and to keep it centered, we added a pan hard bar.

We finished the front end by first hanging the hair pins, then a front axle with a four inch drop.

We put in a super slide spring pack set of front shocks,

brakes and spindles.

And we also installed a Chevy Vega steering box.

Later, we welded together square tubing to brace the body to keep it from flexing

and use the plasma cutter to get rid of the four pans.

Right.

Soon, we were able to set the body on top of the frame for a test fit.

Well, the raunchy rat's been waiting long enough. It's time to give it a motor that's worthy of the image. Now, guys are putting all kinds of engines and rat rides these days and that's part of the fun.

But for us, the only way to go is with the motor that started the whole hot rod craze. The classic Ford flathead

during its 31 year production run, there were several displacement versions of the Fable Ford flathead

though none made more than about 100 25 horsepower.

It took the imagination of post war gear heads and new performance parts to make it the preferred power plant for early hot rods.

Today, the flathead enjoys a revved up revival,

the cool look powering all kinds of vintage hot rods. High boys restored classics

and last but not least rat rods.

But it took a lot of ingenuity and innovation to make it

powerful and dependable for modern day use.

And that's where motor city flatheads comes. In

a few years ago. I met the founder and flathead Guru Mark Kirby,

who's come up with more improvements for the motor than any gearhead going today.

Well, like a main strap that adds strength to the three main rotating assembly,

oversized valve guide to help prevent oil leaks.

A

free flowing oiling system with a remote oil filter that never existed on the stock one.

Well, the list goes on but the result is a flathead that's not only classic looking and durable

but one that makes over 250 horsepower and over 300 ft pounds of torque.

It all starts with an old block that has to be stripped, baked and carefully cleaned before machining.

And

that we took our

block to hardcore racing in Flint, Michigan

under the guidance of John Laho,

the block was decked on AC NC machine to ensure the heads are exactly 90 degrees.

Then onto another machine that bores the cylinder bores. So they're exactly perpendicular to the deck and to the bore center line

vital for perfect piston movement.

Next cylinder honing ensures a proper finish. So the rings will seal with no blowback.

These guys are thorough even checking each new cylinder rod to make sure they're exactly round and to size.

It's about 1.5, 2/10

small. It's in the red

out to the.

Ben. John goes over here to measure the three mains before he lined, hones them

next step, weighing all the valve train components. And this tells the tech what bob weight to use. So the crank shaft can be balanced properly.

It's pretty flat. That means it's pretty close to balance.

And here's our freshly machine block all painted red and ready for a build up with the help of our buddy, Mark here. Of course,

75 years since they introduced this thing. Amazing talk about Bill Ford. Tough boy. It just stood the test of time, didn't it? Sure did. Speaking of time, they haven't built one in a long time. What's your take on the resurgence and popularity of the flathead for things like the rat r uh

for so many years, people beaten up the junk yards trying to find parts and now with stuff readily available over the counter and all the state of the art

ignitions. What have you?

I think it's making people go back to flatheads. Good answer. Well, we're going to show you how to use some of the new stuff to build a classic old motor. It's going to be fun.

Those guys did a good job here.

It sounds like it's going to be a fun project.

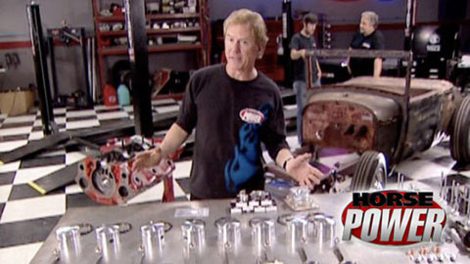
Well, it's flatheads forever today in the horsepower shop as we build our own for the raunchy rat back there. Well, here's what goes in the bottom end of our flathead block. It's a complete rotating assembly from honest Charlie's

that includes the scat crank shaft, set of forged pistons

and billet connecting rods that you saw getting measured earlier on. Now it's for a three and 516

bore by a four and an eight stroke and well, that equals 286 inches. Of course, the kit also comes with a complete set of bearings

and rings for our flathead pistons. Here's the super deluxe cam kit we picked up from Goer's

Hot Rods. Now, it comes with everything you need to install it in the cam shaft. Well, it's a tried and true grind for motor city flatheads. Just check out the ramp angle on the cam lobe.

After plugging the oil galley here, we can install our camshaft. First.

Notice how we installed this aluminum cam gear on the front of it.

All right. Speaking of that, Mr Expert, some guys are still using this old style gear made of phenolic.

Why not here? Not a good plan. They used the

PIC because it ran a lot quieter. And of course, they were concerned with being quiet

the way that's fastened to this aluminum hub.

We're doubling the spring pressure going to a modified cam and it will come apart here. So

for that reason, we always go to a one piece, just a solid aluminum cam gear

don't have any problems. Good tip.

We've already tested our crank shaft to make sure it spins freely. Now, we need to install this end seal over some silicone. Now notice this Kevlar like material, this will cause a little drag against the crank shaft which will make for a good seal.

Well, now we can drop in our crank shaft for real this time

and notice how we've installed this gear oil slinger and sleeve on the end of it

before installing the main caps line up the dots on the crank and cam gears to make sure they're in sync. After dropping on the three main caps, we're gonna use a center cap strapped

like this for extra strength. Now, notice how this cap's been milled flat to accommodate this foot

that's gonna spread the load out.

Now, it's important to use Molly lube on these A RP main studs to get the right pork value, which by the way is 85 ft pounds.

Finally, the center strap boat goes in finger tight only with the gasket in place and some Molly lube on the thrust surface

and the seal,

we can install the front cover.

Well, next with the motor turned over. So the service is flat and I can see straight down to the crank.

I'm gonna install the pistons and rods and here's something important. See that little tang on the rod bearing, make sure you have it pointing to the outside.

Then we carefully tap in the piston,

making sure the rod doesn't nick the crank journal on the way down.

Now with some oil on this bearing and

making sure the tang matches up.

We can install the rod cap.

By the way, the torque specs on these boats is 45 footpaths.

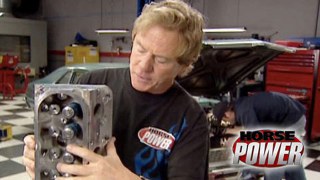
We're using a set of Edelbrock aluminum flathead cylinder heads for a motor. Now, these things have a larger water capacity, excellent breathing characteristics and they'll give us a compression ratio of 8 to 1. Now, we're not gonna bolt them on right now, but we are gonna make sure we have the proper piston to head clearance

to do that, make sure the bolt holes are lined up

and while holding the head in place, turn the motor over

and you'll feel the piston slightly lift the head off the deck.

The minimum piston to head clearance on a flathead is 30,000. So Mike and I are gonna place fewer gauges of that thickness under each corner of the head.

Now, all I gotta do is press down on the head, spin the motor over

and listen and feel for any contact.

Well, it feels like we're pretty good shape. So now I can remove the head and we can move on to the valve tray.

The valve and spring assembly is totally unique to the flathead. So we're gonna show you how they get assembled first, take a looped up valve slide on the valve guide with installed o ring

shims

spring and retainer

and finally your locks.

Hey, Mark, I noticed you champ for the top edge of this

oing. What's all that about

when you go to put this in the lifter board? There's a sharp edge a lot of times if you don't champ for this

is it go in, it'll catch and tear this thing. Then you got a problem

after you drop in each valve assembly, you need to secure it

by compressing the spring and sliding the horseshoe clip into the guide

next. After adjusting the valves, here's something that's really important.

The camshaft lobe sprays oil out of these holes. This baffle allows that oil to be captured in the upper part of the valley. That's the only way the upper part of the engine gets lubrication. So that is a mandatory piece. Finally, we need to install this mechanical fuel pump bushing.

And since we're using an electric fuel pump, we have to plug it.

Anyone who's run an original flathead motor knows the oil filtering system or lack of it was a big drawback. Here's how Mark solved that problem. He takes a stock oil pump like this blocks it internally. So the oil is forced up to this new plate out the plate to a bulkhead fitting through a hose to a remote filter and you can mount this anywhere. Then the oil goes out another hose onto the back of the motor.

As you've seen so far, there are a lot of small pieces that can fall through the block of a flathead engine. That's why we've waited to put the pan on until now. Now we got this specked out from Goer's

hot rods and it came off of a 49 Merk. Now, Phil Goller actually came up with this Dipstick flames repair kit that consists of this plate being tack welded on the inside of the pan.

It allows this flan to be bolted on the outside instead of using rivets like in the old days. Well, now we go ahead and tighten up the bulkhead fitting on the pan and check this out.

As long as this slot here is pointing toward the bottom of the pan, we know there's no kinks in the hose that's inside the pan

with the pan bolted up. We can install the dipstick flange

and screw in the dipstick tube. Now we'll button up our old flathead and get to work on its new age power adder. Make sure you stick with us.

Hey, welcome back to more flathead fun here in the horsepower shop. Here's something cool. I just learned

if you turn the motor over. So that number one cylinders at top dead center on the compression stroke.

There it is. Well, you can bolt up the cylinder heads knowing that your timing is right on.

Since the heads go into water, we want to make sure we treat them to a coat of sealer

and we'll torque them down to 50 ft pounds.

Flatheads use two water pumps. You can get either new or in this case, rebuild original.

Now, notice how we got the balancer installed with the timing mark lined up with the pointer.

The crank case on these old flatheads only had one way to breathe and that was out of a breather up until now, goer's

hot rods came up with this unique P CV kit

and it consists of a bushing that presses into the block A

P CV valve that screws into it connected to an oil resistant vacuum hose.

You know, for our money, the only thing better than a flathead is a supercharged flathead. So we're gonna install this Magnus and root style kit that comes with a cast aluminum intake with cross flow

equal length runners before bolting it up though. We got to connect that vacuum hose to this fitting underneath.

The blower itself is made with eating components and can make up to 60% more power. We'll probably run hours of about 3 to 4 pounds of boost

to feed it. We're using a 500 CFM metal rock carburetor with a manual choke.

Now, here's a fed

up hard line. We ran from the intake to a vacuum port on the carburetor

with the P CV hard line attached, gasses are going to be reintroduced into the induction system and burn rather than being introduced into the atmosphere when using an original style breather.

Well, next, we're going to install the alternator bracket,

the

idler pulley, a

one number two

alternator we got from Power Master

and then route the belt.

Our distributor is an MS D Pro billet ready to run, made for 49 through 53 flatheads

along with a set of their 8.5 millimeter wires that we've cut to the proper lengths.

But finally here at the back of the intake instead of the old gromit breather that used to blow oil all over the firewall rollers,

fed up this little piece that has three purposes. It's a baffle

breather

and even a filler for the oil.

Well, now that we got the flatty finished time to get it off the engine stand so we can install our flywheel clutch and tranny. And for that, you might be a little surprised

we're gonna set the engine on our old steel table,

then bolt up a center force fly wheel made for the flathead

along with one of their dual friction clutches.

You know, it wouldn't be a righteous rat rod with an automatic transmission. So we gave shadow rods a call and they sent us one of the world class T fives with an S 10 tail housing. Now, they stuffed it with a 295 main gear set and fifth gear has a 37% overdrive. Plus it'll be plenty to handle the power we're making in our old flathead

to make it all work though. We need to use one of their adapters that allow us to bolt the T five to the original bell housing.

Finally, we can install the transmission

and the original inspection plate.

We'll install a starter in a few weeks when we drop the motor and transmission in the car. But in the meantime, we've got to go raid a couple local junkyards and even go through some old barns. You see, we've got some pretty crazy parts in mind

to give this old rodent a real personality.

And welcome back to the horsepower shop where we just built a classic flathead for our raunchy rat here, starting with a cast iron block. But

if you want the ultimate flathead, you might want to start with one of these man,

check this out

70 pounds, an aluminum block that

mark developed for his joint venture with shadow rods. And hey man, I know this is just a rough prototype. But what are some of the features you got?

Well, you know, being that it's aluminum block, it was difficult to get sleeves in here and know you're gonna get them the seal. So we developed a way to come in from the bottom and screw the sleeve in,

seated underneath the deck.

We also developed all the ports on the flow bench. It'll have hardened seats and bronze guides.

You won't have to do any port polishing, relieving that will all be CNC machine.

Uh The studs that go right around the cylinder that directly affect upper board distortion.

Now go deep down into the block,

totally eliminating upper board distortion. Cool. Well, send us one anytime you want to. Hey man, we'll do that. You are the man when it comes to flatheads. Thanks for your help. Been a pleasure. Remember, real hot rods don't have valve covers.

I will,

looks can be deceiving and fun when you're building an old rat rod or a street rod. Now, here's a Power Master power gen alternator that's made to look like an old style generator. It's got a one wire hook up produces 75 stamps and you can get in either black powder coat like this or in a polished version. Now, the casing and all the brackets were designed to resemble an old style generator. All you need to do is generate about 370 bucks out of your wallet to have one. Well, here are a couple of more new items to give a retro look to your street or Rat Rod. These come from modest Charlie's. Here's an aluminum fin air cleaner for your carb that measures four inches in diameter and would look great on

a

we do set up. In fact, you get a set of three for 100 and 10 bucks.

Then there's this matching custom coil cover that looks great wrapped around a mallory style ignition coil. This piece goes for about 30. Now, as Mike mentioned earlier, the rat returns in a few weeks so we can finish it up and go out and terrorize the neighborhood. Meanwhile, something totally different. Something very cool for you next week. Come hang out with us.
Show Full Transcript