HorsePower Builds

Video Transcript

Welcome to the shop. Hey, do you remember when four on the floor was the only way to go for a real performance car. Well, times have changed.

Automatics have proven themselves both reliable and viable as performance transmissions.

In fact,

in drag racing where performance is measured in 10/1000 of a second and a miss shift can lose a race.

Automatics are the preferred transmission by most racers.

Problem is most automatics are designed at the factory to give smooth shifts for the most comfort. Plus the shift points are shortened to get you into high gear quickly for the best gas mileage. Of course, we don't have to tell you what that does for your performance. Now, you can improve the performance in your automatic with a few simple modifications. Now, this cut away of an automatic shows you the clutch packs that drive both the forward and reverse gears when the car is in first gear. Well, fluids applied to this clutch pack, then the transmission shifts and it's released from this one as it gradually applies fluid to the second pack and so on. Now this overlap if you will makes for smooth shifts, but again, it

doesn't do very much for your performance.

So if you can make the release and application of fluid more immediate,

the shifts become cleaner. Plus if you can increase the line pressure to the clutches, they also get firmer.

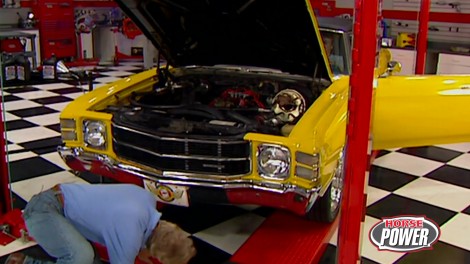
Now that's gonna be part of the plan of attack for my 71 Chevelle there. That's got a turbo 350 in it.

Now, there's no denying that a shift improver kit is one of the best ways to make those improvements.

This one comes from B and M and it contains a valve body separator plate,

oil transfer and middle support plates. A

drill bit to large fluid transfer passages and of course, all the gaskets that you'll need to put everything back together again.

Plus, while we're at it today, we'll swap the stock converter for this B and M hose shot piece. We'll add an aluminum pan and a new trans cooler. Now, in order to make the converter swap, we gotta get the transmission out of Chuck Chavel.

Yeah, the transmission fluid is all drained. So now we can start by removing the drive shaft to do that.

We have to get rid of these strap bolts.

Once we get them out of the way, the drive shaft just drops down

and slides out,

then disconnect the shift linkage,

the speedometer cable,

vacuum line to the modulator

and cooler lines.

Next, remove the converter, cover

the converter bolts

and the trans

mount bolts.

Ok.

I'm using an adjustable jack stand to hold up the back of the engine and a transmission jack to hold up the transmission.

Plus I've already unbolted the cross member. So now we can get it out of the way.

Now we can remove the six bolts that attach the transmission to the engine.

Then it's clear to come down

and out.

Hey, man, I'm glad you finally showed up to do some work here.

I've got all the tools you need. Oh, you're quite a prince set that down.

Now, we bolted this thing to an engine stand so we could roll it over, makes it easy for us to work on. It makes it easy for you to see what we're doing.

Now, if you're not swapping converters, which we are, of course. Well, you can install your shift improver kit with the transmission still in the car in any event. First thing to do is get this pan out of the way so we can remove the filter, have access to the valve body.

After you remove the filter, you can discard it. We'll be replacing it later.

Remove this pivot clip that holds the detent control lever in place.

Then after removing the 18 bolts that hold the valve body in place,

you'll need to disengage this manual valve and link while you remove the valve body,

remove the support plate

along with the separator plate and its gaskets.

And finally, we're using a magnet to remove the four check balls.

I'd say we got lucky. Our gaskets came off nice and clean in one piece. But if you have material left on any of these surfaces, better scrape it off. Otherwise you get an internal leak, lose line pressure and maybe even smoke your clutches.

Right now. I'm gonna give this valve body a bath and some solvent.

We need to enlarge the separator plate that comes in the kit using that drill bit. We showed you earlier. Now we're gonna enlarge these two holes right here. Then using our original plate as a guide.

We'll add a third one right here.

Install new gaskets on the separator plate.

A few dabs of grease

will help hold him in place,

reinstall one check ball right there,

discard the others, then reinstall the separator plate with the gaskets.

Next, the fluid transfer plate

followed by the middle support plate

and the original spacer plate.

Install all the bolts and

hand tight and only

after aligning the separator plate,

torque the bolts

to 100 inch pounds

after reconnecting the S link

position the valve body

and start the retaining bolts by hand.

Now, we can install the D tent roller spring,

then

install the D temp control lever

and torque the bowel body bolts

to 100 inch pounds.

A new filter is the final piece before we button up this bottom end. And to help us do that, we're gonna use this cast aluminum pan that we got from B and M.

Now, the reason I like it is because it's kind of built in drain plug here and that's really gonna help make future services a lot easier. Plus it's got these fins to help keep the transmission fluid cooler.

Now, I know all those parts and passages can really look intimidating, but believe me, it'll really be worth it the first time you bark second gear

later, we'll test the upgrades on Chuck's automatic where it counts out on the street

and a hot tip on how to replace that rusty old rear panel on your street machine. So, stay with us.

All right, welcome back to the shop where we just installed a shift improver kit

on the turbo 350 of Chuck 71 Chevelle there. Now, before we both the transit back under the car, we're gonna throw one of B and M's whole shot converters at it.

Now, it's got a stall speed of 22 to 2400 RPM, which means we'll get into the engine's torque band a lot sooner and we're off the line a lot quicker. Now, you guys who have hot can

in your engines, we'll notice a lot smoother idle with one of these and, well, let's pulling on the brakes when you're at a stoplight. Well, it's time for me to stop

yakking and start pulling off the stock converter. Good idea.

You know, torque converters can be every bit as mystifying as the internal workings of that transmission that we showed you earlier

and looking inside of one probably only adds to the confusion.

But let me explain it to you this way. Imagine you have two fans facing one another and you turn one of them on with the wind from that one is gonna turn the blades from the other. And well, basically that's what happens inside of a torque converter except that they use fluid

rather than wind. Now, this part of the torque converter is bolted to the flex plate, it contains the turbine and it rotates at engine speed.

This part is called the STR

and it's blind to the transmission.

Now, this part here you can think of as the fan that's turned on

this part. Well, think of it as the fan that's catching the wind.

Hey, well put there professor

quite simply you can think of the torque converter as the connection between the engine and transmission in any automatic

but not only does it transfer power, it multiplies torque by two times or even more. Now, with all that going on inside, one of these things, reliability is really an issue.

The whole shot we're installing uses furnace bras, fins

and torrent and bearings for extra strength plus its balance to ensure smooth operation.

Now, before you install any torque converter, it's always a good idea to lube up the hub with some transmission fluid.

That way the front seal stays lubricated during those first critical minutes of operation.

Install the converter too. You hear it, engage the pump drive

and if it is properly seated, the face of the converter will be about an inch back

from the transmission's bell housing flange.

Well, man, let's get a move on. The sooner we get this thing back in the sooner we get out, burn some rubber, just cool your furnace, braise fins for a second there. Pal, I wanna go ahead and replace this spongy rubber, 30 year old mount with this urethane piece that I got from energy suspension. Now, not only is it gonna look a lot better, but it's gonna hold the transmission in place a lot better too.

All right. How's that converter looking over there? I think it's gonna line up perfectly. All right, let me get this line out of the way and it'll go right up into place.

Ok. Here we go.

After bolting the TRS

back to the engine,

the cross member keeps everything supported.

Yeah.

Then we can reconnect all our lines and linkage.

As soon as we get this drive shaft bolted up, we'll be done with the hard part, but not with this project buddy means in fact,

we got another bolt on that'll help Chuck's Tran to keep its cool right after this.

Welcome back to the shop in our automatic transformation on my 71 Chevelle there. Well, so far, Joe and I have treated that turbo 350 to a shift improver kit and a whole shot converter. Of course, the results are gonna be firmer and more timely up shifts plus a quicker launch off the line.

But before we get that thing out on the road and try it out, there's one more upgrade that we need to do

and it's gonna help us out in a long haul. Well, there's no doubt about it.

Excessive heat can be the worst enemy to a high performance transmission.

So a state of the art cooler is a small investment when it comes to dissipating some of that harmful heat.

Our last bolt on is gonna be this high tech super cooler for B and M.

It comes fitted with a 12 volt fan and this thermal switch that turns the fan on whenever the fluid reaches 230 degrees. Now, we want to mount it somewhere where it's out of the way away from header heat and of course, where it gets some good air flow

with that in mind behind the grill here will be an ideal spot.

Now, every installation is a little bit different, but each requires babb up some mounting brackets.

We need to splice our new cooler lines into the existing ones. So we'll use this tubing cutter

to make our cut right here.

Then we connect our hoses from the old lines to the cooler

wiring. The fan is a simple two wire operation. This red one goes from the thermal switch down there to a 12 volt power source. Of course, the black one just goes to the ground

with the grill back in. All we have to do is top off our tranny.

Yeah. To make sure we get the most performance out of our new parts.

We're filling it with some of this trick shift fluid

that's got foam inhibitors

and friction modifiers to help the clutches grab better. Plus the formula also has extreme pressure agents

that's gonna give us some extra protection.

All right, we're about ready to fire up and run it through the gears.

Ok. I checked all the fittings and hoses and good news. No leaks. Now we get this thing off the lift out

the shopping

on the road.

That is silent

juice. Huh?

Hey, that chip improver kit really did tighten things up even when we're just kind of cruising around. But you know, the real test is what happens when we really mash down the gas.

Yeah. What a difference that shift getting converter really helps with the power down. This little Chevelle.

Let me drive. Yeah. Yeah, later on. But you know, it's all in a day's work and about 460 bucks for parts. But hey,

we're not parting company just yet. There's still a lot more horsepower TV to come. Let me drive. Leave me alone, man. I'm driving

hardly

next up a quick tip. That's a cut above the rest. How you can patch up your rust problems by stabbing up a patch panel.

Horsepower T V's Quick Tech is brought to you by

Wyotech.

We all dream of starting out with a rust free project muscle car, but a lot of you have real world challenges. Like this one that instructor Harold

Lamy is gonna teach us how to tap

Joe. Today, we're looking at a 67 mustang. It has a very common problem that people face today.

The bottom of this quarter panel is rotted out and we're gonna show you how to fix it today. Oh, great. Well, you know, problems like this are a big mystery to a lot of us. And I guess uh part of the solution is this patch panel. Right. Exactly. What's the first step we wanna put that up there and we wanna mark that panel to get ourselves a rough cut today

that I'm looking.

That's great.

Thanks Joe.

Using a cut off wheel. Harrell removes the original panel, making his cut a couple of inches below the outline mark of the replacement piece

there,

Joe. We finally got that piece off and by inspection, we can see that this is pretty good shape here.

Now, we can see here we've got some filler that somebody put in this uh hole right here

and we're gonna cut this piece out right here

and we're gonna make a, a brand new piece right here. We're gonna fabricate it

out of some sheet metal.

Now, Harold will use what's left of this original piece as a template to fab up a new one.

Well, Joe, we just got back from the custom fab shop and this is what we made out of a piece of 28 sheet metal. Gosh, great work. Let's show them the difference of what we started with. Harold.

That's amazing. Well, let's see if she fits. All right.

Looks like it's gonna work.

Yeah. Now, you also made a patch up here, right?

If we found some extra rust. So we just cut it out and put a patch in it

after he finishes welding up the new piece. Harrell uses an air grinder to smooth it out.

Good work there. Harold. I guess you're ready for this again now, huh? Yes, thanks, Joe. We'll go ahead and get this fit right up.

It looks like we're a little long back here.

Yeah, I think we'll turn around. We'll cut this off. We'll do a corner weld and then we're gonna go ahead and do a nice butt weld right across the top

using the shear Harold. Now, carefully trims the top edge of the panel.

Yeah.

Got it.

Got it. Joe. Thank you. Look at that bit. You do some nice work. Thank you. What's next? Next? We're gonna tack weld this here.

We're gonna do a corner weld right here.

A nice little lap weld right there

and we're gonna finish out with their plug welds

and then we've got it. We're home free.

The secret to this is continue tacking all around until it's filled in. And remember too much heat will cause the metal to warp

after welding Harold grinds both outside the car and inside the trunk to create an invisible repair

and to protect that fine repair work. Carol. What's the final step?

So, we're gonna under coat the inside of this and then we're gonna use a nice high quality seam sealer to protect the inside of that and give us that factory.

Absolutely. Here's where we started.

Here's where we are now.

Horsepower TV S hot parts is brought to you by Jags. One call, gets it all. One click, gets it quick.

Earlier today we showed you how to improve the performance in non computer controlled automatics. But if your machine uses a computer controlled transmission, well, there's some help for you and the best news is you don't even have to take your transmission apart. The B and M shift plus will tighten up the shifts and most

Ford and GM automatics. A simple flick of the switch. Give you a choice of two firmness levels or the factory setting, plus it hooks right up to your factory computer.

Now, you don't need a computer to tell you that this is a great deal with prices starting at about 40 bucks.

Hey,

don't get me started.

Is that what your Chevy's telling you these days? Well, in that case, maybe you should give one of these a spin

Jag's chrome plated mini starter features, a 5 to 1 gear reduction to get you cranking

no matter how much compression or cubic inches you've got.

Now it's only 10 pounds and well, a small size keeps it away from header heat to eliminate hot start problems.

They've got it for big and small block applications with a price that ought to spend your crank under 200.

Not everybody's running on eight cylinders these days. Insurance and high fuel prices have seen to that.

So for all you V6 Camaro guys out there, Flowmaster is

fed up a set of pipes that'll not only pump up the performance in your 3.8 but you'll also get a healthy big block rumble. Thanks to this unique sound chamber.

Now, this American thunder system bolts right up from the cat back features, Mandril bends and this cool pair of polish stainless tips.

Now, here's another tip for you. Prices start at about 300 bucks.

Hey brother, I'm here to convert you or at least the points type distributor in your GM or Ford V8. This XR I kit from crane is full

digital as a built in adjustable rev limiter and installs easily under your oe distributor cap. It's a simple two wire hook up requires no shutter wheel and well, it's maintenance free.

The price. Well, not exactly free, but how does 100 sound to you? Well, that sounds pretty good to me. But, you know, that's it for hot parts and today's show. Yeah. But we'll see you next week with more horsepower TV.

I like that built in rev limit. I bet you. Do.

You like anything built in?

Yeah, I

do.
Show Full Transcript