HorsePower Builds

Video Transcript

It's test in two time for our Bella

bracket racer here at Music City Raceway

today on HORSEPOWER TV.

It's testing two time for our Bel Air bracket racer. We'll take it to the track and show you some tuning tips for better ETS.

We'll handle the cooling and fuel for our chassis, build up along with headers, exhaust and more. Finally, horsepower as a music video you'll see and hear for yourself.

So hang on for horsepower TV.

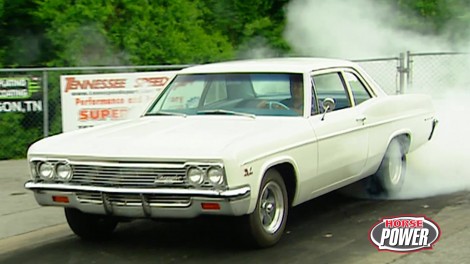
Hi, welcome to horsepower TV. We've come to our local track today to see if our hard work on a white lightning here pays off with a low et slip. Now, as you might remember, we pulled the 66 Bel Air out of Chuck's backyard and into the shop for an engine transplant. That's right now. Old white lightning. Sure. Got some thunder under the hood. Now,

now, that's because back at the shop, we dropped in a GM performance parts 502 big block with a comp cams roller valve train.

Then we capped everything off with Edelbrock heads

intake and carburetor

and we back that up with a jet performance for L AD E overdrive and a curry nine inch rear end.

Well, the purpose of building our Bel Air project was to build a car that was both consistent and competitive on the strip and equally at home on the street. Now, this is the first time we've taken it to the track. So we got to get her dialed in

and show you some bracket racing basics. That'll get you involved in the sport. Well, first order of business is getting a baseline here on the eight mile strip.

All right, that's a good place to start.

832 eto on eight mile track. 86 miles an hour. Not bad. In fact, it felt real good going down the track. Now, before we do any tuning changes though, it's always a good idea to pull the plugs and see where the jetting is at.

Well, that looks pretty good. Now, if you've got a black or dark gray coating on here, well, that means that your carb is too fat, but if that porcelain down there is bone white, well, your carb is too lean. Now, since this thing looks pretty close to being on the money, we're gonna leave the carb alone and instead we're gonna bump the timing a couple of degrees. See what happens

if your ET improves, keep advancing the timing two more degrees until you've got your best time.

But if it slows down, back it down two degrees each pat.

Well, bumping, the timing didn't seem to help us a whole lot. In fact, we ran the same number another 36. But even though our plugs, tell us our jetting is pretty close, I'm gonna go ahead and fatten up the secondary, see if we can get this thing to pick up.

All right, we're going two steps smaller on the metering rod and,

well, let's hope that gives us what we need.

Now, here's another little tip to help get you dialed in when you make a pass. Have your buddy check your footprint at the starting line. If it's darker in the middle. Well, you got too much air but it's darker on the edges like this need to add a little bit.

Sometimes even a half pound can make the difference in a couple of hundreds on your et. So it's a good idea to bring a good gauge along to the track like this one from Moroso.

We're right at 13.5,

we'll add about a half pound to bring it up to 14.

All right, man. At 822 that's your best pass yet. Right. Looks like we're heading in the right direction by fattening up the Secondaries and, and I'm sure there's a lot more left in it,

but I'll tell you what, you don't need to have a big block with high horsepower to have a lot of fun bracket racing at your local track. After all, bracket racing is all

dialing in a number running as close to it as possible without breaking out. That's right. Well, a lot of young guys these days are running cars like this Honda that we borrowed from Akimoto racing sports. Now, this one's loaded with their cold air kit. Otherwise it's pretty well bone stock. What do you say? We laid out some numbers in this little pocket rocket.

Right.

All right. After a couple of time trials, I'm going with an 1185 of this Honda

and I've dialed in at 830

it's time to race. Loser buys refreshments.

Well, unfortunately, for me, that's what we mean by breaking out that 1175 was 1/10 under my dial in. So, guess who's buying beverages? Well, I had to get on the brakes myself to keep from breaking out there. I ran a 37 on that 30 dial in. Come on. Now, that's two out of three. afraid not partner. We gotta get back to the shop. But don't you break out? We'll see you there right after this.

All right. Welcome back to horsepower TV. Well, after some fun and games at the strip, I guess it's time for some serious risk spending here in the shop.

Now, a few weeks ago, we kicked off our Chevelle chassis build up by bolting up some paua

suspension pieces, bear four wheel disc brakes and this 12 volt rear end we got from Curry.

Well, then we added a GM performance parts Ramjet 350

a 700 R four automatic overdrive

from BT E. Now, today we're gonna finish up the fuel system, the cooling system and then we're gonna bolt up the drive shaft and the exhaust and finally the wheels and tires. Now, when we're finished, we're gonna have a rolling chassis that'll eventually be bolted to the body of my 65 Chevelle wagon.

Well, the first thing we're gonna bolt to that chassis today is this cooling module system from B Cool.

They've engineered an entire package that includes their aluminum radiator,

electric fan fan mounts and even wiring. It's all designed to work together. So we don't have to worry about things like babbling up mounts or finding the right relays, switches and wires or even sizing up the fan.

Of

course, we'll need something to hang that radiator on. So I went ahead and cleaned and painted this old original radiator support that I found in a swap

be.

Now it just bolts to the frame right here.

All right, I guess we're ready for this. Now, as you can see, I've mounted the fan to the radiator. This whole thing. Boats to the support using the holes in the radiator's fl.

Let me give you a hand. Thank you.

Well, now we're ready to start working on our fuel system. Now, if you remember last time we installed a set of lines from the right stuff detailing and, well, now we're gonna connect them to this custom stainless tank that we ordered from Rock Valley. Now, over here, we've cut away one of their tanks to show you some of the features they've included to make them compatible with a fuel injected system.

There are several internal baffles designed to keep the fuel from sloshing around

and a special sump right here that surrounds the in tank electric pump to keep it submerged in fuel. Now, you'll also notice that it has pick up and return lines plus the fuel sending unit is calibrated. So it's compatible with the stock fuel gauge.

Now, they can custom build a tank for just about any application and check this out.

They even bent me a couple of mounting straps.

Now, before we can drop in our tank, we need to install this fuel sending unit.

And the first step is to measure the depth of the tank

about 6.5 inches. Now,

using this chart that comes with our kit, we have to determine the distance between this mounting flange and the center of the float pivot

and it tells us three and a quarter inches.

There we go. Now, the final step is to adjust the length of this float arm.

And again, using our chart, we determined it's supposed to be 3.8 inches from its center

to the center of our float pivot.

There we go. Now we'll just insert this arm into the float pivot up to our mark.

After I tighten down the screw, we'll cut off the excess.

After installing the gasket under the flange, insert the float ball through the opening, making sure it's got plenty of room to move.

Then tighten the five mounting screws and you're ready to set the tank in place,

lowered in place on top of the mounting straps

and connect the stainless braided lines that we fabricated

for the pickup and return lines.

This Ram jet 350 makes 350 horsepower. So it's got to have an efficient exhaust system.

This one starts with jet hot headers where they're metallic ceramic coating. Now, they're available in colors. We opted for this chrome like sterling finish not only looks good, but it'll help make horse power by holding in heat

and making the engine more thermally efficient.

Hey, the rest of the exhaust

is pretty efficient too. Now, we're using an American thunder system from Flowmaster with 2.5 inch manual bent aluminized pipes and their 30 series muffler.

Now, this crossover is gonna help reduce resonance and noise inside the car and of course the kit comes with all the hardware and hangers that you need to complete the installation.

Plus your choice of either straight or turn down pipes

after slip, fitting the system together,

check everything for clearance,

then weld it all together.

Hey man, after welding up this system, I'm exhausted.

Yeah. So are your puns? But we got more chassis build up coming down the pipe.

Oh, you got me doing it now. Stay tuned. We'll be right back.

Hey, welcome back to the shop. Well, we've got the fuel cooling and exhaust systems completed on our Chevelle chassis. And well, now it's time to add some goodies from low car, including this engine and transmission dipsticks, plus this TV or throttle valve cable.

Now, the Ramjet 350 is somewhat unique in that the throttle body linkage is on the passenger side of the engine. Now, low cars come up with these special brackets that make their kit compatible with it.

Begin by installing the bracket on the throttle body,

then connect the cable to the linkage on the passenger side of the transmission,

then feed the throttle end of the cable through the bracket

and tighten the jam nut,

then slide the plastic connector onto the throttle arm

and make your final adjustments.

Low car makes a special oil dipstick for the ram jet.

It slips right into the block

and attaches to one of these header bolts.

Now, the transmission dipstick plugs right in too and it attaches to the firewall. Well, once we get one

to get the proper length drive shaft, we had to measure from the back of the tail shaft housing to the center of the differential yoke, then we gave that dimension to the drive line shop so they could fab up this aluminum drive shaft for us. Now, this thing uses thick wall 3.5 inch tubing

and they went ahead and added that heavy duty 1350 series U joint.

Now it's also been dynamically balanced and we pop for that extra cost, Polish finish.

And this thing is really starting to shape up. What do you think? But to be a real roller. Well, we gotta have some wheels and tires. Obviously, Chuck's wagons got some serious break and suspension pieces now. So we need some serious rubber. We're going with Goodyear Eagle F ones. They've got a proven race design that'll give us plenty of grip on dry services. Plus they're designed to channel water away from the contact patch and

that'll prevent aqua planning and improve wet traction as well.

Now, these good years are 2 75 40 seventeens and,

and we've mounted these monsters on some 9.5 by 17 American torque thrust twos.

Now, just check out that nostalgic look. They brought back the gray spokes, but they've made the rim diameters available up to 20 inches. Now, that way you can get that nostalgic appearance and still run some high tech rubber.

I tell you what, man, we got this one classy chassis now, plus you rose as well. Well, don't you roll away anywhere. There's a lot more horsepower ahead. So stay put,

get you out

Ho

Father

horsepower TV

S hot parts. A close up. Look at the latest in high performance hardware.

Hey, we're bringing you hot parts a little earlier than usual. That's because we got a special surprise for you later in the show.

Well, it should come as no surprise to you that one of the best parts for your small block Chevy these days are these aluminum 23 degree heads from trick flow.

Now, they feature a high swirl 60 four cc combustion chamber filled with 2021 60 valves. The intake ports are huge at 100 95 ccs

and you can order them with springs that will handle up to a 600,000 valve lift. So they're great for your bracket racer or serious street machine.

If you're serious about getting a set better have about $850 on hand.

Hey, let me be right up front with you about your brakes that is just check out this force 10 front disc brake set up from stainless steel brakes. Now they come with 12 or 13 inch diameter slotted rotors and aluminum four piston calipers with stainless steel pistons. Now, you can get the calipers either powder coated in colors or fully polished like this one. And for friction material,

they use standard Corvette brake pads available at most part stores.

Now, they also use stainless steel hardware from A RP to hold everything together

and they're available for most popular applications. Now, if you want to bolt up a set, they're gonna cost you about $700. Well, let's see. Now we got heads for go

breaks for. Whoa.

What about something for? Show

this? Protect all lives up to its name because it polishes waxes and cleans everything from glass to aluminum, from painted surfaces to plastics. It's easy to use too. You just spray it on and spread it out with a clean cloth and then wipe it dry.

Now, this is a quick and easy way to make your machine stand out at the next car show or cruise in

and the can goes for about 10 bucks. Well, that's about it for hot parts. But you know something, there's nothing quite like great rock and roll

and what you're about to see is nothing like great rock and roll. You may be right, but it's gonna be a lot of fun and you don't wanna miss it. So stay with us.

Hi guys and welcome back to the show right now to celebrate five years of Chuck Joe and the hottest high performance show on television. It's a musical tribute to Horsepower TV,

featuring the ultimate garage band. The Gearheads

post back.

Get

You

Rams.

Oh, you just can't make

horse power

two,

502.

She's

a

way

ay

report is

actress.

Of

course

yet you

are

ho

that.

It was

about.

No,

that work

big

go big

go

Bobby. She

said,

forget that

you

on the streets of

Yes.

Oh, you just get breaking

for

hour.

All right.

Now let me introduce the gearheads on background vocals, Miss Vicky Reed on drums, Stu Olson on the truck and guitar, Mr Stacy David and Dana Hester on keys and my partner on the Hot Hot Traction Bar guitar, Mr Chuck Hot Licks Hansen.

Hey,

now, that was a lot of fun, but I don't think we ought to quit our day jobs just yet. No, you're probably right. Here's what's on next week.

We'll install a new clutch on our 351 Windsor engine before we drop it into our 65 project pro touring pony car.

We'll also boat on a high performance trimming transmission. Then after some welding and grinding, we'll boat up a special trans mount and new drive shaft

in our horsepower happening. We'll tour the high performance training center of the future out in Laramie Wyoming

and remember high performance fun is what this show is all about. Let's take it to the house boys. Get it, Joe,

who

will get you

for information about the products used in today's show and more. Check us out online at horsepower tv.com

Horsepower TV is an RTM production.
Show Full Transcript