HorsePower Builds

Video Transcript

It's interior decorating time for our pro touring pony. An inside job you don't want to miss

today on horsepower TV.

We'll go inside our project pro touring pony with new door panels, carpet,

cool new gauge cluster and even a set of seats.

We'll show you how to reinforce your chassis without any welding plus, give you a lift by meeting the man behind this cool bus.

So hang on for horsepower TV.

Hi, welcome to the horsepower shop. Mustangs have been popular with car guys ever since they were introduced back in the latter part of 64.

Well, today we got a pair of early models that represent two dramatically different ways to build your Mustang Dream machine

over here. We've got a 67 GT coop with the original 271 horse hypo 289.

It uses higher compression and a solid lift cam to give it more horsepower than the standard four barrel 289.

Now, the original Robin's Egg blue paint is accented with a set of GT stripes and some style steel wheels.

This thing's been restored back to original right down to the chrome plated quad exhaust tips.

Well, in case you missed any of our pro touring pony project. We started with a 65 Mustang fast back. GT

filled the engine bay with a 351 Windsor cranking out over 400 horses and backed it with a five speed trimming.

Now, outside here we got a custom

C hood and over there five spoke halliburtons

with radio rubber by BFG.

The deluxe interior of this 67 has a rare overhead console,

a track tape player and wood wheel

and everything's been correctly restored, including the brushed aluminum trim.

Meanwhile, except for the grant steering wheel, my Mustang's original too. Problem is though it's in pretty bad shape.

So today we'll refurbish the interior and while we're at it and keeping with the pro touring theme, we'll add some upgrades.

Obviously, these seats need attention.

So we'll replace them with the sports seats from flow fit. Then we'll jettison the stock console for this cool new one we got from National Parks Depot. And oh, here's something I think is really trick. How about this gauge cluster from Hay

Line?

Hey, I'm ready to jump right on that interior. Now, we ordered all of our replacement pieces from National Parts Depot, including these reproduction door panels, a set of door handles and window cranks, plus these armrests and all this attaching hardware. Now we're also gonna replace the carpet and then protect that new rug with a set of these cool pony logo floor mats

it sure is a pile of parts for that interior but looks like we got our work cut out for us. We'll get started by replacing those old door panels.

The armrest door handles and window cranks are the first to go.

Then gently pry the retaining clips loose, holding the old door panel in place,

install the water shield that protects the replacement panel,

position these new retainer clips on the door panel,

then snap it into place. After this, we can install our new armrest, window crank and door handle

and even a new lock knob to finish the job up there that looks pretty good. Now, let's get started on the carpet

to replace the carpet. We first removed the front seats,

then the console

door sills

and finally the old carpet.

Now with everything out of the way, we can go ahead and check the condition of our floor pans. If yours have a little bit of surface rust like these do. Now's a good time to hit them with a wire brush, then follow up with a coat of rust, inhibited paint.

Once the paint is dry, we can go ahead and start installing our sound deener.

There's a little tip for you while you're doing this, lay your carpet out in the sun to remove some of those shipping wrinkles and to make it a whole lot easier once you actually get it in the car,

now that the sound eder is in place you can position the carpet

and trim the edges.

Of course, a new set of seal plates finishes the job off nicely.

Now, here's a little tip for you. The seatbelt bolts are hard to find once the carpets in place. So here's what we did.

We reinstalled the bolts first before laying the carpet in. Now, all we have to do is take a razor knife cut over the top of the head of them

and push the carpet down

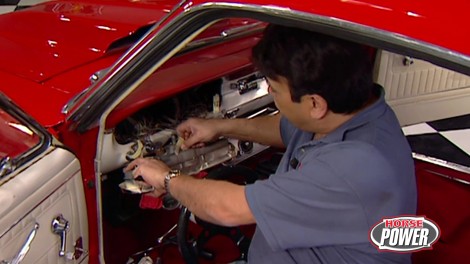
while we got the seats out and have plenty of room to work under the dash. We can get going on this gauge cluster. This ha

line set up includes their white based Teleflex instruments including boats, fuel speedo tac,

water temperature and of course, oil pressure sits in this custom carrier with the

engine turned stainless steel face pretty cool. Now, we also got this optional matching piece for the glove box

and this pre assembled harness that splices into the mustang stock wiring. In fact, it plugs right in here to the spade terminals that we've already installed on the backs of the gauges.

Before we can install our new gauges. We need to get this old cluster out of the way and to do that, we're gonna remove a couple of bolts under here so we can drop the steering column down.

Next, we can remove the screws at the top of the panel that hold it in place

with the panel pulled out of the dash. We've already disconnected the speedometer cable and marked all of our wires before disconnecting them.

Now, this is really important because later on we're gonna be splicing back into that stock harness with our new wires. Hey, speaking of that, I got our new gauges all wired up, but I'm afraid we got a short

break. That is, don't get your wires crossed. We'll be right back. So stay tuned

later on horsepower. A cool bus, a

pretty cool mission

and we'll show you how to install a cage in your street machine without a welder. Stay with us.

Hi. Welcome back to the shop and more of our Mustang interior makeover. Well, we got our new carpet installed

along with door panels, handle, hardware and armrest. Now, before we drop in the seats and console, let's take advantage of all that extra room inside there and install our new gauge cluster, which you can see is all ready to wire up.

Hey, not so fast there, but splice. Now, I've already got the gauge cluster out of the way and I've tagged all the wires in our original harness

now. All right,

I guess now we can go ahead and start splicing the old and the new. Of course, it always helps if you've got a wiring diagram handy like this one that we got with our gauge kit

and to make the job a little bit easier,

I'm gonna go ahead and disconnect the harness right here.

And here while I make my splices,

making splices is pretty easy.

Just strip the insulation back about a quarter inch from the end of the wire,

then slip the end of the wire into the butt connector.

Crimp the connector

and gently tug to make sure you've got a solid connection.

Well, I finished making all the spices under the dash here and now we have left to do is reconnect the harness and position the dash cluster

up here in the opening.

Man. I gotta tell you that looks way cool. It does. Now, the only thing I got less to do here is drill the holes for the retaining screws. All right, while you're doing that, I'll pop the hood and get to work on those sending units. Good idea.

Our gauge kit includes new sending units for both the oil pressure and water temperature and well, they both right in place of the old ones. Also, since we're using an electronic speedometer, we got this one for the trim transmission.

We'll swap out those water temp sending units first.

All right. That takes care of that one.

Now, let's get on this oil sending unit.

I

got to hold it in place. Now, let's see what it looks like with the lights on.

Oh, man, that looks trick. I like that. I tell you what if you get this glove box piece on, I'll get started on the seats. Good idea. But first I'm gonna put this steering column back in place.

Besides being worn out, those stock mustang seats were pretty hard on. Well, mine

but these flow fit sports seats not only fit my bottom, they fit the budget too at about 400 bucks a piece. Now, we got ours covered in cloth here, but you can also get them in vinyl and leather too. Now, the thigh extender

and the reclining feature make them comfortable on long trips, which is what pro turing is all about.

Now, before we can drop them into the car, we have to install these slider brackets to the seat bottoms.

By the way, there are four sliders,

two floaters and two adjusters are set for each seat. Now, make sure you get the adjusters on the outside of each seat so you can get two of them,

then both the mounting brackets to the floor,

then position the slider here over the bracket.

Finally, you can secure the sliders to the brackets with boats that come with your seats.

Our old console was practically useless. It had no storage, no arm rests and no cup holders either.

But this one that we got from National Parks Depot has all of those features. Now, here's the part that I like the best though. It just sits right in place. There are no holes to drill and certainly no screws to lose.

I know you've got a few loose screws as it is. But, hey, this interior is tight and I'll tell you what, it only took us a weekend to pull it off. You bet. But we're not done yet.

It's your turn now to help me with my Camaro. Now, after the break, we're gonna tighten up its chassis and get a little bit of rollover protection at the same time. So, stick with us. Need something for this cup holder right now. Cold beverages.

Hi. Welcome back to the shop. True performance is more than just the power you make it the fly wheel. You've also got to plant that power to the pavement

unibody cars like Chuck's 94 Camaro. Here come from the factory with plenty of power

but to turn it into lower ETS

well, you need to reinforce the chassis.

There are several ways to do that including Subra connectors and other traction enhancing devices. But today we're gonna take you down a little bit different path with this super street cage from Kenny Brown performance. Now, the cage ties in six points of the chassis to form an internal skeleton that gives additional structural support without restricting access to the passenger compartment. Of course, the end result is improved handling, traction and acceleration.

Now this installation will take you the better part of the day, but here's the good part. You can do it with ordinary hand tools and there's no welding. Now, the first step after you get the seat belt boats out of the way is to remove the front seats,

then the bottom cushion of the back seat,

remove the seal plate

and roll the carpet back toward the center of the car.

Next, remove the truck area, side panels.

Well, now it's time to position the main hoop. Now, this thing's made from 100 and 34,000 miles steel manual bent tubing and it's fully welded. Of course, the mounting plate sits right down here on this hump in the floor.

Now, even though the super street cage is heavy duty, if you plan on competing with your car, better check with your sanctioning body to make sure it meets their specs.

The rear support bars can be installed into the main hoop next. And once we do that, we can go ahead and start marking those mounting bolt holes for the main hoop.

I

removed the rear wheel so I can get to this plastic shield and remove it

that way we can get to the metal part of the wheel. Well, where the support plate bolts down. Now, after drilling all of our hose for the plates and tubes, we can bolt them down loosely.

The door bars are next and they just slide right into the main hoop. Now, before we drill the holes for the mounting plates, go ahead and reposition the fuel and brake lines under the driver's side here, so they clear the mounting bolts.

Well, now we're ready to both these support plates for the door bars. From underneath. Once that's done, we can trim the carpet around the floor mounts and the trunk panels around the rear support bars.

Well, that was a pretty fast and easy way to stiffen up our chassis and get a little bit of rollover protection at the same time. Now, the Super street cage is gonna cost you about 550 bucks. Well, that's not a bad deal, particularly since you don't have to pay a professional to weld and finish the installation.

It's pretty cool.

It sure is. And next on the show, you'll meet the man behind this outrageous wheel standing. F

Hey, remember your first ride on a school bus? Pretty exciting, huh?

But not as exciting as a ride on this thing. It's called Well, the Cool Bus.

And it's a one wild ride that gives kids of all ages the lift of their life

built at two third scale. It's one of the longest wheel standards ever created. And the fifth one built by racing veteran Ken Nelson

who along with entertaining crowds at IH

R events nationwide hopes to deliver a message with his cool bus.

There's only one way to

succeed in this

and

leave the drug

alone and stay in school. Get a good education

and you can do anything you want to do.

Ken took us for a tour of his bus which is made of aluminum and fiberglass

and powered by a rear mounted alcohol, fuel injected, blown big block Chevy with a Turbo 400 Trans.

Once we get running and get into staging,

you just push on the, push on the big pedal down here and things start happening real fast.

When the front end comes up,

I can look right straight out through the, through the nose of the car and actually see the ground,

not a lot of it, but I could see enough to get me by

steering. We accomplish with individual brakes,

uh, pull on the right brake and the car will go to the right pull on the left brake and the car will go to the left.

Uh, you just kind of alternate between the two.

pay real close attention to what you're doing and concentrate and, uh, good Lord willing you get to the other end with the wheels in you.

Ken's bus always draws a crowd at events like these

and always gets the same reaction from the many kids who want to get close to it.

It's pretty cool

like it's supposed to be. Huh?

It's pretty awesome.

It's like you never see a bus ride a Willie all the way down the track. So you go on this. It's pretty neat if you're the crew chief, right?

The bashful creature,

right.

Ken's been married to his crew chief Anita for almost 40 years

and they never tire of each other or the experience of getting this high flying bus down the track

as soon as the engine starts.

Uh, it's, it's an adrenaline rush from then on

again. You've had everything from wheel standing cars of all kinds to trucks now. A cool bus. What's gonna be next? Right at this point. We're really happy with the bus. It's worked well to get the message, to stay in school and leave drugs alone

and it's been accepted very well by the kids. And that's what this whole program is all about.

Horsepower TV

S hot parts. A close up. Look at the latest in high performance hardware.

You know, there's no substitute for cubic inches. Now, eagle specialty products is gonna make it easy for you to stroke your 351 Windsor out to 408 cubic inches.

Now, their new Stroker kit includes this 4340 crank that's been knife edged, nitrated polished and of course, the oilers have been opened up. The rods are their H beam designs and they're also made from a 4340 alloy and they

a

set of these srp forged aluminum pistons with a reverse dome that'll give you a 12 to 1 compression

with a 62 CC head.

Now, the kit also includes premium bearings from Clevite and a set of Molly Rings from Je Plus it's available with either +27 50 or three inch mains. Prices start for this kit at about 2100 bucks.

Hey, if you're a late model Mustang fan,

here's the latest scoop for you. In fact, it's a knock off of the famous Cobra jet shaker that was popular back in 69 and 70. Now, this comes from Banshee performance and it's available for 86 to 93 models plus 99 to the newest Mustangs. Now, all the major components including this scoop

and the air box are made from urethane for durability and good looks. The fasteners are made from stainless steel to resist corrosion. Now, the incoming air charge is channeled through a reusable high flow filter

and, and the best part is it's smog legal in all 50 states. Now, if you want one of these, you're gonna have to pony up about 650 bucks.

Hey, if you wanna get your rear and gear, but you can't find a housing. Well, check this one out. It's the new nine plus heavy duty housing from Curry. Now this do it yourself kit is available with either a smooth or notched back and it also comes with cut to length axle tubes and their new investment cast

wild steel axle

phalanges.

As you might expect any nine inch will bolt right up to it. And if you're carrying an extra $300 around, well, this new nine plus can be a new addition to your street machine. Well, speaking of rear ends, it's about time for us to get ours out of here, but not before a look at next week's horsepower TV.

Can we get 400 plus horsepower out of the stock late model pony,

maybe so, especially after installing a new super charger and after cooler

and in our race of the week, it's a new season of heads up street car racing

with a hot new glass at the Southern shootout in Georgia.

And remember high performance fun is what this show is all about.

I mean, two mustang projects in a row. You're gonna be ready for the bow tie, rest

home. You're killing me, man. Take me to the farm, take me to the farm. Did I hold a gun to your head or something?

Yeah,

I was there bullets in that thing

for information about the products used in today's show and more. Check us out online at Horsepower tv.com

Horsepower TV is an RTM production.
Show Full Transcript