

Detroit Muscle Featured Projects


Detroit Muscle Builds


Want more content like this?
Join the PowerNation Email Newsletter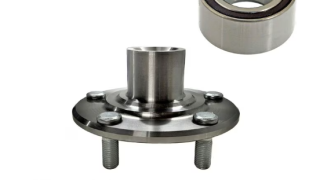
Video Transcript
[ Tommy ] You're watching Powernation!
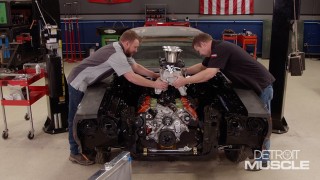
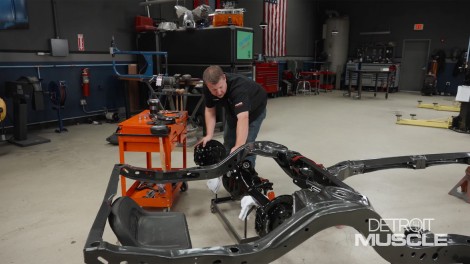
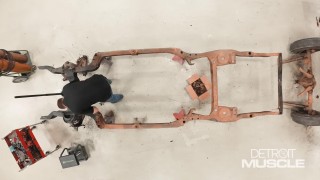
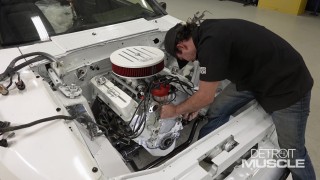
[ Tommy ] Today on Detroit Muscle Project Henchman has been framed literally. We'll see what we can do to get this car ready to ride again. [ Music ] [ engines revving ] [ Music ] [ Tommy ] Hey guys, welcome to Detroit Muscle. Today we're working on our '69 GTO project that we're pretty excited about. So if you're into muscle cars, cool suspension, and anything high performance you're gonna like what we got in store for you today. Now with what we started with all those original components wasn't gonna cut it. So we have to start with a solid foundation and that's this beauty sitting right here. It didn't start out looking this good. When we disassembled this GTO's frame it was a long way from pretty but the fellas at Blast From The Past powder coated it and turned it into this beauty that we're working on today. With our old car we definitely didn't want it to drive like one. You know what I mean. When you hit the corners it feels like that thing's sloshing around. So our solution was to pick up this full kit from RideTech. It's got coil overs on all four corners, big sway bars front and rear, plus all the goodies to make this kit work really well. Now all we really need to do is get it bolted to our chassis. [ Music ] [ metal clanging ] [ Music ]
[ Tommy ] You may have noticed on the end of our links these special little bearings. This is what RideTech refers to as their R-joint. It gives you greater articulation, increased stability, all the while smooth operation. Also here on these uppers they're adjustable. So once we get ride height figured out we can set that pinion angle. For our rear axle assembly we went with a Quick Performance nine inch that's been tailor built to fit right under this ole A-body of ours. Now it has a lot of features going for it. One, it's got a 13-50 billet yoke on it. It also has 31 spline axles and a True Track as a pos unit. Now these things will definitely take the abuse that we're planning to throw at it. Now all I gotta do is get this thing bolted into place. [ Music ]
[ Music ] [ grinder buzzing ] [ metal clanging ] [ Tommy ] Now before we cinch these U-bolts down you need to center each one of the brackets. Get them nice and level. Really want them to match from side to side. Too far, wrong way! [ Music ] That's pretty close. [ Music ] [ ratchet clicking ] [ Tommy ] Well we're ready to go ahead and bolt on our links to this rear sway bar, and this setup is kinda unique. It has some adjustment that you can make on it. Now what I'm referring to is the placement of this lower mount where it goes onto the bar. If you leave it here toward the tip that'll make it a bit softer because it has more leverage on this bar. Or you can slide it back a few inches and it stiffens things up. [ Music ] [ ratchet clicking ] [ Music ] [ Tommy ] We're now ready to install our lower control arms and these are significantly better than those factory ones that we removed. They're tubular. So that means they're lighter and stronger. Plus they've got these Delrin bushings which help to eliminate that rubber squish that factory ones have. Plus they've been engineered to dramatically improve handling. [ Music ]
[ Music ] [ drill humming ] [ Tommy ] Whenever we ordered our spindles we had a couple of options. One is the pin style, similar to what came on this car from the factory. It has an inner and outer bearing, the big rotor, and then the castle nut screws here onto the end that holds everything in place. The other is a hub, and that word refers to the hub bearing that it would have. This is what you normally will see on your later model cars. The reason that we are going this way is for a couple of reasons. This is substantially got some strength to it. Also it gives us the ability to run Corvette brakes, which are larger and lighter than that original setup. So this one just made sense for us. [ Music ] Whenever it comes to your hub bearings you've got a couple of choices that you can go with. We found this Duralast C-7 hub assembly on the AutoZone Pro website. It is a C-7 setup. The reason we went with this one is because the bearing itself is a little bit heavier than the other one, a C-5 or C-6. It also doesn't have this little speed sensor hanging off the end of it. With our application we don't really need it. So that makes this thing the perfect little part for us. Whenever you go to install this there's a couple of tips for you. One, nothing wrong with putting a little bit of grease or anti-seize around here. That will make it go in a lot easier and potentially come out if you ever have to service it. Also our kit come with some new bolts and they recommend you to put some thread locker on there. Now we're not quite ready to do all that because we still have to set the brakes up and I don't want to be dealing with all that stuff. Once we get the brakes figured out, shimmed up if you will, we'll take a few bolts out, seal them, we'll be ready to move on. [ Music ]
[ Music ]
Coming up next, we're taking a break. Sorry, making the brakes!
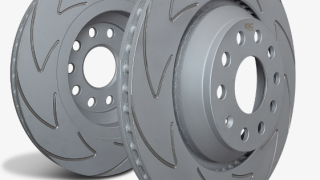
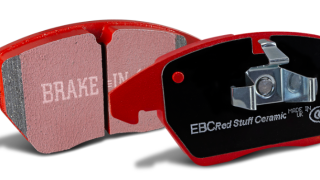
[ Tommy ] Hey guys, welcome back to the shop. Now we're gonna shift gears from the suspension to the brakes. With the spindles that we're running it gives us an opportunity to upgrade to C5-C6 style brakes. What we're gonna be using is this setup from EBC. It's their Red Stuff pads along with their Blade Sport high carbon rotors. If you'll notice they have a unique "V" pattern that helps to keep the rotor and the pad cooler. It also helps to keep the surface clean. One thing I really do like about this is the silver coating. Not only does it look great but it also eliminates that unwanted corrosion that you often times see through the wheels. There's a small amount of setup that we'll have to do before we can just put everything together. The first step is you need to slide your rotor into place and use some washers and a couple of lug nuts to hold this thing where it needs to be. You don't want it drooping or anything like that. The setup that I'm talking about is the placement of your caliper bracket to the rotor. You want to make sure that rotor's nice and tight. It doesn't have any wiggle. It's nice and smooth. Now we'll have to bolt in this little caliper bracket first. [ Music ] With our kit it has these small shims or spacers that have to go in to offset this bracket. [ Music ] Sometimes doing this stuff it feels like you need three different arms. [ Music ]
You want to also snug this thing up. It doesn't have to be crazy tight but it needs to be good and snug. [ Music ] What you want to look for is the spacing between your rotor surface and your little bracket here. This side is considerably tighter than it is on this side. So that means we're gonna have to space this thing out. You want to do that on the lower and upper side. [ Music ]
[ ratchet clicking ] [ Tommy ] With this ole calibrated eye you can tell that this and that looks pretty close. We're gonna verify it with a feeler gauge, and that feels nice. Over here same way. [ Music ] Sometimes whenever you're pulling your brand new calipers out of the box it can be a little confusing to which side is which. All you need to do is look at the bleeder screw whenever it's mounted onto the car. What you want is it to the top. If it's mounted to the bottom whenever the fluid comes in its port it's gonna run straight down and never bleed out. It's a simple, basic tip but it's that easy. [ Music ] Want a little more history on the GTO? We've got you coming up next.
[ Tommy ] For a little more history on the GTO we're gonna talk some about one of my favorite variations of it, the Judge. Order in the court muscle car fans. All rise for the honorable GTO Judge. The verdict is in and this goat's guilty of outrageous styling and disturbing the peace. [ engine revving ] [ Peyton ] This numbers matching 1970 Judge really knows how to lay down the law with its 400 cubic inch Ram Air-3 V-8. This engine could produce 366 horsepower, 16 over the standard GTO. [ Tommy ] It features D-port heads, hydraulic cam shaft, free flowing exhaust manifolds and a Rochester Quadrajet four barrel carb. The Ram Air intake can be opened with a knob under the dash to suck in more air and boost power. Keeping track of all that power was easy with the hood mounted tach. [ Peyton ] Bill Stovall isn't afraid to drop the hammer, or should I say gavel, on this Judge. [ Bill ] It takes a few years off my life. That's how it makes you feel. [ Tommy ] Judges also came with heavy duty suspension, which included coil springs front and rear, a thicker front anti-roll bar, four link in the rear, and stiffer shocks. [ Peyton ] The Judge made its debut in 1969, a much different car than originally planned. The engineers at Pontiac had been working on a budget version of the GTO to compete with Plymouth's RoadRunner. [ Tommy ] It was called the e-t for elapsed time, and it had a 350 engine in it but that project got nixed when Pontiac's division head, John Delorean, refused to have anything smaller than a 400 block in a GTO. What they ended up with was the pricier version of the GTO with a lot more flash and a little extra power. Delorean named it the Judge, based on skit from the hit show Laugh-In. [ Peyton ] In 1970 the Judge got a bit of a facelift. The long tri-color stripe down the side was now two eyebrows over each wheel. The Judge logo was moved to behind the front tire and on top of the rear deck lid. The black caps on the wheels were changed to red by March of 1970, and up front the concealed headlight option was axed, and the grille got the blacked out treatment. In the rear the huge air foil was no longer curved down at both ends but was flat all the way across, and the exhaust was altered to dual tailpipes. [ Tommy ] Now the car didn't look this good when Bill found it about 35 years ago. [ Bill ] The front fenders were basically junk. [ Peyton ] It underwent a total rotisserie restoration, and the result was a car that won a gold award in the concourse class at the 2006 GTO Nationals in Louisville, Kentucky. [ Bill ] People are used to all Judges being orange but that's not true. When you tell somebody you've got a blue Judge that has pink and orange stripes they really think you've gone overboard. [ Peyton ] Only 3,797 Judges were built in 1970, about 3,000 less than the previous year. Thanks to rising insurance costs interest in muscle cars was beginning to wane, and the last Judge was produced in January of '71. Only about 11,000 total were produced in the three year span. That makes these cars highly sought after today, and it's easy to see why. [ Tommy ] Ladies and gentlemen court's adjourned. They say bend don't break. They never said don't bend the brake lines.
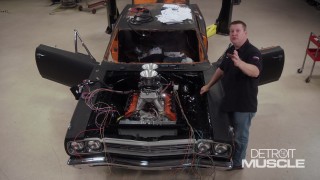
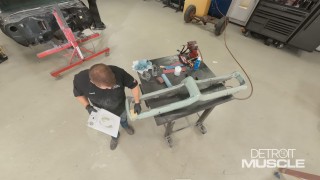
[ Tommy ] With our suspension taken care of on our chassis we're gonna stay after it and keep getting things done. Next thing that I'm gonna take care of is gonna be working on some plumbing. I've got several examples laid out here of some tubing that we had laying around the shop, and I want to give you a few tips and tricks of some stuff to use, some stuff not to use, and so on and so forth. Right over here this kind of gold color stuff this is what's referred to as the nickel copper brake line. Then we've got your standard steel stuff, your pretty stainless steel like this, and then I've got some aluminum tubing. If you notice I didn't say aluminum brake line because aluminum and copper tubing isn't designed to hold the p-s-i that a brake system has in it. Oftentimes people like to use that type of stuff because it's so soft and easy to bend but it's downright dangerous to use. What you'll normally find on most cars is this. This is the mild steel type brake line. If you're doing a restoration project this is what you're gonna be using more than likely. We also picked up from Summit Racing this cool little spring looking thing and it's designed to slide over the lines and help prevent them from getting damaged. I'm gonna recommend if you're doing a restoration you need to use that because that's the way it came from the factory. When it comes to the hot rods you're gonna use some stainless steel, primarily because of its aesthetics. It basically looks like chrome. A very popular material to use is the nickel copper cause it's got a few benefits to it. One is it's very easy to bend and maneuver around. Also it has substantial amount of corrosion resistance. Whenever you're cutting, flaring, and bending brake lines there's a few tips I want to show you here. [ Music ] Whenever you buy brake line by the bulk oftentimes it comes in a spool or roll like this one, and to straighten it out can be a little bit of a task. I've seen guys sometimes take and stretch this stuff out across the floor. Then pick it up and bend the bumps out of it, but that's a lengthy, timely process. What I like to do is use a brake line straightening tool like this one that we got from Summit Racing. Now how it works is really, really simple. You notice all these little wheels here, but what you do is you feed it through the middle and right across through there. As you work it back and forth it straightens things up. If you're gonna cut some tubing it's really recommended to use actual tubing cutter. Don't use a hacksaw. It can leave a jagged edge and that just causes you more work. Just kinda stretch this out here. Good enough, and then feed it through and let this thing do all the work. A little more. [ Music ] One last time. See look at that, and that only took a few seconds. Now let's bend this thing up. This is a bender that we got from Summit Racing as well, and it will bend tubing three different sizes, quarter, five-sixteenths, and three-eighths. And it will bend up to 180 degrees. So if you're looking to make brake lines, fuel lines, or whatever it's crucial to have the right tool for the right job because if you try to use a piece of tubing in the wrong size bender it usually doesn't fare very well. What oftentimes happens is either you'll crush this tube or when you make your bend it will collapse because the sides of the bender is designed to support the tubing during the bending process. Now what you'll want to do is put you tubing in there with one end supported on the little finger and then put your arm against it, and then you'll make a smooth fluid motion and that will actually bend the tubing. We're gonna bend a little 90 degree piece here, and then we'll check it. Now what you'll want to see is this part of the bend not pinched closed because that will be a sign that it collapsed. This piece looks really nice. If you're looking to make some tubes like we are today the final thing you'll get into is making the actual flare. Now you'll also need some information before you get too carried away. Are you gonna be working with 37 degree or 45? If you're working with a-n that's 37, and if it's inverted flare you need the 45 degree. Now our cool little tool here will do both. We just need to make sure that we use the appropriate die on each side. Now we're pretty much ready to start doing some flaring. Also don't forget to slide your little tube nut on now cause once you flare it you've got to cut it off and start again. When you slide this piece into here and make sure you don't want it too deep. It has to be flush with the end of the die. Once it's that way cinch her down and you're ready to go. Then you need to make sure that you select the correct one for your first step sized appropriately. Then what you'll do is this will mushroom it. Then option two does the second step. [ Music ] That's all it is. This process is pretty simple as you guys just saw. All you really need is a couple of cool tools, some material, and patience and time. Now I've got to build the rest of my brake lines for my GTO sitting over there. So you guys need to run off while I get busy.
Show Full Transcript
[ Tommy ] Today on Detroit Muscle Project Henchman has been framed literally. We'll see what we can do to get this car ready to ride again. [ Music ] [ engines revving ] [ Music ] [ Tommy ] Hey guys, welcome to Detroit Muscle. Today we're working on our '69 GTO project that we're pretty excited about. So if you're into muscle cars, cool suspension, and anything high performance you're gonna like what we got in store for you today. Now with what we started with all those original components wasn't gonna cut it. So we have to start with a solid foundation and that's this beauty sitting right here. It didn't start out looking this good. When we disassembled this GTO's frame it was a long way from pretty but the fellas at Blast From The Past powder coated it and turned it into this beauty that we're working on today. With our old car we definitely didn't want it to drive like one. You know what I mean. When you hit the corners it feels like that thing's sloshing around. So our solution was to pick up this full kit from RideTech. It's got coil overs on all four corners, big sway bars front and rear, plus all the goodies to make this kit work really well. Now all we really need to do is get it bolted to our chassis. [ Music ] [ metal clanging ] [ Music ]
[ Tommy ] You may have noticed on the end of our links these special little bearings. This is what RideTech refers to as their R-joint. It gives you greater articulation, increased stability, all the while smooth operation. Also here on these uppers they're adjustable. So once we get ride height figured out we can set that pinion angle. For our rear axle assembly we went with a Quick Performance nine inch that's been tailor built to fit right under this ole A-body of ours. Now it has a lot of features going for it. One, it's got a 13-50 billet yoke on it. It also has 31 spline axles and a True Track as a pos unit. Now these things will definitely take the abuse that we're planning to throw at it. Now all I gotta do is get this thing bolted into place. [ Music ]
[ Music ] [ grinder buzzing ] [ metal clanging ] [ Tommy ] Now before we cinch these U-bolts down you need to center each one of the brackets. Get them nice and level. Really want them to match from side to side. Too far, wrong way! [ Music ] That's pretty close. [ Music ] [ ratchet clicking ] [ Tommy ] Well we're ready to go ahead and bolt on our links to this rear sway bar, and this setup is kinda unique. It has some adjustment that you can make on it. Now what I'm referring to is the placement of this lower mount where it goes onto the bar. If you leave it here toward the tip that'll make it a bit softer because it has more leverage on this bar. Or you can slide it back a few inches and it stiffens things up. [ Music ] [ ratchet clicking ] [ Music ] [ Tommy ] We're now ready to install our lower control arms and these are significantly better than those factory ones that we removed. They're tubular. So that means they're lighter and stronger. Plus they've got these Delrin bushings which help to eliminate that rubber squish that factory ones have. Plus they've been engineered to dramatically improve handling. [ Music ]
[ Music ] [ drill humming ] [ Tommy ] Whenever we ordered our spindles we had a couple of options. One is the pin style, similar to what came on this car from the factory. It has an inner and outer bearing, the big rotor, and then the castle nut screws here onto the end that holds everything in place. The other is a hub, and that word refers to the hub bearing that it would have. This is what you normally will see on your later model cars. The reason that we are going this way is for a couple of reasons. This is substantially got some strength to it. Also it gives us the ability to run Corvette brakes, which are larger and lighter than that original setup. So this one just made sense for us. [ Music ] Whenever it comes to your hub bearings you've got a couple of choices that you can go with. We found this Duralast C-7 hub assembly on the AutoZone Pro website. It is a C-7 setup. The reason we went with this one is because the bearing itself is a little bit heavier than the other one, a C-5 or C-6. It also doesn't have this little speed sensor hanging off the end of it. With our application we don't really need it. So that makes this thing the perfect little part for us. Whenever you go to install this there's a couple of tips for you. One, nothing wrong with putting a little bit of grease or anti-seize around here. That will make it go in a lot easier and potentially come out if you ever have to service it. Also our kit come with some new bolts and they recommend you to put some thread locker on there. Now we're not quite ready to do all that because we still have to set the brakes up and I don't want to be dealing with all that stuff. Once we get the brakes figured out, shimmed up if you will, we'll take a few bolts out, seal them, we'll be ready to move on. [ Music ]
[ Music ]
Coming up next, we're taking a break. Sorry, making the brakes!
[ Tommy ] Hey guys, welcome back to the shop. Now we're gonna shift gears from the suspension to the brakes. With the spindles that we're running it gives us an opportunity to upgrade to C5-C6 style brakes. What we're gonna be using is this setup from EBC. It's their Red Stuff pads along with their Blade Sport high carbon rotors. If you'll notice they have a unique "V" pattern that helps to keep the rotor and the pad cooler. It also helps to keep the surface clean. One thing I really do like about this is the silver coating. Not only does it look great but it also eliminates that unwanted corrosion that you often times see through the wheels. There's a small amount of setup that we'll have to do before we can just put everything together. The first step is you need to slide your rotor into place and use some washers and a couple of lug nuts to hold this thing where it needs to be. You don't want it drooping or anything like that. The setup that I'm talking about is the placement of your caliper bracket to the rotor. You want to make sure that rotor's nice and tight. It doesn't have any wiggle. It's nice and smooth. Now we'll have to bolt in this little caliper bracket first. [ Music ] With our kit it has these small shims or spacers that have to go in to offset this bracket. [ Music ] Sometimes doing this stuff it feels like you need three different arms. [ Music ]
You want to also snug this thing up. It doesn't have to be crazy tight but it needs to be good and snug. [ Music ] What you want to look for is the spacing between your rotor surface and your little bracket here. This side is considerably tighter than it is on this side. So that means we're gonna have to space this thing out. You want to do that on the lower and upper side. [ Music ]
[ ratchet clicking ] [ Tommy ] With this ole calibrated eye you can tell that this and that looks pretty close. We're gonna verify it with a feeler gauge, and that feels nice. Over here same way. [ Music ] Sometimes whenever you're pulling your brand new calipers out of the box it can be a little confusing to which side is which. All you need to do is look at the bleeder screw whenever it's mounted onto the car. What you want is it to the top. If it's mounted to the bottom whenever the fluid comes in its port it's gonna run straight down and never bleed out. It's a simple, basic tip but it's that easy. [ Music ] Want a little more history on the GTO? We've got you coming up next.
[ Tommy ] For a little more history on the GTO we're gonna talk some about one of my favorite variations of it, the Judge. Order in the court muscle car fans. All rise for the honorable GTO Judge. The verdict is in and this goat's guilty of outrageous styling and disturbing the peace. [ engine revving ] [ Peyton ] This numbers matching 1970 Judge really knows how to lay down the law with its 400 cubic inch Ram Air-3 V-8. This engine could produce 366 horsepower, 16 over the standard GTO. [ Tommy ] It features D-port heads, hydraulic cam shaft, free flowing exhaust manifolds and a Rochester Quadrajet four barrel carb. The Ram Air intake can be opened with a knob under the dash to suck in more air and boost power. Keeping track of all that power was easy with the hood mounted tach. [ Peyton ] Bill Stovall isn't afraid to drop the hammer, or should I say gavel, on this Judge. [ Bill ] It takes a few years off my life. That's how it makes you feel. [ Tommy ] Judges also came with heavy duty suspension, which included coil springs front and rear, a thicker front anti-roll bar, four link in the rear, and stiffer shocks. [ Peyton ] The Judge made its debut in 1969, a much different car than originally planned. The engineers at Pontiac had been working on a budget version of the GTO to compete with Plymouth's RoadRunner. [ Tommy ] It was called the e-t for elapsed time, and it had a 350 engine in it but that project got nixed when Pontiac's division head, John Delorean, refused to have anything smaller than a 400 block in a GTO. What they ended up with was the pricier version of the GTO with a lot more flash and a little extra power. Delorean named it the Judge, based on skit from the hit show Laugh-In. [ Peyton ] In 1970 the Judge got a bit of a facelift. The long tri-color stripe down the side was now two eyebrows over each wheel. The Judge logo was moved to behind the front tire and on top of the rear deck lid. The black caps on the wheels were changed to red by March of 1970, and up front the concealed headlight option was axed, and the grille got the blacked out treatment. In the rear the huge air foil was no longer curved down at both ends but was flat all the way across, and the exhaust was altered to dual tailpipes. [ Tommy ] Now the car didn't look this good when Bill found it about 35 years ago. [ Bill ] The front fenders were basically junk. [ Peyton ] It underwent a total rotisserie restoration, and the result was a car that won a gold award in the concourse class at the 2006 GTO Nationals in Louisville, Kentucky. [ Bill ] People are used to all Judges being orange but that's not true. When you tell somebody you've got a blue Judge that has pink and orange stripes they really think you've gone overboard. [ Peyton ] Only 3,797 Judges were built in 1970, about 3,000 less than the previous year. Thanks to rising insurance costs interest in muscle cars was beginning to wane, and the last Judge was produced in January of '71. Only about 11,000 total were produced in the three year span. That makes these cars highly sought after today, and it's easy to see why. [ Tommy ] Ladies and gentlemen court's adjourned. They say bend don't break. They never said don't bend the brake lines.
[ Tommy ] With our suspension taken care of on our chassis we're gonna stay after it and keep getting things done. Next thing that I'm gonna take care of is gonna be working on some plumbing. I've got several examples laid out here of some tubing that we had laying around the shop, and I want to give you a few tips and tricks of some stuff to use, some stuff not to use, and so on and so forth. Right over here this kind of gold color stuff this is what's referred to as the nickel copper brake line. Then we've got your standard steel stuff, your pretty stainless steel like this, and then I've got some aluminum tubing. If you notice I didn't say aluminum brake line because aluminum and copper tubing isn't designed to hold the p-s-i that a brake system has in it. Oftentimes people like to use that type of stuff because it's so soft and easy to bend but it's downright dangerous to use. What you'll normally find on most cars is this. This is the mild steel type brake line. If you're doing a restoration project this is what you're gonna be using more than likely. We also picked up from Summit Racing this cool little spring looking thing and it's designed to slide over the lines and help prevent them from getting damaged. I'm gonna recommend if you're doing a restoration you need to use that because that's the way it came from the factory. When it comes to the hot rods you're gonna use some stainless steel, primarily because of its aesthetics. It basically looks like chrome. A very popular material to use is the nickel copper cause it's got a few benefits to it. One is it's very easy to bend and maneuver around. Also it has substantial amount of corrosion resistance. Whenever you're cutting, flaring, and bending brake lines there's a few tips I want to show you here. [ Music ] Whenever you buy brake line by the bulk oftentimes it comes in a spool or roll like this one, and to straighten it out can be a little bit of a task. I've seen guys sometimes take and stretch this stuff out across the floor. Then pick it up and bend the bumps out of it, but that's a lengthy, timely process. What I like to do is use a brake line straightening tool like this one that we got from Summit Racing. Now how it works is really, really simple. You notice all these little wheels here, but what you do is you feed it through the middle and right across through there. As you work it back and forth it straightens things up. If you're gonna cut some tubing it's really recommended to use actual tubing cutter. Don't use a hacksaw. It can leave a jagged edge and that just causes you more work. Just kinda stretch this out here. Good enough, and then feed it through and let this thing do all the work. A little more. [ Music ] One last time. See look at that, and that only took a few seconds. Now let's bend this thing up. This is a bender that we got from Summit Racing as well, and it will bend tubing three different sizes, quarter, five-sixteenths, and three-eighths. And it will bend up to 180 degrees. So if you're looking to make brake lines, fuel lines, or whatever it's crucial to have the right tool for the right job because if you try to use a piece of tubing in the wrong size bender it usually doesn't fare very well. What oftentimes happens is either you'll crush this tube or when you make your bend it will collapse because the sides of the bender is designed to support the tubing during the bending process. Now what you'll want to do is put you tubing in there with one end supported on the little finger and then put your arm against it, and then you'll make a smooth fluid motion and that will actually bend the tubing. We're gonna bend a little 90 degree piece here, and then we'll check it. Now what you'll want to see is this part of the bend not pinched closed because that will be a sign that it collapsed. This piece looks really nice. If you're looking to make some tubes like we are today the final thing you'll get into is making the actual flare. Now you'll also need some information before you get too carried away. Are you gonna be working with 37 degree or 45? If you're working with a-n that's 37, and if it's inverted flare you need the 45 degree. Now our cool little tool here will do both. We just need to make sure that we use the appropriate die on each side. Now we're pretty much ready to start doing some flaring. Also don't forget to slide your little tube nut on now cause once you flare it you've got to cut it off and start again. When you slide this piece into here and make sure you don't want it too deep. It has to be flush with the end of the die. Once it's that way cinch her down and you're ready to go. Then you need to make sure that you select the correct one for your first step sized appropriately. Then what you'll do is this will mushroom it. Then option two does the second step. [ Music ] That's all it is. This process is pretty simple as you guys just saw. All you really need is a couple of cool tools, some material, and patience and time. Now I've got to build the rest of my brake lines for my GTO sitting over there. So you guys need to run off while I get busy.