Detroit Muscle Featured Projects
Detroit Muscle Builds
Want more content like this?
Join the PowerNation Email NewsletterVideo Transcript
(Tommy)>> You're watching Powernation!
(Tommy)>> Today on Detroit Muscle we get up close and personal with our '66 Nova. What we're starting with isn't much but that's about change. [ Music ] [ engines revving ] [ Music ]
(Tommy)>> Hey guys, welcome to Detroit Muscle. If you like a car that makes a statement or enjoy any and everything high performance you're at the right spot. Fat Stack and Road Burner are a testament to what we like to build. With them all said and done it's time to start a new project.
(Peyton)>> It's easy to see that these two rides have their own unique personalities, but they do have a few things in common. They'll grab your attention, they make plenty of power, and they're definitely a thrill to drive. What we have coming up is sure to do all that and then some.
(Tommy)>> This '66 Chevy Two is a first for us here in Detroit Muscle. While the cards have never been right they finally fell into place and we got us one.
(Peyton)>> The original owner built this as more of a drag style car but we're gonna take it from a heap of parts to a corner crushing hot rod.
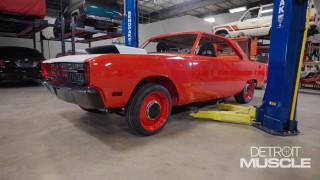
(Tommy)>> Before we get into all that let's check out what we're working with. First of all let's talk about the exterior. This thing looks a lot like a calico cat with all these primered spots here and there. This is a good thing. Someone's already done quite a bit of bodywork for us. After rubbing across it it's really and truthfully not too bad. It feels pretty flat. Now also with this car someone's put quarter panels on it, and these old ones there's really only two types of cars. One's that need quarter panels and those who already have them on it. This being installed saves us quite a bit of work, and I'm definitely okay with that.
(Peyton)>> Moving around to the rear of our car the trunk pan, another common rust area. Water will travel down this body line getting stuck under this weather seal and eventually pouring into the trunk. You may not notice it for a time if you have carpet or a spare tire back here leading to some big rust holes. Luckily somebody's taking the liberty of replacing ours. Another huge time save is our deck lid. It is in great shape. No rust, no dents, nothing. Just checking out the interior on this old hot rod and lucky for us somebody's already put a set of floor pans in it. Which is good because just like the trunk and our quarter panels, they're prone to rust. Moving a little deeper in here we've got a nice set of mini tubs. We'll be able to run our big wheels like we want to run, and that is killer.
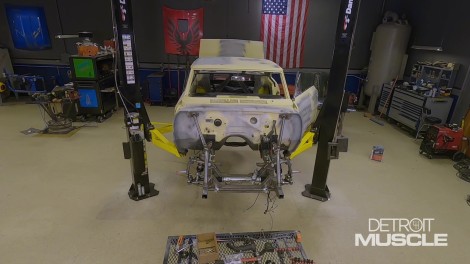
(Tommy)>> Up hereon the front side of this car we've got a giant void, and what I'm referring to is our suspension. These old Chevy Two's have a unique setup on them, and that is where everything bolts to the front of the car. Now we're not gonna be reusing anything factory. We've got some aftermarket stuff that's pretty trick.
(Peyton)>> You can really see they put the new floor pans in under here.
(Tommy)>> It never looks as pretty on the bottom side as it does the top.
(Peyton)>> That's cause it's easier to get to the top than the bottom.
(Tommy)>> We could tidy a lot of that up. We just weld, and hammer, and dolly, and a little bit of seam sealer.
(Peyton)>> Just a little bit of labor. They've modified the transmission crossmember. I don't think that'll support a 500 horsepower motor though.
(Tommy)>> It depends on the tire, the width in the back. Frame connectors, that's a good thing, but I bet that's gonna have to go with our plans for the suspension. Got that old school four link in it, which is not a bad design by any means but that's really not what we're going for.
(Peyton)>> Great for drag racing cause there's not a lot of side to side movement but it's extremely rigid and not super great for highway use.
(Tommy)>> You should check out these welds on the suspension. Not the greatest, not the worst I've ever seen.
(Peyton)>> Looks like Cheez Whiz. Got a good set of coil overs on it though.
(Tommy)>> I definitely like the wheel wells being enlarged on it.
(Peyton)>> That should give us plenty of room to throw at least a 10 light on it. You can tell that this vehicle's probably had several different transmissions in it because it looks like it's been modified several times.
(Tommy)>> I guess it's time to start taking something apart before long.
(Peyton)>> Let's grab some tools.
(Tommy)>> Coming up, the suspension builds. Well it's gotta if we're planning to drive this thing.
(Tommy)>> I'm a big fan of some full figured hot rods because they're large and in charge. That Chevy Two project is nowhere near the size of Fat Stack, but it's gonna be just as cool cause they also have a distinctive silhouette, clean up nicely, and when you drop in some power they're gonna move. Chevy Two Novas are in a league of their own. They were originally built as a compact car for people on a budget. Nowadays these things fetch some serious money.
(Peyton)>> Sharp lines, semi fastback roofline, and a hump in the fenders gives the Chevy the appearance of going fast sitting still.
(Tommy)>> And when you combine the lightweight body and some horsepower you have yourself something that will sizzle.
(Peyton)>> An original Nova SS car that rolled off the assembly line with a high performance V-8 probably should be restored because of its rarity. Lucky for us our car isn't anything special. So we are considering it as a blank canvas for our artwork.
(Tommy)>> With the Nova we have the opportunity to build something really nice, and that is the plan. What we have in mind for this basket case is gonna take it to the next level. We know what we're starting with isn't much but that's okay with us. All the dated and worn suspension is heading to the recycling bin. The aftermarket support for one of these is quite strong, and you guys know how we do it. Trick suspension it is! To motivate this thing we're going modern LS, making north of 500 horses. With a Nova being a lightweight the accelerator will have quite the punch. Backing that up we will be installing a five speed manual, three pedals, a shifter, and that pep under the hood. How could this not be a blast to drive? With the exterior this is where we were kinda all over the place. What color? Should it go something loud? Yellow, not really feeling it. What about something a bit more exotic, kinda like this? Cool purple? Nope, what we decided to do is red. Well a shade of it. There's just something about a lady in red. It's gonna take some work to accomplish what we're wanting to do. You could say we have some big dreams. We don't mind the challenge, and our goal is to create a ride that will be impressive, beautiful, and one heck of a performer so that it will give you the feeling of being starstruck. [ mechanical humming ]
(Peyton)>> We're gonna be installing some adjustable coil overs on our new Nova project. This coil uses a bearing style end on it instead of a sleeve and bushing. These are just gonna be some helpful tips and tricks if you're putting it together yourself. So we're gonna start with these snap rings that go up against the bearings. Put one side in. There's a little groove in there that it just pops into. We'll take our bearing. I like to put just a little bit of anti-seize on here. It's important to make sure that it's lined up and don't try to press these. So just light taps, and there it goes. Then you'll come back with another snap ring, and this just locks this bearing into the end. Repeat the same process on the top side. On this shock body I'm gonna recommend some anti-seize. We'll run the lock nut down, and then we'll run our adjustment nut down. It comes with a shim. It'll slide down on top of that adjustment nut, this coil, and then we'll just throw our top cap on, tighten up our slack, and when we go to adjust our ride height we should have no problems. That's all there is to it.
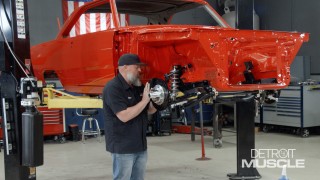
(Tommy)>> We've been excited about this build from the get-go. These Chevy Twos have a style that is distinctive. When it comes to handling you could say something similar but it's not in a good way. This new setup changes everything for the better. The only thing that it reuses is the bolt locations on the firewall. With a few pieces of hardware, a little bit of massaging. [ hammer tapping ] The main structure goes into place. We hear it all the time. You guys make working on cars look so easy. With this design there's no smoke and mirrors. It's pretty straight forward. You bolt it into the stock location, add a couple of support bars, assemble the components as per the instructions. There you have it! Our new GComp suspension will give us better ride and handling. It upgrades from no brakes to all the brakes, and it allows us to lower the car a couple of inches for that aggressive stance that we're wanting. This for sure is time well spent. We've got our front suspension all mocked up on the front of our Chevy Two and now we're gonna go ahead and build our brakes. We're running the smooth disc that's 12 inches, and that'll allow us to run 15 or larger inch wheels on the front. Now also with the Wilwood they come with a dual pattern that allows you to run Ford or Chevy depending on which wheel you want or just which pattern you want to use. Whenever you're building a set of brakes like this they recommend you use some thread locker. We're gonna be using the red, which is considered the high strength. It's also recommended that you do these with hand tools not power tools. It helps to prevent from galling the threads or over torquing this stuff to one side. They have a predetermined setting that they want you to torque these too. I'll always go about half of that recommended one on this first round, and then step it up to the actual recommended level. When you're applying this thread locker you're supposed to just apply the locker to the threads without touching the fastener or the bolt. The reason for that is that can contaminate that tip. If you're using greasy hands and greasy bolts like we all have you can get that funk on there, that can affect the strength of this stuff. Alright, now these are gonna torque at 45. We already have this thing set at 25 from our previous one. I'm just gonna ever so slightly snug them up in a cross pattern. There again that just helps to ensure that you don't tighten this thing up crooked, which can cause the rotor itself to feel warped, or to actually warp it.
(Peyton)>> So we've got our hub and rotor assembly all torqued. Now we're gonna be installing our bearings. So we're just gonna throw a little bit of assembly lubricant on our bearing here. Then we'll just slide this over the spindle.
(Tommy)>> Now we're ready to mount up our caliper. Now these are designed to be like a rigid setup, meaning it doesn't float like a lot of the o-e-ms. One of the things that you need to make sure that you do is it has to run true to your braking surface. Now these things also have the convenience of slipping in the pads, and it's held in place with a cotter pin. So let's go ahead and get these things on and see where we're at. You just want to make sure that the rotor is positioned in the middle of the caliper. [ Music ]
(Peyton)>> So with this car it's not really restoration. I'd say it's a bit more of taking it to the next level.
(Tommy)>> Absolutely, our end goal is to build a ride that is the true definition of its name and you'd know it at a glance. You'd be impressed, you'd be captivated, and maybe even a little bit jealous. That's how I would describe being starstruck.
(Peyton)>> Couldn't have said it better myself.
(Tommy)>> Coming up, we take a look at a fan favorite. It wears a bowtie and has plenty of muscle.
(Peyton)>> Well it's easy to say that the Chevy Two is one popular ride from the day it rolled off the assembly line until today. However, it has a bigger brother that's a force to be reckoned with.
(Tommy)>> The year was 1965, and Chevy's sporty mid-size was about to make a date with destiny. The car debuted the year before and could be anything from a family sedan to a Malibu SS with a small block 327.
(Peyton)>> But '64 was the same year that the GTO was tearing up the streets with that big cube 389. Buick and Olds followed suit in '65 with big block power. Now the stakes were raised.
(Tommy)>> Midway through '65 Chevy went all in with the massive new 396 big block. A muscle car legend was born.
(Peyton)>> Capable of pounding out 375 horsepower, it could slap a goat upside the head. Known as the Z-16 option, it added a whopping $1,500 bucks to the price tag, and production was limited to just 201. You see, Chevy was really using it to tease what they had in store for '66.
(Tommy)>> The 396 was part of the Mark Four family, which had its roots in the 427 race engines that appeared in '63. The design of these motors put breathing first and combustion second. So the valves and push rods were at odd angles, earning it the nickname the porcupine. To handle all that power the car had a boxed convertible type frame with reinforced suspension, stiffened shocks, and 11 inch drum brakes.
(Peyton)>> The extra weight of the engine made it nose heavy. So it handled like an overloaded wheel barrel, but for a straight line go there was no contest.
(Tommy)>> Overall the car looked pretty much like a '64. The car was a few inches longer and lower but still rode on a 115 inch wheelbase. An easy way to spot a '65 is the front end's distinctive V-shape, unlike the flat front end on a '64.
(Peyton)>> Z-16s had subtle differences from your typical SS, like unique black and chrome pieces on the red deck cove. Instead of white walls you got a set of gold stripes with 14-inch mag style wheel covers.
(Tommy)>> Plus the Malibu SS badges were moved from the rear quarter to behind the front tire, and 396 emblems were slapped on the front fenders and rear end. Inside a mandatory Muncie four speed could pull a wide range of gears, all the way up to 4.56. That thing on the dash, no, it ain't a tach, it's a clock. On an SS the 6,000 r-p-m tach took center spot in the gauge panel where the clock normally went. Super Sports also got speedos that went to 160.
(Peyton)>> Now in case dual exhaust wasn't already music to your ears the Z-16s came loaded with AM/FM stereo multiplex. [ engine revving ]
(Tommy)>> Z-16s did its job wetting the appetites of muscle car fans, and in '66 a 396 became the only option for the SS package. The price for one came down to a reasonable $3,000 and over 70,000 were sold.
(Peyton)>> The Chevelle's place in muscle car history was solidified, and it would only grow bigger and stronger in years to come. [ Music ]
(Tommy)>> Coming up, we get our fix for some bad decisions. Yeah, it's pretty bad.
(Tommy)>> Hey guys, today it's all about suspension. We've taken care of the front, and now it's time for us to move toward the rear.
(Peyton)>> Speaking of, we have our buddy Joe from Speedway Motors coming to check out our new project.
(Joe)>> Hey guys!
(Peyton)>> Howdy Joe!
(Joe)>> Looks like a lot of fun.
(Peyton)>> Definitely a basket of parts.
(Joe)>> Literally in a basket.
(Tommy)>> Some good, some bad. We don't know which is which but we'll get to it eventually.
(Joe)>> The car itself looks great. '66, '67 Nova, it doesn't get any better than that, and I just can't wait to see this GComp suspension going underneath this thing. I think it's gonna be killer.
(Tommy)>> We can't wait to be sitting behind the wheel on it cause that stuff that was on the front side of this thing was primitive. Now we've got trick pieces, and that rear, it's gonna handle night and day.
(Peyton)>> That front install was a breeze. Everything's bolt-on, especially with the Nova's style suspension. Everything just bolts on right on the front.
(Joe)>> And this rear is designed to bolt into a stock Nova. So hopefully it all goes the way it should.
(Tommy)>> You want to check this thing out?
(Joe)>> I can't wait. Looks like you're off to a good start.
(Tommy)>> Absolutely.
(Joe)>> It never ceases to amaze how in a morning you can get rid of that archaic Nova suspension and bolt on something cool like this GComp.
(Tommy)>> That's one thing about this generation.
(Joe)>> Looks like you've got a little work to do on the transmission tunnel?
(Tommy)>> Yeah, it's been whittled on to say the least.
(Peyton)>> Everybody clear?
(Tommy)>> Well she's a peach, that's for sure.
(Joe)>> Looks like it's had some work done to it already.
(Tommy)>> It's been modified, not heavily, but it's had some alterations. You need to check out those welds up there.
(Joe)>> Maybe they forgot to turn the gas on or something? Got a four link in here with some coil overs.
(Tommy)>> That's a starter kit.
(Joe)>> Baby 10-bolt.
(Tommy)>> I think it's a seven-five.
(Joe)>> Well that's not gonna work.
(Peyton)>> Somebody pulled that out of Paw-Paw's S-10.
(Joe)>> Coil over brackets welded to. They put a crossmember in here.
(Peyton)>> It looks like it may have been a pre-fab kit. Kind of a d-u-i do it yourself kinda deal.
(Joe)>> The thing with this GComp is once we get all this stuff cut out of here it should just bolt right up. It's meant to bolt into a stock Nova so you can save yourself all the welding, and cutting, and grinding.
(Peyton)>> We've actually got the kit laid out on the floor if you want to glance through it.
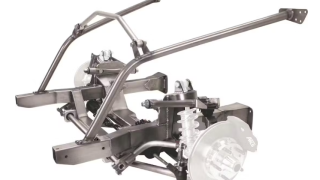
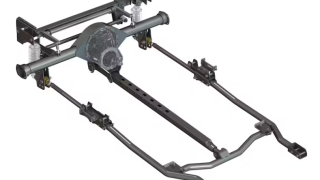
(Joe)>> So this GComp torque arm rear suspension is designed to be completely bolt in, and just incredibly increase the handling and performance potential of this car. The cool thing about this torque arm design is that everything is below the floor. So you don't have to do any cutting. Again you don't have to do any welding. Everything that needs to be welded is already on the housing. It comes with these brackets that bolt up. This is where your crossmember goes. This is where your coil overs mount to. Everything bolts up and sandwiches the existing frame rails. So unlike that thing where everything had to be cut and welded there should be no welding on this. You don't even have to get out the grinder and the welder for this thing. What it does is it gives you a nine inch housing and it gives you a ton of adjustability. You have on the pan hard bar brackets you have all of this adjustability on both sides. On the housing and on the crossmember side to change the roll center of the car. Sorta change how it acts though the corners. There's 11 different rates of sway bars that you can change out, and that's really the idea here is to give you a platform that's gonna handle whatever you're gonna throw at it.
(Peyton)>> I appreciate the heck out of y'alls fabrication process. To have the confidence that this is all gonna fit, bolt up. You could do it with just a few simple hand tools, no welders. To be able to have all this adjustability and set up like your shocks at the track. Or you could go from just having a street car to having a full blown race car basically.
(Joe)>> And this is something that we designed it in Lincoln, Nebraska, at our headquarters. Manufacture it right there. There are lots of people at Speedway Motors who are really, really proud of this product and have put a lot of work into it to make it into something that we know is gonna work at the track. There is no better torture test for suspension components than autocross and road racing. Engineers call it a cycle test. We call it a weekend at the racetrack. That's the idea. To make sure that we're delivering something that's gonna perform as promised.
(Peyton)>> I'm super excited to get this under the car, but first I think we've got to get some junk out from under the car.
(Joe)>> That's gonna be the hard part. This should be fun. That's not gonna be fun.
(Tommy)>> We've got some work to do under there. Sparks to fly! So yeah.
(Peyton)>> I guess it's a good thing you already pulled the gas tank out of it. Nova does mean exploding star.
Show Full Transcript
(Tommy)>> Today on Detroit Muscle we get up close and personal with our '66 Nova. What we're starting with isn't much but that's about change. [ Music ] [ engines revving ] [ Music ]
(Tommy)>> Hey guys, welcome to Detroit Muscle. If you like a car that makes a statement or enjoy any and everything high performance you're at the right spot. Fat Stack and Road Burner are a testament to what we like to build. With them all said and done it's time to start a new project.
(Peyton)>> It's easy to see that these two rides have their own unique personalities, but they do have a few things in common. They'll grab your attention, they make plenty of power, and they're definitely a thrill to drive. What we have coming up is sure to do all that and then some.
(Tommy)>> This '66 Chevy Two is a first for us here in Detroit Muscle. While the cards have never been right they finally fell into place and we got us one.
(Peyton)>> The original owner built this as more of a drag style car but we're gonna take it from a heap of parts to a corner crushing hot rod.
(Tommy)>> Before we get into all that let's check out what we're working with. First of all let's talk about the exterior. This thing looks a lot like a calico cat with all these primered spots here and there. This is a good thing. Someone's already done quite a bit of bodywork for us. After rubbing across it it's really and truthfully not too bad. It feels pretty flat. Now also with this car someone's put quarter panels on it, and these old ones there's really only two types of cars. One's that need quarter panels and those who already have them on it. This being installed saves us quite a bit of work, and I'm definitely okay with that.
(Peyton)>> Moving around to the rear of our car the trunk pan, another common rust area. Water will travel down this body line getting stuck under this weather seal and eventually pouring into the trunk. You may not notice it for a time if you have carpet or a spare tire back here leading to some big rust holes. Luckily somebody's taking the liberty of replacing ours. Another huge time save is our deck lid. It is in great shape. No rust, no dents, nothing. Just checking out the interior on this old hot rod and lucky for us somebody's already put a set of floor pans in it. Which is good because just like the trunk and our quarter panels, they're prone to rust. Moving a little deeper in here we've got a nice set of mini tubs. We'll be able to run our big wheels like we want to run, and that is killer.
(Tommy)>> Up hereon the front side of this car we've got a giant void, and what I'm referring to is our suspension. These old Chevy Two's have a unique setup on them, and that is where everything bolts to the front of the car. Now we're not gonna be reusing anything factory. We've got some aftermarket stuff that's pretty trick.
(Peyton)>> You can really see they put the new floor pans in under here.
(Tommy)>> It never looks as pretty on the bottom side as it does the top.
(Peyton)>> That's cause it's easier to get to the top than the bottom.
(Tommy)>> We could tidy a lot of that up. We just weld, and hammer, and dolly, and a little bit of seam sealer.
(Peyton)>> Just a little bit of labor. They've modified the transmission crossmember. I don't think that'll support a 500 horsepower motor though.
(Tommy)>> It depends on the tire, the width in the back. Frame connectors, that's a good thing, but I bet that's gonna have to go with our plans for the suspension. Got that old school four link in it, which is not a bad design by any means but that's really not what we're going for.
(Peyton)>> Great for drag racing cause there's not a lot of side to side movement but it's extremely rigid and not super great for highway use.
(Tommy)>> You should check out these welds on the suspension. Not the greatest, not the worst I've ever seen.
(Peyton)>> Looks like Cheez Whiz. Got a good set of coil overs on it though.
(Tommy)>> I definitely like the wheel wells being enlarged on it.
(Peyton)>> That should give us plenty of room to throw at least a 10 light on it. You can tell that this vehicle's probably had several different transmissions in it because it looks like it's been modified several times.
(Tommy)>> I guess it's time to start taking something apart before long.
(Peyton)>> Let's grab some tools.
(Tommy)>> Coming up, the suspension builds. Well it's gotta if we're planning to drive this thing.
(Tommy)>> I'm a big fan of some full figured hot rods because they're large and in charge. That Chevy Two project is nowhere near the size of Fat Stack, but it's gonna be just as cool cause they also have a distinctive silhouette, clean up nicely, and when you drop in some power they're gonna move. Chevy Two Novas are in a league of their own. They were originally built as a compact car for people on a budget. Nowadays these things fetch some serious money.
(Peyton)>> Sharp lines, semi fastback roofline, and a hump in the fenders gives the Chevy the appearance of going fast sitting still.
(Tommy)>> And when you combine the lightweight body and some horsepower you have yourself something that will sizzle.
(Peyton)>> An original Nova SS car that rolled off the assembly line with a high performance V-8 probably should be restored because of its rarity. Lucky for us our car isn't anything special. So we are considering it as a blank canvas for our artwork.
(Tommy)>> With the Nova we have the opportunity to build something really nice, and that is the plan. What we have in mind for this basket case is gonna take it to the next level. We know what we're starting with isn't much but that's okay with us. All the dated and worn suspension is heading to the recycling bin. The aftermarket support for one of these is quite strong, and you guys know how we do it. Trick suspension it is! To motivate this thing we're going modern LS, making north of 500 horses. With a Nova being a lightweight the accelerator will have quite the punch. Backing that up we will be installing a five speed manual, three pedals, a shifter, and that pep under the hood. How could this not be a blast to drive? With the exterior this is where we were kinda all over the place. What color? Should it go something loud? Yellow, not really feeling it. What about something a bit more exotic, kinda like this? Cool purple? Nope, what we decided to do is red. Well a shade of it. There's just something about a lady in red. It's gonna take some work to accomplish what we're wanting to do. You could say we have some big dreams. We don't mind the challenge, and our goal is to create a ride that will be impressive, beautiful, and one heck of a performer so that it will give you the feeling of being starstruck. [ mechanical humming ]
(Peyton)>> We're gonna be installing some adjustable coil overs on our new Nova project. This coil uses a bearing style end on it instead of a sleeve and bushing. These are just gonna be some helpful tips and tricks if you're putting it together yourself. So we're gonna start with these snap rings that go up against the bearings. Put one side in. There's a little groove in there that it just pops into. We'll take our bearing. I like to put just a little bit of anti-seize on here. It's important to make sure that it's lined up and don't try to press these. So just light taps, and there it goes. Then you'll come back with another snap ring, and this just locks this bearing into the end. Repeat the same process on the top side. On this shock body I'm gonna recommend some anti-seize. We'll run the lock nut down, and then we'll run our adjustment nut down. It comes with a shim. It'll slide down on top of that adjustment nut, this coil, and then we'll just throw our top cap on, tighten up our slack, and when we go to adjust our ride height we should have no problems. That's all there is to it.
(Tommy)>> We've been excited about this build from the get-go. These Chevy Twos have a style that is distinctive. When it comes to handling you could say something similar but it's not in a good way. This new setup changes everything for the better. The only thing that it reuses is the bolt locations on the firewall. With a few pieces of hardware, a little bit of massaging. [ hammer tapping ] The main structure goes into place. We hear it all the time. You guys make working on cars look so easy. With this design there's no smoke and mirrors. It's pretty straight forward. You bolt it into the stock location, add a couple of support bars, assemble the components as per the instructions. There you have it! Our new GComp suspension will give us better ride and handling. It upgrades from no brakes to all the brakes, and it allows us to lower the car a couple of inches for that aggressive stance that we're wanting. This for sure is time well spent. We've got our front suspension all mocked up on the front of our Chevy Two and now we're gonna go ahead and build our brakes. We're running the smooth disc that's 12 inches, and that'll allow us to run 15 or larger inch wheels on the front. Now also with the Wilwood they come with a dual pattern that allows you to run Ford or Chevy depending on which wheel you want or just which pattern you want to use. Whenever you're building a set of brakes like this they recommend you use some thread locker. We're gonna be using the red, which is considered the high strength. It's also recommended that you do these with hand tools not power tools. It helps to prevent from galling the threads or over torquing this stuff to one side. They have a predetermined setting that they want you to torque these too. I'll always go about half of that recommended one on this first round, and then step it up to the actual recommended level. When you're applying this thread locker you're supposed to just apply the locker to the threads without touching the fastener or the bolt. The reason for that is that can contaminate that tip. If you're using greasy hands and greasy bolts like we all have you can get that funk on there, that can affect the strength of this stuff. Alright, now these are gonna torque at 45. We already have this thing set at 25 from our previous one. I'm just gonna ever so slightly snug them up in a cross pattern. There again that just helps to ensure that you don't tighten this thing up crooked, which can cause the rotor itself to feel warped, or to actually warp it.
(Peyton)>> So we've got our hub and rotor assembly all torqued. Now we're gonna be installing our bearings. So we're just gonna throw a little bit of assembly lubricant on our bearing here. Then we'll just slide this over the spindle.
(Tommy)>> Now we're ready to mount up our caliper. Now these are designed to be like a rigid setup, meaning it doesn't float like a lot of the o-e-ms. One of the things that you need to make sure that you do is it has to run true to your braking surface. Now these things also have the convenience of slipping in the pads, and it's held in place with a cotter pin. So let's go ahead and get these things on and see where we're at. You just want to make sure that the rotor is positioned in the middle of the caliper. [ Music ]
(Peyton)>> So with this car it's not really restoration. I'd say it's a bit more of taking it to the next level.
(Tommy)>> Absolutely, our end goal is to build a ride that is the true definition of its name and you'd know it at a glance. You'd be impressed, you'd be captivated, and maybe even a little bit jealous. That's how I would describe being starstruck.
(Peyton)>> Couldn't have said it better myself.
(Tommy)>> Coming up, we take a look at a fan favorite. It wears a bowtie and has plenty of muscle.
(Peyton)>> Well it's easy to say that the Chevy Two is one popular ride from the day it rolled off the assembly line until today. However, it has a bigger brother that's a force to be reckoned with.
(Tommy)>> The year was 1965, and Chevy's sporty mid-size was about to make a date with destiny. The car debuted the year before and could be anything from a family sedan to a Malibu SS with a small block 327.
(Peyton)>> But '64 was the same year that the GTO was tearing up the streets with that big cube 389. Buick and Olds followed suit in '65 with big block power. Now the stakes were raised.
(Tommy)>> Midway through '65 Chevy went all in with the massive new 396 big block. A muscle car legend was born.
(Peyton)>> Capable of pounding out 375 horsepower, it could slap a goat upside the head. Known as the Z-16 option, it added a whopping $1,500 bucks to the price tag, and production was limited to just 201. You see, Chevy was really using it to tease what they had in store for '66.
(Tommy)>> The 396 was part of the Mark Four family, which had its roots in the 427 race engines that appeared in '63. The design of these motors put breathing first and combustion second. So the valves and push rods were at odd angles, earning it the nickname the porcupine. To handle all that power the car had a boxed convertible type frame with reinforced suspension, stiffened shocks, and 11 inch drum brakes.
(Peyton)>> The extra weight of the engine made it nose heavy. So it handled like an overloaded wheel barrel, but for a straight line go there was no contest.
(Tommy)>> Overall the car looked pretty much like a '64. The car was a few inches longer and lower but still rode on a 115 inch wheelbase. An easy way to spot a '65 is the front end's distinctive V-shape, unlike the flat front end on a '64.
(Peyton)>> Z-16s had subtle differences from your typical SS, like unique black and chrome pieces on the red deck cove. Instead of white walls you got a set of gold stripes with 14-inch mag style wheel covers.
(Tommy)>> Plus the Malibu SS badges were moved from the rear quarter to behind the front tire, and 396 emblems were slapped on the front fenders and rear end. Inside a mandatory Muncie four speed could pull a wide range of gears, all the way up to 4.56. That thing on the dash, no, it ain't a tach, it's a clock. On an SS the 6,000 r-p-m tach took center spot in the gauge panel where the clock normally went. Super Sports also got speedos that went to 160.
(Peyton)>> Now in case dual exhaust wasn't already music to your ears the Z-16s came loaded with AM/FM stereo multiplex. [ engine revving ]
(Tommy)>> Z-16s did its job wetting the appetites of muscle car fans, and in '66 a 396 became the only option for the SS package. The price for one came down to a reasonable $3,000 and over 70,000 were sold.
(Peyton)>> The Chevelle's place in muscle car history was solidified, and it would only grow bigger and stronger in years to come. [ Music ]
(Tommy)>> Coming up, we get our fix for some bad decisions. Yeah, it's pretty bad.
(Tommy)>> Hey guys, today it's all about suspension. We've taken care of the front, and now it's time for us to move toward the rear.
(Peyton)>> Speaking of, we have our buddy Joe from Speedway Motors coming to check out our new project.
(Joe)>> Hey guys!
(Peyton)>> Howdy Joe!
(Joe)>> Looks like a lot of fun.
(Peyton)>> Definitely a basket of parts.
(Joe)>> Literally in a basket.
(Tommy)>> Some good, some bad. We don't know which is which but we'll get to it eventually.
(Joe)>> The car itself looks great. '66, '67 Nova, it doesn't get any better than that, and I just can't wait to see this GComp suspension going underneath this thing. I think it's gonna be killer.
(Tommy)>> We can't wait to be sitting behind the wheel on it cause that stuff that was on the front side of this thing was primitive. Now we've got trick pieces, and that rear, it's gonna handle night and day.
(Peyton)>> That front install was a breeze. Everything's bolt-on, especially with the Nova's style suspension. Everything just bolts on right on the front.
(Joe)>> And this rear is designed to bolt into a stock Nova. So hopefully it all goes the way it should.
(Tommy)>> You want to check this thing out?
(Joe)>> I can't wait. Looks like you're off to a good start.
(Tommy)>> Absolutely.
(Joe)>> It never ceases to amaze how in a morning you can get rid of that archaic Nova suspension and bolt on something cool like this GComp.
(Tommy)>> That's one thing about this generation.
(Joe)>> Looks like you've got a little work to do on the transmission tunnel?
(Tommy)>> Yeah, it's been whittled on to say the least.
(Peyton)>> Everybody clear?
(Tommy)>> Well she's a peach, that's for sure.
(Joe)>> Looks like it's had some work done to it already.
(Tommy)>> It's been modified, not heavily, but it's had some alterations. You need to check out those welds up there.
(Joe)>> Maybe they forgot to turn the gas on or something? Got a four link in here with some coil overs.
(Tommy)>> That's a starter kit.
(Joe)>> Baby 10-bolt.
(Tommy)>> I think it's a seven-five.
(Joe)>> Well that's not gonna work.
(Peyton)>> Somebody pulled that out of Paw-Paw's S-10.
(Joe)>> Coil over brackets welded to. They put a crossmember in here.
(Peyton)>> It looks like it may have been a pre-fab kit. Kind of a d-u-i do it yourself kinda deal.
(Joe)>> The thing with this GComp is once we get all this stuff cut out of here it should just bolt right up. It's meant to bolt into a stock Nova so you can save yourself all the welding, and cutting, and grinding.
(Peyton)>> We've actually got the kit laid out on the floor if you want to glance through it.
(Joe)>> So this GComp torque arm rear suspension is designed to be completely bolt in, and just incredibly increase the handling and performance potential of this car. The cool thing about this torque arm design is that everything is below the floor. So you don't have to do any cutting. Again you don't have to do any welding. Everything that needs to be welded is already on the housing. It comes with these brackets that bolt up. This is where your crossmember goes. This is where your coil overs mount to. Everything bolts up and sandwiches the existing frame rails. So unlike that thing where everything had to be cut and welded there should be no welding on this. You don't even have to get out the grinder and the welder for this thing. What it does is it gives you a nine inch housing and it gives you a ton of adjustability. You have on the pan hard bar brackets you have all of this adjustability on both sides. On the housing and on the crossmember side to change the roll center of the car. Sorta change how it acts though the corners. There's 11 different rates of sway bars that you can change out, and that's really the idea here is to give you a platform that's gonna handle whatever you're gonna throw at it.
(Peyton)>> I appreciate the heck out of y'alls fabrication process. To have the confidence that this is all gonna fit, bolt up. You could do it with just a few simple hand tools, no welders. To be able to have all this adjustability and set up like your shocks at the track. Or you could go from just having a street car to having a full blown race car basically.
(Joe)>> And this is something that we designed it in Lincoln, Nebraska, at our headquarters. Manufacture it right there. There are lots of people at Speedway Motors who are really, really proud of this product and have put a lot of work into it to make it into something that we know is gonna work at the track. There is no better torture test for suspension components than autocross and road racing. Engineers call it a cycle test. We call it a weekend at the racetrack. That's the idea. To make sure that we're delivering something that's gonna perform as promised.
(Peyton)>> I'm super excited to get this under the car, but first I think we've got to get some junk out from under the car.
(Joe)>> That's gonna be the hard part. This should be fun. That's not gonna be fun.
(Tommy)>> We've got some work to do under there. Sparks to fly! So yeah.
(Peyton)>> I guess it's a good thing you already pulled the gas tank out of it. Nova does mean exploding star.