Classic Trucks! Builds

Video Transcript

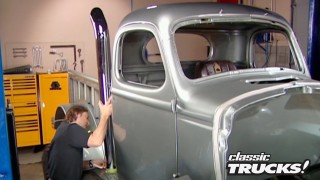
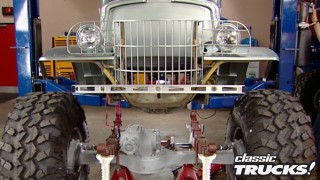
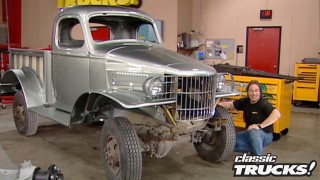
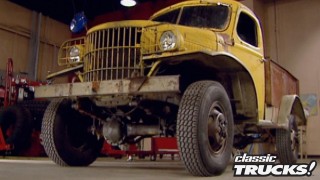
Today on trucks, the guys have already given project Wicked Willies the attitude it had to have on the exterior.

Now they're ready to dive into the interior of their classic wagon. So everything will work together inside and out. After they take the fear factor out of custom interior work, they'll show you a concept vehicle that Chevy just might put into production.

That's all today on trucks.

Welcome to this week's show everybody

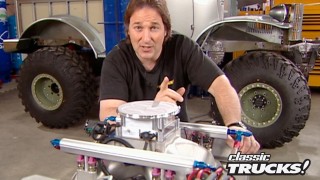
what we have here is one of Chevrolet's latest concept vehicles and don't worry, we'll take a closer look at this ride later in the show. Now, a couple weeks ago, the Wicked Willies made its return to the truck shop and this week we're gonna dive into the interior on our classic wagon. Now, most people look at interior work the same way. They look at electrical and paint work. They're scared to death of it.

So they usually take their vehicle someplace and have a custom done and that can be expensive. So today we're gonna try to take some of the fear out of it for you. See if we can show you some tips so you can put a really neat interior into any kind of vehicle.

Now, the first thing you need to do before you start any interior work is take a long, hard look at exactly what you wanna do and what colors you're gonna use. Now, keep in mind

the carpets, seat and door panels need to work together.

Now, for our application, the seats we got from Choo Choo Customs are a brown ve

with a Tweed insert, the door panels are covered in that same Tweed and the accent we're gonna use to cover the door panels and the dash is a much lighter colored vinyl. Finally, as you can see

the carpet we got from auto custom carpet is gonna tie everything together perfectly.

Now, the carpet is the first place that we're gonna start. Now you can see right off the bat that we've got a major problem because this floor is really uneven. It looks like a truck bed.

You're probably thinking, well, just glue the carpet down over it and you could do that, but

it looked really bad.

So we're gonna go ahead and smooth it out by putting down a piece of plywood. Now, the floor is too long and too wide to do it all in one piece. So we're gonna do it in two sections with the first piece ending right here at this differential hump,

gonna get started by making some good measurements on the sides and around the wheel wells around the whole perimeter

and then cutting it out.

Now that we have the front piece cut out, we need to make sure it's fitting just right now. Obviously, if things aren't laying down exactly where you want them, this is the time to fix it.

Also, the wood needs to mount solidly to the floor. So we need to mark and drill holes for the mounting bolts.

Well, Mel's been busy mounting that front piece. I went ahead and cut out this rear section. Now, it was a little more tricky than the front because I had to go around this gas filler neck,

the wheel wells and of course, that hunt for the rear end. Now, let's see just how close these measurements were

and that's right on. It's perfect. Now, we're gonna mount down the rear piece just like we did the front. So we need to drill more mounting holes.

This is also a good time to get the pedestal for your rear seat in place.

Mark and drill your holes.

Now that we know everything's gonna fit, right, Stacey go to work with the carpet. All right.

Now, here's a tip for cutting carpet. You always want to cut it from the backside if you can using a utility knife. Now, this leaves a nice clean cut because you don't end up cutting the fibers. It's a heck of a lot easier.

Now, we're gonna hold the carpet in place with staples as opposed to glue because they're a lot more durable

and we'll start here in the middle and work our way out to keep the line from going crooked on us.

Make sure that you work the carpet into

all these little contours.

Oh, yeah,

just a reminder. Make sure that your carriage bolts are in to mount all this down if you want to hide that under the carpet.

Now, all we have to do is bolt down the carpeted pieces.

Now, one of the benefits to covering the floor in two separate pieces is if we ever decide to haul something nasty back here like a big old greasy motor. All we have to do is pop out the back panel and we won't destroy it.

Now, with the floor bolted down, we can get started on the sides. Now, mel already showed you the panels we're gonna use in this area,

but out here

and between the panel and the windows, well, that needs to be covered too. And for some of this, we're gonna need to make our own panel.

Now, for this front area, we're gonna take some measurements.

Then we're gonna cut out the backing plate using this thick mat board that we got at the local craft store.

Now, as you can see, we're gonna run from the floor

all the way up to this headliner T

strip.

Now, for the sides, we're gonna stop right there at that body seam.

And remember you have got to make one of these for any area

that you need backing support for your vinyl.

The window

mings are another area that needs some attention because they've been under some serious abuse for years. Now, the first thing we're gonna do is hit him with a 400 grit, sandpaper to clean them up.

Now, since our moldings are down to the bare metal,

we'll use a primer before hitting with a quality epoxy paint for durability.

Now, once you have your backing cut out, you need to cover it with some material. First thing we're gonna do is cover it with a quarter inch piece of foam, that'll give us some nice padding.

Now, take your adhesive,

spray it on the backing

and then lay it on the foam

and finally cut out around it.

Now it's time for the vinyl. Now make sure you lay down a piece of cardboard. So you have a nice flat surface. Now take your piece,

spray your adhesive on the foam

and now lay it on the vinyl.

Make sure you don't get any wrinkles in it.

Yeah,

then finally

cut it out, but make sure you leave about an inch of material all the way around.

Now to get the vinyl to bend around these curves, you need to come in and make a bunch of pie cuts

around the radius of the corner.

Remember the more of these you make

the smoother the band in the material.

Now, a lot of older vehicles already have part of the weather stripping stapled into the window molding from the factory. Of course, ours is shot and needs to be replaced

and it's always best to do this before you paint the molding.

Now, the best way to attach the weather stripping is to get completely away from the idea of using staples

and drill holes through the stripping

and the molding.

Then you can use pop rivets

to hold the stripping in place.

You know, we're not even close to being done with the interior of the Wicked Willies yet. But right now we need to take a break, but don't go away. You need to see what this is gonna look like. We'll be right back

later on trucks. We've got an amazing concept from the minds of Chevrolet to show you. But up first, we still have plenty of work to do inside the Wicked Willies.

Welcome back, everybody. If you're just joining us, we're well on our way to giving the Wicked Willies a custom interior. Now we've already done the carpets panels and window frames. Now it's time to start gluing on the upholstery inside the wagon.

And the first thing we need to do is glue on a piece of this quarter range padding

into these areas that run between the side panels, the windows and these new panels that we made. Then we can cut it to fit.

After that, we can glue on the vinyl, making sure to pull it tight. So there's no wrinkles. Now, keep in mind any of these areas where you're gonna have a seam, you need to roll the vinyl under. So you have a nice finished edge.

These side panels were made for us by Choo

Choo Customs using the original panels as a pattern and

we'll set them in place

that way, we'll be able to see how all these seams and edges are finished out.

Eventually, we're gonna have to put the glass back in the willies. And since we don't want any leakage, we're gonna have to put on new weather stripping.

Now, it's always a good idea

to put the rubber on the glass before you try to put it in place. Also, a

little shot of sealant under your stripping

will ensure it doesn't leak on you.

Now, the dash, that's where things get a little tricky. Now, we knew that we wanted to cover it with vinyl to match the rest of the interior.

But any time you bend vinyl around a complex curve like this, you're gonna get wrinkles, there's just no way around it. So what we'll do is cover it in two pieces.

Now, the main area here will be one piece and then this center section will be its own separate piece. Fortunately, the only area we have to make a backing for is this center area.

Now to do that, take your mat board, soak it in water until it's saturated.

Then carefully bend it around the contours of the area, make sure you don't break it

and trim it to fit and allow it to dry

while we're waiting for the map board to dry.

We can go ahead and put the side panels on. Now, these things are held in place with exterior screws. So all we have to do is make sure they're lined up properly,

punch holes in them

and go ahead and screw them in place.

After that, you can slide in the window followed by the molding. Well, now you're really starting to see how the panels and color choices we made are really starting to work together.

Once your dash piece is dry, set it in place,

mark the area for your gauges. Then all you have to do is cut them out.

Now we've already put foam on the dash and we'll just follow that by gluing on the vinyl. Once we're done, we'll go ahead and do the same thing with the insert.

Now, we had our original gauges restored and calibrated for that Dodge crate motor by United Speedometer.

Now they go in the insert, then the insert goes on the dash and then everything's held in place by the gauge mounting bolts

and check out how nice this scene line follows the contours of the dash. Well, the interior on the Wicked Willies is definitely starting to come together. But before we go any further, we need to pay some bills don't go away. We got more trucks for you right after this.

Chevrolet may put this truck into production, which sounds like a great concept to us. But before we show you the SSR, we need to finish the interior of the Wicked Willies.

Welcome back to trucks, everybody. Now, we're getting pretty close to finishing up the interior on the Wicked Willies. Now it's time to give ourselves a place to sit to be able to take a load off in the rear. We're gonna go with a fold and tumble seat. Now, we've already mounted the pedestals to the holes we drilled earlier.

Now, we have to do is mount the pivot arm to the pedestal

and the rear seat is ready to go.

Now, the front seats are just as easy because we took care of our mounting holes way before we put the carpet down. And

we did have to add these extensions to the bolts though. So they'll go through the plywood all the way through the floor.

Now, all I have to do is bolt them down.

I

tell you what Stacey Stitching in the headrest turned out really cool and those seats are a perfect match for our interior. It really came out good, didn't it? It really did. Now, finally, we can get the door panels in place and these little upholstery buttons are what actually hold them to the door. And the thing that's really neat about using the buttons is you can paint them any color you want.

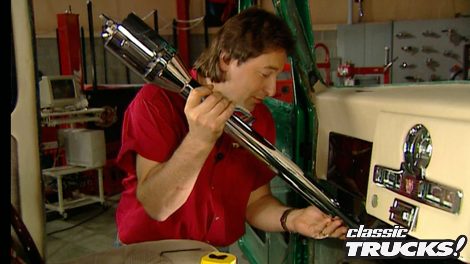
Now up next is the steering column. We got this three inch drop bracket from a company named I did it.

And then we're gonna follow that with their 32 inch chrome tilt steering column. And we're gonna cap that

with this grant signature series wheel. Since we basically copied the stock door panel, we were able to keep the factory handles an armrest. In fact, all we had to do is put a little new material on the armrest to retain some of that classic Willie style.

Now that we know where we're gonna be sitting at, we need to adjust our shifter linkage. Now you can see this lever on this NV 4505 speed we got from advanced adapters

is sitting in a really nice spot.

We've also got their Atlas two transfer case that has dual controls that you can mount

wherever you want.

We're gonna lay ours down here into the center so they clear the seats and the main shifter. We also have to make a metal panel to cover all this.

Now,

since you might be wondering where we're gonna mount our battery, we'll go ahead and show you we're gonna use this battery box from Mr gasket, so it'll be safely contained right here behind the wheel. Well, and we'll still have easy access. Of course, inside the box, we're gonna stuff a deep cycle off to it.

The last thing we're gonna do on the interior today is make some carpet pieces for the floor.

And the best way to do this is to make a pattern out of cardboard, transfer it to the carpet and then just cut it out.

Now, keep in mind just like the dash. Any time you have a compound bend like this, you're gonna need to make a seam. If you don't want it to buckle, finally, we'll finish it off with these factory seal plates. Of course, these need to be buff.

Well, it's plain to see. The wicked willies is definitely starting to live up to its name, both inside and out. And now you can see exactly how the interior as well as the exterior are working perfectly together.

Now, today's tip deals with balancing. Now, I know a lot of you guys are building 383 strokers out there by taking a 350 sticking in a 400 crank. Now, this gives you more cubic inches and ultimately more horsepower. Now where you can run into trouble is by getting your crank rods and pistons. But forgetting that you've got to upgrade your dam

to one that's for an externally balanced 400 crank. Like this one we got from summit racing. A

stock 350 unit is not gonna cut it.

Also. If you're running a stick, you've got to upgrade to a 400 flywheel. Remember the flywheel and the damper have got to match the crank or it won't balance right?

And it will come apart on you in a hurry.

Just can't get enough of trucks. Check us out online at Trucks tv.com.

Thanks for staying with us. Everybody. Now, one, look at the SSR concept vehicle and the first question that comes to mind is what the heck is it? Is it a truck? Is it a hot rod? The reincarnation of the El Camino maybe? Well, from what we've heard, it might be the replacement of the Camaro which is designated to disappear in 2003.

Now, with all those confusing questions in mind, one thing that's not a mystery at all is what SSR stands for and that super sport Roadster

and let's face it any time the word Roadster is involved, you have to have a convertible and the creative minds at Chevy have taken that concept to a whole another level.

Now, when you look at the styling on the front end of the SSR, there is no mistake in the influence of an early fifties Chevy pickup.

It's got the horizontal grill with big rounded fenders and a large split windshield,

but lurking under the hood is what really raise the hair on the back of your neck.

They didn't mess around with a four or a six cylinder but dropped in a huge 6 L V eight and it spins all the way through rear wheel drive. This thing's begging to be stomped on. Thank you Chevrolet.

Another thing that Chevy really hit the mark on is the interior. Of course, you always want it to be functional, but it's got to match up stylistically as well. And this cockpit definitely captures a classic feel with the round gauges, steering wheel and seats.

But it's also charging into the new millennium with a hidden sound system and check out the fiber optics in the format.

The SSR is sitting on 100 and 16 inch wheel base with 20 inch good years in the rear nineteens in the front. And just in case you forget the heritage of this vehicle, little bow ties have been carved right into the rubber.

And here's a new concept. The designers didn't just build a nice front clip and stop there.

They followed it all the way back to the rear end with big bulging fenders and rounded tail lights.

Now, this vehicle was designed with driving in mind not hauling jet skis and motorcycles, but since it is a truck, it does have storage space under the smooth tunnel and contour tailgate, you've got a really clean bed with wood slats that once again follows the styling cues of a fifties era pickup with a modern twist. Now, let's we have 6 L V eight power, a color changing paint job and styling. That's just awesome.

Yeah, those are the reasons for us to give this vehicle two very enthusiastic thumbs up.

Now, the question becomes, when is Chevy gonna put this thing into production so we can all have one. Let's just say we hope it's before 2003.

And now truck gear, parts, tools and equipment for pickups and sport utilities.

Ok. So you're stranded on the side of the road. Yeah, you got a set of jumper cables. Problem is they aren't gonna do you much good because you've run the gas tank bone dry.

Not to worry. That's where a half gallon of Pennzoil's new roadside rescue comes to the rescue. All you have to do is pour this product into your tank and you can go up to 10 miles in search of the next gas station. Roadside rescue goes for about 15 bucks a bottle

and can be safely stored in your vehicle for up to five years.

If you're gonna go off road, you need to be prepared. And that means having a good winch. Now, this 9000 S series from Super Winch has got all the power that you'll need to get yourself or a couple buddies out of a hole.

It's got a two horsepower electric motor

and all the important winch features like power in and out with a remote

and automatic in the drum braking.

The best part about this winch is you can mount it down on the bumper or you can rotate the housing,

mount it behind the bumper no matter what your situation. Super winch has got a set up in your price range.

One thing you can always count on is if you put your truck to work, it's gonna get dirty. And since we know you guys are always in search of the ultimate all purpose cleaner. Let us introduce you to Ready Race. This stuff works on everything from aluminum to stainless steel and vinyl and can even handle the toughest job,

like break dust on rims or spilled antifreeze. All you have to do is spray it on and wipe it off and let's face it. Since rain race only costs about five bucks a bottle.

You almost owe it to yourself to give it a try.

That's gonna do it for truck gear. Here's a preview of next week's show.

The trail boss gets an axle upgrade as well as brand new disc brakes in the rear

before the guys go under the hood of their CJ seven to install the ultimate off road tool.

Then it's another creation from Performance West. It looks like a PT cruiser,

but it's really a bruiser.

After all that, he'll upgrade the fuel delivery system on the wicked Willies. That's all next week on trucks.

Well, that's gonna do it for this week's show. We appreciate you hanging out with. Yeah, we'll have more trucks for you next week. Time to hammer on this thing.

Couldn't have said it.

So, where's the keys at?

Oh,

man,

you don't have the keys. The Chevy guys took the keys,

just hotwire. It, then there is a point. Hey,

don't have,

oh,

trucks is an RT M production.
Show Full Transcript