Trucks! Builds
Want more content like this?
Join the PowerNation Email NewsletterParts Used In This Episode
ARB 4x4 Accessories
ARB Air Locker
JD Squared Inc.
Notch Master Tubing Notcher
Matco Tools
Steering Wheel Puller Service Set
Power Probe
Butane Solder Kit
Power Probe
Micro Torch Kit
PSC Motorsports
'77 1/2 -' 79 4WD Bronco/F150 Steering Gear with Cylinder Assist Ports
PSC Motorsports
'80 - '06 Hi-Performance P-Series Pump / Reservoir Kit
PSC Motorsports
1.75" x 8" Assist Cylinder
PSC Motorsports
Field Serviceable Cylinder Hose Kit w/ 4-90s and 6 Feet of #6 Hose
Video Transcript
Today, we're rocking and rolling with Project Dos
Bronco. Before we take her out, we'll beef up the roll cage. Then it's dang the torpedoes. This thing's like a bull in a China shop. Turn stuff up nice. Woo
hoo.
It's all today here on trucks
that hurt.
Hey, guys, welcome to trucks. Well, today we're taking do
S Bronco back out on the trail to test our recent improvements.
But before we do that, we want to do something to protect the body, both this Ford body and the occupants inside the vehicle.
Now, when we first built this vehicle, well, we installed the roll cage, but it was more of a
safe to prevent the roof from collapsing. Should the unfortunate happen. But now that we've made some upgrades and this thing is more capable, we're going to be tackling more difficult trails with more difficult trails comes an increased likelihood that we're going to end up belly side up. So to make sure we're safe, we're going to reinforce our existing six point roll cage.
Now, in building a roll cage or adding to a roll cage like we're doing, it's a good idea to lay out your plans, using some blue painter's tape.
It'll help you visualize what you're going to be doing
and it'll prevent you from wasting not so cheap dom tubing.
And when designing and laying out a roll cage,
really good practice to have all tube joints supported on the other side of a tubing intersection. That way you don't end up with what's called a dead note where a piece of tubing teas into an open span unsupported on the other side. Now,
sometimes it's unavoidable, but it should always be your goal.
Now, the Dom tube we're using has a 120 wall thickness, meaning it's just shy of an eighth of an inch and pretty standard for roll cage construction.
Now, when notching tube, you can use a ha
saw that matches your tube diameter or you can use one that's one size smaller. In our case, we're working with inch and five eights tube and we're using an inch and five eights hall saw,
but you can also use an inch and a half hall saw because the saw has a tendency to walk around a little bit. You can just go back and clean it up with a grinder. Either way the tube end needs to be beveled for a nice clean weld after you notch.
Now we're using our notch master to be notch,
but you can get the job done with a torch, plasma cutter or even just a grinder. It's just easier. And a little bit more accurate this way,
using an 80 grip flap wheel on our angle grinder. We put a pretty healthy bevel all the way around the circumference of the two
and that'll not only give you more surface area to weld to it will allow the weld pool to lay into that bevel, nice and flat. Instead of piling up on top, making the weld stronger and a little bit more pleasing to the eye.
We're using a couple of ratchet straps to temporarily hold things in place.
We're just tack welding things in place for now, we'll fully burn it in once we're done mocking things up.
Now, before we put this brace in, it's gonna connect the center of the harness bar with this point right here, we want to think about it for a second.
Now, if you just put a straight piece of tube in, will it be in close proximity to the driver's coconut? And it could be an interference problem? So, if you just put a slight bend in the end of the tube at the top section, well, you can see
it'll give you a couple inches of clearance and prevent the driver from knocking himself out while bouncing around off road or in a rollover.
And since it's a little difficult to hang a leather welding blanket on the windshield, we're using welding and spark deflection paper to protect the windshield.
All right,
it's all
get on me.
Do you
now, unless we connect the A and B pillar with full door bars, the dash bar is gonna give us a couple of those dead notes, but we wanna be able to get in and out of this thing easily. So we're gonna have to compromise.
Yeah, you can still clearly see the gauges
cool
and with everything mocked up, you need to stretch out, get flexible and get ready to welder size.
We're also gonna change out the steering wheel, get rid of the stock kind of busted up wheel. In exchange for this grant wheel we got from summit racing. It's a little bit larger diameter. It's gonna give us a little bit better leverage and it's got a better foam grip. It's gonna be easier to hang on to. And that matters, especially with the front end locked. We're up on some tight trail.
We're using our Matco master steering wheel puller kit, which just really means that it's got more thread pitch options,
which just means that it'll fit a variety of steering wheels. Now, it's pretty self explanatory. Just make sure you resist the urge to use power tools. You could damage the threads.
You want to locate the pin for your self canceling turn signals and line it up with a notch on your new steering wheel adapter hub,
feed your wires through the cover plate and then through the steering wheel
and then finally into the first horn ring plate,
your original steering shaft not holds everything in place while you assemble the rest of the kit, which is pretty straightforward.
Well, this new steering wheel is a lot more comfortable than this old piece of plastic melted onto some wire and we hooked the horn up because, well, you know, you don't really need a horn legally off road, but it's nice to know that you've got one to get somebody's attention real quick. Hook the battery up. Right.
Right.
Yeah,
up next, we'll unleash a full broadside on our favorite off road park and later the park fires back.
Stay tuned.
Welcome back to trucks. We're here at one of our favorite off road parks. Woolies off road. And we're gonna test out these upgrades on
Dos Bronco.
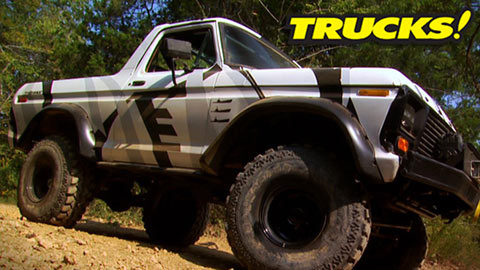
Now, there's no doubt about it. This 79 Bronco is full size and the phrase Bull in a China shop has never been more true.
A
lot of these trails are cut out for dovetailed two buggies. But Das
Branco, well, she's sporting her full body armor,
but we still managed to make our way just about everywhere we wanted to go.
Now, these rutted out trails. Well, they showed us some of the limitations we faced last time, but this time around
we had to fix
front locker.
Yeah.
Now this is where it comes in incredibly handy to have an air locker in the front.
We got an open dip, one wheel spinning, we're stuck until now kicking that locker room
gotta love a locker.
And the last time we were up here, well, we kept it simple and only armed ourselves with a single coolant temp gauge.
And you could say its performance was rather random, not giving us a very accurate reading, but we fixed that since then too.
All right now it's nice having these gauges in communication with what's going on underneath the hood. Our trans temps sitting about 190 right where it needs to be
t water temp is about 210, a little high, but we're only creeping through the woods, plenty of oil pressure and our voltage is good
one.
And after feeling things out on some mild dirt trails, we wanted to hit something a little more aggressive. So we headed over to the rocky trails and we got caught up and kind of missed lunch.
Well, one of us did anyway,
I go,
go, Bambi.
Come on.
Very nice. I think we saw about 2 ft of air underneath that right front. Tire
rock and roll.
Ok, Ryan, what would Ivan Stewart do? Uh, wide open
the
Yeah,
that's it. I'm out, I'm walking back.
That was fun.
Definitely.
After spotting my shorts, I spotted Ryan on a couple of trails
go
now, right here,
these rockers, they're not just aesthetic. This, this rocker guard is in place to make sure that
this door opens. It ain't about being pretty,
it's about off road function and those things are doing their job
promise
another little pain can fix.
All right. Now, our newly added transmission cooler and fan module, it's working pretty hard today, but that's ok. It's keeping the fluid cool. The first time we had this Bron, well, all we had was the factory cooler. No gauge. No fan. Now, we know we're not gonna burn up our rebuilt C six.
Yes,
you got it.
Now, this thing is not a rock crawler. So we're still running the factory stamp steel front diff cover and it's taken a little bit of a shot. No big deal. The steering system. Well, that's taking a hit too. Now, if we hadn't have flip the tie rod to the top side of the knuckle and gained three or four inches of clearance. Well, this straight bar here might have a little bit of a kink to it. So that modification is already paying off.
Now, our hydro assist steering from PSE made this thing much easier to drive
and the log front end made it more capable,
but it still wasn't bulletproof.
Oh,
that hurt.
I think we may have broken something. I don't know. It sure felt solid. Where did that tree come from? Um,
the ground about 300 years ago.
Oh, yeah.
Busker
Drugs.
Oh.
Oh, jeez. All right.
Oh, yeah, that's what that big noise was.
Um,
you think we have a patch kit that'll work for this thing?
Yeah,
I didn't see that route
and we still made it. Ok. We got about two hours damage here. We got R and I, and the tire probably got a wheel rim. We got a set of bushwhacker flares.
Uh Ryan
next couple weekends I know who's gonna be doing some body work
over time.
You're watching trucks for a DVD copy of this episode. Just go to Power Block tv.com and order your copy for just 595 plus shipping and handling. Start your own trucks. Collection delivered right to your door from the Power block.
Hey guys, welcome back to trucks. Well, after what we put her through Das
Bronco is probably gonna need a little bit of touch up paint here and there. And if you remember we painted that rig quite a while ago using the dup color paint shop system, using these three colors and a couple of coats are clear.
Now, the good thing here is that these colors are pre packaged and premixed. So no matter what color I reach for, I know I'm gonna get a consistent color match, but just because these colors are gonna match perfectly. Well, it doesn't mean you have to stay with them. There's some custom colors out there.
Now, duple
color has come up with some unique signature custom colors for trucks and muscle car. And as you can see, the custom formulas are easy to follow and accessible through a link from the truck's website, but you can take it a step further
for instance, what I've done here is lay down the candy base coat with the candy apple green, translucent mid coat for an old school custom look. But you can any one of these bases with any other paint shop color, keep track of your formula and make your own custom mix. My point is this whether you use the color straight out the can use the trucks or muscle cars, signature colors or create your own custom mix using paint shops, factory package system and a formula. You're practically guaranteed, a repeatable custom mix and that takes a lot of the mystery out of custom painting, making it easier to do yourself.
Hey, guys, if you're looking to improve the performance of your late model vehicle, you might wanna take a look at the super chips flash pack tuner. It's got all the standard programmer features, but it also has vehicle specific options.
If you've got a Jeep with a factory equipped locking differential, it will allow you to engage it in high range. It's also got a crawl tune to maximize torque while off road
for you GM guys, it will allow you to override the manual transmission, skip shift feature. And for Nissan
gets rid of the wide open throttle restriction
with the flash pack, you can calibrate your speedometer for tire size or gear ratio changes, you can read engine data and they're all USB up update.
So you can get the latest tune or file directly from super chips.
Now, here's a couple of convenient butane powered products from power probe. First is the mini torch and it comes in really handy when doing soldering or using heat shrink tubing. And you don't have room for a larger propane powered torch.
The second is their butane soldering kit and it comes with all the tips and attachments you're gonna need.
Now, one of the advantages to a butane soldering iron over an electric version is they heat up much quicker. Hey, guys, thanks for watching trucks. Check us out on the website. See you next week.
Show Full Transcript
Bronco. Before we take her out, we'll beef up the roll cage. Then it's dang the torpedoes. This thing's like a bull in a China shop. Turn stuff up nice. Woo
hoo.
It's all today here on trucks
that hurt.
Hey, guys, welcome to trucks. Well, today we're taking do
S Bronco back out on the trail to test our recent improvements.
But before we do that, we want to do something to protect the body, both this Ford body and the occupants inside the vehicle.
Now, when we first built this vehicle, well, we installed the roll cage, but it was more of a
safe to prevent the roof from collapsing. Should the unfortunate happen. But now that we've made some upgrades and this thing is more capable, we're going to be tackling more difficult trails with more difficult trails comes an increased likelihood that we're going to end up belly side up. So to make sure we're safe, we're going to reinforce our existing six point roll cage.
Now, in building a roll cage or adding to a roll cage like we're doing, it's a good idea to lay out your plans, using some blue painter's tape.
It'll help you visualize what you're going to be doing
and it'll prevent you from wasting not so cheap dom tubing.
And when designing and laying out a roll cage,
really good practice to have all tube joints supported on the other side of a tubing intersection. That way you don't end up with what's called a dead note where a piece of tubing teas into an open span unsupported on the other side. Now,
sometimes it's unavoidable, but it should always be your goal.
Now, the Dom tube we're using has a 120 wall thickness, meaning it's just shy of an eighth of an inch and pretty standard for roll cage construction.
Now, when notching tube, you can use a ha
saw that matches your tube diameter or you can use one that's one size smaller. In our case, we're working with inch and five eights tube and we're using an inch and five eights hall saw,
but you can also use an inch and a half hall saw because the saw has a tendency to walk around a little bit. You can just go back and clean it up with a grinder. Either way the tube end needs to be beveled for a nice clean weld after you notch.
Now we're using our notch master to be notch,
but you can get the job done with a torch, plasma cutter or even just a grinder. It's just easier. And a little bit more accurate this way,
using an 80 grip flap wheel on our angle grinder. We put a pretty healthy bevel all the way around the circumference of the two
and that'll not only give you more surface area to weld to it will allow the weld pool to lay into that bevel, nice and flat. Instead of piling up on top, making the weld stronger and a little bit more pleasing to the eye.
We're using a couple of ratchet straps to temporarily hold things in place.
We're just tack welding things in place for now, we'll fully burn it in once we're done mocking things up.
Now, before we put this brace in, it's gonna connect the center of the harness bar with this point right here, we want to think about it for a second.
Now, if you just put a straight piece of tube in, will it be in close proximity to the driver's coconut? And it could be an interference problem? So, if you just put a slight bend in the end of the tube at the top section, well, you can see
it'll give you a couple inches of clearance and prevent the driver from knocking himself out while bouncing around off road or in a rollover.
And since it's a little difficult to hang a leather welding blanket on the windshield, we're using welding and spark deflection paper to protect the windshield.
All right,
it's all
get on me.
Do you
now, unless we connect the A and B pillar with full door bars, the dash bar is gonna give us a couple of those dead notes, but we wanna be able to get in and out of this thing easily. So we're gonna have to compromise.
Yeah, you can still clearly see the gauges
cool
and with everything mocked up, you need to stretch out, get flexible and get ready to welder size.
We're also gonna change out the steering wheel, get rid of the stock kind of busted up wheel. In exchange for this grant wheel we got from summit racing. It's a little bit larger diameter. It's gonna give us a little bit better leverage and it's got a better foam grip. It's gonna be easier to hang on to. And that matters, especially with the front end locked. We're up on some tight trail.
We're using our Matco master steering wheel puller kit, which just really means that it's got more thread pitch options,
which just means that it'll fit a variety of steering wheels. Now, it's pretty self explanatory. Just make sure you resist the urge to use power tools. You could damage the threads.
You want to locate the pin for your self canceling turn signals and line it up with a notch on your new steering wheel adapter hub,
feed your wires through the cover plate and then through the steering wheel
and then finally into the first horn ring plate,
your original steering shaft not holds everything in place while you assemble the rest of the kit, which is pretty straightforward.
Well, this new steering wheel is a lot more comfortable than this old piece of plastic melted onto some wire and we hooked the horn up because, well, you know, you don't really need a horn legally off road, but it's nice to know that you've got one to get somebody's attention real quick. Hook the battery up. Right.
Right.
Yeah,
up next, we'll unleash a full broadside on our favorite off road park and later the park fires back.
Stay tuned.
Welcome back to trucks. We're here at one of our favorite off road parks. Woolies off road. And we're gonna test out these upgrades on
Dos Bronco.
Now, there's no doubt about it. This 79 Bronco is full size and the phrase Bull in a China shop has never been more true.
A
lot of these trails are cut out for dovetailed two buggies. But Das
Branco, well, she's sporting her full body armor,
but we still managed to make our way just about everywhere we wanted to go.
Now, these rutted out trails. Well, they showed us some of the limitations we faced last time, but this time around
we had to fix
front locker.
Yeah.
Now this is where it comes in incredibly handy to have an air locker in the front.
We got an open dip, one wheel spinning, we're stuck until now kicking that locker room
gotta love a locker.
And the last time we were up here, well, we kept it simple and only armed ourselves with a single coolant temp gauge.
And you could say its performance was rather random, not giving us a very accurate reading, but we fixed that since then too.
All right now it's nice having these gauges in communication with what's going on underneath the hood. Our trans temps sitting about 190 right where it needs to be
t water temp is about 210, a little high, but we're only creeping through the woods, plenty of oil pressure and our voltage is good
one.
And after feeling things out on some mild dirt trails, we wanted to hit something a little more aggressive. So we headed over to the rocky trails and we got caught up and kind of missed lunch.
Well, one of us did anyway,
I go,
go, Bambi.
Come on.
Very nice. I think we saw about 2 ft of air underneath that right front. Tire
rock and roll.
Ok, Ryan, what would Ivan Stewart do? Uh, wide open
the
Yeah,
that's it. I'm out, I'm walking back.
That was fun.
Definitely.
After spotting my shorts, I spotted Ryan on a couple of trails
go
now, right here,
these rockers, they're not just aesthetic. This, this rocker guard is in place to make sure that
this door opens. It ain't about being pretty,
it's about off road function and those things are doing their job
promise
another little pain can fix.
All right. Now, our newly added transmission cooler and fan module, it's working pretty hard today, but that's ok. It's keeping the fluid cool. The first time we had this Bron, well, all we had was the factory cooler. No gauge. No fan. Now, we know we're not gonna burn up our rebuilt C six.
Yes,
you got it.
Now, this thing is not a rock crawler. So we're still running the factory stamp steel front diff cover and it's taken a little bit of a shot. No big deal. The steering system. Well, that's taking a hit too. Now, if we hadn't have flip the tie rod to the top side of the knuckle and gained three or four inches of clearance. Well, this straight bar here might have a little bit of a kink to it. So that modification is already paying off.
Now, our hydro assist steering from PSE made this thing much easier to drive
and the log front end made it more capable,
but it still wasn't bulletproof.
Oh,
that hurt.
I think we may have broken something. I don't know. It sure felt solid. Where did that tree come from? Um,
the ground about 300 years ago.
Oh, yeah.
Busker
Drugs.
Oh.
Oh, jeez. All right.
Oh, yeah, that's what that big noise was.
Um,
you think we have a patch kit that'll work for this thing?
Yeah,
I didn't see that route
and we still made it. Ok. We got about two hours damage here. We got R and I, and the tire probably got a wheel rim. We got a set of bushwhacker flares.
Uh Ryan
next couple weekends I know who's gonna be doing some body work
over time.
You're watching trucks for a DVD copy of this episode. Just go to Power Block tv.com and order your copy for just 595 plus shipping and handling. Start your own trucks. Collection delivered right to your door from the Power block.
Hey guys, welcome back to trucks. Well, after what we put her through Das
Bronco is probably gonna need a little bit of touch up paint here and there. And if you remember we painted that rig quite a while ago using the dup color paint shop system, using these three colors and a couple of coats are clear.
Now, the good thing here is that these colors are pre packaged and premixed. So no matter what color I reach for, I know I'm gonna get a consistent color match, but just because these colors are gonna match perfectly. Well, it doesn't mean you have to stay with them. There's some custom colors out there.
Now, duple
color has come up with some unique signature custom colors for trucks and muscle car. And as you can see, the custom formulas are easy to follow and accessible through a link from the truck's website, but you can take it a step further
for instance, what I've done here is lay down the candy base coat with the candy apple green, translucent mid coat for an old school custom look. But you can any one of these bases with any other paint shop color, keep track of your formula and make your own custom mix. My point is this whether you use the color straight out the can use the trucks or muscle cars, signature colors or create your own custom mix using paint shops, factory package system and a formula. You're practically guaranteed, a repeatable custom mix and that takes a lot of the mystery out of custom painting, making it easier to do yourself.
Hey, guys, if you're looking to improve the performance of your late model vehicle, you might wanna take a look at the super chips flash pack tuner. It's got all the standard programmer features, but it also has vehicle specific options.
If you've got a Jeep with a factory equipped locking differential, it will allow you to engage it in high range. It's also got a crawl tune to maximize torque while off road
for you GM guys, it will allow you to override the manual transmission, skip shift feature. And for Nissan
gets rid of the wide open throttle restriction
with the flash pack, you can calibrate your speedometer for tire size or gear ratio changes, you can read engine data and they're all USB up update.
So you can get the latest tune or file directly from super chips.
Now, here's a couple of convenient butane powered products from power probe. First is the mini torch and it comes in really handy when doing soldering or using heat shrink tubing. And you don't have room for a larger propane powered torch.
The second is their butane soldering kit and it comes with all the tips and attachments you're gonna need.
Now, one of the advantages to a butane soldering iron over an electric version is they heat up much quicker. Hey, guys, thanks for watching trucks. Check us out on the website. See you next week.