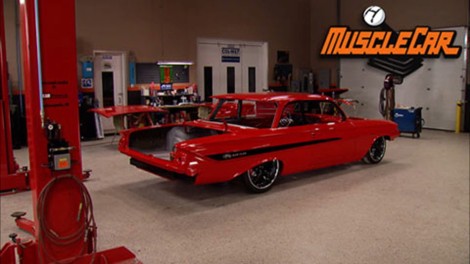
MuscleCar Builds
Want more content like this?
Join the PowerNation Email NewsletterParts Used In This Episode
C.P.I. Divisions
Starter Repair Kit
Springfield Auto Recyclers
Manual Transmission Pedal Set
Video Transcript
Today on muscle car. Rick's your how to guru making a clutch linkage out of recycled odds and ends and rebuilding a starter. Tommy gets red sled riding on air plus ride the lightning in Ford's Superstock drag demon.
Hey, welcome to muscle car. Our 61 Impala project is coming together for the last time. So we're gonna break out the lock tight and send everything down for good.
Now, red sleds already been mocked up a few times so the body should drop right on and once it's there, we can hook up the steering build all the clutch linkage.
Last time we built a wicked custom console,
got some eye popping color on it.
Imagine that red fled red
and tagged its tail with the red sled logos.
Now we can finally drop the shell onto the frame
and from the factory, our car was a column shift automatic, but we're adding the third pedal and putting four on the floor. Now, whatever clutch linkage we come up with, it's going to have to work around our pedal assembly and our steering components. So we'll get that stuff put in first,
nobody's making these pedal assemblies. But Springfield Auto Recyclers gave us a set from their huge stock of hard to find parts. It didn't come with any mounting hardware or linkage. So it's time to build some stuff starting with column braces.
This I did it. Stainless steering column is designed to be adapted to almost any vehicle. A couple of handmade straps will keep it in place. Next come the universal joints and steering shaft from Borgeson,
the upper U joint is rubber isolated to reduce vibration in the column
with the steering assembled. I can build the clutch linkage. The pivot ball goes in first followed by the Z BAR.
I made a mounting bracket out of eight inch plate to hold the other end.
The only real trick in making this plate is to give yourself enough clearance between the Z bar and the mount to allow the pivot ball to drop in and adjust correctly.
Look at that. It
looks like a jam.
The original clutch rod from the pedal to the Z bar had been chopped off with a torch so I'll extend it out and make it adjustable with some more salvaged metal.
People always give me a hard time so I hate throwing junk out but this is why I use the old U bolts from the rear end off our 71
C A to build most of the linkage on this thing. They were still good. So I didn't throw them out. Guess what I used them
Now, this piece is gonna go into the bottom of the linkage and even built a little pin here, it's gonna drop through the back
through the bottom of the linkage. And this right here is actually gonna actuate our clutch fork. We should be dialed.
Now, using the same basic concepts you can design and build a clutch linkage for almost any vehicle
with a master cylinder on our pedal assembly is done well, other than coming back and maybe beautifying our linkage a little bit. We still need to assemble all of our brake lines. But before we do that, we need to get our wheel wells on. We'll be doing that right after the break
up. Next red sleds rad, remote controlled air ride.
That's right.
Hey, welcome back. Like Rick said earlier, we need to get the inner fenders on to finish plumbing the brake line.
That means the doors gotta go on then the fender and then finally the inner fender, the body slipped on pretty easy and we're hoping our luck holds out with the rest of the panels.
Red sled looks sweet with some sheet metal on her and we can start to get an idea of what she'll look like cruising into her first car show
and of course, she looks a whole lot better lowered and up until this point, we've been using ball valves to air it up and down. But now that the chassis and the body are united we can install the lines and the rest of the air ride system. Air ride technologies, airpod makes insulation easy by combining the tank compressor valves and electronics in one unit, just simply run some airlines power and control panel leads and you're done for easy access. We're mounting ours here in the trunk.
Air ride suspension uses plastic, air brake tubing. There's a couple of things you need to know before you start your installation.
One thing is to make sure your cut ends are nice and square. If they're cut at an angle, they won't seal or seat properly, you can use a razor blade, but a tubing cutter makes things a lot easier and faster. Also use push to connect fittings, they're easy to use. And if you ever need to remove a line, just simply push that collar in tube slides right out.
All compressors make noise but mounting it with some rubber isolators will keep it to a minimum.
The airpod uses quarter inch lines and to keep the chassis clean, we're running them inside the frame room.
If the fitting is hard to get to pre marking, the hose will make it easier to tell when it's fully seated.
Make sure to keep the hoses away from any moving suspension parts or you'll end up with a torn line.
We're not quite ready for wiring yet. So I rigged up a battery to test everything out. This control panel plugs right in and we'll run it up front when the interior goes in. This controller is pretty cool. It's got presets to let you lay it out, set it to a perfect ride height or lift it all the way up at the touch of a button.
The Airpod even comes with a key fob so you can stand back and watch it do its thing.
That's right
after the break, the Ford Super Stocker that edged out the Max Wedge,
restore your classic pick up SUV or suburban at shop, classic truck, parts.com. We stock anything and everything for Ford, Chevy GM and Dodge trucks, complete bodies, complete interiors, fuel systems, hard parts, chrome trim accessories and more log on now and save
the all new power block directory.com. Your source for everything. Automotive, find all the parts and brands. Thousands of racetracks from Daytona to Long Beach, plus events, clubs and more. Find the stuff you're looking for the all new power block directory.com, your source for everything. Automotive.
Today's flashback. A 1964 Ford Thunderbolt.
I've been a Ford man all my life and this was the first chance to really get a hold of a, a real Super Stalker that was made just for drag racing.
He's talking about the car. He raced back in 1964 Ford's Lightning Fast Thunderbolt. These cars put the blue oval on top and Super stock edging out the max Wedge mo
cars that had ruled the strip for so many years. Ford teamed up with Dearborn steel tubing to trans.
It's humbled Fairlane 500 into a drag demon.
Only 100 were built and you had to be a die hard racer to get your hands on. One.
Steve took one look at the car in a magazine and was hooked. He'd been racing since 1958 when he was only 16. So he took all of his time slips and trophies to the Ford dealer to prove he was the real deal. It worked, but they kept trying to sell him an automatic and I'd say
no automatics are for little old ladies and school teachers and I'd like to have a, a four speed. He finally got his wish in March of 64 and towed the car all the way home from Michigan to Alabama through a snowstorm. Once home, he started blueprinting the motor with the help of the legendary Don Nicholson.
The formula for the thunderbolt was simple, big power and a little car.
The monster 427 was shoe horned in and topped off with a high rise manifold and dual four barrel halls. Air was gulped in through tubes hooked to the headlight.
Bezels rated a 425 horse and made upwards of 600 in race tune
to shave off
glass was used for the teardrop hood and fenders. The bumpers and grill were aluminum
and the windows were made of plexiglass.
The inside was stripped down to the bare essentials, no heater, no radio, no carpet, just some van seats of four speed and attack, all told it came in at just 20 pounds above the minimum super stock weight
underneath the suspension was beefed up with asymmetrical heavy duty lee
springs and two inch by three inch rectangular traction bars.
You can see how the car hopped up almost six inches on launch. Steve won his first time out and raced the car for a year all over the Southeast, taking on guys like Billy Jacobs and Emma Austin.
All of the stuff that I did I had to do on my
no, no pit crew, no sponsors
and just kind of dog paddling to get by. Must have been some pretty fast dog paddling. He won over 100 races every weekend. He hit the drag strip, but during the week he was hitting the books at Auburn. I learned about weight transfer leverage and all of that.
And every week, uh, I would polish my skills
in
school to go, make my car run faster.
He wound up shaving off a second on his eet running 1097 at 100 and 31
MPH. In 65 Steve went to work for Ford where he got a drag comet as his company car. He traded the thunderbolt for a mustang and 1000 bucks, but the check bounced and when I tried to go to court to get my money.
Uh I almost got eliminated
and I had to run for my life. 40 years later, the car is Steve's once again
and he also earned a spot in the Southeastern drag racers Hall of Fame.
His racing days may be behind him, but he still loves taking it to the track.
Many last words,
famous last words,
but this was a blast
coming up, Rick's step by step, starter, rehab.
You're watching Muscle car for a DVD copy of this episode. Just go to Power Block tv.com and order your copy for just 595 plus shipping and handling. Start your own muscle car collection delivered right to your door from the power block.
Restore your classic pickup SUV or suburban at shop, classic truck, parts.com. We stock anything and everything for Ford, Chevy GM and Dodge trucks, complete bodies, complete interiors, fuel systems, hard parts, chrome trim accessories and more log on now and save
my power block is fueled by you. Join groups, post build pics
and share videos.
You're the star
at my power block.com.
Hey guys, welcome back now with the project blue collar buick over here. The idea is to spend our money as wisely as possible. That's amazing how fast the savings can add up on just the little stuff and that leaves more money for cool stuff like performance upgrades and appearance parts.
But one way to do this is to rebuild as many parts as you can like the starter
build on a budget muscle car projects that save you time and money.
Now, most people just go to an auto parts store and pick up a rebuilt starter. I mean, it's not like they're super expensive, but there's a couple of things you might want to consider before you do that. Now, some of those rebuilt starters contain inferior parts like a nose cone and that can affect the alignment of your drive gear to your ring gear. Now, victory lap starter rebuild kit started under 20 bucks for most cars allow you to reuse your original nose cone and they're made in the USA
and that's cool. Now, I hate grease. So I wanna get this thing cleaned up first. I'm scrubbing it in our parts cleaner, but a can of degreaser and a brush should work just as well.
Now, we know the starter works because it's the same one that we use on a junkyard 455. But it did sound a little bit strange. So we're going to go ahead and rebuild it anyway, just for reliability. If you don't know the condition of the starter, when you get it, here's a good way to check,
clip your positive battery lead to the power supply post on the
Cleoid. Then clamp a low tester on the battery cable, making sure the scale is set to read at least 200 amps DC, secure the starter to the table because it will want to walk when you put power to it.
Now we just need to bridge the power over to the starter post on the solenoid when you do this with a screwdriver like I'm doing, just make sure that your contact points are between the two nuts, do not touch the threads because the arc will mess them up.
Now, the highest dry I saw was just about 70 amps and the free spinning was just over 50. And that's well within manufacturers specs if you're looking for the numbers for your starter, you can either check online or just give your local builder a call.
These numbers tell us that this starter doesn't really need a rebuild, but we're gonna do it anyway, just so we can show you guys how easy it really is.
The
solenoid comes off first, I'm marking the endplate and housing. So I know which way it goes on. Reassembly.
I'm actually making an imprint instead of using a marker so I can clean it and not worry.
Now, I'm willing to bet there's a lot of guys out there that have been building cars for a lot of years and they don't really understand how a starter works. A solenoid is basically nothing more than an electro magnet. When you put power to it,
it attracts the cylinder which pulls on the forks
and the forks right on the collar right here on your drive and that's what actually engages your drive gear.
There's helical cut grooves in the main shaft that actually spins the gear. So it engages into the ring gear more easily.
Next, pull the cover and remove the armature from the housing.
Drive gears get worn down over time, which is why the kid comes with a new one
to remove it,
use a socket to drive the retaining ring back,
remove the clip, then slide the gear off
after getting all the crud washed out. Some 1000 grit, sandpaper or emery cloth, cleans up the shaft and contact surface for the brushes.
A coat in a lightweight oil will make sure there's no hiccups. When the starter engages,
drop the new drive gear onto the shaft, then install the new retainer ring and clip.
Perfect. So
we're also replacing the bushing on the inside of the vacuum plate. I'm using a slightly modified punch and a hammer to get it out of the way.
Always test fit it just to make sure that bushing didn't distort when you're putting it in.
It's like we're good.
Next come the four brushes. Now GM starters use two different sizes and the kit comes with both. So match them up before swapping them out.
Check out how much these brushes here wear down over time. Pretty amazing.
And now when replacing the armature, be gentle, there are plastic pieces inside the housing that can be easily broken.
A
don't strong arm. It
a couple of soft bushings cushion the armature from the end plate, a few drops of oil and we can seal it back up, making sure to line up the marks I made earlier,
getting the forks and the nose cone back onto the collar and the drive gear can be a little tricky, but once it's lined up, it should all fall together.
Looks like there's no binding. So the solenoid can go back on.
The last step is to throw some power to it and make sure the sucker works
right on. Sounds good. Now, rebuild start is probably gonna draw a few more amps than a good used one. But that's only because the bushings haven't quite broken in yet. Now, this whole rebuild ran about 20 bucks in less than an hour's time to do it. It's a pretty good investment. Uh, victory lap also makes rebuild kits for alternators. We'll have to save that for another episode because for today we're out of time. So, until next time we're out of here.
Show Full Transcript
Hey, welcome to muscle car. Our 61 Impala project is coming together for the last time. So we're gonna break out the lock tight and send everything down for good.
Now, red sleds already been mocked up a few times so the body should drop right on and once it's there, we can hook up the steering build all the clutch linkage.
Last time we built a wicked custom console,
got some eye popping color on it.
Imagine that red fled red
and tagged its tail with the red sled logos.
Now we can finally drop the shell onto the frame
and from the factory, our car was a column shift automatic, but we're adding the third pedal and putting four on the floor. Now, whatever clutch linkage we come up with, it's going to have to work around our pedal assembly and our steering components. So we'll get that stuff put in first,
nobody's making these pedal assemblies. But Springfield Auto Recyclers gave us a set from their huge stock of hard to find parts. It didn't come with any mounting hardware or linkage. So it's time to build some stuff starting with column braces.
This I did it. Stainless steering column is designed to be adapted to almost any vehicle. A couple of handmade straps will keep it in place. Next come the universal joints and steering shaft from Borgeson,
the upper U joint is rubber isolated to reduce vibration in the column
with the steering assembled. I can build the clutch linkage. The pivot ball goes in first followed by the Z BAR.
I made a mounting bracket out of eight inch plate to hold the other end.
The only real trick in making this plate is to give yourself enough clearance between the Z bar and the mount to allow the pivot ball to drop in and adjust correctly.
Look at that. It
looks like a jam.
The original clutch rod from the pedal to the Z bar had been chopped off with a torch so I'll extend it out and make it adjustable with some more salvaged metal.
People always give me a hard time so I hate throwing junk out but this is why I use the old U bolts from the rear end off our 71
C A to build most of the linkage on this thing. They were still good. So I didn't throw them out. Guess what I used them
Now, this piece is gonna go into the bottom of the linkage and even built a little pin here, it's gonna drop through the back
through the bottom of the linkage. And this right here is actually gonna actuate our clutch fork. We should be dialed.
Now, using the same basic concepts you can design and build a clutch linkage for almost any vehicle
with a master cylinder on our pedal assembly is done well, other than coming back and maybe beautifying our linkage a little bit. We still need to assemble all of our brake lines. But before we do that, we need to get our wheel wells on. We'll be doing that right after the break
up. Next red sleds rad, remote controlled air ride.
That's right.
Hey, welcome back. Like Rick said earlier, we need to get the inner fenders on to finish plumbing the brake line.
That means the doors gotta go on then the fender and then finally the inner fender, the body slipped on pretty easy and we're hoping our luck holds out with the rest of the panels.
Red sled looks sweet with some sheet metal on her and we can start to get an idea of what she'll look like cruising into her first car show
and of course, she looks a whole lot better lowered and up until this point, we've been using ball valves to air it up and down. But now that the chassis and the body are united we can install the lines and the rest of the air ride system. Air ride technologies, airpod makes insulation easy by combining the tank compressor valves and electronics in one unit, just simply run some airlines power and control panel leads and you're done for easy access. We're mounting ours here in the trunk.
Air ride suspension uses plastic, air brake tubing. There's a couple of things you need to know before you start your installation.
One thing is to make sure your cut ends are nice and square. If they're cut at an angle, they won't seal or seat properly, you can use a razor blade, but a tubing cutter makes things a lot easier and faster. Also use push to connect fittings, they're easy to use. And if you ever need to remove a line, just simply push that collar in tube slides right out.
All compressors make noise but mounting it with some rubber isolators will keep it to a minimum.
The airpod uses quarter inch lines and to keep the chassis clean, we're running them inside the frame room.
If the fitting is hard to get to pre marking, the hose will make it easier to tell when it's fully seated.
Make sure to keep the hoses away from any moving suspension parts or you'll end up with a torn line.
We're not quite ready for wiring yet. So I rigged up a battery to test everything out. This control panel plugs right in and we'll run it up front when the interior goes in. This controller is pretty cool. It's got presets to let you lay it out, set it to a perfect ride height or lift it all the way up at the touch of a button.
The Airpod even comes with a key fob so you can stand back and watch it do its thing.
That's right
after the break, the Ford Super Stocker that edged out the Max Wedge,
restore your classic pick up SUV or suburban at shop, classic truck, parts.com. We stock anything and everything for Ford, Chevy GM and Dodge trucks, complete bodies, complete interiors, fuel systems, hard parts, chrome trim accessories and more log on now and save
the all new power block directory.com. Your source for everything. Automotive, find all the parts and brands. Thousands of racetracks from Daytona to Long Beach, plus events, clubs and more. Find the stuff you're looking for the all new power block directory.com, your source for everything. Automotive.
Today's flashback. A 1964 Ford Thunderbolt.
I've been a Ford man all my life and this was the first chance to really get a hold of a, a real Super Stalker that was made just for drag racing.
He's talking about the car. He raced back in 1964 Ford's Lightning Fast Thunderbolt. These cars put the blue oval on top and Super stock edging out the max Wedge mo
cars that had ruled the strip for so many years. Ford teamed up with Dearborn steel tubing to trans.
It's humbled Fairlane 500 into a drag demon.
Only 100 were built and you had to be a die hard racer to get your hands on. One.
Steve took one look at the car in a magazine and was hooked. He'd been racing since 1958 when he was only 16. So he took all of his time slips and trophies to the Ford dealer to prove he was the real deal. It worked, but they kept trying to sell him an automatic and I'd say
no automatics are for little old ladies and school teachers and I'd like to have a, a four speed. He finally got his wish in March of 64 and towed the car all the way home from Michigan to Alabama through a snowstorm. Once home, he started blueprinting the motor with the help of the legendary Don Nicholson.
The formula for the thunderbolt was simple, big power and a little car.
The monster 427 was shoe horned in and topped off with a high rise manifold and dual four barrel halls. Air was gulped in through tubes hooked to the headlight.
Bezels rated a 425 horse and made upwards of 600 in race tune
to shave off
glass was used for the teardrop hood and fenders. The bumpers and grill were aluminum
and the windows were made of plexiglass.
The inside was stripped down to the bare essentials, no heater, no radio, no carpet, just some van seats of four speed and attack, all told it came in at just 20 pounds above the minimum super stock weight
underneath the suspension was beefed up with asymmetrical heavy duty lee
springs and two inch by three inch rectangular traction bars.
You can see how the car hopped up almost six inches on launch. Steve won his first time out and raced the car for a year all over the Southeast, taking on guys like Billy Jacobs and Emma Austin.
All of the stuff that I did I had to do on my
no, no pit crew, no sponsors
and just kind of dog paddling to get by. Must have been some pretty fast dog paddling. He won over 100 races every weekend. He hit the drag strip, but during the week he was hitting the books at Auburn. I learned about weight transfer leverage and all of that.
And every week, uh, I would polish my skills
in
school to go, make my car run faster.
He wound up shaving off a second on his eet running 1097 at 100 and 31
MPH. In 65 Steve went to work for Ford where he got a drag comet as his company car. He traded the thunderbolt for a mustang and 1000 bucks, but the check bounced and when I tried to go to court to get my money.
Uh I almost got eliminated
and I had to run for my life. 40 years later, the car is Steve's once again
and he also earned a spot in the Southeastern drag racers Hall of Fame.
His racing days may be behind him, but he still loves taking it to the track.
Many last words,
famous last words,
but this was a blast
coming up, Rick's step by step, starter, rehab.
You're watching Muscle car for a DVD copy of this episode. Just go to Power Block tv.com and order your copy for just 595 plus shipping and handling. Start your own muscle car collection delivered right to your door from the power block.
Restore your classic pickup SUV or suburban at shop, classic truck, parts.com. We stock anything and everything for Ford, Chevy GM and Dodge trucks, complete bodies, complete interiors, fuel systems, hard parts, chrome trim accessories and more log on now and save
my power block is fueled by you. Join groups, post build pics
and share videos.
You're the star
at my power block.com.
Hey guys, welcome back now with the project blue collar buick over here. The idea is to spend our money as wisely as possible. That's amazing how fast the savings can add up on just the little stuff and that leaves more money for cool stuff like performance upgrades and appearance parts.
But one way to do this is to rebuild as many parts as you can like the starter
build on a budget muscle car projects that save you time and money.
Now, most people just go to an auto parts store and pick up a rebuilt starter. I mean, it's not like they're super expensive, but there's a couple of things you might want to consider before you do that. Now, some of those rebuilt starters contain inferior parts like a nose cone and that can affect the alignment of your drive gear to your ring gear. Now, victory lap starter rebuild kit started under 20 bucks for most cars allow you to reuse your original nose cone and they're made in the USA
and that's cool. Now, I hate grease. So I wanna get this thing cleaned up first. I'm scrubbing it in our parts cleaner, but a can of degreaser and a brush should work just as well.
Now, we know the starter works because it's the same one that we use on a junkyard 455. But it did sound a little bit strange. So we're going to go ahead and rebuild it anyway, just for reliability. If you don't know the condition of the starter, when you get it, here's a good way to check,
clip your positive battery lead to the power supply post on the
Cleoid. Then clamp a low tester on the battery cable, making sure the scale is set to read at least 200 amps DC, secure the starter to the table because it will want to walk when you put power to it.
Now we just need to bridge the power over to the starter post on the solenoid when you do this with a screwdriver like I'm doing, just make sure that your contact points are between the two nuts, do not touch the threads because the arc will mess them up.
Now, the highest dry I saw was just about 70 amps and the free spinning was just over 50. And that's well within manufacturers specs if you're looking for the numbers for your starter, you can either check online or just give your local builder a call.
These numbers tell us that this starter doesn't really need a rebuild, but we're gonna do it anyway, just so we can show you guys how easy it really is.
The
solenoid comes off first, I'm marking the endplate and housing. So I know which way it goes on. Reassembly.
I'm actually making an imprint instead of using a marker so I can clean it and not worry.
Now, I'm willing to bet there's a lot of guys out there that have been building cars for a lot of years and they don't really understand how a starter works. A solenoid is basically nothing more than an electro magnet. When you put power to it,
it attracts the cylinder which pulls on the forks
and the forks right on the collar right here on your drive and that's what actually engages your drive gear.
There's helical cut grooves in the main shaft that actually spins the gear. So it engages into the ring gear more easily.
Next, pull the cover and remove the armature from the housing.
Drive gears get worn down over time, which is why the kid comes with a new one
to remove it,
use a socket to drive the retaining ring back,
remove the clip, then slide the gear off
after getting all the crud washed out. Some 1000 grit, sandpaper or emery cloth, cleans up the shaft and contact surface for the brushes.
A coat in a lightweight oil will make sure there's no hiccups. When the starter engages,
drop the new drive gear onto the shaft, then install the new retainer ring and clip.
Perfect. So
we're also replacing the bushing on the inside of the vacuum plate. I'm using a slightly modified punch and a hammer to get it out of the way.
Always test fit it just to make sure that bushing didn't distort when you're putting it in.
It's like we're good.
Next come the four brushes. Now GM starters use two different sizes and the kit comes with both. So match them up before swapping them out.
Check out how much these brushes here wear down over time. Pretty amazing.
And now when replacing the armature, be gentle, there are plastic pieces inside the housing that can be easily broken.
A
don't strong arm. It
a couple of soft bushings cushion the armature from the end plate, a few drops of oil and we can seal it back up, making sure to line up the marks I made earlier,
getting the forks and the nose cone back onto the collar and the drive gear can be a little tricky, but once it's lined up, it should all fall together.
Looks like there's no binding. So the solenoid can go back on.
The last step is to throw some power to it and make sure the sucker works
right on. Sounds good. Now, rebuild start is probably gonna draw a few more amps than a good used one. But that's only because the bushings haven't quite broken in yet. Now, this whole rebuild ran about 20 bucks in less than an hour's time to do it. It's a pretty good investment. Uh, victory lap also makes rebuild kits for alternators. We'll have to save that for another episode because for today we're out of time. So, until next time we're out of here.