HorsePower Builds
Want more content like this?
Join the PowerNation Email NewsletterParts Used In This Episode
American Powertrain Systems
ProFit™ TKO-600 .64 Kit, TKO600.64 with Custom Streamlined Main Case, ProGrip™ Billet steel flywheel, Crossmember and mount kit, Cryo hardened slip yoke, Race Grade-8 Flywheel and Pressure Plate Bolts, Hurst shifter with AP Mustang Console Stub, ProGrip™ Full Circle Kevlar disc, ProGrip™ Low-Flex Formed Pressure Plate, Hydramax™ Hydraulic clutch kit, QuickTime Inc. Performance Products SFI Scattershield and Motor Plate.
Flaming River
Laser Cut Collapsible Tilt Column, column mount, Borgeson u-joints and DD shaft.
Global West Suspension
Subframe connectors are a important upgrade for your pony car. Subframes add additional support to the chassis by reducing flex. This increases load transfer from front to rear or corner to corner depending on your application. They also improve the integrity of the the uni-body., Jacking rails go to the outer rocker rails and weld on the inside edge.This kit also provides an avenue for connecting the roll cage to the entire assembly.
Jaz Products
16 Gallon Pro Sport Circle Track Fuel Cell with aviation safety foam and D-ring cap.
Milodon
Front sump design for use in road race applications in stock pre-74 chassis and all Cobras . Features multiple baffles to provide oil supply during violent turns, acceleration and deceleration. Fits most stock chassis using front sump pan. Features multiple baffles and trap doors to provide oil supply during violent turns, acceleration and high speed deceleration. Has a 1/2" pipe oil temperature sender bung.Pan Capacity is 7 Quarts Plus Filter - 7 1/2" Sump Depth.
Autopower Industries,Inc.
Bolt-In Roll Cages are SCCA & NASA legal for club racing.
Mandrel Bending Solutions
Mandrel Bent Straight and Angled 3.5" Oval exhaust tubing and transition tubing from oval to round.
O'Reilly Auto Parts
Fittings
O'Reilly Auto Parts
Dual feed line for AVS carb
O'Reilly Auto Parts
Case of brake cleaner
O'Reilly Auto Parts
Plastigage .001-.003 Green (6)
O'Reilly Auto Parts
Roloc Disc (25)
O'Reilly Auto Parts
Roloc Disc (25)
O'Reilly Auto Parts
Heli-coil kit
Rocket Performance Machine, Inc.
18x8, 5x4 1/2 bolt pattern, 4.75" backspacing, Rocket Booster Gray Center-Machined Outer 1 pc wheel.
Wilwood Engineering
Forward Swing Mount Triple Master Cylinder Pedal Assembly, Compact Remote Combination Master Cylinders.
YearOne
Bumper Inner Arms and outer arms, Rear bumper brackets, Front and rear bumpers, front lower valance, tail lamp housings, Front grille, bumper bolts, hood latch, front fenders, hood hinges, headlamp assemblies, grille moldings and window moldings, standard hood, hood catch and grille support, quarter panel extensions.
YearOne
Taillight bezel kit, front lower spoiler, quarter vent assemblies, stone deflector, body fastener kits,taillight lenses.
Video Transcript
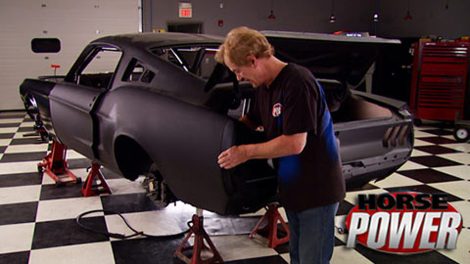
Horsepower is on track building its first performance road course machine. A 68 Mustang body 347 Ford, small block and a race worthy suspension.
A tribute to Vic Edelbrock
that you can win.
But now on to phase two.
Well, first off, we're gonna handle a safety feature that's a must for any kind of track car. And that's a solid roll cage.
Now, they might conjure up images of notching and welding and bending and so forth, but not this time,
we're gonna use one of these bolton cages from auto power and
they've done all the bending and big welding for us. Now, we've got it mocked up to give you an idea of how it's gonna look inside the mustang and
we got the Mustang up on jack stands to make sure that the chassis is level all the way around.
The first thing we wanna do is get the rear hoop in place and as far back as we can
and attach the rear support braces
so it stays upright.
Not bad, I think fits nice.
Then using the supplied eight inch sleeves, install the two forward supports,
followed by the forward support braces and hold them in position with the sleeves. Finally, the windshield crossbar,
I'm still gonna throw a tape on this thing, but I almost don't have to. Every corner is almost perfect scene for scene
and check out the rear support braces.
They have a little curvature on the mounting pad which fits almost perfect to the wheel tub for a prebuilt cage. It doesn't get much better than this.
And 716, we're square
then drill two holes through the floor
and attach the reinforcement plate from the bottom
and use it as a template to drill the third hole.
Notice how the plate forms to the floor
and do the same to all four corners.
Hey, you might be interested in knowing that auto power makes these bolted cages for dozens of domestic
and foreign rides. And I think one of the coolest features is the sleeves that hold the bars together while you bolt them in place. The uh uncool part. Well, we got 10 sleeves and 20 b
holes to make. So we're gonna be busy for a while.
We recruited Chris and his uh artistic skills to start making a home for our Mustangs Jazz Pro sport fuel cell. This thing holds 16 gallons of fuel in a seamless cross link inner shell.
Well, he's making lots of annoying noise. We're gonna install our Global West Subprime connector.
They gotta have these in a track car to prevent torsional twist on the corners.
They attached to the front and back unibody frame rails.
Well, at least it's supposed to so much for our lucky streak.
Now, with replacement shells, you gotta expect a few little fitment issues and we can't modify it. So, see what we can do with the subprime.
That's right. When in doubt, cut it out,
we're just gonna tack we the connectors in place for now.
And that's because we're gonna use this jacking rail kit to add extra strength
and literally create a place to jack up the car quickly without hurting the body seams.
You clamp the inch square long rail along the rocker scene. First,
then the cross tube that connects it to the subprime connectors
and the second tube goes to the car's original front ra
the tubes are too close to the floor for a complete welding. So after everything's in place with tack wells, we have to drop the entire assembly,
weld it all together,
paint the top only to prevent rust.
Then after it's back under the car, we can weld back that connector piece we had to remove because of our fitment problem.
Finally, we box in this gap and weld it up.
Finally, we get to see Chris's fuel cell craft work after he bolts in this bottom aluminum plate to close in the trunk compartment.
Well, now he can drop in the steel case, bolt it up
and our cell finally has a new home.
Well, I gotta say I'm pretty impressed with how much progress the three of us have made so far in our allotted time, especially with that roll cage.
I'm willing to bet that you without a cameraman and director slowing you down could be one in about an hour. Well, we got a lot more time ahead and a lot more work ahead. So hang with us.
Yeah, we're back and we're getting kind of anxious to get that mustang off the jack hands and onto its own 4 ft.
That is if we had them
before mine can measure for wheels and tires, the front fenders need to be installed and like our body shelves, the reproductions came from dyno
Corn.
Then we need to raise the suspension to ride height.
How about a little wheel? 101? Now, the first thing you want to consider is offset, every wheel has one and it's either zero, positive or negative
offset refers to the location of the hub mounting surface. For example, if it's even with the center line of the wheel, it's zero. If it's towards the back of the wheel, it's negative.
And if it's to
towards the front,
it's positive. You also need to know up front how wide you want your wheels to be. Here's a heads up though,
for example, a wheel that's advertised at eight inches is almost nine inches wide from edge to edge.
But manufacturers go by the width inside the lips, which is eight.
So make sure you factor in the extra width for clearance.
The first thing I'm gonna do is hang this nut and string on the inside of the fender. Now, this is gonna let us know how far we can come out with the wheel since it still has to tuck underneath it.
The straight edge is on a reference where the wheel sits on the hub. Now take your tape measure and go to the innermost point where the wheel can make interference, which in our case is the upper control arm, we're sitting at five inches. So take a quarter away from that and our asset will be four and three quarter and we're still inside of our eight inch mark inside the fender wheel.
If you're working with a metric offset like a Honda Toyota or Nissan, just remember that if you multiply the number in inches by 25.4 remember that it's 25.4 that'll give you the correct offset. So in our case, we're looking at about 100 and 20 millimeter positive off
wheel size is only half of the equation. You also need to know how much tire you can get under there. Now, the easiest way to that is get an ideal tire size in mind. We're thinking something about a 2 45 40 which has an overall diameter of 25.5 inches.
Here's where you need to pay attention. We bent this rod and this four and three quarter inch measurement represents where the mounting flange of the wheel to the inside of the tire is going to be the 12 and three quarter inch measurement represents the overall diameter of the tire from the center line of the spindle. Now, with it held in place, turn the wheel to the far right lot.
This will show you how much clearance you have from the inside of the tire to the
outside of the frame rail to check the clearance to the outside of the fender, just reverse your measurement from the mounting flange to the outside of the wheel.
There you go.
You've been
adjudicated.
We next out back, more bodybuilding exercises and all these parts from the louver to the lenses came from the year one catalog for early model Mustangs might as well get started with these rear quarter extensions.
This is probably one of the few parts that we put on this thing one time and one time only it's mostly about test fitting
and every part that you see us put on this car
comes off when it's time to paint
pretty close there. Huh?
Yeah,
we're good here.
Just with brackets not lined up. We got to move it that way.
Pull this back off.
That should be good.
Let's see how lucky we get
it goes,
man. That's a nice fit. Check out the line up here between the headlight bucket and the hood and this part will come up once we get the hood latches on. And of course, the way of the motor, by the way, we're not too far away from dropping in our favorite part to fit that 347 small block.
But this motor has to hang around for a little bit longer
because we need to know how much room the steering is gonna take up in the engine compartment. And we can't figure that out until we know where we're gonna sit. Now to offset some of the drivers weight to the rear of the car, we're gonna move the seat back as far as possible.
Now, remember this is a giveaway car. So we're also gonna build a bracket underneath the seat that has a couple of mounting locations for drivers preference.
Now, some of you may be thinking I'm sitting awful low. We're also gonna bring that seat up with the bracket to have a perfect view out of the windshield. Now, here's something to keep in mind with the steering. If you have it too far forward, your range of motion gets shortened by your elbows hitting. So the closer you have it to you, the larger amount of range you get.
Now for a measurement, let's check that out.
Looks like 23 inches
with some one inch tubing, a
blade,
a bit,
some heat.
Oh, and don't forget the seat, this one came from Kirky. It's made of aluminum and it's a universal fit perfect for our track car.
We're adding one more piece to the roll cage and that's a dash bar
and to it the first support bracket for the steering.
Now we're welding the rest of the brackets to this Flaming River collapsible column.
It mounts to a
hem at the front
and to the original column, mount under the dash and back,
using the supply joints and double D shaft connect the column to the rack.
The distance from the driver to the steering wheel is perfect with the bracket underneath the seat. I got a killer view out of the front windshield and up top plenty of room for my brain bucket. What more could I ask for the motor? And it's coming up right after the break,
we're back with horsepower's Mustang track car now with a solid roll cage inside for safety and a fuel cell out back for some goat juice. We measured for wheels and tires and even preassembled some body parts
before we dropped the motor in. We've got one little problem. Some of you may have noticed where the rack was located where there's no way that rear sump pan is gonna clear it.
I guess that's a good thing about having spare parts around the shop. We found the right pickup and the front sump pan to take care of the problem.
Pull it forward a little
good.
Our Tko 600 gearbox came from American power train and they sent it to us as a complete kit specifically for our 68. Now, it has the correct shifter location. So there's little to no modifications needed for the trans tunnel. All the gears have been rem polished for super smooth high RPM shifts and the input shaft is 26 blind output shaft is 31. Now, they've been cross
bly hardened to remove any imperfections in the metal and to strengthen them up. Now, each transmission is assembled by a single person and it's rated to 1000 ft pounds of torque. Now, as far as the clutch goes, it's their pro grip brand and it's a low effort, high pressure diaphragm style plate with a full circle Kevlar disk which offers a lot less chatter than a puck style. Now,
it comes with a billet steel sf I quality flywheel, a bell housing, cross member and all the rest of the hardware and pieces. You need to install a complete set up. Now, one of the cool things, if you're installing this thing at say 234 in the morning,
they're one of the only aftermarket companies that offer full 24 hour customer service.
The old flywheel was for dyno use only so it's gone.
First thing to go up is the engine plate
followed by the new fly wheel and
Dals.
Now the disk and pressure plate are next
quick time supplied the spun high grade steel bell housing.
And now what that means is, it's as tough as it looks
with the correct spacer. We can slide the hydro max hydraulic release bearing onto the bearing retainer,
place the transmission on a jack and lift it into place. You lined up in there.
You can't,
I wish it was that simple. I don't know why it won't go
in
there. It went, popped
into
once it's all seated, install the trans mount
and finally the cross member.
Have you ever wondered how to measure for a U joint? Well, the easiest thing to do is jump on the internet and get a list of the actual U joint sizes. Then all you need is a tape measure or a set of dial calipers. Now, the first thing we wanna do is figure out the width from the inside of the cup mount,
which is 3.625. Now measure for the actual cup diameter,
which is 1.188.
Now compare those measurements to a conversion chart and that'll show you you got a 1350 U joint. Now, we need to take a measurement from the back of the transmission
to the center of where the cup is in the seat in the rear yoke, which is 52.5 inches. Now, we know the length of the shaft we need to order,
we knew we were going to have a tight fit but not this tight.
That's exactly why I put the steering in first
instead of cutting the header up. We're gonna go ahead and move the steering over and bend it down towards the rack here. Now, even though it's a tighter bend, you're not gonna have any problems with the Flaming River joints binding up
with the
Hyman insert in the right spot.
See what I told you about the joints. No binding
the passenger side doesn't have anything in the way. So a nice fit was expected
for brakes. We're using the steel pedal assembly from will wood. Now it's got two pedals on it, one for the clutch, one for the brake. Now, the clutch has a slave mounted on the back side of it.
The brake pedal has two masters mounted on the back of it. Now, one for the front, one for the rear brakes. Now it's also got an adjustable bar which changes the bias from the front to the rear. It's an amount to the firewall with this backing plate on the front side.
Hey, guess what?
We got wheels and tires. Now,
these are 18 inch center machine, outer aluminum wheels, one piece for a rocket racing
and we wrapped them with G Force R ones from BF Goodrich. Now, these things are molded to a 4, 30 seconds of an inch tread depth, which means a couple of pace laps and you'll have them scuffed in and ready to go. Now, they also have a tread wear rating of 40. What that means is
the tread consistency is super soft and so that'll grip the track even better. Now, when I say soft look, this
comes right off now as a trade off, of course,
they're not gonna last as long, but that depends on your aggressive driving habits.
Plus the vintage look at these wheels brings out the nostalgia in all of us
and just like cars from the old days, this one's developed a serious attitude now for the exhaust
and the plan is to run two pieces of pipe to about here, mount both of our mufflers and then more pipe to say here, then we'll have the exhaust exit in front of the rear tire with a set of these.
Now we got them from manual bending solutions.com and various lengths to cover all of our options
to lower the decibels in our track car. We're using these Magna flow five by eight race mufflers. Now they're six inches long, have 3.5 inlets and outlets and a straight through design. Plus they're fully stainless steel.
This finishes up all the
fing and test fitting we had planned. Now we got to take everything off so the track pony can make a trip to the paint booth, then we can reassemble the parts plus add things like a radiator, fuel lines, brake lines, gauges glass. Well, this goes on,
we want to do an extra good job because after we complete the build and test it at the road course could be heading to your house. That's right. We're giving away this track car to some lucky driver
watch. For details on our website. We'll be back
build on a budget horsepower projects that save you time and money.
Now that the tear downs begun, let me show you something over here. The Ford small block has been a popular performance platform for a long time and in high performance applications, builders have determined that there's an insufficient oiling problem at the front of the block. Well, the oil pump pumps oil to this main gallery in the rear and then it goes to the front of the motor. Well, on its way there, it has to oil
all the main and rod journals as well as the total valve train. So by the time it gets to the front, it's insufficient. Well, here's a way to fix all that for less than 15 bucks
what you'll need from the parts store of your brass fittings, some line and from your garage at home, a drill, a tubing cutter, a tap, a drill bit and of course a pilot drill
starting in the front of the motor. We're going to run two feed lines.
The first step is to use the pilot bit to drill into the oil passage, then use the larger bit to open the hole up for the tap.
Now use oil when tapping the hole or you could risk breaking it off in the block.
Now thread, the fittings in using a little lock tight
on the rear of the block where the oil comes from. It's the same process just using the T fitting
now, just connect all of your fittings with the copper line. Now, some of you may be wondering, are there any interference problems? Well, the answer is no, it's under the intake line and it'll clear the lifters, push rods and the rest of the valve train components. Now, I think one of the coolest benefits of this whole thing is racers do it all the time and now you know how to do it at home.
Show Full Transcript
A tribute to Vic Edelbrock
that you can win.
But now on to phase two.
Well, first off, we're gonna handle a safety feature that's a must for any kind of track car. And that's a solid roll cage.
Now, they might conjure up images of notching and welding and bending and so forth, but not this time,
we're gonna use one of these bolton cages from auto power and
they've done all the bending and big welding for us. Now, we've got it mocked up to give you an idea of how it's gonna look inside the mustang and
we got the Mustang up on jack stands to make sure that the chassis is level all the way around.
The first thing we wanna do is get the rear hoop in place and as far back as we can
and attach the rear support braces
so it stays upright.
Not bad, I think fits nice.
Then using the supplied eight inch sleeves, install the two forward supports,
followed by the forward support braces and hold them in position with the sleeves. Finally, the windshield crossbar,
I'm still gonna throw a tape on this thing, but I almost don't have to. Every corner is almost perfect scene for scene
and check out the rear support braces.
They have a little curvature on the mounting pad which fits almost perfect to the wheel tub for a prebuilt cage. It doesn't get much better than this.
And 716, we're square
then drill two holes through the floor
and attach the reinforcement plate from the bottom
and use it as a template to drill the third hole.
Notice how the plate forms to the floor
and do the same to all four corners.
Hey, you might be interested in knowing that auto power makes these bolted cages for dozens of domestic
and foreign rides. And I think one of the coolest features is the sleeves that hold the bars together while you bolt them in place. The uh uncool part. Well, we got 10 sleeves and 20 b
holes to make. So we're gonna be busy for a while.
We recruited Chris and his uh artistic skills to start making a home for our Mustangs Jazz Pro sport fuel cell. This thing holds 16 gallons of fuel in a seamless cross link inner shell.
Well, he's making lots of annoying noise. We're gonna install our Global West Subprime connector.
They gotta have these in a track car to prevent torsional twist on the corners.
They attached to the front and back unibody frame rails.
Well, at least it's supposed to so much for our lucky streak.
Now, with replacement shells, you gotta expect a few little fitment issues and we can't modify it. So, see what we can do with the subprime.
That's right. When in doubt, cut it out,
we're just gonna tack we the connectors in place for now.
And that's because we're gonna use this jacking rail kit to add extra strength
and literally create a place to jack up the car quickly without hurting the body seams.
You clamp the inch square long rail along the rocker scene. First,
then the cross tube that connects it to the subprime connectors
and the second tube goes to the car's original front ra
the tubes are too close to the floor for a complete welding. So after everything's in place with tack wells, we have to drop the entire assembly,
weld it all together,
paint the top only to prevent rust.
Then after it's back under the car, we can weld back that connector piece we had to remove because of our fitment problem.
Finally, we box in this gap and weld it up.
Finally, we get to see Chris's fuel cell craft work after he bolts in this bottom aluminum plate to close in the trunk compartment.
Well, now he can drop in the steel case, bolt it up
and our cell finally has a new home.
Well, I gotta say I'm pretty impressed with how much progress the three of us have made so far in our allotted time, especially with that roll cage.
I'm willing to bet that you without a cameraman and director slowing you down could be one in about an hour. Well, we got a lot more time ahead and a lot more work ahead. So hang with us.
Yeah, we're back and we're getting kind of anxious to get that mustang off the jack hands and onto its own 4 ft.
That is if we had them
before mine can measure for wheels and tires, the front fenders need to be installed and like our body shelves, the reproductions came from dyno
Corn.
Then we need to raise the suspension to ride height.
How about a little wheel? 101? Now, the first thing you want to consider is offset, every wheel has one and it's either zero, positive or negative
offset refers to the location of the hub mounting surface. For example, if it's even with the center line of the wheel, it's zero. If it's towards the back of the wheel, it's negative.
And if it's to
towards the front,
it's positive. You also need to know up front how wide you want your wheels to be. Here's a heads up though,
for example, a wheel that's advertised at eight inches is almost nine inches wide from edge to edge.
But manufacturers go by the width inside the lips, which is eight.
So make sure you factor in the extra width for clearance.
The first thing I'm gonna do is hang this nut and string on the inside of the fender. Now, this is gonna let us know how far we can come out with the wheel since it still has to tuck underneath it.
The straight edge is on a reference where the wheel sits on the hub. Now take your tape measure and go to the innermost point where the wheel can make interference, which in our case is the upper control arm, we're sitting at five inches. So take a quarter away from that and our asset will be four and three quarter and we're still inside of our eight inch mark inside the fender wheel.
If you're working with a metric offset like a Honda Toyota or Nissan, just remember that if you multiply the number in inches by 25.4 remember that it's 25.4 that'll give you the correct offset. So in our case, we're looking at about 100 and 20 millimeter positive off
wheel size is only half of the equation. You also need to know how much tire you can get under there. Now, the easiest way to that is get an ideal tire size in mind. We're thinking something about a 2 45 40 which has an overall diameter of 25.5 inches.
Here's where you need to pay attention. We bent this rod and this four and three quarter inch measurement represents where the mounting flange of the wheel to the inside of the tire is going to be the 12 and three quarter inch measurement represents the overall diameter of the tire from the center line of the spindle. Now, with it held in place, turn the wheel to the far right lot.
This will show you how much clearance you have from the inside of the tire to the
outside of the frame rail to check the clearance to the outside of the fender, just reverse your measurement from the mounting flange to the outside of the wheel.
There you go.
You've been
adjudicated.
We next out back, more bodybuilding exercises and all these parts from the louver to the lenses came from the year one catalog for early model Mustangs might as well get started with these rear quarter extensions.
This is probably one of the few parts that we put on this thing one time and one time only it's mostly about test fitting
and every part that you see us put on this car
comes off when it's time to paint
pretty close there. Huh?
Yeah,
we're good here.
Just with brackets not lined up. We got to move it that way.
Pull this back off.
That should be good.
Let's see how lucky we get
it goes,
man. That's a nice fit. Check out the line up here between the headlight bucket and the hood and this part will come up once we get the hood latches on. And of course, the way of the motor, by the way, we're not too far away from dropping in our favorite part to fit that 347 small block.
But this motor has to hang around for a little bit longer
because we need to know how much room the steering is gonna take up in the engine compartment. And we can't figure that out until we know where we're gonna sit. Now to offset some of the drivers weight to the rear of the car, we're gonna move the seat back as far as possible.
Now, remember this is a giveaway car. So we're also gonna build a bracket underneath the seat that has a couple of mounting locations for drivers preference.
Now, some of you may be thinking I'm sitting awful low. We're also gonna bring that seat up with the bracket to have a perfect view out of the windshield. Now, here's something to keep in mind with the steering. If you have it too far forward, your range of motion gets shortened by your elbows hitting. So the closer you have it to you, the larger amount of range you get.
Now for a measurement, let's check that out.
Looks like 23 inches
with some one inch tubing, a
blade,
a bit,
some heat.
Oh, and don't forget the seat, this one came from Kirky. It's made of aluminum and it's a universal fit perfect for our track car.
We're adding one more piece to the roll cage and that's a dash bar
and to it the first support bracket for the steering.
Now we're welding the rest of the brackets to this Flaming River collapsible column.
It mounts to a
hem at the front
and to the original column, mount under the dash and back,
using the supply joints and double D shaft connect the column to the rack.
The distance from the driver to the steering wheel is perfect with the bracket underneath the seat. I got a killer view out of the front windshield and up top plenty of room for my brain bucket. What more could I ask for the motor? And it's coming up right after the break,
we're back with horsepower's Mustang track car now with a solid roll cage inside for safety and a fuel cell out back for some goat juice. We measured for wheels and tires and even preassembled some body parts
before we dropped the motor in. We've got one little problem. Some of you may have noticed where the rack was located where there's no way that rear sump pan is gonna clear it.
I guess that's a good thing about having spare parts around the shop. We found the right pickup and the front sump pan to take care of the problem.
Pull it forward a little
good.
Our Tko 600 gearbox came from American power train and they sent it to us as a complete kit specifically for our 68. Now, it has the correct shifter location. So there's little to no modifications needed for the trans tunnel. All the gears have been rem polished for super smooth high RPM shifts and the input shaft is 26 blind output shaft is 31. Now, they've been cross
bly hardened to remove any imperfections in the metal and to strengthen them up. Now, each transmission is assembled by a single person and it's rated to 1000 ft pounds of torque. Now, as far as the clutch goes, it's their pro grip brand and it's a low effort, high pressure diaphragm style plate with a full circle Kevlar disk which offers a lot less chatter than a puck style. Now,
it comes with a billet steel sf I quality flywheel, a bell housing, cross member and all the rest of the hardware and pieces. You need to install a complete set up. Now, one of the cool things, if you're installing this thing at say 234 in the morning,
they're one of the only aftermarket companies that offer full 24 hour customer service.
The old flywheel was for dyno use only so it's gone.
First thing to go up is the engine plate
followed by the new fly wheel and
Dals.
Now the disk and pressure plate are next
quick time supplied the spun high grade steel bell housing.
And now what that means is, it's as tough as it looks
with the correct spacer. We can slide the hydro max hydraulic release bearing onto the bearing retainer,
place the transmission on a jack and lift it into place. You lined up in there.
You can't,
I wish it was that simple. I don't know why it won't go
in
there. It went, popped
into
once it's all seated, install the trans mount
and finally the cross member.
Have you ever wondered how to measure for a U joint? Well, the easiest thing to do is jump on the internet and get a list of the actual U joint sizes. Then all you need is a tape measure or a set of dial calipers. Now, the first thing we wanna do is figure out the width from the inside of the cup mount,
which is 3.625. Now measure for the actual cup diameter,
which is 1.188.
Now compare those measurements to a conversion chart and that'll show you you got a 1350 U joint. Now, we need to take a measurement from the back of the transmission
to the center of where the cup is in the seat in the rear yoke, which is 52.5 inches. Now, we know the length of the shaft we need to order,
we knew we were going to have a tight fit but not this tight.
That's exactly why I put the steering in first
instead of cutting the header up. We're gonna go ahead and move the steering over and bend it down towards the rack here. Now, even though it's a tighter bend, you're not gonna have any problems with the Flaming River joints binding up
with the
Hyman insert in the right spot.
See what I told you about the joints. No binding
the passenger side doesn't have anything in the way. So a nice fit was expected
for brakes. We're using the steel pedal assembly from will wood. Now it's got two pedals on it, one for the clutch, one for the brake. Now, the clutch has a slave mounted on the back side of it.
The brake pedal has two masters mounted on the back of it. Now, one for the front, one for the rear brakes. Now it's also got an adjustable bar which changes the bias from the front to the rear. It's an amount to the firewall with this backing plate on the front side.
Hey, guess what?
We got wheels and tires. Now,
these are 18 inch center machine, outer aluminum wheels, one piece for a rocket racing
and we wrapped them with G Force R ones from BF Goodrich. Now, these things are molded to a 4, 30 seconds of an inch tread depth, which means a couple of pace laps and you'll have them scuffed in and ready to go. Now, they also have a tread wear rating of 40. What that means is
the tread consistency is super soft and so that'll grip the track even better. Now, when I say soft look, this
comes right off now as a trade off, of course,
they're not gonna last as long, but that depends on your aggressive driving habits.
Plus the vintage look at these wheels brings out the nostalgia in all of us
and just like cars from the old days, this one's developed a serious attitude now for the exhaust
and the plan is to run two pieces of pipe to about here, mount both of our mufflers and then more pipe to say here, then we'll have the exhaust exit in front of the rear tire with a set of these.
Now we got them from manual bending solutions.com and various lengths to cover all of our options
to lower the decibels in our track car. We're using these Magna flow five by eight race mufflers. Now they're six inches long, have 3.5 inlets and outlets and a straight through design. Plus they're fully stainless steel.
This finishes up all the
fing and test fitting we had planned. Now we got to take everything off so the track pony can make a trip to the paint booth, then we can reassemble the parts plus add things like a radiator, fuel lines, brake lines, gauges glass. Well, this goes on,
we want to do an extra good job because after we complete the build and test it at the road course could be heading to your house. That's right. We're giving away this track car to some lucky driver
watch. For details on our website. We'll be back
build on a budget horsepower projects that save you time and money.
Now that the tear downs begun, let me show you something over here. The Ford small block has been a popular performance platform for a long time and in high performance applications, builders have determined that there's an insufficient oiling problem at the front of the block. Well, the oil pump pumps oil to this main gallery in the rear and then it goes to the front of the motor. Well, on its way there, it has to oil
all the main and rod journals as well as the total valve train. So by the time it gets to the front, it's insufficient. Well, here's a way to fix all that for less than 15 bucks
what you'll need from the parts store of your brass fittings, some line and from your garage at home, a drill, a tubing cutter, a tap, a drill bit and of course a pilot drill
starting in the front of the motor. We're going to run two feed lines.
The first step is to use the pilot bit to drill into the oil passage, then use the larger bit to open the hole up for the tap.
Now use oil when tapping the hole or you could risk breaking it off in the block.
Now thread, the fittings in using a little lock tight
on the rear of the block where the oil comes from. It's the same process just using the T fitting
now, just connect all of your fittings with the copper line. Now, some of you may be wondering, are there any interference problems? Well, the answer is no, it's under the intake line and it'll clear the lifters, push rods and the rest of the valve train components. Now, I think one of the coolest benefits of this whole thing is racers do it all the time and now you know how to do it at home.