HorsePower Builds
Want more content like this?
Join the PowerNation Email NewsletterParts Used In This Episode
2020 Software Solutions, Inc.
Bend-Tech PRO software.
Accufab,Inc.
Clamshell clamp custom 90mm throttle body, clamshell clamp, 4" ferrule, IAC block off plate, throttle position sensor.
Bassani Manufacturing
1 5/8" Equal length coated headers.
CP Pistons
Custom pistons, rings, wrist pins, and locks.
Crower Cams & Equipment Co., Inc.
4340 Forged steel crankshaft custom stroke, Maxi-Light #5 connecting rods, severe duty roller lifters,8620 billet roller camshaft.
Crower Cams & Equipment Co., Inc.
One-piece pushrod 5/16" 8.350 length.
Crower Cams & Equipment Co., Inc.
Shaft mounted rocker arms 1.6 ratio.
Design Engineering, Inc. (DEI)
2" X 50' Exhaust wrap, stainless steel locking ties, Silicone coating (black).
Dupli-Color
Dupli-Color Aerosol Truck Bed Coating.
Hellion Power Systems
Turbonetics Turbocharger (88mm), 16 gauge Stainless Steel hot and cold parts (Mild Steel Headers), Spearco high flow air to air intercooler, High flow Turbonetics wastegate, Silicone hose kit,
Stainless T-bolt clamp kit , 45 mm Blow-off valve, Oil feed and drain lines. All other necessary hardware to install kit.
High Performance Controls
The MFI system was designed from the ground up to provide a very simple and easy to understand tuning interface specifically for race only applications requiring very high fuel flow rates.
Nitro-Plate
NitroPlate Bright is a highly polished aluminum ceramic coating capable of withstanding 1300 degrees. NitroPlate Bright is perfect for headers that see high heat but can also be used on a number of items such as intake manifolds, brake rotors, rear end housings, control arms, brackets, wheelie bars, and hood hinges.
Robert Bosch LLC
High performance "blue top" fuel injectors. 1680cc (160lb/hr).
Summit Racing
Scat Type R fixed racing seats, bracket mounting, slider assemblies.
Trick Flow Specialties
Trick Flow CNC ported 225cc cylinder heads with 70cc combustion chambers, Performance head gaskets for use with o-rings, upper plenum kit.
World Products
Man O' War SBF engine block with 4.030 bore and 9.5" deck, Man O' War polished valve covers.
Video Transcript
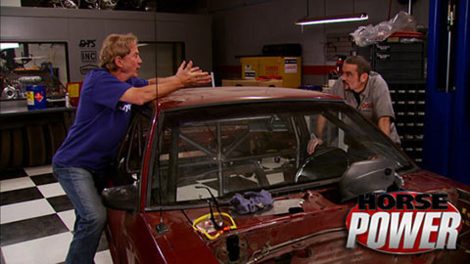
Hey guys, welcome to Xtreme 4x4, man. What are you talking about? We've got a Mustang in here. Let me correct them. Hey, welcome to horsepower. Now, a while back, we built an 830 horsepower big block Chevy for one of the extreme trucks and it's not just any project. It's our full on mud racing pickup. They're gonna throw in some serious slop and now it's time to return the favor and that favor is to finish the cage off in our turbo Mustang since he does have all the equipment down here. But first take a look at what we've done so far. The build up of our 382 inch small block started with the World Man O war cast iron block that we filled with a crow.
Cro
Molly forged crank billet rods, forged aluminum pistons from CP and a roller camshaft
on top. We bolted up some trick flow CNC machine race heads and went with crow
again for solid roller lift,
chrome
moley push rods and top that off with shaft mounted rockers, the intake manifolds, a two piece set up from trick flow and to feed it an F 90 throttle body from
a fab plus 100 and 60 pound bosch injectors.
Now, our turbo system was put together for us by Hellion power systems and it features an 88 millimeter y2k turbines
turbo.
The guys at Hellion recommend
Bassani
shorty headers with inch and five eights primaries leading into two inch collectors.
Now, smaller headers create more pressure to make more boost and they're mounted backwards because the turbo system mounts up front.
The owners of high performance controls helped us get the right tune in the engine one that helped the motor make almost 1000 horsepower on pump gas and well over 1100 on race fuel.
Now, this isn't the first time that this Mustang has gone under the knife. It already has a main hoop in place as well as some additional tubing.
That was when I just had a 5 L in it that was naturally aspirated Mike plans to put some serious power underneath the hood. So we need to upgrade the cage specifically. We need to add some front support here in case of a roll over, this roof could completely compress down on the driver
also by adding these front bars to stiffen up the chassis altogether. And we took some measurements on this whole cage that's already in here and there's a couple of issues. There's some tubes that don't meet at exact intersect points and therefore they're just adding weight and not strength. This main hoop is a little bit too low for my taste. And we looked at the whole thing over. We decided the best thing to do here is just cut this whole thing out, start from scratch.
Now, we designed the entire roll cage using Ben Tech Pro and that allows us to visualize all the tubing in a three dimensional environment. Now, if we're building this cage for a specific form of racing, we want to check with the sanctioning body to see if they have any design cues that we had to follow. In our case, we're after safety and weight and the key to that is what's called the intersect points on the cage. You can see if you look at the top view of this roll cage that all the tubes convert
to a single point that's going to carry all the load into one specific spot in the cage. And we went even further because we're going to be two seats in this roll cage. And we also converged them right down into the middle of the belt line bar. That means if there's an accident with this car, all the weight and everything that tries to get transferred through that cage will be stopped and we will stop in one solid center point. That way everyone will be safe. We're going to start with the main hoop
now for the cage and the mustang we're going to be using
and three quarter 120 while dom tubing.
Now, the size of tubing is specified by most racing sanctioning bodies.
This car should be legal to run on almost any track.
Now, the first piece will obviously be the main hoop. We'll bend up a second hoop to become the halo bar up at the roof line.
We'll notch it to fit and then grind the opening to get good weld penetration and all we have to do is measure for all the straight parts of the cage.
Now, Mike's going ahead and he's welding in all the joints that we can get to. Then we'll take the entire roll cage and drop it through the floor to weld the top side of the parts that we can't reach with the cage inside. Then we'll finish weld the cage to the frame and the tubes that run to the back and this car ready for the trap
stereo,
you nuts.
It fits really good.
All this thing turned out awesome, man. There's only one problem though.
You got a big block, Chevy out of the deal. I got some bent too. Well, I won't bill you for the tubing and we'll call it a deal. All right. That'll work. All right. This thing's gonna have a lot of power and with that cage, I'm definitely gonna feel safe behind the wheel. There's a few more things we have to do here. Once you get your seats in there, Mike, we'll drop in some door bars and once the engines under the hood we'll brace up these truck towers just for some extra safety in there. But aside from that,
I think you still got some other work to do. Yeah, we do. And during the break we're gonna haul this thing back down to our shop and continue working on the turbo staying.
I'm gonna stay here where the four by fours are.
We're back and you're looking at the future home of 1000 horse pump gas, small block. Will it fit in there? Well, we'll find out in a few minutes, but right now we gotta finish up inside.
You see, with that open area back there. Well, Mike Galley might choke on tire smoke and what have you. So time for some tin work and
time to call in another favor this time, Brett, a
muscle car man. Thanks a lot for coming down. What are you gonna do first?
Well, I guess we'll just start off by making some cardboard templates and see if we can get this thing all covered up. I guess you got a plan for the 10 though, right? Somewhat. Ok. You, you want me to help you?
Ok, if you want, I don't want,
it's pretty much the same drill with each section. First paper patterns that Brett tapes together.
Then down at the muscle car shop, he transfers the paper template to 10
and use a nibbler to cut it out with occasional help from the whole sauce
next the bender for a 90 degree angle.
And in the case of this large piece, he cuts it in half for easier installation.
Tell me
one more.
Yeah, that it's nice.
Oh, yeah.
Get back.
Well, looks like he didn't need my help after all. Looks pretty good. Now, all we have to do is click on everything in place and it's a done deal. But
this piece has gotta come out for now for phase two,
which involves cutting on the floorboard a lot first to make a channel for a sub frame connector using some of the steel tubing.
Secondly, well, over the years that floorboards become corroded and gotta be replaced
while Joe finishes up the cutting,
I'm going to bend the Subra connector to match the contour of the floor
with the Subra connector clamped in place. We can begin to weld it.
Next, we cut out the trans tunnel and then make a template
uh
by using the template. I made these U bins to be incorporated on the floor as a seat race and a mounting point for the tunnel in the floor.
You
now it's time to fit the seat and don't forget about the door bar because it has to clear the seat.
Then we mark for the first hole and measure for the other three.
Now we can drill them out
next, we can start on the floor with a little bit of trimming and fitting that's ready to be packed in place.
Using our measurements from the old tunnel, we transfer them to sheet metal and cut it to side,
using a pinch roller. We form it into our new tunnel
with it in place. Our core is almost done.
All right. Now that we've got the floor welded in, we're gonna lay some seam sealer in all the joints. Now, this is gonna do two things. One, it's gonna keep a lot of the smoke out of the inside of the car during a burnout. And number two, when we're driving it down the road, it's gonna keep the water from coming up to the floorboard.
Make sure you use enough sealer to completely fill the gap.
Then using duple color truck bed coating buddy and I sprayed the entire floor and firewall to protect the sheet metal from corrosion and give it a cool look. All right, while that stuff dries, let me show you the seats we're going to use in our turbo staying. Now, these are the extreme 1700 series from Scat. Now, they feature deep side
pockets and great lateral support. Plus they have extra cushioning in the sides to keep you in the seat while you're driving. Now, the seat frame is built of all steel and it's been tig welded for extra strength and durability. Now, they also have five openings for your racing harnesses and we got ours in a black velour finish.
We drilled through the floor using the holes we made earlier, then we bolted up from underneath.
All right, now that we have this seat installed, we're done with the Turbot
for today, but in a couple of weeks, we're gonna bring it back and get it real close to testing tune time. Meanwhile, Joe's on his way down to Georgia where a hot poker tournament and a car show are going to help a worthy cause you'll see in just a few minutes, man. I think this thing needs a little more rake to the back. Yeah, we got about three inches in the bowl. We're gonna be comfortable. Cool.
This car show proves two things. First that people are still doing cool things to old cars.
Secondly, more important hot rodders have a big heart
year one sponsors monthly Razel
and Bash
at its headquarters in Georgia.
They're all fun family outings for car lovers,
but this one is special.
It's an annual fundraiser to help fight a fatal children's disease called
Progeria.
Well, you know, Progeria is very dear to myself and my family because my sister Amy had Progeria.
She passed away in 85
and back then,
there really was nothing going on to, uh you know,
to help these Children with Progeria.
Chip boost, tirelessly supports the mission of finding a cure for Progeria
and Friday night.
The chips were down
this weekend's fundraising bash with Chip's name on it began with a poker tournament here in car collector Milt Robinson's toy bar.
Well, I was proud to be part of this event along with my pals, Courtney Hansen,
Kenny Wayne Shepherd and others.
But the real celebrity here was Sam Burns,
a
victim of the mysterious disease that causes premature, accelerated aging.
Thank you so much. I mean, I know it's Friday and
you could be watching baseball. You were doing something besides Gamble,
Dr
Scott Burns and his wife started the
Bia Research Foundation shortly after Sam was diagnosed.
And now we're in the midst of the first ever clinical trial and we have a drug that looks like it may possibly help these kids. And so we made a lot of progress in a short period of time and we're all part of the team trying to find the answer. So, thank you.
Well, thanks to the poker tournament and an ongoing auction, nearly 100 grand was raised before the Saturday car show
for the community of Brass
and to come out in the numbers that they do and support the calls and help us raise money for the private money that it takes to fund to try to figure out what that disease is exactly and how to cure it
is just phenomenal. And this community comes out in droves every year. This car show had a little of everything from classics and muscle cars to a limited edition Space Age Hot Rod called the Foose
Coop, a permit piler completely carbon fiber.
It's got a Shelby GT 500 motor in it. Fire on horsepower.
Uh don't know, tell you, I can't tell you what it weighs, but I know what it's really like.
You can often find interesting stories behind cool cars. Well, like this Nova with its gold plated engine, a car that went through an amazing comeback,
the car got destroyed. And Hugo, the whole building fell in on the car and he got real discouraged with the car
and I settled with the insurance and I put it in my garage and left it. My sons got together and I, I said, I'd like to fix the car. I offered the car for sale and nobody wanna give me two or $300 and I wouldn't do that. And I kept telling him, I said, dad
don't get discouraged. We can build the car and that's what led the car to where it is now.
It's gorgeous. I think, I mean, it's priceless to me because of the fact that my son has done it for me.
Like I said earlier, hot waters do have big hearts. Whether it means working on a car for a family member
are working on a better future for Children like Sam,
you know, it's all passion for.
Exactly.
That's why we build these cars. That's why we want to help the kids.
When you hear someone talking about CC A cylinder head, that means they're measuring the combustion chamber in cubic centimeters. Now, this information is extremely important to find the compression ratio of your engine with the piston you're using. Now, a lot of you may be saying, wait a minute, the manufacturer gives you those numbers. Well, unless the head is CNC machine, those numbers can be inaccurate. See the number can change from cylinder to
cylinder and if the head has been milled, that'll definitely change the size of the combustion chamber. Now, you can easily do this yourself at home with a few items you probably have just laying around like petroleum jelly and rubbing alcohol. Now, we got ours with Wintergreen because it's easier to see, but you can add a few drops of food coloring to clear alcohol and have the same thing. Now, a piece of plexiglass with a hole drilled off to one side
and we'll get to that in a few minutes. Finally, a barrette like this is ideal. But if you don't have one, you can use an eye dropper as long as it has CCS marked on it. There's a little math involved, but it's fairly easy to do.
Now, we need to make sure there's no built up gasket material on the mating surface and the combustion chamber is free of any carbon deposits. Now, we can install the spark plug the same way you would into your car.
Now, you wanna make sure the cylinder head is on a firm surface and at a little bit of an angle with the combustion chamber facing up. Then we wanna take some petroleum jelly
and wipe it around the outer diameter
of the combustion chamber.
The petroleum jelly is there to make a seal against the plexiglass. Now, this is the one I showed you earlier that can be easily made at home or you can use a fixture like this like we have. Now, it's flat on the bottom side and it'll go towards the combustion chamber. Now, gently press the plexiglass down onto the cylinder head. Now, if you watch closely, you'll see the petroleum jelly spread out and make the seal. Now the hole is in the plexiglass so we can fill it with fluid. And it also needs to be at the highest point in the combustion chamber which is above the spark plug. So all the air escapes as the fluid goes in.
If you're using a barrette,
pour in the liquid.
I
now each milliliter mark is equal to one CC. We're gonna fill ours up to 100 and 50 which will be plenty
position the barrette over the hole and open the valve slowly until a combustion chamber fills, take a reading on the barrette.
And that's your volume number in CCS
64 in our case. All right, to check for inconsistencies, make sure you check at least one chamber on both of the cylinder heads. That way, you know, everything's pretty even and you're not working with two mismatched heads
now you can remove the spark plug to drain the alcohol from the chamber onto a rag and use the rag to clean the jelly off the head surface and the plexiglass.
All right, most piston manufacturers will offer you the compression ratio to their set of pistons with any given combustion chamber size.
And just think the extra money you save doing this at home will give you a little extra cash to buy that new set of pistons,
whether you race your car, show it or just cruise in it. Here's something you and it will take a shine to. Nitro plate is the original ceramic coating that can give your components good looks and take the heat up to 1300 degrees. Now, while headers come first,
it's good for the entire exhaust system. Plus other components like well intake manifolds, timing covers control arms, you name it. Now, each coating is guaranteed for three years and prices vary according to the component that gets coded
when it comes to controlling under hood temperatures. D I's header wrap is designed to keep the heat in the exhaust until it evacuates the engine compartment.
The result is up to 50% reduction in heat
that results in more horsepower and engine protection.
Now, they've got wrap kits starting at just over nine bucks. Plus you can get the stainless steel ties and this high temp silicone coating to seal and protect your wrap.
Well, that's a wrap for this week's horse power. Hey, don't forget to join us. Next time we're gonna show you how to build a stout V8 for your daily driver. On an amazingly low budget. See you then.
Show Full Transcript
Cro
Molly forged crank billet rods, forged aluminum pistons from CP and a roller camshaft
on top. We bolted up some trick flow CNC machine race heads and went with crow
again for solid roller lift,
chrome
moley push rods and top that off with shaft mounted rockers, the intake manifolds, a two piece set up from trick flow and to feed it an F 90 throttle body from
a fab plus 100 and 60 pound bosch injectors.
Now, our turbo system was put together for us by Hellion power systems and it features an 88 millimeter y2k turbines
turbo.
The guys at Hellion recommend
Bassani
shorty headers with inch and five eights primaries leading into two inch collectors.
Now, smaller headers create more pressure to make more boost and they're mounted backwards because the turbo system mounts up front.
The owners of high performance controls helped us get the right tune in the engine one that helped the motor make almost 1000 horsepower on pump gas and well over 1100 on race fuel.
Now, this isn't the first time that this Mustang has gone under the knife. It already has a main hoop in place as well as some additional tubing.
That was when I just had a 5 L in it that was naturally aspirated Mike plans to put some serious power underneath the hood. So we need to upgrade the cage specifically. We need to add some front support here in case of a roll over, this roof could completely compress down on the driver
also by adding these front bars to stiffen up the chassis altogether. And we took some measurements on this whole cage that's already in here and there's a couple of issues. There's some tubes that don't meet at exact intersect points and therefore they're just adding weight and not strength. This main hoop is a little bit too low for my taste. And we looked at the whole thing over. We decided the best thing to do here is just cut this whole thing out, start from scratch.
Now, we designed the entire roll cage using Ben Tech Pro and that allows us to visualize all the tubing in a three dimensional environment. Now, if we're building this cage for a specific form of racing, we want to check with the sanctioning body to see if they have any design cues that we had to follow. In our case, we're after safety and weight and the key to that is what's called the intersect points on the cage. You can see if you look at the top view of this roll cage that all the tubes convert
to a single point that's going to carry all the load into one specific spot in the cage. And we went even further because we're going to be two seats in this roll cage. And we also converged them right down into the middle of the belt line bar. That means if there's an accident with this car, all the weight and everything that tries to get transferred through that cage will be stopped and we will stop in one solid center point. That way everyone will be safe. We're going to start with the main hoop
now for the cage and the mustang we're going to be using
and three quarter 120 while dom tubing.
Now, the size of tubing is specified by most racing sanctioning bodies.
This car should be legal to run on almost any track.
Now, the first piece will obviously be the main hoop. We'll bend up a second hoop to become the halo bar up at the roof line.
We'll notch it to fit and then grind the opening to get good weld penetration and all we have to do is measure for all the straight parts of the cage.
Now, Mike's going ahead and he's welding in all the joints that we can get to. Then we'll take the entire roll cage and drop it through the floor to weld the top side of the parts that we can't reach with the cage inside. Then we'll finish weld the cage to the frame and the tubes that run to the back and this car ready for the trap
stereo,
you nuts.
It fits really good.
All this thing turned out awesome, man. There's only one problem though.
You got a big block, Chevy out of the deal. I got some bent too. Well, I won't bill you for the tubing and we'll call it a deal. All right. That'll work. All right. This thing's gonna have a lot of power and with that cage, I'm definitely gonna feel safe behind the wheel. There's a few more things we have to do here. Once you get your seats in there, Mike, we'll drop in some door bars and once the engines under the hood we'll brace up these truck towers just for some extra safety in there. But aside from that,
I think you still got some other work to do. Yeah, we do. And during the break we're gonna haul this thing back down to our shop and continue working on the turbo staying.
I'm gonna stay here where the four by fours are.
We're back and you're looking at the future home of 1000 horse pump gas, small block. Will it fit in there? Well, we'll find out in a few minutes, but right now we gotta finish up inside.
You see, with that open area back there. Well, Mike Galley might choke on tire smoke and what have you. So time for some tin work and
time to call in another favor this time, Brett, a
muscle car man. Thanks a lot for coming down. What are you gonna do first?
Well, I guess we'll just start off by making some cardboard templates and see if we can get this thing all covered up. I guess you got a plan for the 10 though, right? Somewhat. Ok. You, you want me to help you?
Ok, if you want, I don't want,
it's pretty much the same drill with each section. First paper patterns that Brett tapes together.
Then down at the muscle car shop, he transfers the paper template to 10
and use a nibbler to cut it out with occasional help from the whole sauce
next the bender for a 90 degree angle.
And in the case of this large piece, he cuts it in half for easier installation.
Tell me
one more.
Yeah, that it's nice.
Oh, yeah.
Get back.
Well, looks like he didn't need my help after all. Looks pretty good. Now, all we have to do is click on everything in place and it's a done deal. But
this piece has gotta come out for now for phase two,
which involves cutting on the floorboard a lot first to make a channel for a sub frame connector using some of the steel tubing.
Secondly, well, over the years that floorboards become corroded and gotta be replaced
while Joe finishes up the cutting,
I'm going to bend the Subra connector to match the contour of the floor
with the Subra connector clamped in place. We can begin to weld it.
Next, we cut out the trans tunnel and then make a template
uh
by using the template. I made these U bins to be incorporated on the floor as a seat race and a mounting point for the tunnel in the floor.
You
now it's time to fit the seat and don't forget about the door bar because it has to clear the seat.
Then we mark for the first hole and measure for the other three.
Now we can drill them out
next, we can start on the floor with a little bit of trimming and fitting that's ready to be packed in place.
Using our measurements from the old tunnel, we transfer them to sheet metal and cut it to side,
using a pinch roller. We form it into our new tunnel
with it in place. Our core is almost done.
All right. Now that we've got the floor welded in, we're gonna lay some seam sealer in all the joints. Now, this is gonna do two things. One, it's gonna keep a lot of the smoke out of the inside of the car during a burnout. And number two, when we're driving it down the road, it's gonna keep the water from coming up to the floorboard.
Make sure you use enough sealer to completely fill the gap.
Then using duple color truck bed coating buddy and I sprayed the entire floor and firewall to protect the sheet metal from corrosion and give it a cool look. All right, while that stuff dries, let me show you the seats we're going to use in our turbo staying. Now, these are the extreme 1700 series from Scat. Now, they feature deep side
pockets and great lateral support. Plus they have extra cushioning in the sides to keep you in the seat while you're driving. Now, the seat frame is built of all steel and it's been tig welded for extra strength and durability. Now, they also have five openings for your racing harnesses and we got ours in a black velour finish.
We drilled through the floor using the holes we made earlier, then we bolted up from underneath.
All right, now that we have this seat installed, we're done with the Turbot
for today, but in a couple of weeks, we're gonna bring it back and get it real close to testing tune time. Meanwhile, Joe's on his way down to Georgia where a hot poker tournament and a car show are going to help a worthy cause you'll see in just a few minutes, man. I think this thing needs a little more rake to the back. Yeah, we got about three inches in the bowl. We're gonna be comfortable. Cool.
This car show proves two things. First that people are still doing cool things to old cars.
Secondly, more important hot rodders have a big heart
year one sponsors monthly Razel
and Bash
at its headquarters in Georgia.
They're all fun family outings for car lovers,
but this one is special.
It's an annual fundraiser to help fight a fatal children's disease called
Progeria.
Well, you know, Progeria is very dear to myself and my family because my sister Amy had Progeria.
She passed away in 85
and back then,
there really was nothing going on to, uh you know,
to help these Children with Progeria.
Chip boost, tirelessly supports the mission of finding a cure for Progeria
and Friday night.
The chips were down
this weekend's fundraising bash with Chip's name on it began with a poker tournament here in car collector Milt Robinson's toy bar.
Well, I was proud to be part of this event along with my pals, Courtney Hansen,
Kenny Wayne Shepherd and others.
But the real celebrity here was Sam Burns,
a
victim of the mysterious disease that causes premature, accelerated aging.
Thank you so much. I mean, I know it's Friday and
you could be watching baseball. You were doing something besides Gamble,
Dr
Scott Burns and his wife started the
Bia Research Foundation shortly after Sam was diagnosed.
And now we're in the midst of the first ever clinical trial and we have a drug that looks like it may possibly help these kids. And so we made a lot of progress in a short period of time and we're all part of the team trying to find the answer. So, thank you.
Well, thanks to the poker tournament and an ongoing auction, nearly 100 grand was raised before the Saturday car show
for the community of Brass
and to come out in the numbers that they do and support the calls and help us raise money for the private money that it takes to fund to try to figure out what that disease is exactly and how to cure it
is just phenomenal. And this community comes out in droves every year. This car show had a little of everything from classics and muscle cars to a limited edition Space Age Hot Rod called the Foose
Coop, a permit piler completely carbon fiber.
It's got a Shelby GT 500 motor in it. Fire on horsepower.
Uh don't know, tell you, I can't tell you what it weighs, but I know what it's really like.
You can often find interesting stories behind cool cars. Well, like this Nova with its gold plated engine, a car that went through an amazing comeback,
the car got destroyed. And Hugo, the whole building fell in on the car and he got real discouraged with the car
and I settled with the insurance and I put it in my garage and left it. My sons got together and I, I said, I'd like to fix the car. I offered the car for sale and nobody wanna give me two or $300 and I wouldn't do that. And I kept telling him, I said, dad
don't get discouraged. We can build the car and that's what led the car to where it is now.
It's gorgeous. I think, I mean, it's priceless to me because of the fact that my son has done it for me.
Like I said earlier, hot waters do have big hearts. Whether it means working on a car for a family member
are working on a better future for Children like Sam,
you know, it's all passion for.
Exactly.
That's why we build these cars. That's why we want to help the kids.
When you hear someone talking about CC A cylinder head, that means they're measuring the combustion chamber in cubic centimeters. Now, this information is extremely important to find the compression ratio of your engine with the piston you're using. Now, a lot of you may be saying, wait a minute, the manufacturer gives you those numbers. Well, unless the head is CNC machine, those numbers can be inaccurate. See the number can change from cylinder to
cylinder and if the head has been milled, that'll definitely change the size of the combustion chamber. Now, you can easily do this yourself at home with a few items you probably have just laying around like petroleum jelly and rubbing alcohol. Now, we got ours with Wintergreen because it's easier to see, but you can add a few drops of food coloring to clear alcohol and have the same thing. Now, a piece of plexiglass with a hole drilled off to one side
and we'll get to that in a few minutes. Finally, a barrette like this is ideal. But if you don't have one, you can use an eye dropper as long as it has CCS marked on it. There's a little math involved, but it's fairly easy to do.
Now, we need to make sure there's no built up gasket material on the mating surface and the combustion chamber is free of any carbon deposits. Now, we can install the spark plug the same way you would into your car.
Now, you wanna make sure the cylinder head is on a firm surface and at a little bit of an angle with the combustion chamber facing up. Then we wanna take some petroleum jelly
and wipe it around the outer diameter
of the combustion chamber.
The petroleum jelly is there to make a seal against the plexiglass. Now, this is the one I showed you earlier that can be easily made at home or you can use a fixture like this like we have. Now, it's flat on the bottom side and it'll go towards the combustion chamber. Now, gently press the plexiglass down onto the cylinder head. Now, if you watch closely, you'll see the petroleum jelly spread out and make the seal. Now the hole is in the plexiglass so we can fill it with fluid. And it also needs to be at the highest point in the combustion chamber which is above the spark plug. So all the air escapes as the fluid goes in.
If you're using a barrette,
pour in the liquid.
I
now each milliliter mark is equal to one CC. We're gonna fill ours up to 100 and 50 which will be plenty
position the barrette over the hole and open the valve slowly until a combustion chamber fills, take a reading on the barrette.
And that's your volume number in CCS
64 in our case. All right, to check for inconsistencies, make sure you check at least one chamber on both of the cylinder heads. That way, you know, everything's pretty even and you're not working with two mismatched heads
now you can remove the spark plug to drain the alcohol from the chamber onto a rag and use the rag to clean the jelly off the head surface and the plexiglass.
All right, most piston manufacturers will offer you the compression ratio to their set of pistons with any given combustion chamber size.
And just think the extra money you save doing this at home will give you a little extra cash to buy that new set of pistons,
whether you race your car, show it or just cruise in it. Here's something you and it will take a shine to. Nitro plate is the original ceramic coating that can give your components good looks and take the heat up to 1300 degrees. Now, while headers come first,
it's good for the entire exhaust system. Plus other components like well intake manifolds, timing covers control arms, you name it. Now, each coating is guaranteed for three years and prices vary according to the component that gets coded
when it comes to controlling under hood temperatures. D I's header wrap is designed to keep the heat in the exhaust until it evacuates the engine compartment.
The result is up to 50% reduction in heat
that results in more horsepower and engine protection.
Now, they've got wrap kits starting at just over nine bucks. Plus you can get the stainless steel ties and this high temp silicone coating to seal and protect your wrap.
Well, that's a wrap for this week's horse power. Hey, don't forget to join us. Next time we're gonna show you how to build a stout V8 for your daily driver. On an amazingly low budget. See you then.