HorsePower Builds

Video Transcript

Hey, welcome to Horsepower TV. Where Mopar

mania has invaded our shop again

before we jump on our next phase of Project Kingfish.

I wanna show you an awesome example of why Plymouth Muscle cars make for perfect street machine build ups. This is a 68 roadrunner owned by Dan Gillis who's dropped a 440 crate engine under his hood

along with a shot of nitrous and brand new electronics. Now, out here, you gotta love this, that screaming yellow paint job's been decorated with a Gary Miser

graphics creation.

Of course on back he's shaved the door handles and inside

there's a full row cage red, of course to match the graphics, racing seats. And hey,

how about that custom laser cut dash.

Of course, late sixties, Barracudas make popular platforms too. And that's why we hooked you with our project Kingfish this 67 coup here. Now, our goal just like the road runner there was to build a street

Mopar one that would hook and handle with the best of them.

We started our a body project with a magnum 360 short block from jigs

and then we added a roller valve train from comp CAMS.

A pair of Edelbrock performer heads and an air gap intake along with a 750 demon carb.

Then we button up the bottom end with a moroso oil pan.

But before dropping the new motor in, we had to get rid of the one that was in the car, a 440 RB motor that was ok for drag racing.

But our goal is to have a more balanced drivable street machine

that'll go through the curves as well as it goes down the straight away.

So at Steven's performance in Rogersville, Alabama, we found a used correct K member and bolted it up to the

Kudus frame.

Then back at the shop, we dropped in our magnum 360 along with some new headers and exhaust from tube technologies.

We installed a TCI Street fighter 727 torque flight trans

and finished up the day with a power master mini starter,

a mallory high fire ignition

and be cool radiator with twin electric fans.

The last time we had it in the shop, we installed a new Dana rear end from DTs,

some new axles from strange engineering

and upgraded the brakes with a disk set up from stainless steel brakes.

Finally, with the drive line modifications complete, we had to measure for a new drive shaft

after calling in our measurements to the drive line shop. Here's what we got. It's a three inch aluminum drive shaft with heavy duty 1350 U joints and a steel slip yoke. Now, this thing's also been dynamically balanced to eliminate any vibrations. And, well, I think it's time to slip this thing into place and see how it fits.

Well, we'll hold your horses there, partner. We got a clearance issue to cope with. First, that d

is a much larger rear end than the eight and three quarter we pulled out of here. So the pinion offset puts the yoke here

might close to this muffler. In fact, it's rubbing. So we got to reposition the pipes at least and maybe do something about those mufflers. Well, I think the first thing we wanna do though is cut this tack. We right here at the crossover pipe. Now that's gonna allow us to spread these head pipes apart and well, if we're lucky, they, we'll get the clearance, we need that way.

After cutting and spreading the head pipe,

you can react the crossover pipe.

Well, it looks like that gave us a clearance we needed. Now, let's try the drive shot.

Oh, man, one thing's going right today. That thing fits just like it should. Now we have to do is put the straps on the yoke. Yeah. Well, don't get the big head yet. Bud. That big Dane is also causing a problem back here. This aluminum girdle we installed for extra strength is gouging right into the factory fuel tank. Now, unless we want to put on an unscheduled fire show, we better give that rear end some room.

Well, the way I see it, we've got a couple of options. We can remove the gas tank and have it modified to give us the clearance that we need around that rear end. Or we can just get rid of the whole gas tank and put a fuel cell up in the trunk.

Now, you're talking something like what Dan's done to his roadrunner here. Check out this custom installation. He's got the trunk pan to make room for the cell

and he's plunged the system with dash six stainless braided line that feeds into that big filter before the fuel goes to the pump, the regulator and on into the engine. And that is one nice installation.

But I want you to take a good look here at this substructure he's built, not only does it support the fuel cell, but it also gives it a great place to attach firmly to.

And he's added this line here that vents all the vapors out of the cell and he's added this fuel scenting in it that runs the gauge up in the dash.

If you're looking for a textbook installation of a fuel cell, I'd say this would be a great one to pay attention to.

Now, what do you say? We get the old tank out of the fish

after draining the fuel from the stock tank, remove this access panel in the trunk to allow the filler neck some room to move around.

Then under the car disconnect the fuel lines

and with the tank supported,

remove the strap, holding the tank in place.

Finally, with a little bit of rattling, we can now remove the tank.

Thanks partner. You're welcome. Now that's gonna give us the room that we need around the rear end. You bet. Now, after we do some shopping for a new fuel cell, we'll show you how to install one of those things in a few weeks. Yeah, but right now we're gonna shift gears. We're gonna show you how to put a performance shifter in the old Kingfish there. But we're gonna take a little bit of a break first and we'll be right back. So stay with us

after we install that performance shifter and wire it up, we'll put the brakes on Project Kingfish, literally with a new front disk set up and we'll show you how to run the line. So don't run away.

Hey, welcome back to the shop in case you're just joining us, we've already bolted a new drive shaft in Project Kingfish here. Then we remove the gas tank to give us some more clearance around that rear end. And hey, we're gonna replace it with a new fuel cell in a few weeks, but right now we got the old ka

back on the ground and ready to take on another project.

Yeah. As we told you earlier, we've got a new 360 magnum crate engine in this thing along with a new torque flight trans,

but we're trying to shift gears with a worn out shifter. That's about as shiftless as my partner over there.

This one is mounted in a beat up old console that we're not too crazy about. So we remove both of them to make way for today's upgrade. I'll get started by removing the handle, then we can get the console out of the way and access the shifter base

shiftless. Huh? Well, if that's your idea, reverse psychology to help get me to work, man, you can just park it.

Now, let me show you the shifter that we chose.

It's the pistol grip quarter stick shifter here and it uses the same shifting mechanism that's made this thing so popular for so many years for both racing and street applications. But they've designed this billet pistol grip for a new look and to help you get a handle on each gear change. Plus they've added this button right here that you can use to activate a line lock, nitrous or even a trans break. Now, Hurst has also improved their design with this built in neutral safety switch and a weather pack connection that's gonna make wiring up that button a breeze. Now, you'll also get the cable brackets and wiring. Well, just everything that you need to complete the installation. Now, I think it's about time to go check on my partner over here. See, how he's doing.

Well. How's it going? Great timing. I was just getting this old shift out of the way. Let me have that one. Now,

now let's see how she works.

Oh, that's gonna be fine. The old location works perfect. Of course, we're replacing floor shifters. So there's already a hole here for the cable. But if you're converting from a column shifter, well, you'll need to drill a hole about six inches in front of the shifter location.

After mounting the shifter and running the cable through the floor pan past the island end of the cable through the mounting hole and secure it with the supplied clip,

then take the islet and attach it to the shifter pin.

Well, now we need to get the old kingfish in the air so we can get rid of the old shift or hardware and connect up that new cable

and everything is sure tied up in there between the transmission and the tunnel. So I'm gonna show you how it all goes together out here where you can get a good look at it. Now, this shifter arm attaches to the side of the transmission, then this pin on the end of the cable goes right in the hole right here.

You can make the gear changes. This bracket holds the cable in place and it just bolts right up here on the side of the transmission pan.

Of course, once you get everything together, you just put the transmission and the shift are neutral and you make any adjustments right here on this threaded end of the cable.

Well, now that Chuck's got everything hooked up down there, let's run through the gears,

make sure they're working properly. Yeah, it feels good.

Now we can secure that cable with a cotter pin.

Well,

that pretty much takes care of things under here, but I've got a couple of tips for you when you're routing that shift or cable. Make sure that you don't put any sharp kinks or bends in it. Anything that'll put that cable in a bind. Plus you want to keep it away from head or heat,

anything that rotates and well, really anything that moves under here

with the car back down. Now let's jump on the wiring for our neutral safety switch. Now to do that, we wanna remove this pin here at the base of the shifter.

Now, raise the switch, release it from the arm

and you can reveal these two spade terminals. Then go ahead, wire it in series with your existing safety switch wiring.

Of course, if you didn't already have a floor shifter, you'll have to go under the dash and tap into the factory harness

with the wiring completed. You need to go ahead and make sure your engine will start in both the neutral and park positions. Of course, for us, we need to wait until we get that fuel cell installed. Yeah, but right now we need to take a short break. However, we're back with even more project Kingfish after these messages,

still later, some classic wheels for a classic muscle car

and a little upholstery 101. As we get some expert advice on how to cover a seat in style. Keep your seat till we come back.

Hey, thanks for staying with us as we finish today's work on project Kingfish with new disc brakes to match the ones out back. Now, this ought to go pretty easily since we've already installed a new master cylinder and adjustable proportioning valve.

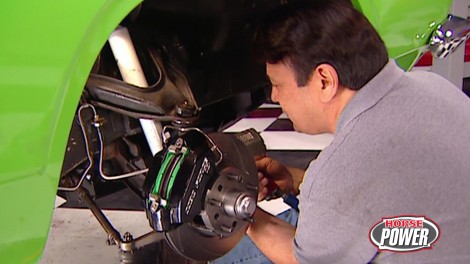
Well, I just removed the front drums here. And what we've got left is the spindle still attached to the control arms. Now, the new brakes are gonna bolt right up here after I clean some of this here stuff up to give us a clean mating surface. Our front disc kit from stainless steel brakes includes these 11

and a quarter inch slotted rotors, four piston aluminum calibers that mount on these special brackets here. Of course, you also get pads, wheel bearing seals, brake lines and hardware. But the first thing we bolt up is this caliber bracket,

but before we can bolt it up, we need to drill out this hole on the spindle to a half inch.

Then after aligning the bracket with a capper mounting holes to the rear, mount it to the spindle

and install a spindle spacer with a cup side facing in

Well, now we're ready to install the rotors. You'll notice they come with a dual bolt pattern here, five on four inches and five on 4.5. Now we chose the larger pattern so it would match our rear end. Oh, by the way, these studs,

they just drive in from the backside.

Now, you can install the rotor on the spindle

along with the outer wheel bearing

after adjusting the wheel bearings,

install a collar pin

with a flex line and the pads already installed in the Caler slide. These spacers over the Caler mounting bolts and position the caliper

over the rotor.

After bolting into the Caler bracket, torque the mounting bolts to 55 ft pounds.

Finally attach the flex lines to the original brake lines

and install the retainer clip.

Of course, you wanna turn the wheel lock to lock to make sure you don't have kinks or binding in the brake lines.

Once you're satisfied that everything fits,

go ahead and bleed the brakes.

Everything looks good under here.

Well, now that we've got disc brakes all the way around, we're gonna install a set of these Edelbrock I shocks up front here just like we did out back

that way. We'll make sure that we've got balance breaking and handling to keep the old kingfish here on course.

Since our fish swims on air instead of water, we need some good all around street tires. So we opted for these Firestone Firehawk SZ 250 EPS. In fact, we showed you these a few weeks ago when we used them with our mount mate

to determine the proper wheel size and offset.

And here's the wheel we came up with. It's an updated version of the classic Krager Ss,

like the original, it comes with a five spoke design and chrome finish.

But now you get these with a 17 inch diameter so you can take advantage of the improved handling and traction of today's high tech rubber.

No doubt that is a classic design and it's gonna complement the classic lines of our 67 Barracuda perfectly. Now check this out Kreger designed the spokes of this wheel, so they'll clear the calipers of most big brake systems and with that 4.5 inch bolt circle we respect

and that thing tucks right up in there perfectly,

man. That is one fine looking fish. Of course, we'll take it for a ride, but without a gas tank, we wouldn't get very far. Well, don't you get too far from your seat? There's more horsepower TV coming right up.

Extra. Crash course on seat upholstery that may keep you glued to your seat.

Then from high

tech hoses to the latest in brake set ups on horsepower, hot parks,

horsepower TV. S Quick Tech is brought to you by

Wyotech.

You know what they say, don't judge a book by its cover

and any street machine that spiffed up to the max on the outside

gotta be just as cool on the inside.

Those seats you sit on are usually the worst for wear and the first to wear out.

Well, here in the trim in upholstery shop at

W Tech,

they teach students everything from headliners and carpets

to door trims and of course seats.

Well, instructor Dan Dermott agreed to give us a crash course in seat cover surgery.

That's a seat I just saw you sitting on, isn't it, Dan? Yes, sir.

We're gonna be using this today to uh show you guys how to make a seat cover without a pattern.

Now, we're talking motorcycle seats or car seats.

Oh, a little bit of both

on this motorcycle seat. This seam right here, we will lay out

the same way that we'll lay out

this seam on a car seat.

Dan first removes the felt backing from the bottom of the seat.

Then the seat cover itself can come off.

He uses a sharpie to draw a line where the new seam of the cover will be

and he makes a center mark and alignment marks about every four inches.

He lays down a piece of four mil translucent plastic to transfer the seam line

and alignment marks.

Then

he can cut out the pattern.

Why? Only half a pattern?

Well, when we have half a pattern here

for this plate,

we take it and we flip it over to make the other side. This gives us a symmetrical plate

in doing that.

It'll allow us to have this seam come out in the same spot on both sides of the seat

and give us the same corner in the back.

Pretty cool. That'd be pretty tough to freehand that symmetrically. Right. For sure.

Here's the new black vinyl material he's using and the pattern pieces are transferred to it

by first tracing around them, adding an extra half inch to allow for the scene.

Also, he transfers the alignment marks,

cutting out the pieces is next

and here's where those alignment marks are critical. Dan carefully matches them up

before he sows the inserts to the boxing

time. Now to spray glue around the backside edges of the finish cover but not the center.

It looks like you're just about done with this thing. Sure are. All we gotta do is finish trimming the bottom out, put the felt on and we should be all set to go.

One last thing. The reason we didn't uh glue down the insert here is so that we ended up with a nice smooth finish and not showing any imperfections in the F.

Ok. Well, that you did, that's a fine seed. And uh thanks for letting us in on some of your deep seeded secrets. Not a problem.

Horsepower T V's hot parts is brought to you by Js.

One call. Gets it all one click, gets it quick.

Hey, if you're putting your race car on a diet. Well, here's a way to save a few pounds. These pro light hoses from Earls weigh half as much as these stainless braided hoses and they still provide the same maximum pressure capabilities. Now, this outer nylon braid is bonded to an inner hose liner that remains flexible down to 40 below. Plus it's easy to cut

and you won't cut your fingers whenever you install those new ends. Well, speaking of that, their

Anno tough ends are the perfect complement where they're matching black finish,

hard

anodizing, improves the wear characteristics and corrosion resistance of these aluminum fittings at an affordable cost. Don't like black ends. Well, they're also available with a bright dip finish as well. Now you can finish off your race cars plumbing, save some weight and save money too. Just check your dealer for prices

after you've plumb your race car, you may wanna plumb your street cars exhaust with these headers for LS one powered vehicles from Stainless Works. Now, this set will fit 97 and up C five Corvettes, but they also have them for 98 and up F bodies and for street rods too.

Now, all of them are made from three or four stainless mandrel bent, fully tig welded tubes with C MC laser cut

FLS. Now, they also include all the fittings for sensors and pollution equipment. So they're 50 state smog legal and for about a grand in legal tender, you can have a set for your ride. If your ride happens to be a Honda, here's something that'll make you stop and take notice. It's a rear disc upgrade kit from beer that'll convert either drum or OEM disk for approved stopping massive 12 inch rotors are mated with aluminum PB R calipers and build aluminum caliber

packets for an easy bolt on. That's effective as it is good looking. Now, if you're looking for a good way to bring your Honda to a halt prices on the start at 895. Well, that's a good price. You know, we did a lot of work on old kingfish today, but don't tell anybody, but I'd just as soon be working on your mustang.

Really? Well, your secret is good with me but no secret about next week's show, it's gonna be a good one. See you then. In fact, I'll bring the mustang in. Yeah, you do that.
Show Full Transcript