HorsePower Builds

Video Transcript

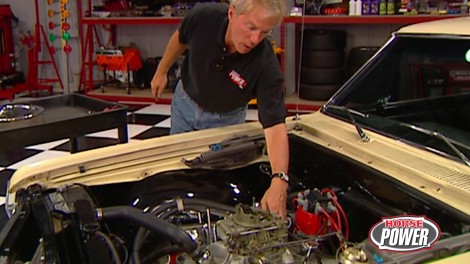
Hi, welcome again to the horsepower shop. Fuel injection has been around for quite a while now. And from the earliest mechanical units to the latest computer controlled systems. Well, it's always been a more efficient, more powerful way to feed fuel to your engine. That's right now, Chevy first introduced fuel injection back in 1957 with their 283 and this 327 powered vet was the last to use the mechanical style in 65.

Now, fuel injection is sure come a long way since then.

And today you can't even buy a new vehicle with a car bonnet.

Of course, Chuck still got one on the 283 and his 65 wagon here. Now, you might remember a short time ago, we added this Holly Carb

Edelbrock intake and MS D ignition, after which we made about 100 80 rear wheel horsepower on the dyno Jet, but that's still old tech on an old car. So today we're gonna upgrade the fuel system with multi point electronic fuel injection.

This kit from Edelbrock contains almost everything that you need to complete the conversion. Now, the intake mounts a 750 CFM throttle body and fuel injectors right down here in the runners.

It also includes a fuel pump and filter, an ignition upgrade fuel lines and a wiring harness that connects everything to the ECU. Now, final fuel and spark calibration are dialed in with this handheld programmer.

Well, we've already disconnected the battery before draining the radiator and removing the carburetor. I

guess. Now we can pull this distributor,

then remove the alternator brackets

and the upper radiator hose,

the temp sending you to the next to go

and finally the intake itself.

Well, now we're ready to drop in the new intake. Now, I've gone ahead and cleaned the mating surfaces dropped in our new Mr gasket ultra seals and laid in a bead of silicone on each end. Now, Joe, if you'll give me a hand with this, you bet we wanna drop it straight down and not disturb those gaskets. Good job. There we go,

snug the intake bolts down, starting from the center working in a clockwise direction,

then tor

them down to 25 ft pounds,

then reconnect any vacuum lines.

The transmission kick down linkage

and the throttle linkage.

Be sure to check it for smooth operation all the way from idle through wide open.

Well, now we can test fit this harness by connecting it to the injectors and as many sensors as possible. There you go.

This way, we'll find a suitable place to drill a hole in the firewall to pass the harness through. Oh,

by the way, we want a spot that's away from intense heat and one that offers access from inside the car.

Ok. Chuck, start sending it through.

There we go.

Now, this one is for the power relay.

It supplies 12 volts to our computer.

Next, this big one here

is for the ECU itself.

Finally,

this one is for that handheld programmer you saw earlier.

Oh, by the way, we took the inside of the glove box out and modified it

so we can fit the ECU right inside. Pretty slick. Huh?

That way it doesn't take up much room. It stays dry and well protected.

The distributor needs to be modified with this new pickup and shutter wheel. That'll give the computer both engine speed and firing location. Now, nothing wrong with MS D but they use electronics that just aren't compatible with this modification. So we're gonna be using a stock Delco distributor. Now, the first thing that we wanna do

is go ahead and drive out this roll pin so we can remove the drive gear and the shims

then remove the distributor shaft,

the vacuum advance

and the ignition module.

Then we can go ahead and install the new pickup in the distributor housing.

Well, next, we can go ahead and install the shutter wheel on the rotor mounting plate.

And since the computer is gonna control timing advance, we'll install this little timing lock plate right here.

That's it.

And we'll hold it in place

with the original advanced springs.

After sliding the shaft back into the housing, give it a spin to make sure the shutter teeth don't interfere with the pickup. Now, once that checks out,

we're ready for the shims

and the drive gear.

Now, what you want down here on this end is 15 to 30 thousands clearance. And well, if that checks out, you can go ahead and reinstall the rotor

with the engine at 10 degrees before top dead center, we can go ahead and drop in the distributor. Now, you wanna make sure that the rotor points to the number one plug position, which we've marked here on the distributor body.

Once the distributors down, we can go ahead and hook it up to the ignition amplifier that we've mounted here on the firewall while Chuck completes the ignition. Here's something else to spark your interest. A word from our sponsors. We'll be back with our EF I conversion after this.

Hi, welcome back to the shop and our fuel injection swap.

Well, so far we've installed an Edelbrock intake and throttle body

laid in our wiring harness mounted the computer inside the car and modified this distributor.

Well, now we need to upgrade the Chevelle fuel delivery system after we get it up in the air,

all fuel injection systems need a return line for fuel that bypasses the injectors. So the first thing we're gonna do is add one to our pickup and center assembly. Now you may have to drop your tank to do this,

but check this out.

Looks like we got lucky.

Ours is gonna come out with the tank still in place.

All right, there you go. Thanks. You know, needless to say when you work around gas fumes, you wanna be extra careful. That means an empty tank, good ventilation and of course no smoking. Now with this fuel sending unit out, we now want to drill a 5/16 hole in it for that new return line.

Next we bend this return line so it directs return fuel away from the pickup.

We also made this little support brace

to attach the two of them. Now I'm gonna take all of this to a local radiator shop and have it all soldered together.

Meanwhile, I've been plumbing the fuel pump and the filter. Now, since electric pumps push a whole lot better than they pull. This is a good location. It will keep it low

and close to the gas tank.

Now you'll notice it's also directional. So you wanna make sure that the arrow points in the direction of flow,

clean fuel is a must for fuel injection

since the smallest particle can easily clog an injector and cause poor performance. Now, our kit came with this in line fuel filter that we're gonna mount right here between the pump and the engine.

Well, here's our modified sending unit with return line. We've added and it's ready to go back in the tank.

We're using our old feed line here as part of our return line that we've connected with this rubber hose to the one we just added.

Now, Edelbrock includes this high pressure hose that we'll use as our new supply line.

Our next job under here is to put power to the pump. Now, this harness connects to the terminals on the pump.

The other end goes to the main harness up in the engine compartment.

Finally add the 02 sensor to the passenger side head pipe.

Make sure you mount it. So the harness connector will reach

well, after rechecking our connections, topping off the coolant and reconnecting the battery. Well, I guess we're ready to fire this thing up. Go ahead crank it. Chuck

Well, now we can dial in our fuel injection using this handheld controller.

It'll help compensate for various engine combinations and well, once we get everything set, we'll strap it to the

dyno Jet and see what kind of power we're making.

Well, what's the story?

220 horsepower? That's quite a jump in that 180 baseline. Yeah. And the drive building mileage is probably gonna pick up too. Now, it cost us about $1900 for this setup and took us a weekend in the driveway money well spent. I'd say you bet. Well, that's it for our EF I project, but there's more horsepower ahead. Stay tuned

next bear

mania invades Gateway International Raceway in America's Heartland

and Chuck gets to the heart of high performance breaks in this week's quick tech.

This week it's an annual event at Gateway International Raceway in Saint Louis where you won't find any Chevys, no Fords, but uh, anybody like

bears,

you get the drift.

It's billed as a monster Mopar

weekend.

An event that's grown from humble beginnings to a mash that truly lives up to its name. The first year we did it, we had 80 cars and we thought we were uh just knocking them dead.

And here 16 years later, 16 years later, it's 800 to 1000 cars. Some of those cars came to race and classes ranging from the max. We shoot out to the Indy quick 16

exhibition racers included Chris de

Salvo in his N hr A pro stock truck and even this Ram Club Jet truck, a kerosene burning door slammer piloted by Paul Hot Rod

Stiner.

That pass we just did was about 40 gallons worth 40 gallons in one pass. Yeah, 40 gallons. I think

it's 100 and 60 gallons though. My only thing we get with this thing,

everybody recognizes the general Lee from the Dukes of Hazards. But here in the show car area, well, it's the mo parts with the high impact colors and the low production numbers that grab your attention

case in point. This 1970 Chrysler 300 H was produced for only one year

loaded with a 440 magnum. It's a rare breed that went for a pricey $6900. The aftermarket air bag is optional.

Then. How about this plunk? Crazy 71 K

A convertible. One of only 17 ever made

or this 70 sublime T A Challenger rushed into limited production to compete in the Trans Am racing series.

Lots of rally red A Ar Cudas were made in 1970 but only a handful with red interior.

Well, you get the idea.

The rare originals here run the gamut,

but don't forget about the Super Birds that dominated the circle tracks back in 1970.

And of course, you got to love the modified mo parts like Ken Hell's

69 road runner with a blown 440. Anybody can restore one

takes a real man to cut one up. So I like this. This is what I like. Well, we've always been a little tick left of center

and uh we're very loyal. We, we, we like our products a lot. We tend to think we're more loyal to our products than the Ford and the Chevy guys are.

Mo

Avens love to race their machines too.

And weekend drag racing competition attracted people like Kenny Lazere

driving a Dodge with a 605 inch hemi

that he built at work.

It's a 605 inch hemi.

It's a legend.

Hemi and it's all Indie cylinder head. We, we, we made the whole engine.

Now, the fastest door car has to be the 69 AM X driven by Randy Brewer.

It's got a top alcohol hemi

block with twin 1050 carbs and two stages of Nitrous. Randy's raring to take it into the high sixes during eliminations,

we have the horsepower. We, we could use it

but you know, we, we, we're doing all we can do to try to figure out how to use it.

Well, on the next run, Randy goes for broke. Uh literally hear that sound.

That's a nitrous pop that put him and the car out of competition.

No doubt, the Mopar

stars of the show were two legends of superstar

in hr a record holder and engine builder, Bob Reed up against his buddy and Mopar

race. King Ronnie Socks who started his career back in the early sixties. A guy came by a while ago and

had something outside

30 years ago for him and

I told him to come back 30 more years and I'll sign something else for it.

Now, both racers are famous for banging gears and there are four speed 68

Kas,

I'll leave the starting line in about 7000 RPM. S and we ship at about 8500

and it'll go through on a good run.

Uh about about 8, 600 Tiger.

I mean, people don't like to hear it but these are men's car. Th this is a man's car when you're changing gears, using the clutch pedal.

It, it's worked, but it's fun. I think the automatics is boring. I wanna beat him. He wants to beat me. And, uh,

we put on a good show. It's

a, it's, it's a little bit of a rush, I guess you'd call it.

The Superstock stars did put on a good show with ETS that were consistently within 1/100 of each other.

However, Sox seemed to have a little more at the finish line to take this two out of three shootout. I mean, it's the sound corny, but I'm honored to be running him

because he was always my idol

and I respect my elders.

I

heard

he didn't look like he respected at the start line.

Well, whether they're N hr A legends weekend racket racers here for the show or the go, you gotta give it to the Mopar guys. They're a pre depart from the rest

and when it comes to their favorite brand,

the world knows that Mopar

probably is the best

coming up next, the fast breaking tip, choosing the right calipers for your break. Set up.

Horsepower T V's Quick tech is brought to you by

Wyotech.

Hey, welcome back. You know, having a lot of horsepower can be a lot of fun, but sooner or later, you're gonna have to rein in those ponies. Now, the last time we showed you about the important role that rotors play in a high performance braking system. And today we're gonna show you how

CALIPERS have an equally important part. Now, this assortment of CALIPERS includes a stocker cast iron

and this assortment of high performance high tech calipers that we got from our friends at bay.

Now, when you say we take a look at the differences and figure out which is the right one for you.

The stalker is a single piston floating caliper that slides back and forth on these pins whenever the brakes are applied. Now, it's inexpensive to produce but somewhat inefficient since the single piston applies pressure to only one pad. Now, the pins can also deflect

and the integrity of the caliper is compromised by this big hole right here that allows it to be used with smaller stock steel wheels. Now, it also allows the caliper to deflect, giving you a spongy brake pedal.

Next, we have an aluminum caliper that uses a steel anchor bracket to surround it and the pads so they're always parallel to the rotor. Now, this design reduces caliper flex significantly and the braking loads are transferred directly to this anchor bracket.

Now, this adds up to a better balance, clapping forces, improved driver control and shorter stopping distances. Hey, this is a good upgrade for your street car.

Now, let's look at a fixed mount four piston caliper that uses opposed pistons to give you more stable application of the clamping forces. Now, they also use different size pistons to compensate for the higher wear rate on the leading edge of the pads and to further equalize the pressure applied to them.

These calipers are found on race cars and very serious street cars. Finally, we have the billet aluminum six piston caliper.

Now, this is a fixed mount design too and the material is the stiffest available to minimize deflection.

It also uses a huge piston to pad ratio for optimum driver modulation. Now, don't kid yourself. This is a race only piece. And if you step on one of these bad boys,

you better be prepared to put your eyeballs back in their sockets.

Hey, whether you drive a late model Camaro or Firebird, here's a way to put your LS one on the bottle. This new kit from Nitrous work is a single stage set up that'll add from 75 to 100 25 horsepower at the flick of a switch.

This power wing nozzle injects fuel and nitrous at the same time to help simplify installation.

So now you can spray your way to the winners circle for about 475 bucks.

Hey, Nitrous isn't the only way to pump up the power in your fuel injected ride for you. Throttle body. Guys summit has this new spacer kit that adds both torque and horsepower. Now, the kit includes all the necessary mounting hardware and a spacer made from phenolic resin to isolate heat and give you more plenum volume. Now, the result is a cooler denser incoming fuel charge to give you more power just where you need it. Of

course, you'll need to cough up about 65 bucks for this set up.

We hope you enjoyed our fuel injection swap today. And if you've got one planned for yourself, well, here's how to add a GM throttle body or tune port and make it

well, painless. You see, painless performance has a complete wiring kit with all the connectors you need for modules, sensors and injectors.

You just provide the injection, set up the computer and the labor price is pretty painless too at 240

up.
Show Full Transcript