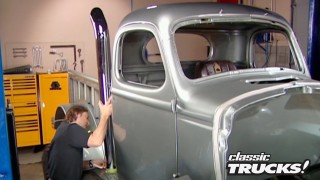
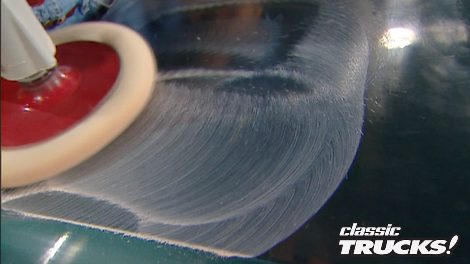
Classic Trucks! Builds

Video Transcript

Welcome to trucks. Today, we're gonna kick it off talking about paint

because if you ask people what the most important part of their truck is,

almost everybody's gonna say the paint job

and whether the truck is stock or custom, it doesn't matter. Everybody wants killer paint

problem is most people are scared to death to do anything paint related. Now, in past shows, I've shown you some of the tricks on how to shoot paint on and the tools involved with that.

But today I'm gonna show you what to do with the paint that's already on your truck. How to maintain it, how to keep it looking good.

Heck, how to bring something back to life that's all faded and oxidized and stained. Now, the purpose of all this is to hopefully

take some of the fear factor out of buffing and polishing.

So you don't take your truck somewhere, spend a lot of money having somebody else do

what you can do yourself first. We're gonna take a look at some paint that's a few years old.

Still really nice. It just needs to shine, brought back up to where it needs to be. Now, what happens is over time.

You get a lot of little scratches in your clear coat from

dirt and grime waxing, just general wear and tear

and the paint starts to take on kind of a hazy milky look. That's what I'm gonna show you how to get rid of.

Obviously, you gotta use some quality materials on a project like this. So we went to mcguire's got what they call the Centennial collection.

Now, this is a huge kit and this includes everything you're gonna need to completely detail your truck, not just the paint,

you got leather conditioners and carpet cleaners and tire dressing

and of course, polishes and waxes.

Then you have detailing brushes, detailing clay

applicator pads, towels,

you even get this dual action polisher, which you are gonna love. Now, the best thing about buying a kit like this is it's actually cheaper than buying all this stuff separately. Once the truck is washed and clean, now you're ready to start polishing.

And this is also where a lot of people freak out because they've heard horror stories of burnt paint and swirl marks and all kinds of nasty stuff. And I'm gonna address those issues. But first let's talk tools. Now this my friends is a grinder.

It looks like a buffer but it's not, it's got a lot of power, a lot of torque and one speed. If you put a pad on one of these things

and you try to buff your paint you're gonna burn through it in a second.

This is a buffer. Now, it looks very similar to a grinder,

but it's only got a top speed of about 3000 RPM.

S.

Also, you've got this variable speed knob here to where you can slow this thing right down

and put it exactly where you want it.

Now, you use a buffer after you've wet, sanded your paint and you're using compound to bring the gloss back.

Now, a buffer is very aggressive

and it's possible to burn and swirl your paint if you don't know what you're doing

more on this one later.

And this of course is that Maguire's dual action polisher. Now it's got a variable speed just like the buffer, but it has a very passive dual action, which means it is impossible for you to burn or swirl your paint with one of these. For example, look at this,

it will not hook an edge. Now, you try to do what I just did with one of these

and it's gonna tear your hand off. But you gotta remember, this is not a buffer. It's a polisher. This is for taking out real fine scratches and imperfections in your paint.

And this

is how it works,

put some compound on the foam pad and then start polishing.

It's best to work in about 2 ft sections at a time using a light pressure on the polisher, letting it do the work.

And once the compound starts to dry.

You're ready to wipe it off and move to your next polisher wax to finish it off. Remember, never use two different compounds on the same pad. Keep them separate if you want them to do what they're supposed to do.

Once you're done with the final polish and wax, wipe it off. Step back and take a look at the difference.

This is what we started with and this is what we have now, you could buff for hours by hand and never get this kind of result.

Now, that's fine for paint that's fairly fresh. But what about paint? That's a little older. Got some miles on it, got some oxidation, some scratches

like this old explorer. Now, this is about 10 years old

and this is pretty much what you're gonna find on anybody's daily driver. Now, as you can see, you've got scratches,

you've got spots that are dug right into the paint. You have all kinds of oxidation.

There is no way that you're just gonna polish this out.

You're gonna have to get more aggressive than that,

which means

wet, sanding and buffing. Now, you are gonna take off a little bit of paint when you do this.

So the trick is to take off as little as possible and still get the result that you're after, which means

you gotta go slow, take your time

and you've got to be realistic about your paint.

If it's already been power buffed a few times. Paint's looking thin or you're starting to see primer coming up through the color. Forget it. Buffing is not gonna help you. You need a new paint job.

Now, I'm gonna tape this hood off so you can see just how dramatic these results are gonna be.

All right, got the demonstration area. All taped off. Ready to go. We need to take a break. But when we come back,

I'm gonna show you how to revive an old tired paint job.

Hey, you're back. If you're just getting here,

I'm in the process of showing you how to buff and polish your paint to make it look better than you ever thought possible.

Now, the victim here is an older Ford Explorer. I got a lot of oxidation, a lot of spots, a lot of scratches on it.

I've taped off a demonstration area. Now, I'm gonna show you how to bring that paint back to life.

I'm gonna start with this mcguire's 2000 grit, super, super fine sandpaper,

gonna wrap it around a rubber sanding block. So I don't accidentally put grooves into the paint.

Then using plenty of water

sand, the hood,

keep the paper away from any sharp edges or creases because the paint is usually thinner there and you don't want to sand through,

go slow and keep checking your progress. What you're looking to do here

is remove the imperfections,

not go through the clear coat

when sanding contours you'll need to ditch the block and use your hands,

make sure that you're careful not to cause ripples or waves.

Now is a good time to clarify. Just what type of paint you're gonna be working on

first, you have your base coat, clear coat. That's what most vehicles have. That's what we're working on here

and it means you have a base coat of color

and then you've got a clear coat over the top of that and that clear coat is what gives you all that depth and that shine that you like. Unfortunately, the clear coats also got the imperfections that you wanna get rid of.

So that's what you're gonna be sanding and buffing on. Now, if you go too deep,

you'll get down into the color coat and that's gonna leave a nice, ugly dull spot.

The only way to get rid of that

is to shoot on more clear coat, then you have your single stage and that's exactly what that sounds like.

You got your clear coat and your color basically rolled into one package.

So when you sand and buff on that, you're gonna be going right down into the color. And if you go too deep,

well, you're gonna end up in the primer so you can see no matter what kind of paint you're working on.

An easy touch. A light touch is the most important, but you are gonna find some things that are too deep for you to get out,

knowing when to stop is very important.

Once the area is sanded and dry,

it's time for the buffing.

I'm using a light compound. So I don't take off too much of the remaining clear coat.

You wanna slightly tilt the buffer, keeping the pressure at 12 o'clock and three o'clock and working in this area here, once again, stay away from sharp edges and increases

as you work, progress to finer compounds and pads

to bring out the shine.

Once you're done with your buffing, put on a nice coat of wax to protect it

and you are done. Now, let's take a look at this hood

before and after. Now, this actually looks better than when this truck rolled off the showroom

because the wet sanding took all that nasty stock orange peel off. And now this part of the hood is laying super flat, super smooth like a show truck

and all it takes is a little time. The right tools and your willingness to try it.

There is one drawback though.

Now, I need to do the rest of the truck

when it comes to custom trucks, whether it's two wheel drive, four wheel drive, a street driver, an off Roader doesn't matter. It is an honor to have your truck featured in a magazine. A matter of fact, I bet every one of you would love to own the truck on the cover of a magazine.

Well, that was the goal for John Atkins when he set out with the guys at Silver Star Customs

to build this blazer over four years ago,

this thing started out life as an 89 2 door blazer, but you'll have to look pretty close to find anything that resembles a stock blazer anymore. For example, front sheet metal was cut off and discarded and then molded and modified. 2000 Sonoma sheet metal takes its place along with the custom grill.

The hood was modified so it pulls forward and tips up for easy access to the engine.

The detail continues under the hood as chrome and paint run all over the hot 4.6.

And once you get past that,

notice the killer paint not only runs down the firewall but even onto the frame rails,

the rest of the body received the same kind of slicing and cutting with shaved door handles and body lines.

And of course in back, the tailgate was welded in

the tail light, shaved and a roll pan added and then it was all smooth to perfection and painted

to get inside. You've got a choice, the normal door

or the suicide door,

but whichever one you choose, both are decked out with custom door panels and speakers

as you continue inside, flamed leather and Tweed seats are what you sit on.

But what really grabs your eye is the custom handmade dash and console that holds everything from gauges to hydraulic switches.

And speaking of hydraulics.

That's what'll bring this blazer up for driving and lay it flat on the ground when it's parked

with 20 inch wheels tucking right up into the fenders like they should.

I'm sure by now that you've noticed that the custom paint goes everywhere on this truck with custom graphics taken on every shape imaginable ranging through 20 different colors.

So after four years of building John's dream finally came true when his blazer

hit the cover of mini truck and magazine,

but the story doesn't stop here. Now, now he's gonna make somebody else's dream come true because he's gonna give this truck away to one of you.

So if you'd like to own a cover truck, you need to go to Silver Star customs.com and find out how oh by the way, she does not come with the truck.

You're on your own for that one

on today's tool tech.

We are gonna be talking about cutting tools more specifically tools to cut metal.

Now, I'm not talking about plasma cutters and torches and things like that.

That's a different category. We'll deal with that another day.

What I'm talking about

is a way to cut a bolt or piece of steel or a piece of tubing that you're working on with your project.

It doesn't matter if you're a total beginner or a professional fabricator, you need to know how to cut metal.

Here's some ways to do it

first. You got your basic hacksaw been around forever. Human powered. And everybody needs one or two of these in their toolbox. Now, they're basically just a frame and a blade. But they do serve a purpose. Even with all the fancy cutting tools I've got around here once in a while, still need to use the old hack.

The next step up would be a grinder or a cut off wheel. Now, these are a lot quicker and easier than a hack.

They're also a lot noisier and messier. And since you're holding a power tool at all kinds of crazy angles, they're a lot more dangerous. You tangle with one of these, you're gonna get some stitches. Matter of fact,

if you take a good look at the hands of any fabricator,

you're gonna find some scars from a grinder

moving on. You have the chop saw and it's basically a big cut off wheel in a much more controlled environment. So it's very quick, very accurate.

But you need to wear eye and ear protection just like a grinder

and it leaves a lot of slag on the cuts and it will also shower your shop with sparks and coat everything with dust.

Now, most people are probably familiar with the tools I've shown you so far,

but not this next one. This is made by Dake and it's called a cold saw.

Now, a lot of you are probably looking at this going.

Oh man, that's just a chop saw. No, no, it's much more than that. First of all, you got some heavy duty clamps and rollers to hold your work in place. And then

the whole cutting assembly will rotate up to 45 degrees for extremely accurate minor cuts and straight cuts. But

the biggest difference is how it cuts.

Notice the blade rotates very slowly and is washed in cutting fluid. So there's no heat,

it's quiet.

You get precise slag free cuts

and there's no sparks or metal shavings flying around.

They all end up in a nice neat pile right down here.

Now, the cold salt will cut through any thickness of material from thick sea channel.

It's a solid steel stock,

stainless steel square tubing,

super thin stuff without distortion,

it'll even cut perfect fish mouths and tubing.

If you're building a tube chassis. Now, how thin will it cut? Well, I just sliced off a piece here. It's as thin as a dime.

Now, obviously a cold saw is not for everybody. If you're just a weekend wrench

man, your hack saws and your cut off wheels will serve you just fine.

But if you're more serious than that or a professional fabricator,

you may wanna call up Dick and check out a cold saw. It will make your life a lot easier.

Isn't that what tools are for?

Since we're on the subject of tools? What's the most important tool in your shop? Come on, quick

screwdriver, hammer

your pants, man.

That's what protects you when you're crawling around on the ground and throwing sparks and welding.

Unfortunately, most pants are not designed for the movement of a human body. So when you're working around in the shop,

you can get in kind of a bind. Well, diamond cut jeans has got an answer to that

with their denim jeans that have a special panel sewn right into the crotch area.

And this gives you more room and allows the pants to conform to you

instead of you getting conformed to the pants.

So before you go out and work in your shop or go hunting or fishing or four wheeling, anything that you're gonna do that's gonna be active.

You need to give diamond cut jeans a call and get yourself a pair. Your body will thank you

since we're on the subject of clothes, wouldn't it be nice to have some that never got wet

that were completely immune to gas oil grease? Any type of liquid? Well, now you can have that with this stuff from Jeep clothing.

Now they have jackets and pants that look and feel normal enough, but they have a Teflon fabric protector on them.

So any type of liquid

just rolls right off, it doesn't soak in.

Just think

no more driving home with wet clothes, no more gas oil grease stains. Just think of the fun that you can have going out to the lake, going in and out with dry clothes or heck if you fell in.

The only thing you'd have to do

is worried about dumping your pockets out

and the only place you can get this is a Jeep clothing

that's gonna do it for today.

Make sure you get out there and start buffing on your truck, but practice on your buddy's car first just in case you screw it up. We'll see you next week.
Show Full Transcript