More Copperhead Episodes

Classic Trucks! Builds

Video Transcript

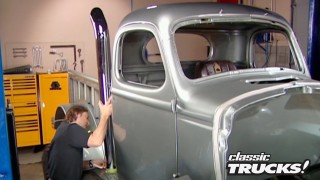
Welcome to Trust. I've got a great show for you today. One you've been wanting to see for a long time. Heck, one I've been wanting to do for a long time and that is set the cab down on the chassis of Copperhead and start assembling this truck. So, hold on because here we go.

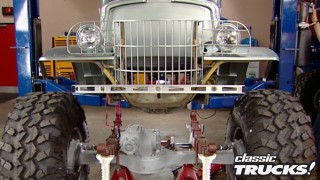
When you go to set a body down on a chassis, of course, the ideal situation is to have a lift like this

and go jacks under the chassis so you can roll everything around and line it up perfectly.

However, very few people are gonna have these tools.

So the next best thing is to get about four of your buddies and a couple of pizzas and have them help you set the cab in place

and once the cab is sitting on the rubber mounts, four bolts is all it takes to mount it down

with the cab bolted down on the frame. Then you can see how this is starting to lay out in here. Now it is tight. You got about an inch of clearance here at the back of the valve cover and about a half inch here at the back of the air cleaner, but that's enough. All right, this thing's finally starting to look like, like a truck again. We're gonna go ahead and turn our attention to the bed.

One of the great things about the 67 through 72 GM truck is that almost every piece for the bed is available brand new, which means you don't have to go out and try to resurrect an old rusty bed

unless of course you just want to. Now we got this whole kit, every piece from early classic enterprises. Here's what we got.

Two new bedsides. Tell you a little bit more about those in a minute,

a new head gate,

a new smooth tailgate. Now we got the smooth one as opposed to the one that says Chevrolet in it because

if you don't know, this is a Chevy by now guys, we can't help you.

Now we got two new wheel tubs, a

bunch of support braces for the bed and most importantly, a big bag of stainless hardware. So we don't have to mess around with old rusty bolts.

As you can see this kit from early classic is really nice.

But the two most unique pieces are these bedsides. Now, these are made by good Mark industries.

And when these things hit the market a few years ago, people went crazy because until that time, man, finding two good bedsides was almost impossible. Remember these are trucks, people used them to haul things with.

Now, these pieces fit just like the originals. But notice

our marker lights have been shaved

steak, pocket holes have been filled. Good mark does not make these like that. They make them original. So if you want it smoothed down,

you need to do it yourself. But I've showed you how to smooth panels in the past. So you know how to do it

to put the bed together, it's best to assemble it off the frame. Now, this is an area where you're gonna need an extra set of hands because you can't do this by yourself. Now, I've got my good buddy, Dave Clark. Give me a hand.

We'll start with one bedside and bolt on the rear cross member.

Next is the front head gate.

Now, make sure if you're using stainless hardware like we are,

is you use some aniseed on the thread. So you don't gall them. We got ours with the kit.

Next comes the other bedside. Keep in mind our bolts are just finger tight at this point so we can square this thing up later. Also, don't be surprised if you have to file and fit a little to get things just right

and be prepared to touch up your paint. Yeah, it's all part of the reassembly process.

Now that we have a basic structure done, it's time to put it up on jack stands. So we don't damage the bottom edges of the bedsides, then we'll just bolt in the wheel tubs.

All right. Now, it is time to square up this bed

and you need to take your time here

because this is what's gonna determine just how square and true this bed's gonna sit

and how nice these tailgate gaps are gonna be and nothing looks worse than a crooked or cock eyed bed.

Now, once you have it exactly how you want it,

go ahead and tighten down your bolts.

All right.

Now we're ready for the wood and the kit that I got for that also came from early classic. Here's what it consists of nice premium quality oak planks,

all precut, ready to fit your bed

and then to go between those planks, got these polished aluminum strips. Now notice you don't see any mounting bolts here. This is one of their hidden mounting bolt kits and I'll tell you more about this when we go to put these in.

Now, it's important to remember that your bed kit does not come out of the UPS truck ready to just drop into your truck. No man, you gotta pre ft it, which means you gotta set it in place, drill your holes, make it fit your bed because each bed is different,

then need to sand it, stain it and seal it. Like we showed you how to do a few weeks ago,

then you can set it aside. So when you come to this final assembly step, everything should just slide into place, no scratched paint, no marred wood. Everybody's happy

to install the wood. We'll start with the smaller side pieces around the wheel tubs,

then bolt in the remaining cross members. This is where you'll be really glad you pre ft everything,

then just slide in your planks

and your aluminum strips.

Make sure

that you leave out the plank that's gonna cover these mounting bolts or you won't be able to bolt your bed in.

All right, Dave and I are gonna take a break, get something to eat. It's your turn to buy

again.

Now that we're putting all these parts into the bed. A copperhead, you can see just how nice this bed's gonna be.

Now, all we have to do is bolt it down onto the frame, tighten everything up

and copperhead is two thirds finished. We'll be back after this.

All right. Go ahead and start lowering this down.

Hey, we're back for those of you that are just getting here.

We are reconstructing the body on project copperhead, a 67 Chevy short bed pickup. Now, speaking of bed, we have spent the first part of the show. Reconstructing this bed. Now, it's just a matter, they are setting it in place

that's looking good, looking

good

and bolt it on. Now, if you don't have lifting equipment like this,

you're gonna need at least four buddies to come in here and help you set this down on here.

That's it.

So you don't scratch the paint

buddy. We are on

before you tighten the bed bolts, make sure that you recheck the squareness of your bed because picking it up and moving it around

can cause it to move a little once it's right. Tighten them down.

Now, we're ready to tighten the bed strip bolts. But before we do, I wanna tell you a little bit about these strips because they're pretty unique. Now, running down the backside is a slot that goes all the way down

and into that slot slides this very unique bolt that has that special shoulder on it. Now, what this does slides into the slot and gives you adjustment for your cross members and then that shoulder gives you the grip allows you to pull this thing down tight into the wood. And what this does is eliminate any bold heads for a super clean look.

Ok? I've got the gas tank out doing some measurements

and there's something I wanna bring to your attention here if you are relocating your gas tank to under the bed of the truck,

and this is not just for this style of truck, this is for any kind of truck,

you need to figure out some way to get the gas down into the tank. And unfortunately, you can't really lay that out until the whole bed is put together. You see how it's all gonna fit.

Now, you can take this as far as your imagination. Will let you

come in, put a filler cap coming out here and put a remote door there, hide it under a marker light. You can bring it out through the tail light. Have the tail light pivot down like a 56 Chevy

or the aftermarket is full of billet flip doors that recess into the wood or

kits that let the wood flip up and you've got a lot of options here.

But that's another project for another day because we still have a lot of body parts to put on. Just don't forget you need to do that.

The last big piece to go on the bed is the tailgate.

Once again, this is a two man job because it needs to be finessed into place. So you don't scratch that paint all up

once the gates in place, put on the hardware and latches and you are done.

Now, we're ready to look at some tail lights and we got these brand new reproduction tail lights

and backup lights from early Classic enterprises. Now, these are great. These will slide right into the stock openings,

but

they utilize this old style technology, a single, dual filament bulb. These were notorious for being too dim.

Now, that was great for 1967 but there's been a lot of changes in lighting since then.

So to go with this,

we got this led panel kit from early Classic.

Now, this utilizes 100 and 60 led bulbs which is far brighter than this, uses less power than this

and it won't burn out like this.

The best part is

slides right into the original socket

lays down on the housing

on goes the lens

and you are ready for your truck

and that is all there is to it,

an original look modern lighting. Now, while I'm back here,

what about this big empty area right here? Well, as usual, you've got a couple choices you can put on a rear roll pan. Now, what this will do

is blend into these lower bedsides

and roll metal down underneath giving you a really smooth, clean look, they're cool, but

they've got a couple of drawbacks. Number one,

you're gonna wanna weld it in which means you're gonna have to do some metal work and some paint work. Number two, you can say goodbye to that hitch

and number three, you're not gonna have any kind of protection back here from any kind of fender bender

or your other choice would be to use an original style bumper, which is what I'm gonna do. And the reason is

not only can I keep the hitch

and keep some protection back here, but also

these trucks were built in an era where the bumper was actually designed to be part of the styling of the rig,

so they look really cool. So yeah, we're gonna keep it

the bumper bolts on easy using factory braces

and that is it now notice the hitch is hidden behind the bumper and the license plate, but when you need it,

there it is. Now step back, take a look at this. Is this sweet or what? Now this takes care of the assembly of the bed but

don't go away. We got a lot more to do after this.

Just can't get enough of trucks. Check us out online at trucks, tv.com.

Welcome back to the shop if you're just getting here.

Oh man, you have missed some good stuff because we're putting copperhead back together and it's going quick. They always do at this point. Now, it doesn't matter if you're working on a 67 to 72 Chevy like this or whatever,

the assembly steps are gonna be pretty much the same no matter what you're working on.

So for you latecomers, we're gonna walk you through the steps of what we've done so far.

Starting with the finished chassis, we bolted the cab on,

then we completely constructed a bed using new sheet metal

wood floor with smooth strips. So you don't see any bolt heads,

an original style bumper, new tail lights, everything. And as you can see, this is turning into an awesome truck. Now, one of the most amazing things though is the only original piece of GM sheet metal I've used so far

is this cab? Everything else is reproduction parts.

It gives you a pretty good idea of the quality of aftermarket parts. Out there.

That's also one of the main reasons for this build up to show you what's out there. Hopefully get you excited about a build up of your own. Now, the cabs bolted down the back half of the truck is assembled.

It's time to do something about this steering system.

Now, obviously, we need a steering column and you got a couple of choices here. You can try to hunt down an original column. You can still find them,

but then you're gonna have to paint it. You're gonna have to detail it. And once you're all done with that,

you still have an original column. Now, that's fine.

But you do have another choice. This is from I did it.

This is their chrome tilt column and it is made specifically for this model of truck. So it's gonna slide right into place and bolt right up and it will make a huge difference in the look of your interior

and you get your turn signals,

tilt,

hazard lights and everything is wired up to plug into your wiring harness. This is nice

now to connect that column to the steering box,

got a stainless steel shaft

and a couple of Borgeson U joints. Now, this big boy here is to absorb vibration,

so you don't get vibration up into your steering wheel.

Now, speaking of steering wheel,

this is Colorado customs Lazer

wheel. Now check this out.

Colorado custom offers steering wheels to match their custom wheels. That is a nice touch

and the leather on the wheel matches the upholstery inside and the wheel itself, it's got this polished aluminum adapter that's gonna mate right up with that steering column and it's gonna look perfect. And that's the idea here. Build your truck to where everything matches and works together and you can do that no matter what budget you're on

to install the column, just slide it into place,

bolted up with the factory hardware

with the column loosely in place.

We'll just slide on the steering wheel

and then we'll position the column in the cab where we want it.

Now, you need to take your time here because this,

this is where you make it fit, how you want it to fit.

I notice you've got two or three inches here that you can move this thing forward and back.

Also, when you're setting up a steering system, ideally, you want it to be a driving position

and the steering column to be straight pointing right at you.

That way

you've got full benefit of your tilt option. Now, once you have it, how you want it,

go ahead and bolt it up underneath the dash,

connect your steering shaft up at the box

and that is it.

And that's also it for right now because we have to take a break, but don't go too far. We'll be right back

if you've ever been down a highway or even seen one of these trucks. Well, you've probably heard that they can go over a million miles without an overhaul.

Now, how is that possible when your gasoline car just died? At 100,000? Well, good question. We are gonna show you how it works.

Oh,

it works.

Brought to you by Wyotech.

All right, Dan. That's the question. How does a big rig diesel go so far and last so many miles? There's no doubt that the manufacturer, their engineers, the materials that they're using are helping these engine last a lot longer than they used to. Probably seven or eight years ago. We were tearing these engines down at 300,000 miles. Now, we're all the way up to a half a million to a million miles before we ever get into these babies. Now, I bet maintenance and tuning would have a lot to do with that. Right. Absolutely. We have to keep

these valves adjusted properly. The right clearance is there also these electronic injectors have to be set properly for these engines to last those kind of miles. Ok. How about the Great Destroyer heat? It is a destroyer, isn't it?

Whether it's diesel, the gasoline, the

transmissions,

we

go,

yeah,

it destroys stuff.

This is just one thing, uh, that these diesel companies are using to get rid of the heat. This is an oil cooler again. Just one,

the things that we're trying to keep this engine so we can keep it lasting. As long as possible. Ok. Now we're gonna show you what happens when things go bad.

All right, we got a piston here. It's got a little bit of a problem. What,

what happened here

again? We just got done talking about heat and this is a good example of what can happen. What happens. We didn't maintain the heat. Well, this thing is made completely out of aluminum which expanded a lot faster inside of this liner. And so the reason

is all of the aluminum comes sliding off and rebuild time.

All right. Now here's a normal piston. This is how it should look. I know you got metal up here on top, you got steel. What's going on? We do. This is, is to help again, the longevity of the engine. If we can put a ring on a steel dome,

we're not gonna beat that Ringland out

just the opposite here. This is a full ste uh

aluminum piston

again. We can beat the ring lands out with a chrome piston on this

right now. What happened here? I tell you it wasn't my fault. No, no, no, I heard it was,

this is something that you did. They told me I kicked down

the hill maybe a little bit too fast and you didn't use a torch. You did.

All right.

Now they say one of the good things about a diesel like this is that you don't ever have to bore them out.

Just re, uh, reinsert a new liner

and then rebuild it. Is that right? Yes, we can.

Uh, when we get ready to rebuild the liner comes out, the piston comes out, we turn right around the liner goes in,

slap the pissing on

and get ready to put the head on. Cool. Well, that should give you an idea of what's going on in these diesels when they're running a million miles. And that's a good thing because you never know when you're gonna have to tell somebody

how it works.

This is awesome. And I gotta keep

that.

You hang that around your neck. Dan did this

when it comes to trucks. One thing's for sure

if you use your bed for hauling stuff like you should be. Well, you need some sort of bed liner, you're just gonna destroy everything.

Now, if you're looking for a drop in removable bed liner,

you need to check out what Dura

Con has with the dural liner. Now this is a one piece plastic liner, custom fit for your application

and it's got the ribbed bottom. So it will handle some abuse.

It's not gonna crack on you.

It's not gonna fade, it's not gonna get slick and those ribs allow air flow underneath. So it's not gonna rust out your bed and of course it comes with a lifetime warranty even if you abuse it like I just did. So if you're looking for a drop in liner,

Duon

can help you out.

Ok. You got your Jeep TJ all lifted up and ready to go rock crawling and that's nice. But what if you need more than that

skyjacker's got some products that can help you out on the trail. The first one is this one piece shifter kit

or the transfer case?

Now, this eliminates the binding found in the original linkage when you get into extreme situations.

Now, this is a skid plate for your steering box. Basically, what this does is keep you from breaking your steering box off on a rock. So if you're setting a TJ up for some hardcore rock action, you need to call skyjacker, see what they got.

Have you ever been carrying a big load of junk and wish that you could just come up to your tailgate and say the magic words and it would just fall right open.

Well, I've got the next best thing for you. This kit is called the drop tail and it's from JSC engineering.

It's very simple. It's an electric cylinder and some hookups and it allows you to open and close your tailgate with just the push of a button.

Not only that, but you can set it to automatically open the tailgate

to a spoiler position when you're at freeway speeds,

this gives you less drag, more gas mileage, more performance.

Now, I know some of you are thinking, oh man, that's a gimmick. Uh uh

This won an award at S A last year is one of the best new products for trucks. So, if you wanna check it out JSC Engineering is who to call that does it for today. Next week, the front of Copperhead, we'll see you then.
Show Full Transcript