Classic Trucks! Builds
Want more content like this?
Join the PowerNation Email NewsletterVideo Transcript
Welcome to trucks. We have got a great show planned for you today. Now, you've all heard of spray and bed liner. I know that you have because you ask about them all the time.
What are they, what do they cost? What does it take to put them in? Are they really that good?
Well, these are all valid questions. So we have come to
LINX of Nashville
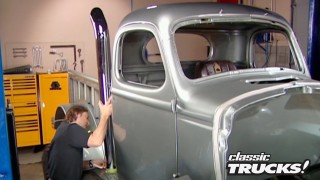
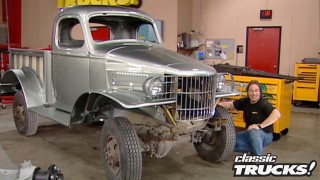
to have them spray some Linex on our freshly stripped bare naked body of project crazy horse. Now, some of you might be asking what is a spray on coating and why the heck would I wanna do it?
Well, the answer is durability and protection and we're gonna show you how it's done.
The first thing they do when you pull a vehicle into the shop is start taping off everywhere where you don't want LINX to go
and they use a special wire tape.
So you have a nice sharp line when they pull the tape up.
Now, while the guys are taping,
let's find out more about the actual Linux product and why we are using it.
LINX is a high pressure, high temperature spray
that cures in 3 to 5 seconds.
And the advantage of that is that it cures even and it sprays even throughout the bed of the pickup truck or whatever you're spraying.
It's very durable, has the highest impact in abrasion resistance
and it will stretch 100 and 25% of its size before it breaks, it is elastic, it will, it will contract and expand with the heat and cold.
The LINX coating is so strong
that the military has been testing it for use in protecting buildings during bomb blasts.
LINX is a chemical corporation and has many different products
and they've come up with a compound that they use now for uh cement walls. They've used it for uh uh trials with the Navy on submarine hatches as well as bomb and blast explosions with NATO and
the army
and there've been some very positive results.
They've even sprayed some of the walls in the Pentagon,
which was interesting.
LINX
can be sprayed on many different surfaces. This is a concrete block that was sprayed and I broke it to see how tough the
LINX was and of course, it doesn't de laminate or crack
or tear
an unprotected cinder block at 20 ft.
And again with LINX,
it's been a transfer of technology
because
LINX was not just for truck bed liners. And so it opened up many, many different opportunities
with everything taped off. It's now time to mix the color we want
then start spraying
Now, the two parts that make up LINX flow through different hoses that meet in the spray gun where they're mixed and sprayed at almost exactly the same time.
You'll also notice the spraying technique for
LINX is completely different than conventional painting.
LINX is not like spraying a car with paint at low pressure, uh, at 40 pounds of pressure,
it, it's sprayed on at 2500 pounds of pressure
and, uh, it really comes out but it is controlled because we have a trigger on the gun just like a giant spray gun
and we can texture it. The texturing process is mist in the air and it falls and, and because it cures so fast, you can build the texture up to make it grippy as you want
or as textured as you want or not quite as much texture like you would have on the bottom of the boat where you would need it smooth.
The last thing to do is pull the tape
and roll the body out of the paint booth.
Now, the really amazing thing here is there is no waiting for drying time. This stuff is dry, literally seconds after it hits the surface.
It's a liar.
Five.
Well, there you have it. The perfect finishing touch to a restored body
and using Linex is far superior to any rust proofing or any undercoating that you're gonna find out there.
Just
make sure that this is what you want before you have it sprayed on
because once it's dry,
nothing short of an air chisel is gonna take this stuff off. All right, this finishes up this part of project Crazy Horse. Now, after the break,
I got a project that you're gonna love. It's a little dangerous way, politically incorrect.
I'm not gonna tell you. You gotta come back.
Hey, welcome back to trucks.
You know, there's a lot of ways that you can bring attention to your truck. Fancy paint job, hot engine, loud pipes,
drop suspension drag blocks. Oh, there's a lot of stuff, but
one of the most popular and
controversial are flame throwers. Now, a lot of you guys are writing in saying, how do you do it? So
today we're gonna show you how to install them and
hopefully not burn down the garage in the meantime.
But the first question is
what the heck's a flamethrower?
Well, basically, it's a way to throw flames at your pipes. 2345, 10, sometimes even 20 ft.
And people have been doing this since the fifties,
but it's always been a little legendary, mythical sort of thing that
very few people knew how to do, right. And
obviously you don't want to do this wrong.
So the guys at Auto Lock decided to help out all the mere mortals and came out with a flamethrower kit. Now, this kit consists of just the wiring harness, but that's the most important part.
You've got a relay
the control module and of course, an activation switch. Now, what you're gonna have to add to this kit
is a couple of spark plugs
and a couple of coils if you want dual flames
and some way to mount those spark plugs into your exhaust pipe, I'll talk more about that a little later on. Now, I know a lot of you are wondering
man, how does this work?
Well,
when you hit the switch,
the flamethrower cuts off power to your engine coil that allows raw gas to flow down through your engine into your exhaust pipe where it's ignited by these spark plugs and these coils and
blows flame out the back
pretty simple. Now, a couple of things here
running raw fuel down through your engine is not the best thing for it.
It can wash the oil off your cylinder walls and your piston rings. So you gotta change your oil more often.
Also,
you can't do this on a vehicle with catalytic converters. So don't try it on Dad's New Cadillac. We are gonna put it on this 48 Chevy Hot Rod truck that the owner is in the process of turning into a 50 style hot rod. So this is perfect for flame throwers.
First thing that you need to decide is where you're gonna mount your wiring and relays. Now, you can put it anywhere you want.
But your best choices are either here on the firewall or up under the dash.
I'm gonna put it on the firewall here because that gives me easy access to this coil wire.
Once your holes are drilled, mount the components
and then splice into the power wire that runs from the ignition to the coil
inside the cab.
It is time to decide
where you're gonna put this trigger switch.
I'm gonna mount ours right here
beneath the dash.
So we've got easy access to it
at this point. All you have left to do is to run your wires, make your connections
and that takes care of this part of the project. See,
pretty simple. We're gonna take a break, but after that, we're gonna stick this thing up on the left, get those spark plugs back in the exhaust pipes. We're gonna make some fire.
Don't go away. The moment of truth is coming up, just watch this.
Uh uh uh
You've got to come back,
just can't get enough of trucks. Check us out online at trucks, tv.com.
Hey, welcome back to trucks. We are in the process of showing you how to install the ultimate attention getter
the flame thrower. Yeah.
Yeah.
Now we're using a kit that we got from auto lock. We already have all the wiring harness installed.
Now it's time to deal with these exhaust pipes. First thing you need to do,
decide what kind of plugs you're gonna use and where you're gonna mount them.
Ideally, you want to use a plug that's got a long thread on it.
So the electrode of the plug comes into the center of the pipe as much as possible. This gives you the best flame at the back.
Now where you mount this plug in the pipe is also very important. The further up here you go,
well, the more your flame is gonna be in the pipe and
that's not what you want.
So I found about 3 to 6 inches from the end is the best place. Now to mount the plug, you got a couple choices here too.
You can just drill a hole weld on the nut, put the plug in the nut. The problem is the thickness of the nut.
It doesn't allow the electrode to go into the center of the pipe. So a better way to do it
is to go out and buy a hella coil, which is just a threaded insert
and we'll mount that on the pipe. This is how to do it
drill a hole in the pipe,
thread, the hole with the heli coil tool,
screw in the threaded insert.
See it with the flaring tool.
Finally screw in your plug. Now notice how deep this allows the plug to see into the exhaust pipe.
Next, you are ready for your coils. Now, you can mount these pretty much anywhere you want,
but you do want to keep them fairly close to your spark plugs and a long way away from the gas tank or vents
and put a whole another meaning to flame thrower.
Now, we're gonna put ours here on the inner fender up out of the way.
And I know a lot of you are probably wondering about these coils. Now, these are just cheapies. I got these down at the local auto parts store nine bucks each. And they will be perfect
with your coils in place. Make your connections to the wiring harness up front, then run the wires out of the way
and then just hook up your plugs and you're ready to roll.
All right. This, is it the moment of truth. Are these things gonna work or is this just some sort of backyard voodoo? Well, to make these operate, you run your engine up to about 3500, hit the button and pump the gas.
You think? I'm kidding.
Just watch this.
Oh.
Mhm.
All right. All right. Calm down, calm down. I told you that these were cool. Now comes the warnings. You knew there was gonna be some warnings. These are not technically legal on any public highway. So, if you think you're gonna roast the local tail gator with these. Well, that's tempting. But no, don't do it also.
You gotta be careful with these. If you torch these things off in your driveway and burn down your neighbor's fence, well, you're on your own for that. These are best used at a show or a cruise or
a
lot of shows. Have competitions with these things. The best part is if you never put these on your rig,
at least you know how to do it. And that puts you in that mythical, legendary category
of the flame thrower.
When the smoke clears Stacy shows a lift. You won't believe this thing has a lifting capacity of 6000 pounds too.
Hey, welcome back. I know you've seen me use lifts a lot here on the show.
It'd be hard to do a lot of these projects without one.
And the lift that I use here is a 10,000 pound commercial unit.
So I can get some pretty stout trucks on here. But that's gonna be a little big for the average garage. But if you're thinking about building a shop, well, here's some stuff that you need to know before you buy a lift and use it for the first time. First. If you're looking at a dual post lift like this, you need to have some good solid concrete to mount it to because
that's what these bolts go down into and these bolts are what holds this thing up. Right?
Second. Make sure you've got enough ceiling space to mount the lift
to lift the vehicle. You gotta find the center of gravity before you put that thing on the lift. Now, I'm not talking about the center of the wheelbase. I'm talking the center of gravity. Remember the front with the engine is gonna be heavier than the rear, especially on a truck. And the idea here is to center it up to where the weight is evenly dispersed. Front rear. That way the truck doesn't fall off when you try to lift it.
Generally, this means that the rear is gonna stick out further than the front.
All right. I know a lot of you are probably thinking, which, yeah, I'd love to have a lift but
I don't need anything quite that heavy duty for my little truck and
I don't have that kind of space. Well, I've got a surprise for you. Come on over here.
This is called the Mobile Man Lift and it's something new from Eagle equipment. Now, it's a cantilever style lift that slides in from the side
and picks your rig up. And the best part is this thing's completely portable.
The lifting arms slide out in all directions, giving you the ability to lift just about any vehicle.
The pads also pivot and you have a threaded telescopic adjustment for getting into those hard to reach areas.
You even have these supports in the rear for extra stability.
Now, I know what you're thinking because I thought exactly the same thing when I first saw this thing,
you expect me to pick up a truck with this and then get underneath it and work on it.
You're crazy. Well, check this out because this really does work.
Just slide the lift in place,
set the lift pads
then just hit the button
and up. She goes
since the cantilever design list from the center.
Well, man, you've got all kinds of great access to the undercarriage under here and this thing will lift 6000 pounds. Now, the really good news,
this thing only costs 3500 bucks and that is delivered to your door guys. That is a great investment on a really innovative tool.
So don't be surprised if all your buddies wanna borrow it. Now, one last thing, any time you use a lift or any other kind of shop equipment,
make sure that you understand how to use it and that you're doing it safely because the idea here is to build the world's coolest truck, not die trying
if you've been around the world of trucks very much. Well, you know, there's a lot of new tires hitting the market
and one of the toughest tires to build is the all terrain tire. It's gotta be good on the highway. It's gotta be good off road.
Well, Bridgestone's got that covered with the duer A T rivo.
Now, Bridgestone uses new technology both in the design and in the compound
to give you a nice smooth running tire on the highway.
These things will go 50,000 miles, but also the tread design is aggressive enough to where it won't get stuck in the mud or the water. Now, obviously, you're not gonna use these on a rock crawler,
but they would be good on the truck that's pulling the trailer, that's got your rock crawler on it.
So, if you're looking for a good all terrain tire,
you need to check these ones out from Bridgestone.
One thing is for sure. One of the best ways to change the look and the feel of your interior
is to install some custom gauges.
And you have got a lot of choices out there like these from auto meter that they call the street rod series.
And these have a nice clean silver face, easy to read numbers, classic style pointer
and thin chrome
bezel
and a domed lens for a nice smooth clean look.
Now, you also get all the sending units and wiring to hook these things up and make them work.
But you have another choice here. You can get the five piece gauge set,
but you can also add to it a matching tachometer and clock. So you have a complete set of gauges, that little clock is pretty cool. So if you're ready to do something about your interior, want it to be different.
Give auto meter a call. Now when you're working on a truck, especially an old rusty truck,
having a good penetrating oil is worth its weight in gold. Here is some that you have to have in your toolbox. This is called gibbs penetrating oil and it will absolutely destroy and dissolve any kind of rust or corrosion on bolts or in engines cylinder walls, hinges, you name it.
Matter of fact, if this stuff won't break it loose,
it's probably not gonna come loose.
This is one of the few penetrating oils that I've seen.
You can actually dip a bolt in and watch it go up the threads. Now, if you don't believe me, go ahead and buy a can of this stuff and try it,
this will get into a millionth of an inch.
Now, it's more than just a penetrating oil though. You can also use it as a cutting oil or a water repellent on your ignition system.
The bad news is you can't get this stuff just anywhere. You've got to go to a place called machines and more to get Gibbs oil.
Today's quick tip is an answer to a lot of emails that I get from you Bronco guys wondering what I'm gonna do about my clutch linkage here on Project Crazy Horse. Now, for those of you that don't know
back when the Broncos were new right here in the block. There was this threaded boss that actually held the bracket.
They came in and held the other side of this equalizer bar and worked your clutch. Unfortunately,
Ford hasn't made those blocks in years. So what do you do when you put a late model block into an early Bronco? I've
got a solution here for you.
I took the original mounting bracket still available at almost any Bronco parts place
bolted it right here to the original hole in the bell housing.
Then I took exactly the same bracket stood it on its end,
welded it to this bracket and used some round stock to strengthen this joint here.
Then just machined a hole here in the top
and now it bolts to the back of the head.
Now, look at this,
look how nicely that bends naturally around that head. I didn't do any of this bending
and now I have a nice strong bracket to support my clutch equalizer bar. Now, keep in mind if you do this, you're gonna have to do some modification to this upper part of the bracket
depending on where your bolt holes are in the back of the head. Hopefully,
this gives you a fairly simple solution to an age old Bronco problem
and you can use variations of this on Jeeps or Scouts, anything that's got some real tight clutch linkage.
Well, that does it for today.
It won't be long until I've got a body on here and I'm ready to take this thing out and rock and roll with it. If you want to see that,
you're gonna have to keep watching
the
Show Full Transcript
What are they, what do they cost? What does it take to put them in? Are they really that good?
Well, these are all valid questions. So we have come to
LINX of Nashville
to have them spray some Linex on our freshly stripped bare naked body of project crazy horse. Now, some of you might be asking what is a spray on coating and why the heck would I wanna do it?
Well, the answer is durability and protection and we're gonna show you how it's done.
The first thing they do when you pull a vehicle into the shop is start taping off everywhere where you don't want LINX to go
and they use a special wire tape.
So you have a nice sharp line when they pull the tape up.
Now, while the guys are taping,
let's find out more about the actual Linux product and why we are using it.
LINX is a high pressure, high temperature spray
that cures in 3 to 5 seconds.
And the advantage of that is that it cures even and it sprays even throughout the bed of the pickup truck or whatever you're spraying.
It's very durable, has the highest impact in abrasion resistance
and it will stretch 100 and 25% of its size before it breaks, it is elastic, it will, it will contract and expand with the heat and cold.
The LINX coating is so strong
that the military has been testing it for use in protecting buildings during bomb blasts.
LINX is a chemical corporation and has many different products
and they've come up with a compound that they use now for uh cement walls. They've used it for uh uh trials with the Navy on submarine hatches as well as bomb and blast explosions with NATO and
the army
and there've been some very positive results.
They've even sprayed some of the walls in the Pentagon,
which was interesting.
LINX
can be sprayed on many different surfaces. This is a concrete block that was sprayed and I broke it to see how tough the
LINX was and of course, it doesn't de laminate or crack
or tear
an unprotected cinder block at 20 ft.
And again with LINX,
it's been a transfer of technology
because
LINX was not just for truck bed liners. And so it opened up many, many different opportunities
with everything taped off. It's now time to mix the color we want
then start spraying
Now, the two parts that make up LINX flow through different hoses that meet in the spray gun where they're mixed and sprayed at almost exactly the same time.
You'll also notice the spraying technique for
LINX is completely different than conventional painting.
LINX is not like spraying a car with paint at low pressure, uh, at 40 pounds of pressure,
it, it's sprayed on at 2500 pounds of pressure
and, uh, it really comes out but it is controlled because we have a trigger on the gun just like a giant spray gun
and we can texture it. The texturing process is mist in the air and it falls and, and because it cures so fast, you can build the texture up to make it grippy as you want
or as textured as you want or not quite as much texture like you would have on the bottom of the boat where you would need it smooth.
The last thing to do is pull the tape
and roll the body out of the paint booth.
Now, the really amazing thing here is there is no waiting for drying time. This stuff is dry, literally seconds after it hits the surface.
It's a liar.
Five.
Well, there you have it. The perfect finishing touch to a restored body
and using Linex is far superior to any rust proofing or any undercoating that you're gonna find out there.
Just
make sure that this is what you want before you have it sprayed on
because once it's dry,
nothing short of an air chisel is gonna take this stuff off. All right, this finishes up this part of project Crazy Horse. Now, after the break,
I got a project that you're gonna love. It's a little dangerous way, politically incorrect.
I'm not gonna tell you. You gotta come back.
Hey, welcome back to trucks.
You know, there's a lot of ways that you can bring attention to your truck. Fancy paint job, hot engine, loud pipes,
drop suspension drag blocks. Oh, there's a lot of stuff, but
one of the most popular and
controversial are flame throwers. Now, a lot of you guys are writing in saying, how do you do it? So
today we're gonna show you how to install them and
hopefully not burn down the garage in the meantime.
But the first question is
what the heck's a flamethrower?
Well, basically, it's a way to throw flames at your pipes. 2345, 10, sometimes even 20 ft.
And people have been doing this since the fifties,
but it's always been a little legendary, mythical sort of thing that
very few people knew how to do, right. And
obviously you don't want to do this wrong.
So the guys at Auto Lock decided to help out all the mere mortals and came out with a flamethrower kit. Now, this kit consists of just the wiring harness, but that's the most important part.
You've got a relay
the control module and of course, an activation switch. Now, what you're gonna have to add to this kit
is a couple of spark plugs
and a couple of coils if you want dual flames
and some way to mount those spark plugs into your exhaust pipe, I'll talk more about that a little later on. Now, I know a lot of you are wondering
man, how does this work?
Well,
when you hit the switch,
the flamethrower cuts off power to your engine coil that allows raw gas to flow down through your engine into your exhaust pipe where it's ignited by these spark plugs and these coils and
blows flame out the back
pretty simple. Now, a couple of things here
running raw fuel down through your engine is not the best thing for it.
It can wash the oil off your cylinder walls and your piston rings. So you gotta change your oil more often.
Also,
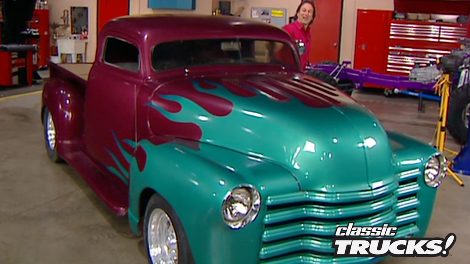
you can't do this on a vehicle with catalytic converters. So don't try it on Dad's New Cadillac. We are gonna put it on this 48 Chevy Hot Rod truck that the owner is in the process of turning into a 50 style hot rod. So this is perfect for flame throwers.
First thing that you need to decide is where you're gonna mount your wiring and relays. Now, you can put it anywhere you want.
But your best choices are either here on the firewall or up under the dash.
I'm gonna put it on the firewall here because that gives me easy access to this coil wire.
Once your holes are drilled, mount the components
and then splice into the power wire that runs from the ignition to the coil
inside the cab.
It is time to decide
where you're gonna put this trigger switch.
I'm gonna mount ours right here
beneath the dash.
So we've got easy access to it
at this point. All you have left to do is to run your wires, make your connections
and that takes care of this part of the project. See,
pretty simple. We're gonna take a break, but after that, we're gonna stick this thing up on the left, get those spark plugs back in the exhaust pipes. We're gonna make some fire.
Don't go away. The moment of truth is coming up, just watch this.
Uh uh uh
You've got to come back,
just can't get enough of trucks. Check us out online at trucks, tv.com.
Hey, welcome back to trucks. We are in the process of showing you how to install the ultimate attention getter
the flame thrower. Yeah.
Yeah.
Now we're using a kit that we got from auto lock. We already have all the wiring harness installed.
Now it's time to deal with these exhaust pipes. First thing you need to do,
decide what kind of plugs you're gonna use and where you're gonna mount them.
Ideally, you want to use a plug that's got a long thread on it.
So the electrode of the plug comes into the center of the pipe as much as possible. This gives you the best flame at the back.
Now where you mount this plug in the pipe is also very important. The further up here you go,
well, the more your flame is gonna be in the pipe and
that's not what you want.
So I found about 3 to 6 inches from the end is the best place. Now to mount the plug, you got a couple choices here too.
You can just drill a hole weld on the nut, put the plug in the nut. The problem is the thickness of the nut.
It doesn't allow the electrode to go into the center of the pipe. So a better way to do it
is to go out and buy a hella coil, which is just a threaded insert
and we'll mount that on the pipe. This is how to do it
drill a hole in the pipe,
thread, the hole with the heli coil tool,
screw in the threaded insert.
See it with the flaring tool.
Finally screw in your plug. Now notice how deep this allows the plug to see into the exhaust pipe.
Next, you are ready for your coils. Now, you can mount these pretty much anywhere you want,
but you do want to keep them fairly close to your spark plugs and a long way away from the gas tank or vents
and put a whole another meaning to flame thrower.
Now, we're gonna put ours here on the inner fender up out of the way.
And I know a lot of you are probably wondering about these coils. Now, these are just cheapies. I got these down at the local auto parts store nine bucks each. And they will be perfect
with your coils in place. Make your connections to the wiring harness up front, then run the wires out of the way
and then just hook up your plugs and you're ready to roll.
All right. This, is it the moment of truth. Are these things gonna work or is this just some sort of backyard voodoo? Well, to make these operate, you run your engine up to about 3500, hit the button and pump the gas.
You think? I'm kidding.
Just watch this.
Oh.
Mhm.
All right. All right. Calm down, calm down. I told you that these were cool. Now comes the warnings. You knew there was gonna be some warnings. These are not technically legal on any public highway. So, if you think you're gonna roast the local tail gator with these. Well, that's tempting. But no, don't do it also.
You gotta be careful with these. If you torch these things off in your driveway and burn down your neighbor's fence, well, you're on your own for that. These are best used at a show or a cruise or
a
lot of shows. Have competitions with these things. The best part is if you never put these on your rig,
at least you know how to do it. And that puts you in that mythical, legendary category
of the flame thrower.
When the smoke clears Stacy shows a lift. You won't believe this thing has a lifting capacity of 6000 pounds too.
Hey, welcome back. I know you've seen me use lifts a lot here on the show.
It'd be hard to do a lot of these projects without one.
And the lift that I use here is a 10,000 pound commercial unit.
So I can get some pretty stout trucks on here. But that's gonna be a little big for the average garage. But if you're thinking about building a shop, well, here's some stuff that you need to know before you buy a lift and use it for the first time. First. If you're looking at a dual post lift like this, you need to have some good solid concrete to mount it to because
that's what these bolts go down into and these bolts are what holds this thing up. Right?
Second. Make sure you've got enough ceiling space to mount the lift
to lift the vehicle. You gotta find the center of gravity before you put that thing on the lift. Now, I'm not talking about the center of the wheelbase. I'm talking the center of gravity. Remember the front with the engine is gonna be heavier than the rear, especially on a truck. And the idea here is to center it up to where the weight is evenly dispersed. Front rear. That way the truck doesn't fall off when you try to lift it.
Generally, this means that the rear is gonna stick out further than the front.
All right. I know a lot of you are probably thinking, which, yeah, I'd love to have a lift but
I don't need anything quite that heavy duty for my little truck and
I don't have that kind of space. Well, I've got a surprise for you. Come on over here.
This is called the Mobile Man Lift and it's something new from Eagle equipment. Now, it's a cantilever style lift that slides in from the side
and picks your rig up. And the best part is this thing's completely portable.
The lifting arms slide out in all directions, giving you the ability to lift just about any vehicle.
The pads also pivot and you have a threaded telescopic adjustment for getting into those hard to reach areas.
You even have these supports in the rear for extra stability.
Now, I know what you're thinking because I thought exactly the same thing when I first saw this thing,
you expect me to pick up a truck with this and then get underneath it and work on it.
You're crazy. Well, check this out because this really does work.
Just slide the lift in place,
set the lift pads
then just hit the button
and up. She goes
since the cantilever design list from the center.
Well, man, you've got all kinds of great access to the undercarriage under here and this thing will lift 6000 pounds. Now, the really good news,
this thing only costs 3500 bucks and that is delivered to your door guys. That is a great investment on a really innovative tool.
So don't be surprised if all your buddies wanna borrow it. Now, one last thing, any time you use a lift or any other kind of shop equipment,
make sure that you understand how to use it and that you're doing it safely because the idea here is to build the world's coolest truck, not die trying
if you've been around the world of trucks very much. Well, you know, there's a lot of new tires hitting the market
and one of the toughest tires to build is the all terrain tire. It's gotta be good on the highway. It's gotta be good off road.
Well, Bridgestone's got that covered with the duer A T rivo.
Now, Bridgestone uses new technology both in the design and in the compound
to give you a nice smooth running tire on the highway.
These things will go 50,000 miles, but also the tread design is aggressive enough to where it won't get stuck in the mud or the water. Now, obviously, you're not gonna use these on a rock crawler,
but they would be good on the truck that's pulling the trailer, that's got your rock crawler on it.
So, if you're looking for a good all terrain tire,
you need to check these ones out from Bridgestone.
One thing is for sure. One of the best ways to change the look and the feel of your interior
is to install some custom gauges.
And you have got a lot of choices out there like these from auto meter that they call the street rod series.
And these have a nice clean silver face, easy to read numbers, classic style pointer
and thin chrome
bezel
and a domed lens for a nice smooth clean look.
Now, you also get all the sending units and wiring to hook these things up and make them work.
But you have another choice here. You can get the five piece gauge set,
but you can also add to it a matching tachometer and clock. So you have a complete set of gauges, that little clock is pretty cool. So if you're ready to do something about your interior, want it to be different.
Give auto meter a call. Now when you're working on a truck, especially an old rusty truck,
having a good penetrating oil is worth its weight in gold. Here is some that you have to have in your toolbox. This is called gibbs penetrating oil and it will absolutely destroy and dissolve any kind of rust or corrosion on bolts or in engines cylinder walls, hinges, you name it.
Matter of fact, if this stuff won't break it loose,
it's probably not gonna come loose.
This is one of the few penetrating oils that I've seen.
You can actually dip a bolt in and watch it go up the threads. Now, if you don't believe me, go ahead and buy a can of this stuff and try it,
this will get into a millionth of an inch.
Now, it's more than just a penetrating oil though. You can also use it as a cutting oil or a water repellent on your ignition system.
The bad news is you can't get this stuff just anywhere. You've got to go to a place called machines and more to get Gibbs oil.
Today's quick tip is an answer to a lot of emails that I get from you Bronco guys wondering what I'm gonna do about my clutch linkage here on Project Crazy Horse. Now, for those of you that don't know
back when the Broncos were new right here in the block. There was this threaded boss that actually held the bracket.
They came in and held the other side of this equalizer bar and worked your clutch. Unfortunately,
Ford hasn't made those blocks in years. So what do you do when you put a late model block into an early Bronco? I've
got a solution here for you.
I took the original mounting bracket still available at almost any Bronco parts place
bolted it right here to the original hole in the bell housing.
Then I took exactly the same bracket stood it on its end,
welded it to this bracket and used some round stock to strengthen this joint here.
Then just machined a hole here in the top
and now it bolts to the back of the head.
Now, look at this,
look how nicely that bends naturally around that head. I didn't do any of this bending
and now I have a nice strong bracket to support my clutch equalizer bar. Now, keep in mind if you do this, you're gonna have to do some modification to this upper part of the bracket
depending on where your bolt holes are in the back of the head. Hopefully,
this gives you a fairly simple solution to an age old Bronco problem
and you can use variations of this on Jeeps or Scouts, anything that's got some real tight clutch linkage.
Well, that does it for today.
It won't be long until I've got a body on here and I'm ready to take this thing out and rock and roll with it. If you want to see that,
you're gonna have to keep watching
the