Classic Trucks! Builds
Want more content like this?
Join the PowerNation Email NewsletterVideo Transcript
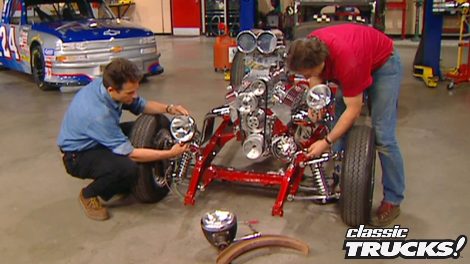
To take on trucks after months of cutting and fitting, welding and fabricating, the harry Haller's chassis is finally ready for its final assembly. Let's just say the cool factor is way high on this one.
The cool factor continues when the guys take a close up. Look at two time NASCAR champion Jack Spragg
Chevy Silverado.
Finally, we'll show you how to be prepared for the unexpected.
That's all today on trucks.
Welcome to this week's show everybody glad you could join us. Now, if you've been following the build up of the Harry Hall, then you know, a ton of work has gone into the transformation of our 34 international. It was just a forgotten old relic when we found it, but it's gonna be a one of a kind hot rod when we're finished.
That's right. Now. Any time you do a build up like this, well, it takes time. There's just no way around it.
You have to cut and fit and weld and then refit and cut some more and
custom build a bracket here and then put it all together
just to have to take it apart three or four times. Now, we've showed you these tips and these techniques to show you that if you take your time, you really can build just about anything.
Now, we come to the part of the build, that's actually the most fun as well as rewarding. And that's when you get to put all the parts back on for good. That's right. No more mockups at this point. Now, this is also where all that time you took, making sure everything fits just right and being real meticulous about all your measurements really pays off. Of course. The last thing we need to do before we can do the final assembly on the chassis is paint the frame. Now remember that Hairy Hauler is gonna spend some time as a fully fender rod as well as fender less. So these frame sides as well as from this body mount forward needs to be really slick.
So we spent some time with the grinder getting everything nice and smooth.
Then we hit it with a good coat of Epoxy primer surfer to take out any kind of imperfections.
Then we hit it with a coat of Raspberry pearl from house of colors and then covered that with a nice thick coat of clear. You can see the results are spectacular
and it's only gonna get better when we put our polished stainless steel, a arms and steel spindles we got from He's
hot rod shop back on.
Now, make sure to put some grease on the bushings to keep them from squeaking. And it's always important to use aniseed on stainless steel bolts
with the coil over shocks in place. It's time for the hubs, rotors and calipers.
Now, for those, we went to Will wood and got these really trick polished aluminum pieces.
Now, with the hubs and rotors in place, go ahead and bolt on the caliper
but make sure that you use some lock tight on the caliper bolts and the hub bolts to keep it from backing out.
Now, once that's done, you're ready for your wheels.
Now, the last thing we need to bolt on to our front suspension is this rack and pinion unit. We also got from heights
and it's gonna be held in place with supplied stainless steel hardware. Now, whatever you do take the time to paint these tire rod ends, otherwise they're gonna stick out like a sore thumb on an otherwise flawless front suspension.
Now it's time to assemble the rear suspension. Of course, we painted this nine inch curry rear end to match the frame that makes that polly center section really pop.
Now, we'll just jack it up here into place.
Then we put on our stainless steel four bars followed by the Panter bar
and then finally the coil over shocks. Now we'll make the final adjustments on our opinion angle. Once we have the drive shaft in
with the rear housing fully mounted,
we were able to slide our rear axles back into the place. Now, the rear brakes are also polished will woods and they're very similar to the ones we're gonna run in front except for one thing.
And that's these little parking brakes here that mount right on to the caliper bracket. Now, once we have our rotors and calipers back on, we'll be ready for those big old rear tires.
The last thing we're gonna put on the rear end are these wheelie bars and you didn't think we'd forget those. Did you?
Now, they just bolt up to the brackets that we welded to the rear end. Now, keep in mind that this rear end is empty. So we're gonna fill it with some royal purple synthetic gear lube. Keep those gears happy for a long time.
Now, we're ready to put our stainless steel lines back on and since we already did all the bending, cutting and flaring before Stace laid down that killer looking Raspberry paint on the frame. Now we have to do is put them back in their proper place. By the way, this is the perfect time to hit them with a good polish to really bring out that shine.
Well, Mel's taking care of the brake lines. I went ahead and put on the fuel lines, the fuel pump and the fuel filter. Now, since our holes are already drilled and tapped, it's just a matter of bolting everything on.
Now, you're probably wondering where we got these cool chrome plated 12 point bolts that we're putting everything on with because they're expensive and they're kind of hard to find if you don't know where to look.
Well, here's a trick.
We got them all in a Mr
gasket engine detailing kit. Now, this gives you a complete assortment of chrome plated bolts that are about half the price than if you buy them all separate.
Now, with the brake lines in place and ready to go, it's time to put on our brake booster and master cylinder. Now, the master cylinder is bare metal. So make sure you hit it with a good rust prohibitive paint after that, go ahead and bolt it all in place and follow that up with your clutch master cylinder
with the master cylinder in place. We can go ahead and make the final connections to the lines. Now, as you can see our stop light switch and the residual valves are in line where they need to be.
And the good thing about having the master cylinder down in the frame like this
is that once you have everything tight, you can go ahead and bleed the brakes and you're ready to go. Speaking of brakes, we really need to take one but don't go away. We got more trucks for you right after this. Here's that Wrench man. All right, thanks. This is looking very cool. It's almost too nice to put a body on it pretty much. I was thinking maybe just a seat that's crossed my mind. Now,
later on trucks, we've got a Silverado to show you that can push 200 miles an hour at Daytona.
Jack Sprague's NASCAR Craftsman series truck is coming up after we finish up the chassis on the Hairy Hauler.
Welcome back to trucks.
Now, with all of our suspension components bolted to the frame, all we have left to do is bolting the drive train.
Make sure you keep a lot of rags handy because you're gonna be doing a lot of polishing on something like this.
Now, you may have noticed that we painted our bell housing the same color as the rest of the frame.
This gives us a nice splash of color between all this polished aluminum on the engine
and on the transmission.
Now, all we have left to do is finish up some of the details like the scoop and the alternator and this exhaust system.
You know, one of the main problems on an older truck like our 34 international is that the stock radiator is never gonna keep a modern V8 cooled down. That's why we went to Evans cooling
and got this custom Griffin aluminum radiator that's gonna fit inside of our stock shell. We're also gonna run Evans wireless coolant to help keep temperatures down as well
with the radiator mounted in the grill shell. You can see that we decided to keep this original top opening because it's so stinking cool matter of fact that's what real hot rods are all about.
You also notice we still have plenty of room to come in here and mount a flex, a light electric cooling fan to keep everything cool.
Now, for the radiator and heater hose, we're gonna use this cool flex hose from total performance and that's really the only way to go because all you have to do is cut it and bend it to shape
and you have a really cool custom hose that won't ever wear out on you.
All right. Now, we've talked a lot about how we're gonna run the hauler both with and without fenders. Of course, this brings up a real interesting problem. And that is headlights.
Now, with the fenders in place, the stock headlights
are supported by these braces that run under the fenders. Of course, we're gonna reuse those. But
with the fenders off as you can see, well, that doesn't look any good.
So, what are we gonna do? Well, we thought you'd never ask.
We went to Socal
speed shop and got a set of these really cool polish stainless steel pedestals
that mount right on the frame on either side of the grill shell, high boy style.
Now to mount these, all you have to do is drill and tap your holes, which we've already done
and just bolt them on.
Of
course, we couldn't put just any old lights on those pedestals. We knew we had to have something really special for the look and style. We're after. Fortunately for us, we didn't have to look any further than total performance for a pair of their chrome plated king B lamps. Now, these things not only match our pedestals perfectly, but they also give us that really cool look. We just had to have,
well, that takes care of the chassis assembly for now man, it's nice when things go together like that and
you can stay fairly clean
and now it's time to get dirty again because we've still got some work to do here in the cab and that involves everybody's favorite subject.
Wiring and electrical.
You know, the reason most people don't like messing with wirings because for the longest time, there were no kits available to help you out. Of course, that was before painless wiring offered up this complete kit to take the pain out of that process. Now, this kit comes with all the fittings, fuses, wiring and hookups. You'll need
to get up and running.
Here's that harness.
ST All right. Thank you.
Now, installing your harness is pretty much like anything else. You need to spend some time mapping it out. So you know how it's gonna lay. Now, the more time you spend here, the less time you'll have to spend later on fixing your mistakes.
Now, we're gonna mount our fuse panel
up on the firewall behind the steering column where it's out of the way, but we still have access to it,
then we'll run our wires down the side and under the cab as neatly and out of the way as possible.
Obviously, we had to have some new gauges for the hauler. So we went to Stewart Warner and grabbed a set of their wings gauges. Now, these have that vintage look we're after with their white faces, classic pointer and of course the little wings logo,
but they're a whole lot more than just another pretty face. They're also loaded with state of the art electronics to keep up with that blown motor. Now, where you mount your gauges is entirely up to you and your own personal preference. Now, on a vehicle like the old 34 that's got two great big holes already cut in the dash. Well, you have a couple of choices. You can make some patch panels, weld them in, grind it all down
and then cut your holes for your new gauges or if you don't wanna do that, that's a lot of work.
You can make a cover plate out of nice wood or polished aluminum or stainless steel.
Put it up there,
cut your holes in the plate and the dash and mount your gauges. Now, either way done. Right? Will be awesome.
Well, speaking of awesome, we thought we'd give you one good look at how well everything fits together from the rear axle to the drive shaft, the brake line
and steel braided fuel lines. To the transmission and motor all the way down into the front suspension as well as the wheel and tire combination. Let's just put it this way with a chassis that looks this good. You can count on a, one of a kind hot rod when we're finished
up next on trucks, the guys have a few things to show you that should always be with you before you leave the driveway.
You just can't get enough of trucks. Check us out online at trucks, tv.com.
Thanks for staying with us. Everybody. You know, when you're out on the road or even the trail situations can come up that you're really not prepared for. And you might think being prepared for the various situations means carrying a big old box of tools and equipment. Well, the fact is that's not only impractical but it's really not necessary either. That's right. So we're gonna show you a list of things that everybody should carry in their truck first off. Is this amazing stuff known as duct tape?
Now, the trick to duct tape is that it's very sticky
and very strong. You can use this stuff to tape up, sagging headliners, broken windows, use it to make emergency repairs on hoses. Heck, I've even seen guys hold on fenders and bumpers with this stuff. Now, here's a trick.
Keep the tape in a plastic bag.
So all the adhesive that oozes out around the sides won't get all over everything
next up is a simple pad of paper. Why you ask? Well, come on, how many times have you dug through your glove box trying to find something to write with?
Having these two items allows you to take down information if you're in a wreck record, license numbers and locations. If you happen to witness a crime, even jot down directions and phone numbers if you end up lost. Now, this may seem obvious, but most people never even think to carry this pair.
Now, we have what most people call the miracle tool and that is the vice grip
and these things literally take the place of a vice pair of pliers, a whole set of sockets and wrenches,
even a hammer. Now, you can use these things to reconnect broken suspension parts, body panels, even exhaust systems. We definitely recommend
having the biggest pair that
in your truck because the bigger ones are a lot stronger than little dinky ones. Now, the next thing you want to look into is a good flashlight and the trick here is to get one that's small, so it doesn't take up a lot of storage space, but still has a good strong beam. Now, these are great for looking under a hood or into a trunk at night and they're a whole lot more versatile as well as more safe than something like a flare.
Now, as far as tools go, having a good multi tool like this. Leatherman is a definite must. Now, these have everything from a pair of pliers to screwdrivers to a knife blade. Seriously, between this and the vice grips, there's very few things that you won't be able to handle. Now, when you're looking for a multi tool,
make sure you get something pretty sturdy and has its own case. Now, the next thing you don't wanna be without is a fire extinguisher. Now, chances are you're never gonna need one of these things. But if you ever do,
you're really gonna be glad you have one. Of course, you want it to be small, so it's easy to store, but you also need to make sure that it'll handle all types of fires, especially electrical and fuel fires. Finally, a flat tire comes along at the worst possible times, usually on a dark street with no shoulder.
So you need a can to fix a flat. Now, this not only seals most flat tires, but it also inflates the tire for you. Let you get someplace safe,
but keep in mind fix a flat is only temporary. You need to get somewhere and get the tire fixed properly as soon as you can
there. You have it a few simple things everyone should have with them before they leave their driveway.
There's no doubt that when it comes to high performance hoses using braided stainless steel is the only way to go.
It's far superior to a stock rubber hose. However,
it doesn't mean that it lasts forever. The rubber hose inside the braiding will eventually deteriorate and start to leak on you, but the hose will still look new because of the braiding
and that can create a potentially dangerous situation. So,
when do you change the hoses? Well, on the street application, if your hoses are around 10 years old,
it's time to replace them.
Hey, who drooled on the scoop?
Welcome back to trucks. You know, there's a lot of forms of racing out there. And for the longest time, majority of the vehicles that were whipping around the tracks across the country were cars.
Well, that changed in 1995 when the Craftsman Truck series was born and the only driver that runs in that series that started every race is two time NASCAR champion Jack Spring.
Today we're gonna take a close up look at his Silverado.
Now, this racing Silverado sits on a seven inch shorter wheelbase and stock and the roof line is 10 inches shorter than what comes off the assembly line.
All the body panels are lightweight aluminum and of course, there's no glass in the truck, including the headlights, which are nothing more than very realistic looking stickers.
Now, the cockpit is all business with its racing seat and harness. And since this bow tie doesn't have any doors, a quick release steering wheel makes it easier to get in and out. A complete roll cage protects Jack when any of those racing deals come up and a large rear view mirror allows him to keep an eye on the competition
under the hood sits a 358 small block Chevy that's been massaged to kick out about 750 horses. Of course, that's backed up with a four speed manual.
Now, the racing front suspension is all open and easy to get to. So, making adjustments for various track conditions is a snap.
Now, since we're on the subject of suspension, this chassis was built by Hendrick Motorsports on the same jig that Jeff Gordon's Winston Cup. Monte Carlo is built on now on a super speedway like Daytona or Talladega, this truck can run in excess of 190 miles an hour. Thanks in large part to the third year racing.
Surprisingly enough, there is something that vaguely resembles a bed in back under this little panel, but you can forget about cargo.
All this thing hauls is a 22 gallon fuel cell that feeds a very thirsty motor 104 octane racing fuel
maybe. Now, you have a better idea of exactly what goes into a NASCAR craftsman truck and nobody does it better than Chevrolet
winning more than 50% of all the races won since the first checkered flag dropped in 95
and now truck gear, parts, tools and equipment for pickups and sport utilities.
Now, if you're into off road and you know that airing your tires up and down is something that you've got to do to get maximum traction.
Well, extreme outback products has made that a lot easier with their extreme air compressor and tank kit
that they claim is the fastest,
highest pressure, continuous duty compressor on the market
and you can mount this thing in any position on your truck
and the cooling fan keeps the compressor from overheating and shutting down on you. So that way you can not only air up your big tires, everybody else's too.
Now, the whole kit goes for about 380 bucks
and extreme outback is who has it.
You know, when the PT cruiser first came onto the scene, a whole lot of people couldn't help but sit up and take notice and hey, why not? They resemble an old surfer's wagon, except for one thing.
That's right. No wood.
Well, PT cruising took care of that omission with their woody kit. Now, these panels are made of plastic so they won't deteriorate in the weather, but you'd be real hard pressed to tell these aren't real wood.
The best part about this kit, however is how well everything fits around the door handles and emblems and installation only takes a couple hours in your driveway.
That's gonna do it for truck. Here, here's a preview of next week's show.
We'll take a 99 Sierra and give it a few things every outdoor rig should have.
Then we'll show you the latest on project big blaze before bolting on a heavy duty bumper and winch combination.
After that, we'll take you on a tour of duty with one of the ultimate British war machines. All that plus a little fun with the c
of the Hairy Hauler.
That's right. We'll show you how to replace those rusty panels.
Well, that's gonna do it for this week's show. We appreciate you hanging out with. Yeah, we got more trucks for you next week. Check
this
out, man.
Oh, those are beautiful.
So you can't just have one set of
covers. You gotta have 20, I see. Like the fenders or three
days we'll have a fender.
Depends on the weather
trucks is an RTM production.
Show Full Transcript
The cool factor continues when the guys take a close up. Look at two time NASCAR champion Jack Spragg
Chevy Silverado.
Finally, we'll show you how to be prepared for the unexpected.
That's all today on trucks.
Welcome to this week's show everybody glad you could join us. Now, if you've been following the build up of the Harry Hall, then you know, a ton of work has gone into the transformation of our 34 international. It was just a forgotten old relic when we found it, but it's gonna be a one of a kind hot rod when we're finished.
That's right. Now. Any time you do a build up like this, well, it takes time. There's just no way around it.
You have to cut and fit and weld and then refit and cut some more and
custom build a bracket here and then put it all together
just to have to take it apart three or four times. Now, we've showed you these tips and these techniques to show you that if you take your time, you really can build just about anything.
Now, we come to the part of the build, that's actually the most fun as well as rewarding. And that's when you get to put all the parts back on for good. That's right. No more mockups at this point. Now, this is also where all that time you took, making sure everything fits just right and being real meticulous about all your measurements really pays off. Of course. The last thing we need to do before we can do the final assembly on the chassis is paint the frame. Now remember that Hairy Hauler is gonna spend some time as a fully fender rod as well as fender less. So these frame sides as well as from this body mount forward needs to be really slick.
So we spent some time with the grinder getting everything nice and smooth.
Then we hit it with a good coat of Epoxy primer surfer to take out any kind of imperfections.
Then we hit it with a coat of Raspberry pearl from house of colors and then covered that with a nice thick coat of clear. You can see the results are spectacular
and it's only gonna get better when we put our polished stainless steel, a arms and steel spindles we got from He's
hot rod shop back on.
Now, make sure to put some grease on the bushings to keep them from squeaking. And it's always important to use aniseed on stainless steel bolts
with the coil over shocks in place. It's time for the hubs, rotors and calipers.
Now, for those, we went to Will wood and got these really trick polished aluminum pieces.
Now, with the hubs and rotors in place, go ahead and bolt on the caliper
but make sure that you use some lock tight on the caliper bolts and the hub bolts to keep it from backing out.
Now, once that's done, you're ready for your wheels.
Now, the last thing we need to bolt on to our front suspension is this rack and pinion unit. We also got from heights
and it's gonna be held in place with supplied stainless steel hardware. Now, whatever you do take the time to paint these tire rod ends, otherwise they're gonna stick out like a sore thumb on an otherwise flawless front suspension.
Now it's time to assemble the rear suspension. Of course, we painted this nine inch curry rear end to match the frame that makes that polly center section really pop.
Now, we'll just jack it up here into place.
Then we put on our stainless steel four bars followed by the Panter bar
and then finally the coil over shocks. Now we'll make the final adjustments on our opinion angle. Once we have the drive shaft in
with the rear housing fully mounted,
we were able to slide our rear axles back into the place. Now, the rear brakes are also polished will woods and they're very similar to the ones we're gonna run in front except for one thing.
And that's these little parking brakes here that mount right on to the caliper bracket. Now, once we have our rotors and calipers back on, we'll be ready for those big old rear tires.
The last thing we're gonna put on the rear end are these wheelie bars and you didn't think we'd forget those. Did you?
Now, they just bolt up to the brackets that we welded to the rear end. Now, keep in mind that this rear end is empty. So we're gonna fill it with some royal purple synthetic gear lube. Keep those gears happy for a long time.
Now, we're ready to put our stainless steel lines back on and since we already did all the bending, cutting and flaring before Stace laid down that killer looking Raspberry paint on the frame. Now we have to do is put them back in their proper place. By the way, this is the perfect time to hit them with a good polish to really bring out that shine.
Well, Mel's taking care of the brake lines. I went ahead and put on the fuel lines, the fuel pump and the fuel filter. Now, since our holes are already drilled and tapped, it's just a matter of bolting everything on.
Now, you're probably wondering where we got these cool chrome plated 12 point bolts that we're putting everything on with because they're expensive and they're kind of hard to find if you don't know where to look.
Well, here's a trick.
We got them all in a Mr
gasket engine detailing kit. Now, this gives you a complete assortment of chrome plated bolts that are about half the price than if you buy them all separate.
Now, with the brake lines in place and ready to go, it's time to put on our brake booster and master cylinder. Now, the master cylinder is bare metal. So make sure you hit it with a good rust prohibitive paint after that, go ahead and bolt it all in place and follow that up with your clutch master cylinder
with the master cylinder in place. We can go ahead and make the final connections to the lines. Now, as you can see our stop light switch and the residual valves are in line where they need to be.
And the good thing about having the master cylinder down in the frame like this
is that once you have everything tight, you can go ahead and bleed the brakes and you're ready to go. Speaking of brakes, we really need to take one but don't go away. We got more trucks for you right after this. Here's that Wrench man. All right, thanks. This is looking very cool. It's almost too nice to put a body on it pretty much. I was thinking maybe just a seat that's crossed my mind. Now,
later on trucks, we've got a Silverado to show you that can push 200 miles an hour at Daytona.
Jack Sprague's NASCAR Craftsman series truck is coming up after we finish up the chassis on the Hairy Hauler.
Welcome back to trucks.
Now, with all of our suspension components bolted to the frame, all we have left to do is bolting the drive train.
Make sure you keep a lot of rags handy because you're gonna be doing a lot of polishing on something like this.
Now, you may have noticed that we painted our bell housing the same color as the rest of the frame.
This gives us a nice splash of color between all this polished aluminum on the engine
and on the transmission.
Now, all we have left to do is finish up some of the details like the scoop and the alternator and this exhaust system.
You know, one of the main problems on an older truck like our 34 international is that the stock radiator is never gonna keep a modern V8 cooled down. That's why we went to Evans cooling
and got this custom Griffin aluminum radiator that's gonna fit inside of our stock shell. We're also gonna run Evans wireless coolant to help keep temperatures down as well
with the radiator mounted in the grill shell. You can see that we decided to keep this original top opening because it's so stinking cool matter of fact that's what real hot rods are all about.
You also notice we still have plenty of room to come in here and mount a flex, a light electric cooling fan to keep everything cool.
Now, for the radiator and heater hose, we're gonna use this cool flex hose from total performance and that's really the only way to go because all you have to do is cut it and bend it to shape
and you have a really cool custom hose that won't ever wear out on you.
All right. Now, we've talked a lot about how we're gonna run the hauler both with and without fenders. Of course, this brings up a real interesting problem. And that is headlights.
Now, with the fenders in place, the stock headlights
are supported by these braces that run under the fenders. Of course, we're gonna reuse those. But
with the fenders off as you can see, well, that doesn't look any good.
So, what are we gonna do? Well, we thought you'd never ask.
We went to Socal
speed shop and got a set of these really cool polish stainless steel pedestals
that mount right on the frame on either side of the grill shell, high boy style.
Now to mount these, all you have to do is drill and tap your holes, which we've already done
and just bolt them on.
Of
course, we couldn't put just any old lights on those pedestals. We knew we had to have something really special for the look and style. We're after. Fortunately for us, we didn't have to look any further than total performance for a pair of their chrome plated king B lamps. Now, these things not only match our pedestals perfectly, but they also give us that really cool look. We just had to have,
well, that takes care of the chassis assembly for now man, it's nice when things go together like that and
you can stay fairly clean
and now it's time to get dirty again because we've still got some work to do here in the cab and that involves everybody's favorite subject.
Wiring and electrical.
You know, the reason most people don't like messing with wirings because for the longest time, there were no kits available to help you out. Of course, that was before painless wiring offered up this complete kit to take the pain out of that process. Now, this kit comes with all the fittings, fuses, wiring and hookups. You'll need
to get up and running.
Here's that harness.
ST All right. Thank you.
Now, installing your harness is pretty much like anything else. You need to spend some time mapping it out. So you know how it's gonna lay. Now, the more time you spend here, the less time you'll have to spend later on fixing your mistakes.
Now, we're gonna mount our fuse panel
up on the firewall behind the steering column where it's out of the way, but we still have access to it,
then we'll run our wires down the side and under the cab as neatly and out of the way as possible.
Obviously, we had to have some new gauges for the hauler. So we went to Stewart Warner and grabbed a set of their wings gauges. Now, these have that vintage look we're after with their white faces, classic pointer and of course the little wings logo,
but they're a whole lot more than just another pretty face. They're also loaded with state of the art electronics to keep up with that blown motor. Now, where you mount your gauges is entirely up to you and your own personal preference. Now, on a vehicle like the old 34 that's got two great big holes already cut in the dash. Well, you have a couple of choices. You can make some patch panels, weld them in, grind it all down
and then cut your holes for your new gauges or if you don't wanna do that, that's a lot of work.
You can make a cover plate out of nice wood or polished aluminum or stainless steel.
Put it up there,
cut your holes in the plate and the dash and mount your gauges. Now, either way done. Right? Will be awesome.
Well, speaking of awesome, we thought we'd give you one good look at how well everything fits together from the rear axle to the drive shaft, the brake line
and steel braided fuel lines. To the transmission and motor all the way down into the front suspension as well as the wheel and tire combination. Let's just put it this way with a chassis that looks this good. You can count on a, one of a kind hot rod when we're finished
up next on trucks, the guys have a few things to show you that should always be with you before you leave the driveway.
You just can't get enough of trucks. Check us out online at trucks, tv.com.
Thanks for staying with us. Everybody. You know, when you're out on the road or even the trail situations can come up that you're really not prepared for. And you might think being prepared for the various situations means carrying a big old box of tools and equipment. Well, the fact is that's not only impractical but it's really not necessary either. That's right. So we're gonna show you a list of things that everybody should carry in their truck first off. Is this amazing stuff known as duct tape?
Now, the trick to duct tape is that it's very sticky
and very strong. You can use this stuff to tape up, sagging headliners, broken windows, use it to make emergency repairs on hoses. Heck, I've even seen guys hold on fenders and bumpers with this stuff. Now, here's a trick.
Keep the tape in a plastic bag.
So all the adhesive that oozes out around the sides won't get all over everything
next up is a simple pad of paper. Why you ask? Well, come on, how many times have you dug through your glove box trying to find something to write with?
Having these two items allows you to take down information if you're in a wreck record, license numbers and locations. If you happen to witness a crime, even jot down directions and phone numbers if you end up lost. Now, this may seem obvious, but most people never even think to carry this pair.
Now, we have what most people call the miracle tool and that is the vice grip
and these things literally take the place of a vice pair of pliers, a whole set of sockets and wrenches,
even a hammer. Now, you can use these things to reconnect broken suspension parts, body panels, even exhaust systems. We definitely recommend
having the biggest pair that
in your truck because the bigger ones are a lot stronger than little dinky ones. Now, the next thing you want to look into is a good flashlight and the trick here is to get one that's small, so it doesn't take up a lot of storage space, but still has a good strong beam. Now, these are great for looking under a hood or into a trunk at night and they're a whole lot more versatile as well as more safe than something like a flare.
Now, as far as tools go, having a good multi tool like this. Leatherman is a definite must. Now, these have everything from a pair of pliers to screwdrivers to a knife blade. Seriously, between this and the vice grips, there's very few things that you won't be able to handle. Now, when you're looking for a multi tool,
make sure you get something pretty sturdy and has its own case. Now, the next thing you don't wanna be without is a fire extinguisher. Now, chances are you're never gonna need one of these things. But if you ever do,
you're really gonna be glad you have one. Of course, you want it to be small, so it's easy to store, but you also need to make sure that it'll handle all types of fires, especially electrical and fuel fires. Finally, a flat tire comes along at the worst possible times, usually on a dark street with no shoulder.
So you need a can to fix a flat. Now, this not only seals most flat tires, but it also inflates the tire for you. Let you get someplace safe,
but keep in mind fix a flat is only temporary. You need to get somewhere and get the tire fixed properly as soon as you can
there. You have it a few simple things everyone should have with them before they leave their driveway.
There's no doubt that when it comes to high performance hoses using braided stainless steel is the only way to go.
It's far superior to a stock rubber hose. However,
it doesn't mean that it lasts forever. The rubber hose inside the braiding will eventually deteriorate and start to leak on you, but the hose will still look new because of the braiding
and that can create a potentially dangerous situation. So,
when do you change the hoses? Well, on the street application, if your hoses are around 10 years old,
it's time to replace them.
Hey, who drooled on the scoop?
Welcome back to trucks. You know, there's a lot of forms of racing out there. And for the longest time, majority of the vehicles that were whipping around the tracks across the country were cars.
Well, that changed in 1995 when the Craftsman Truck series was born and the only driver that runs in that series that started every race is two time NASCAR champion Jack Spring.
Today we're gonna take a close up look at his Silverado.
Now, this racing Silverado sits on a seven inch shorter wheelbase and stock and the roof line is 10 inches shorter than what comes off the assembly line.
All the body panels are lightweight aluminum and of course, there's no glass in the truck, including the headlights, which are nothing more than very realistic looking stickers.
Now, the cockpit is all business with its racing seat and harness. And since this bow tie doesn't have any doors, a quick release steering wheel makes it easier to get in and out. A complete roll cage protects Jack when any of those racing deals come up and a large rear view mirror allows him to keep an eye on the competition
under the hood sits a 358 small block Chevy that's been massaged to kick out about 750 horses. Of course, that's backed up with a four speed manual.
Now, the racing front suspension is all open and easy to get to. So, making adjustments for various track conditions is a snap.
Now, since we're on the subject of suspension, this chassis was built by Hendrick Motorsports on the same jig that Jeff Gordon's Winston Cup. Monte Carlo is built on now on a super speedway like Daytona or Talladega, this truck can run in excess of 190 miles an hour. Thanks in large part to the third year racing.
Surprisingly enough, there is something that vaguely resembles a bed in back under this little panel, but you can forget about cargo.
All this thing hauls is a 22 gallon fuel cell that feeds a very thirsty motor 104 octane racing fuel
maybe. Now, you have a better idea of exactly what goes into a NASCAR craftsman truck and nobody does it better than Chevrolet
winning more than 50% of all the races won since the first checkered flag dropped in 95
and now truck gear, parts, tools and equipment for pickups and sport utilities.
Now, if you're into off road and you know that airing your tires up and down is something that you've got to do to get maximum traction.
Well, extreme outback products has made that a lot easier with their extreme air compressor and tank kit
that they claim is the fastest,
highest pressure, continuous duty compressor on the market
and you can mount this thing in any position on your truck
and the cooling fan keeps the compressor from overheating and shutting down on you. So that way you can not only air up your big tires, everybody else's too.
Now, the whole kit goes for about 380 bucks
and extreme outback is who has it.
You know, when the PT cruiser first came onto the scene, a whole lot of people couldn't help but sit up and take notice and hey, why not? They resemble an old surfer's wagon, except for one thing.
That's right. No wood.
Well, PT cruising took care of that omission with their woody kit. Now, these panels are made of plastic so they won't deteriorate in the weather, but you'd be real hard pressed to tell these aren't real wood.
The best part about this kit, however is how well everything fits around the door handles and emblems and installation only takes a couple hours in your driveway.
That's gonna do it for truck. Here, here's a preview of next week's show.
We'll take a 99 Sierra and give it a few things every outdoor rig should have.
Then we'll show you the latest on project big blaze before bolting on a heavy duty bumper and winch combination.
After that, we'll take you on a tour of duty with one of the ultimate British war machines. All that plus a little fun with the c
of the Hairy Hauler.
That's right. We'll show you how to replace those rusty panels.
Well, that's gonna do it for this week's show. We appreciate you hanging out with. Yeah, we got more trucks for you next week. Check
this
out, man.
Oh, those are beautiful.
So you can't just have one set of
covers. You gotta have 20, I see. Like the fenders or three
days we'll have a fender.
Depends on the weather
trucks is an RTM production.