Classic Trucks! Builds
Want more content like this?
Join the PowerNation Email NewsletterVideo Transcript
Day on trucks. Project big blaze draws closer to completion when the guys install a bulletproof drive train as well as drive shafts on their K five blazer.
After that, they've got a 94 S 10 that's not afraid to drop the hammer on the sound barrier.
They'll follow that up with all the tools you need to lay down a signature paint job.
That's all today on trucks.
Welcome to this week's show everybody. We're glad you're with us. Now, if you've been paying attention to trucks the past few weeks
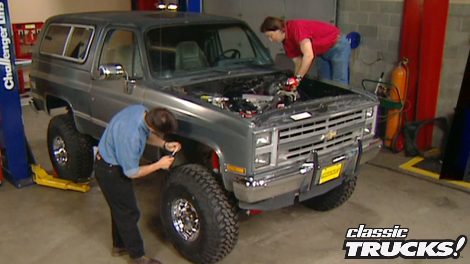
and you're pretty familiar with project big blaze that rolled into our shop, a well worn 88 blazer. But for the sake of you, folks who may have missed it, we already put on a lift kit, axle's front and rear as well as an aggressive wheel. Entire combination.
Of course, we followed all that up with a 350 crate motor and that leads us right into this week's show where we're gonna go to work on the drive train. That's right. Now, our blazer came stock with a 700 R four transmission
and an NP 208 transfer case. Now, these are adequate for a stock vehicle. But for something that modified,
these will never get it.
Now, the 700 R four is a little bit controversial because everybody wants them for the fourth gear,
but they got a reputation of being a little weak right off the bat. And that's not necessarily the case.
Matter of fact, you can really make those things stout with a few modifications. So
we went to B and M racing got one of their modified 700 R fours that'll handle up to 450 ft pounds of torque
and also give us the benefits of an overdrive transmission.
Now, for the transfer case, we knew we needed something really strong to round out a bulletproof drive trim. So we gave advance adapters a call and ordered up one of their Atlas two transfer cases. Now this thing features a solid one piece aluminum case as well as all gear drive for the ultimate in strength. Now, the Atlas two is available in different gear ratios depending on your needs and also comes with all the shifters linkage as well as adapters. You'll need to be able to bolt it in and go.
First thing we need to do is install the torque converter onto the transmission.
Now, for this, we're using the B and M lock up style converter for this application. Now, here's a few tips when you go to install the torque converter,
make sure that you've got at least a quart of fluid down inside. So you get some lubrication on initial start up
and also put a little bit around the seal and on the shaft
and then install the converter.
Now, here's where a lot of people make some big mistakes. Now you saw me push on this,
it's not going in any further, so it should be seated right wrong.
Notice these holes are almost flush with each other.
The converter needs to sit
at least an inch down inside.
So you need to just keep turning on it until it sees in like that. And
remember if you try to install a transmission without the torque converter fully engaged,
you'll mess up the transmission.
You know, one of the biggest reasons for having the drive train out of the vehicle is that it makes it a whole lot easier to assemble. Now, this aluminum adapter is not only what connects the transmission to the transfer case, but it's also what mounts everything to the cross member. So we'll go ahead and get that on right now and we're also gonna go with this brand new tranny mount. We got from energy suspension
and that bolts right up to the bottom of our adapter.
Finally, we're ready for the transfer case. Now, one of the neat things about the Atlas too
is that you can tilt it to get the right angle to clear your drive shafts and your shifters. Now, once you get your angle decided ours is gonna sit at about 45 degrees. Put your studs in, run a bead of silicone around the flange and you're ready to slide this thing in place. But you will need an extra set of hands and mel you wanna give me a hand, do it.
All right.
It's not light, is it
then just bolted on?
Of course, it would be silly to invest all your time and money in all these new parts and then try to reuse the old cables and Dipstick tube for the transmission. So we went to low car and got this really trick, braided steel cable and dipstick tube
to not only dress things up but to perform better as well.
Finally, we're ready to bolt the transfer case and the transmission into the truck. Now we'll just jack it up and slide the bell housing up against the engine and engage these dial pins. Now, the transmission should slide up flush to the engine very easily. If it doesn't,
that means your torque converter is not engaged all the way or you've got some sort of obstruction up here. Now, whatever you do don't just stick a bolt in here and try to tighten it down and pull the two pieces together.
You'll definitely mess up something in the transmission.
You need to fix the obstruction first,
then you can bolt it on. Follow that by bolting the torque converter to the flex plate.
Now we're ready to get the inspection plate and the cross member into place. Now, do yourself a huge favor here and take a little time to clean and paint these parts
because it makes completing the project a lot less messy. Now, at this point, all you're gonna do
is loosely bolt the cross member into place because you may need to move things around a bit when you do your final hookups
next up are the shifters for the transfer case. Now, ideally you want them to come up through the stock hole in the floor.
So I've already cut the threaded rod and the support tube for the shifters.
Now, all you gotta do is slide them in place.
Now, once you have it all together, all you have left to do
is hook up your linkage. Now, keep in mind you might have to come in here and trim this floor a little bit to make room for these shifters
while we're on the subject of linkage. Now is the time to hook your tranny linkage back up as well. Now make sure you check all the original parts and if they're bad, go ahead and replace them. This is also a good time to reconnect your transmission lines to the radiator and take care of all the small stuff like the speedometer cable as well as all your electrical connection.
Well, all the parts on big Blaze are really starting to come together. We still have some hookups to make, we'll take care of those after the break. We'll be right back
later in the show. We've got the tools you need to lay it down.
But up first, we've got some finishing touches for big blaze to show you.
Welcome back to trucks. Now that we have a bulletproof drive train in our blazer,
it's time to connect that to the axles and that means drive shafts. Now, for those, we went to Denny's drive shaft service and got us a couple of monsters that are guaranteed not to break. That's right. You break one of the wells or twist the tubes on one of these guys and they'll replace it free.
Can't beat that.
Now, for the front shaft, we've got a thick two inch tubing
with a CV joint at one end
and a standard U joint at the other.
Now, for the rear shaft, we've got a massive three inch tube
with once again a CV joint for the transfer case end, standard U joint for the P end. And
also these shafts are balanced and tested before they leave the shop. So they're also guaranteed not to vibrate.
Now in a project like this, you can just go ahead and plan on having to have your exhaust pipes custom bent
to clear the drive shaft or anything else that might get in the way. But we are gonna show you some of the components we're gonna run on our system. Now up first we're gonna change out the stock catalytic converter with this high flow cap. We got from random technologies and from that, we're gonna run through this Edelbrock RPM muffler for great sound and flow. And finally everything's gonna exit through the stainless steel tips. We also got from Edelbrock
now that we have all the major stuff done underneath, we can lower the truck down
and then show you the kind of headers we're gonna use. Now, for those, we went to JB A got a set of these ceramic coated shorties. That'll look great for a long time, but they also flow like crazy too.
Now, any time you put headers on a later model, Chevy
can be kind of a pain because you've got to modify the power steering bracket.
There was a whole arm here that needed to be cut off. Now JB A knows this. So they include all the hardware and some really detailed instructions to make this as easy on you as possible.
While we're up here in the engine compartment,
there's still a few minor details to finish up like the air filter for that.
We went to Can N and picked up one of their filter elements for our crate motor. Now, we also needed a dipstick. So on that trip to low car, we picked up this one made specifically for the Ramjet 350. Speaking of low
car now is a good time to hook up the cables and the dipstick for the transmission that we showed you earlier as well as this really trick throttle cable. Now, the dipstick for the transmission will mount somewhere on the firewall for easy access. The TV cable from the transmission and the throttle cable from the gas pedal will both hook up to a stock location on the throttle body.
Now that we have all our brand new upgrades stuffed into the engine compartment, there's no way we're gonna hide all that stuff with a stock hood. So we went to Good Mark and got one of their cow induction hoods. Now, this thing is all steel top and bottom with a two inch scoop and you can mount it using all your factory hardware and the fit. Well, that's as good if not better than your original hood.
Now, any time you start swapping drive trains around, you might as well figure you're gonna have to do some fabrication things just don't slide right in. That'd be too easy. Take all the fun out of it.
Now, you can see where we had to come in here and cut out to clear these shifters
and you're gonna wanna fill that hole in.
So I went ahead and made this panel slides right into place and you can either hold it in with sheet metal
so you can remove it to get access to your shifters
or for a more permanent situation. Just weld it in.
Now over here, I'm definitely welding a panel in, take up all this excess original hole. Then of course, the boots
will fill up all the rest. Now, any time you're making panels like this, try to make them as smooth and flat as you can. So the carpet lay right over the top of them
and no one will even know they're there.
Now, you might be wondering with the awesome suspension and drive train we put on big blaze whether or not we're gonna do anything with the exterior. Well, you can put your mind at ease because we got some big ideas to work with.
But the first thing we're gonna do is get rid of all the stock trim on our 88 Blazer. One. Last thing, any time you put in new axles or transmission, they're always shipped dry.
So make sure that you fill them with the proper lubricants. Also
double check your fuel lines and your electrical hookups or you could end up with a big blaze of your own. And I'm not talking about the truck also. Double check all of your steering linkage, your shifter, linkage, your cooling system,
all that needs to be taken care of before you ever turn that key. But hey, whatever you do, don't turn the channel because we got more trucks for you right after this.
Up. Next on trucks, we've got an S 10. That sounds like it's ready to get up and go.
You just can't get enough of trucks, check us out online at TRUCKS, tv.com.
Thanks for staying with us. Everybody. Now, when it comes to building the street truck, most people zero in on one aspect of their vehicle, they really want to stand out and that can result in anything from a real showstopper to a hot rod or even a street cruiser.
That's true. And very rarely does somebody build a vehicle that's really competitive in more than one area.
That's exactly what Chet Simmons did with this 94 S 10, he calls megawatt.
Now, as you probably guess this truck houses a pretty serious sound system under the fiberglass cap serious enough to consistently walk away with the top prize in sound quality and pressure.
Of course, that's due in large part to the attention to detail as well as the layout of the
eqs and wiring in the back.
Well, by now, you're probably wondering about that slick black paint, those N Os stickers and of course, that massive hood scoop probably all just for show. Right.
Well, go ahead and pop that hood and you'll see there really is something to pull this thing down the.
And what you're seeing is a 4.3 V6 with numerous upgrades including a nitrous system.
Now, this adds up to 386 horsepower on the
dyno
with quarter mile times in the mid 12. Now, that is smoky,
the high performance theme factors heavily into the interior layout with racing style pedals and bucket seats with five point harnesses that hold everything in place when the need for speed calls. And speaking of that need, check out the controls for the nitrous and auxiliary fans in the center console.
Also up on the A pillar is a gauge pod to make sure everything's happy
under the hood.
James Bond style gadgetry continues behind the seats where 215 inch subs rumble away. Of course, neon flashes in time to the music and that earns points in the sound quality competitions.
Now, for the sound pressure or overall volume competitions
just punch a button
that unleashes a way of a wattage of bolts through 16 speakers that can rattle windows into the next county.
The exterior received its share of attention as well with a three inch drop all the way around and big meaty tires in the back that do their best to get the power on the pavement.
One of the most unique features on this truck is the exhaust now instead of running out the back like everybody else, one big huge tip exits right out the side of the bed and the sound that comes out of that is music to our ears.
Welcome back to trucks. Everybody. Now, if you've been to any truck shows lately, you've probably noticed custom paint jobs showing up on everything from radical off road vehicles to lower street cruisers. But with the cost of those custom paint jobs going through the roof, more and more people are deciding to
do it themselves. Unfortunately, most people don't realize the type of tools and materials required to do this kind of work. So they end up having a really bad experience.
So today we're gonna show you some state of the art tools from sa
that'll help you set your shop up. Right.
Of course, the first thing that you need is a good gun. Now you get what you pay for here. So now is not the time to get cheap.
Now, we've got this
Sage Jet 2000 HV LP gun
that has all the controls and adjustments that you'd expect in a state of the art gun as well as the benefits of high volume, low pressure. But when you go to shoot one of these guns, it has the feel of a conventional high pressure gun, which is really nice for you guys that have never shot an HB LP system before because they do feel a little different.
Now, also, this is a very light well balanced gun. Now, that may not seem really important right now,
you get about halfway through a paint job out over a hood
and you will be kissing this thing.
Also, if you're gonna use a gravity feed gun,
make sure that you invest in some sort of stand because you definitely don't wanna lay it down
and it definitely won't stand up by itself.
Now, for door jams and smaller jobs, you have to have a detailed gun. Now, this set up allows you to get into tight areas you can't get into with a big gun. Also, if you're doing some small detail work like valve covers and only need an ounce or two of paint, this is the set up you want.
All right. Now we come to the really big issue and that's safety. Now, everybody knows that painting can be a little hazardous to your health. So what do you need?
Well, if you're not painting very often
and you're not shooting anything with Iso
Cyan its in it,
then a little half mask like this with the activated charcoal filters is plenty.
Just make sure that when you have one of these on
that you don't smell any paint or solvents because if you do
means those filters are worn out, you need to replace them.
Also, I know it's real tempting to go out and shoot in shorts and a T shirt.
Do yourself a favor. Invest in one of these little painting coveralls because they're cheap and they protect your skin.
Now, if you do a lot of painting or you might be shooting something with isocyanates in it,
then you need to look into a fresh air respirator and a full head mask. Now, the way these things work
is they totally cover your head
and they seal around your face to completely lock out the fumes.
Now, the air runs from the compressor through this filter system.
Then another line runs to your belt through yet another filter and then up to the mask giving you better air than you're actually breathing right now. Always remember painting a vehicle should be a great experience, not a hassle. And there's nothing like seeing a paint job come to life, using the right equipment. Also staying alive to enjoy your work by using the proper safety equipment is a big bonus as well. So invest wisely let your creative juices flow and we'll see you at the shows.
And now truck gear, parts, tools and equipment for pickups and sport utilities.
Now, if you drive a truck or SUV, you know, there's about as many products out there to hold your cargo in place as there seem to be stars in the sky.
But today we want to introduce you to the 401 cargo pull that not only acts as a cargo stop in the back of your vehicle,
but thanks to this hook on the end, can also help you retrieve cargo that's moved around on you in transit.
You also have a flashlight to help you out in the dark. But if all you wanna do is cart your clothes to the next destination.
A pair of hooks on either end, make that possible as well. Get four tools in one with the cargo pull for about 70 bucks.
Now, for those of you that are welders and you're still using the old tip and flip style helmet. Well, you're gonna wanna throw that thing in the trash
when you see these new auto dimming helmets by Jackson products. Now, these allow you to see what you're doing when you're not welding.
But as soon as you strike an art,
the liquid crystal dims in 1 25/1000 of a second to the proper shade to protect your eyes. Then of course, when you're done, it lightens right back up. Now, this not only protects your eyes, but it allows you to concentrate on your work as opposed to goofing around with your helmet.
Now, these lightweight state of the art helmets go for 280 bucks and you can get them from the Eastwood company
when it comes to detail in your motor. Nothing quite sets it off like this Cool flex hose from total performance. It's a flexible metal hose. You can cut to any length
and bend to whatever shape you want. But the really big news here is Cool Flex is now available in red, blue and purple
as well as the standard chrome. They're famous for Cool Flex is also available in upper and lower radiator hoses as well as heater hoses and comes with all the hose ends and hardware. You'll need to replace the stock rubber ones forever. How's gonna do it for truck gear? Let's take a quick look at next week's ship,
but Hairy Hauler is back next week, the guys will show you how the detail work can be the difference between a hack job and a real Showstopper. Then we've got a 56 F 100 that's not like any blue oval we've ever seen.
Finally, we'll take our cameras down south to Moroso Motorsports Park with a Jet and truck nationals. That's all next week on trucks.
Well, that's gonna do it for this week's show. We appreciate you hanging out with us. Yeah, we expect to see you back here on trucks next week.
This,
now, is that a cow induction hood or?
And it works with the Lions, just right.
Trucks is an RTM production.
Show Full Transcript
After that, they've got a 94 S 10 that's not afraid to drop the hammer on the sound barrier.
They'll follow that up with all the tools you need to lay down a signature paint job.
That's all today on trucks.
Welcome to this week's show everybody. We're glad you're with us. Now, if you've been paying attention to trucks the past few weeks
and you're pretty familiar with project big blaze that rolled into our shop, a well worn 88 blazer. But for the sake of you, folks who may have missed it, we already put on a lift kit, axle's front and rear as well as an aggressive wheel. Entire combination.
Of course, we followed all that up with a 350 crate motor and that leads us right into this week's show where we're gonna go to work on the drive train. That's right. Now, our blazer came stock with a 700 R four transmission
and an NP 208 transfer case. Now, these are adequate for a stock vehicle. But for something that modified,
these will never get it.
Now, the 700 R four is a little bit controversial because everybody wants them for the fourth gear,
but they got a reputation of being a little weak right off the bat. And that's not necessarily the case.
Matter of fact, you can really make those things stout with a few modifications. So
we went to B and M racing got one of their modified 700 R fours that'll handle up to 450 ft pounds of torque
and also give us the benefits of an overdrive transmission.
Now, for the transfer case, we knew we needed something really strong to round out a bulletproof drive trim. So we gave advance adapters a call and ordered up one of their Atlas two transfer cases. Now this thing features a solid one piece aluminum case as well as all gear drive for the ultimate in strength. Now, the Atlas two is available in different gear ratios depending on your needs and also comes with all the shifters linkage as well as adapters. You'll need to be able to bolt it in and go.
First thing we need to do is install the torque converter onto the transmission.
Now, for this, we're using the B and M lock up style converter for this application. Now, here's a few tips when you go to install the torque converter,
make sure that you've got at least a quart of fluid down inside. So you get some lubrication on initial start up
and also put a little bit around the seal and on the shaft
and then install the converter.
Now, here's where a lot of people make some big mistakes. Now you saw me push on this,
it's not going in any further, so it should be seated right wrong.
Notice these holes are almost flush with each other.
The converter needs to sit
at least an inch down inside.
So you need to just keep turning on it until it sees in like that. And
remember if you try to install a transmission without the torque converter fully engaged,
you'll mess up the transmission.
You know, one of the biggest reasons for having the drive train out of the vehicle is that it makes it a whole lot easier to assemble. Now, this aluminum adapter is not only what connects the transmission to the transfer case, but it's also what mounts everything to the cross member. So we'll go ahead and get that on right now and we're also gonna go with this brand new tranny mount. We got from energy suspension
and that bolts right up to the bottom of our adapter.
Finally, we're ready for the transfer case. Now, one of the neat things about the Atlas too
is that you can tilt it to get the right angle to clear your drive shafts and your shifters. Now, once you get your angle decided ours is gonna sit at about 45 degrees. Put your studs in, run a bead of silicone around the flange and you're ready to slide this thing in place. But you will need an extra set of hands and mel you wanna give me a hand, do it.
All right.
It's not light, is it
then just bolted on?
Of course, it would be silly to invest all your time and money in all these new parts and then try to reuse the old cables and Dipstick tube for the transmission. So we went to low car and got this really trick, braided steel cable and dipstick tube
to not only dress things up but to perform better as well.
Finally, we're ready to bolt the transfer case and the transmission into the truck. Now we'll just jack it up and slide the bell housing up against the engine and engage these dial pins. Now, the transmission should slide up flush to the engine very easily. If it doesn't,
that means your torque converter is not engaged all the way or you've got some sort of obstruction up here. Now, whatever you do don't just stick a bolt in here and try to tighten it down and pull the two pieces together.
You'll definitely mess up something in the transmission.
You need to fix the obstruction first,
then you can bolt it on. Follow that by bolting the torque converter to the flex plate.
Now we're ready to get the inspection plate and the cross member into place. Now, do yourself a huge favor here and take a little time to clean and paint these parts
because it makes completing the project a lot less messy. Now, at this point, all you're gonna do
is loosely bolt the cross member into place because you may need to move things around a bit when you do your final hookups
next up are the shifters for the transfer case. Now, ideally you want them to come up through the stock hole in the floor.
So I've already cut the threaded rod and the support tube for the shifters.
Now, all you gotta do is slide them in place.
Now, once you have it all together, all you have left to do
is hook up your linkage. Now, keep in mind you might have to come in here and trim this floor a little bit to make room for these shifters
while we're on the subject of linkage. Now is the time to hook your tranny linkage back up as well. Now make sure you check all the original parts and if they're bad, go ahead and replace them. This is also a good time to reconnect your transmission lines to the radiator and take care of all the small stuff like the speedometer cable as well as all your electrical connection.
Well, all the parts on big Blaze are really starting to come together. We still have some hookups to make, we'll take care of those after the break. We'll be right back
later in the show. We've got the tools you need to lay it down.
But up first, we've got some finishing touches for big blaze to show you.
Welcome back to trucks. Now that we have a bulletproof drive train in our blazer,
it's time to connect that to the axles and that means drive shafts. Now, for those, we went to Denny's drive shaft service and got us a couple of monsters that are guaranteed not to break. That's right. You break one of the wells or twist the tubes on one of these guys and they'll replace it free.
Can't beat that.
Now, for the front shaft, we've got a thick two inch tubing
with a CV joint at one end
and a standard U joint at the other.
Now, for the rear shaft, we've got a massive three inch tube
with once again a CV joint for the transfer case end, standard U joint for the P end. And
also these shafts are balanced and tested before they leave the shop. So they're also guaranteed not to vibrate.
Now in a project like this, you can just go ahead and plan on having to have your exhaust pipes custom bent
to clear the drive shaft or anything else that might get in the way. But we are gonna show you some of the components we're gonna run on our system. Now up first we're gonna change out the stock catalytic converter with this high flow cap. We got from random technologies and from that, we're gonna run through this Edelbrock RPM muffler for great sound and flow. And finally everything's gonna exit through the stainless steel tips. We also got from Edelbrock
now that we have all the major stuff done underneath, we can lower the truck down
and then show you the kind of headers we're gonna use. Now, for those, we went to JB A got a set of these ceramic coated shorties. That'll look great for a long time, but they also flow like crazy too.
Now, any time you put headers on a later model, Chevy
can be kind of a pain because you've got to modify the power steering bracket.
There was a whole arm here that needed to be cut off. Now JB A knows this. So they include all the hardware and some really detailed instructions to make this as easy on you as possible.
While we're up here in the engine compartment,
there's still a few minor details to finish up like the air filter for that.
We went to Can N and picked up one of their filter elements for our crate motor. Now, we also needed a dipstick. So on that trip to low car, we picked up this one made specifically for the Ramjet 350. Speaking of low
car now is a good time to hook up the cables and the dipstick for the transmission that we showed you earlier as well as this really trick throttle cable. Now, the dipstick for the transmission will mount somewhere on the firewall for easy access. The TV cable from the transmission and the throttle cable from the gas pedal will both hook up to a stock location on the throttle body.
Now that we have all our brand new upgrades stuffed into the engine compartment, there's no way we're gonna hide all that stuff with a stock hood. So we went to Good Mark and got one of their cow induction hoods. Now, this thing is all steel top and bottom with a two inch scoop and you can mount it using all your factory hardware and the fit. Well, that's as good if not better than your original hood.
Now, any time you start swapping drive trains around, you might as well figure you're gonna have to do some fabrication things just don't slide right in. That'd be too easy. Take all the fun out of it.
Now, you can see where we had to come in here and cut out to clear these shifters
and you're gonna wanna fill that hole in.
So I went ahead and made this panel slides right into place and you can either hold it in with sheet metal
so you can remove it to get access to your shifters
or for a more permanent situation. Just weld it in.
Now over here, I'm definitely welding a panel in, take up all this excess original hole. Then of course, the boots
will fill up all the rest. Now, any time you're making panels like this, try to make them as smooth and flat as you can. So the carpet lay right over the top of them
and no one will even know they're there.
Now, you might be wondering with the awesome suspension and drive train we put on big blaze whether or not we're gonna do anything with the exterior. Well, you can put your mind at ease because we got some big ideas to work with.
But the first thing we're gonna do is get rid of all the stock trim on our 88 Blazer. One. Last thing, any time you put in new axles or transmission, they're always shipped dry.
So make sure that you fill them with the proper lubricants. Also
double check your fuel lines and your electrical hookups or you could end up with a big blaze of your own. And I'm not talking about the truck also. Double check all of your steering linkage, your shifter, linkage, your cooling system,
all that needs to be taken care of before you ever turn that key. But hey, whatever you do, don't turn the channel because we got more trucks for you right after this.
Up. Next on trucks, we've got an S 10. That sounds like it's ready to get up and go.
You just can't get enough of trucks, check us out online at TRUCKS, tv.com.
Thanks for staying with us. Everybody. Now, when it comes to building the street truck, most people zero in on one aspect of their vehicle, they really want to stand out and that can result in anything from a real showstopper to a hot rod or even a street cruiser.
That's true. And very rarely does somebody build a vehicle that's really competitive in more than one area.
That's exactly what Chet Simmons did with this 94 S 10, he calls megawatt.
Now, as you probably guess this truck houses a pretty serious sound system under the fiberglass cap serious enough to consistently walk away with the top prize in sound quality and pressure.
Of course, that's due in large part to the attention to detail as well as the layout of the
eqs and wiring in the back.
Well, by now, you're probably wondering about that slick black paint, those N Os stickers and of course, that massive hood scoop probably all just for show. Right.
Well, go ahead and pop that hood and you'll see there really is something to pull this thing down the.
And what you're seeing is a 4.3 V6 with numerous upgrades including a nitrous system.
Now, this adds up to 386 horsepower on the
dyno
with quarter mile times in the mid 12. Now, that is smoky,
the high performance theme factors heavily into the interior layout with racing style pedals and bucket seats with five point harnesses that hold everything in place when the need for speed calls. And speaking of that need, check out the controls for the nitrous and auxiliary fans in the center console.
Also up on the A pillar is a gauge pod to make sure everything's happy
under the hood.
James Bond style gadgetry continues behind the seats where 215 inch subs rumble away. Of course, neon flashes in time to the music and that earns points in the sound quality competitions.
Now, for the sound pressure or overall volume competitions
just punch a button
that unleashes a way of a wattage of bolts through 16 speakers that can rattle windows into the next county.
The exterior received its share of attention as well with a three inch drop all the way around and big meaty tires in the back that do their best to get the power on the pavement.
One of the most unique features on this truck is the exhaust now instead of running out the back like everybody else, one big huge tip exits right out the side of the bed and the sound that comes out of that is music to our ears.
Welcome back to trucks. Everybody. Now, if you've been to any truck shows lately, you've probably noticed custom paint jobs showing up on everything from radical off road vehicles to lower street cruisers. But with the cost of those custom paint jobs going through the roof, more and more people are deciding to
do it themselves. Unfortunately, most people don't realize the type of tools and materials required to do this kind of work. So they end up having a really bad experience.
So today we're gonna show you some state of the art tools from sa
that'll help you set your shop up. Right.
Of course, the first thing that you need is a good gun. Now you get what you pay for here. So now is not the time to get cheap.
Now, we've got this
Sage Jet 2000 HV LP gun
that has all the controls and adjustments that you'd expect in a state of the art gun as well as the benefits of high volume, low pressure. But when you go to shoot one of these guns, it has the feel of a conventional high pressure gun, which is really nice for you guys that have never shot an HB LP system before because they do feel a little different.
Now, also, this is a very light well balanced gun. Now, that may not seem really important right now,
you get about halfway through a paint job out over a hood
and you will be kissing this thing.
Also, if you're gonna use a gravity feed gun,
make sure that you invest in some sort of stand because you definitely don't wanna lay it down
and it definitely won't stand up by itself.
Now, for door jams and smaller jobs, you have to have a detailed gun. Now, this set up allows you to get into tight areas you can't get into with a big gun. Also, if you're doing some small detail work like valve covers and only need an ounce or two of paint, this is the set up you want.
All right. Now we come to the really big issue and that's safety. Now, everybody knows that painting can be a little hazardous to your health. So what do you need?
Well, if you're not painting very often
and you're not shooting anything with Iso
Cyan its in it,
then a little half mask like this with the activated charcoal filters is plenty.
Just make sure that when you have one of these on
that you don't smell any paint or solvents because if you do
means those filters are worn out, you need to replace them.
Also, I know it's real tempting to go out and shoot in shorts and a T shirt.
Do yourself a favor. Invest in one of these little painting coveralls because they're cheap and they protect your skin.
Now, if you do a lot of painting or you might be shooting something with isocyanates in it,
then you need to look into a fresh air respirator and a full head mask. Now, the way these things work
is they totally cover your head
and they seal around your face to completely lock out the fumes.
Now, the air runs from the compressor through this filter system.
Then another line runs to your belt through yet another filter and then up to the mask giving you better air than you're actually breathing right now. Always remember painting a vehicle should be a great experience, not a hassle. And there's nothing like seeing a paint job come to life, using the right equipment. Also staying alive to enjoy your work by using the proper safety equipment is a big bonus as well. So invest wisely let your creative juices flow and we'll see you at the shows.
And now truck gear, parts, tools and equipment for pickups and sport utilities.
Now, if you drive a truck or SUV, you know, there's about as many products out there to hold your cargo in place as there seem to be stars in the sky.
But today we want to introduce you to the 401 cargo pull that not only acts as a cargo stop in the back of your vehicle,
but thanks to this hook on the end, can also help you retrieve cargo that's moved around on you in transit.
You also have a flashlight to help you out in the dark. But if all you wanna do is cart your clothes to the next destination.
A pair of hooks on either end, make that possible as well. Get four tools in one with the cargo pull for about 70 bucks.
Now, for those of you that are welders and you're still using the old tip and flip style helmet. Well, you're gonna wanna throw that thing in the trash
when you see these new auto dimming helmets by Jackson products. Now, these allow you to see what you're doing when you're not welding.
But as soon as you strike an art,
the liquid crystal dims in 1 25/1000 of a second to the proper shade to protect your eyes. Then of course, when you're done, it lightens right back up. Now, this not only protects your eyes, but it allows you to concentrate on your work as opposed to goofing around with your helmet.
Now, these lightweight state of the art helmets go for 280 bucks and you can get them from the Eastwood company
when it comes to detail in your motor. Nothing quite sets it off like this Cool flex hose from total performance. It's a flexible metal hose. You can cut to any length
and bend to whatever shape you want. But the really big news here is Cool Flex is now available in red, blue and purple
as well as the standard chrome. They're famous for Cool Flex is also available in upper and lower radiator hoses as well as heater hoses and comes with all the hose ends and hardware. You'll need to replace the stock rubber ones forever. How's gonna do it for truck gear? Let's take a quick look at next week's ship,
but Hairy Hauler is back next week, the guys will show you how the detail work can be the difference between a hack job and a real Showstopper. Then we've got a 56 F 100 that's not like any blue oval we've ever seen.
Finally, we'll take our cameras down south to Moroso Motorsports Park with a Jet and truck nationals. That's all next week on trucks.
Well, that's gonna do it for this week's show. We appreciate you hanging out with us. Yeah, we expect to see you back here on trucks next week.
This,
now, is that a cow induction hood or?
And it works with the Lions, just right.
Trucks is an RTM production.