Classic Trucks! Builds

Video Transcript

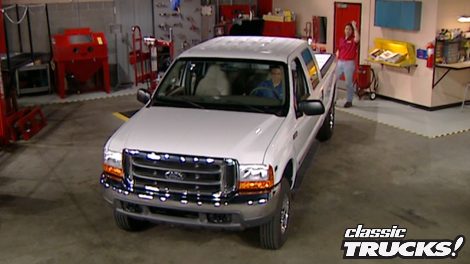
Today on trucks, we'll bring a brand new F 250 into the shop and get our super duty ready for some heavy duty work with an under hood generator.

After that, we'll take a look at a 55 F 100 that extends itself as one of a kind.

Finally, we'll slide into a project that helps you get the most out of your cargo space without pulling the cap off. That's all today on trucks.

Yeah.

Hey, everybody. Thanks for being with us again this week.

You know, a lot of people are into trucks because you can put them to work in this big old F 250 super duty we got from Ford is the perfect platform to work with. So in the weeks to come, we're gonna transform our great white hope into project workhorse. Now, if you've ever been to a job site, you know that if you don't have power to run your tools,

you don't really have a job site

and you also probably know that dragging around a portable generator is a pain in the butt. So today we're gonna show you how to put that power under the hood where it belongs.

And for that, we went to Aura Systems for their mobile generator that fits right under the hood of your vehicle and kicks out 5000 continuous watts at idle. Now, as you can see, this kit comes with a whole bunch of hardware, but don't let that scare you. It's really not as bad as it looks.

Now, obviously, the first thing we need to do is to clear a path for that big old thing and give us some room to work under here. First thing we're gonna do is disconnect the battery.

Get rid of this jack unhook, the air inlet, move it out of the way and drain the radiator also to give you a better view of what we're gonna be doing under here. We're gonna get rid of that hood.

Now with the radiator drain,

I went ahead and pulled off the coolant reservoir and the radiator hose. After that, I unbolted the fan shroud

as well as the fan itself so we could pull them both out

at the same time

with everything out of the way. It's always a good idea to put a piece of cardboard over the radiator.

So you don't nick it up when you go to work

now that we have some room up here. Well, this is where things get a little tricky. So, hold on. I'm gonna tell you what we need to do.

Now in the Ford V 10, the generator is gonna sit right here where the alternator is.

So, the first thing we need to do is pull that off and set it aside.

The larger idler pulley here needs to be taken off, moved down

and bolted to the belt tensioner. The smaller pulley on the belt tensioner needs to come off and come up here where the idler pulley is.

Now, we can install the new Iler bracket

as well as the grooved pulley

that comes with the kit

once all that's done, we can go ahead and bolt on the crank coupler.

After that, we can pull out the old water pump

to make room for the new one that comes with the kit.

Finally, we can reinstall the original belt as long as it's in good shape. Now, if it's not, this is the time to replace it.

Now, you can see how the belt has been rerouted to make up for the missing alternator pretty slick. Huh?

Another thing we need to do for clearance is move the radiator a little bit forward.

Now, what we're gonna do is remove this bracket and red drill the holes about a half inch back of their original location.

Now, the generators turned by a secondary belt and it gets its power from this pulley assembly that slides right into the crank and bolts to the block.

We'll follow that up by bolting on the idler bracket

and the pulleys on the passenger side of the engine

and then finally

put on the new belt tensioner.

Now, the generator itself is gonna sit in the same area that Stacy's been clearing out to hold it in place. It's got its own heavy duty mounting bracket as well as various supports and braces. Keep it from moving around or vibrating when it's under L

by the way, just in case you're wondering, there's also a brand new mounting plate for the stock alternator.

You ready for this dog, man, that's a big sucker

baby.

With all the brackets in place. We can install the alternator and finally set the generator in place

and keep in mind this sucker weighs about 70 pounds. So it's a good idea to have someone give you a hand here, so you don't end up pulling something.

Now, once you have it in place, go ahead and install the new belt.

Now we've already modified the location of the radiator, but you still need to make sure you have plenty of clearance between your belt

and your fan shrub.

Keep in mind you need at least three quarters of an inch here. So you're definitely gonna have to do some trimming on the shroud before you can install it.

Now, the origin

comes with a throttle control assembly that allows you to adjust the idle of your vehicle, so you get peak performance out of your generator.

Now it slides right here on to the throttle body and goes over the idle set, screw

now it's time to put all our stock parts back on like the upper radiator hose and the coolant reservoir. This is also a really good time to change any of your hoses that might be showing excessive wear.

And since this pretty much takes care of things under the hood, it's a good time to take a break, but don't go away because you're definitely gonna wanna see what this thing will do

later on trucks. We'll show you how to slide into a great idea. That's also a major time saver. But that's after we finish bolting that under hood generator onto our super duty.

Welcome back to trucks. Now, we've already installed our aura systems, generator, fired up our V 10, made sure we didn't have any coolant leaks or belt misalignment. Now, the problem is we can't use any of that power because he doesn't have anywhere to go.

And that's what we're gonna deal with right now.

Rounding out the kid is this huge electronic control unit, two big wiring harnesses as well as some heavy duty hardware that's gonna have no trouble handling the 5000 watts that'll be running through it.

Here's that power switch, Steve. All right, thanks. Now, the generator is turned on and off by this little switch and it mounts inside the cab. Generally the best place is down underneath the dash somewhere,

but you wanna make sure that you put it where it's out of the way, but you still have easy access to it.

It looks like this is gonna be our best choice.

Now, while Stacey is getting things done inside the cab, I can go ahead and lay out the cable and make the connections under the hood that are really well marked. Now, as you can see, this is some pretty thick cable. So you gotta have a pretty good size opening to run it through. So, what we're gonna do is go down the wheel. Well, here on the passenger side,

then we're gonna run it along the frame back to the bed.

Now, speaking of the bed, that's where this big old control unit's gonna go.

Now, where are you mounted in the bed? Heck, that's entirely up to you. But

we do strongly suggest that you make sure

that you're not gonna put it where there's a roll bar or a toolbox or something else gonna go later on.

Now, with all that in mind,

we're gonna mount ours here on the side of the bed because that'll tuck it up real nice out of the way.

Now, mounting this thing, simple as drilling four holes, putting on the rubber feet

and bolting it on.

Finally, you'll need a hole saw and knock out some holes for the wiring harnesses to come through.

Now that we have the holes drilled in our bed, we can run our wires up to the control unit. Keep in mind it's real important to take the time to route your wires and wire time up out of the way, that way, they're not getting burned or pinched on any hot or moving parts.

Now, when you're hooking up the control unit, just like the generator under the hood, all you have to do is take off the control panel and wire it up according to the wiring diagram.

Now, just in case you're wondering,

this unit is completely waterproofed and sealed. So you don't have to worry about a big thunderstorm shorting out the unit and frying it.

Another unique thing about this kid is you do have options. For example, if you don't want that big control unit taking up too much space in the bed, you can always mount it underneath the body or even inside the cab under the seats. Now, for the power outlets, you can get this portable strip that has plugs for both 110 and 220. So you can run everything from a drill all the way up to an air compressor.

Of course, we're gonna go a step further than that and hardwire, some permanent outlets right here in the side of the bed.

Now, those don't come with the kit. So we went down to the local hardware store picked up some outdoor boxes as well as some GFC I outlets. Now, you have to use this type of outlet

because it'll sense if you got a ground fault and trip and that will keep you from getting electrocuted

for a clean install. All you need to do is mark your openings,

drill some pilot holes

and then cut them out.

Now that you have your holes, cut out, go ahead and wire up your outlets and put them in. Now, remember these are wired up like a house, not a vehicle, which means that you're black and you're red or your hot wires.

Your green is a ground and your white is a neutral return.

Of course, you can install the origin yourself and save a big chunk of change in the process. But if this project is a little bit more than what you might be up to, you can't have somebody do it for you for about 600 bucks. But even if you are a do it yourself or there is one part of this project you can't do. And that's getting a computer program set up for that. You have to have an origin tech, make a service call and get you online. You ready to plug this thing in Mark.

Hey, man, can you get Nintendo on this?

Let's hook it up.

Now that we have everything online and ready to go. It's time to put our generator to work.

Well, let's just say if you need to take your tools out on location

and then have power to run and once you get there, gonna be hard pressed to beat this combination at any price, you're also gonna be pretty hard pressed to keep us from taking a break. Don't go away. We'll be right back.

Uh, Mel uh,

you shut the power off, man

up next. We've got a 55 F 100 to show you that's in a class all by itself.

Welcome back to trucks. Everybody.

You know, there's been a lot of classic truck designs over the years, but there's something about a fifties era F 100 that really gets people going and we've seen a lot of really nice ones that shows all over the country. But every once in a while one comes along that stops you dead in your tracks.

So what does it take to go to the F 100 Nationals and actually walk away with that coveted Truckers Choice Award.

Well, you start by building a vehicle that's absolutely incredible when it comes to fit and finish, then you follow that up by actually driving the vehicle to and from the event.

Let us introduce you to Mark Coleman's 1955 F 100.

Now, as you probably already know, extended cabs are all the rage today,

but in 1955 there was no such thing, which was the only reason Coleman needed to build one.

Now, what he started out with was a standard 55 cab and a backyard full of donor trucks

to extend the cab. He added 18 inches to the back and custom made his own rear side windows. Now, the roof skin was swiped from a Chrysler Cordoba to get the right look.

Everything works together so well. You hardly even notice the tops been chopped 2.5 inches in the front two in the rear.

Inside this beautiful rig, the fifties theme continues with brand new but vintage style gauges and steering wheel. Not to mention a custom tuck and roll style upholstery and heck, there'd be no point in doing this project. If you didn't have a back seat, you could use.

Now, of course, these old Fords look really cool when they got the right stance. So to get that, a Vela Subra was grafted onto the original frame

to get the nose down in the weeds where it belongs.

Now under the hood, of course, the original engines long since gone, but there's still a blue oval under there. That's a 351 Windsor with all the goodies like power steering, power brakes, air conditioning and take a real good look at that air cleaner that was custom made out of two rear fenders,

moving back to the rear, the frame and running boards were lengthened to work with the extended cab. And behind all that work sits a super smooth bed that's filled with posh

oak planks.

Finally, at the tail end,

you won't find any modern day roll pans on this ride. Instead, the classic look is still there with a stainless steel bumper tailgate and lights.

Of course, the whole thing is finished off with painted steel wheels, beauty rings and hubcaps.

Now, for those really big awards like the Trucker's choice.

Well, you're not gonna win those with just an average paint color. Now, believe it or not, this unusual mint green is a factory color

for a Porsche.

And in our opinion, it never looked better than it does on this F 100

just can't get enough of trucks. Check us out online at trucks, tv.com.

Thanks for staying with us, everybody. All right, here's the deal. You have an old nasty engine that needs to go down to the machine shop. The problem is you got a cap on the bed of the truck. Now, you can either thread the cherry picker in through the back, which is always a little challenging

or you can go through the hassle of taking the cap on and off. Wouldn't it be nice if there was another option?

Thanks to the bed slide. Now, you have that third option. Now, you can't tell just by looking at it, but when this thing is installed, it acts like a retractable shelf that holds up to 1000 pounds is removable and believe it or not, doesn't require any major modifications to the bed of your truck.

The first thing we need to do is set the bottom part of the bed slide into the bed

and then just center it up,

mark around these front pins

and then drill out the hole.

After that, we can slide the bottom section back into place.

Now that we have the front pins in place, we can get started on the rear just like the front. All you have to do is make sure the piece is centered in the bed.

Then you can mark around this back pin and drill out the hole.

Now, like we've told you before, whenever you drill holes into the bed of your truck, make sure you don't have any wires or a gas tank that can get in the way of that drill bit.

And once you have all your holes drilled, this bottom framework is mounted once you slide everything into place. Now, this rear pin keeps things from moving side to side or front to back the front pins, keep it from tipping up on you when you have it extended.

Now, if you want a more permanent mount, say for some really heavy loads, the bed slide comes with three drilled holes in these cross members so you can bolt it right to the bed.

Finally, we're ready for the top unit with a person on each side, lift and align the bearings into the slots of the channel on the bottom unit,

you got it. Yep. All right.

Once you have everything aligned, slowly, push the unit forward till you hit the stops, then lift up the back end to clear the stops

and push it all the way forward.

Just like you would, a desk drawer and this thing installs in just 30 minutes and if you ever want to remove it,

we're only looking at about 30 seconds.

Of course, the real moment of truth when we put some weight on it. So we're gonna try it out with our old 302.

All right. Go ahead and drop it down. Now,

there you go. Keep coming. Keep coming.

Get nervous, aren't you?

That's got it.

The only thing we can't figure is why no one ever thought of this before.

Now you really can carry the heavy stuff without losing the option of a cap.

Yeah, another really neat thing about this kit.

You don't have to worry about any clearance problems with your tailgate either

when you're putting that coat of wax on your truck and that's a fact that you're gonna get some globs in all the nooks and crannies and especially around the emblems. And what are you gonna do?

There's no way to get a buffing rag in there to get it all out.

Well, the answer is a soft bristle toothbrush.

Now, these things are fantastic for getting around all those tight, impossible to reach areas.

Now, what about all these door and body seams using a toothbrush on? Those can be a little tedious.

Well, the answer is to go down to a hardware store, pick up a two or three inch paint brush, cut the bristles off to where they're about three quarters of an inch long.

Now, you have a soft detailing brush

that won't scratch the paint.

Ok. So you have your truck and you have stuff to put in your truck, like camping gear, groceries or even the family dog. But what if it rains,

your stuff will get all wet

unless

you get an A re truck cab.

We've been rated a consumer digest best Buy,

visit your A re dealer soon.

So you're not left out in the rain.

Check us out at www 0.4

A re.com

and now truck gear, parts, tools and equipment for pickups and sport utilities.

Here's something new from turtle wax. It's called extreme 2001. This stuff's a professional grade protectant.

It has a special blend of silicone compounds to give you the best shine possible as well as long lasting protection.

Extreme 2001 is the perfect choice for dashes

plastic trim and of course, tires, the application couldn't be any easier. Just wipe it on and let it stand for a few seconds and then wipe off the access, keep your truck or SUV looking brand new with a little help from turtle wax for about four bucks a bottle.

What would you say if we told you that you could get up to 15 extra horsepower

with just some simple hand tools. Well, air raid intake systems definitely claims that's possible with one of their setups.

Now they use a unique inlet and filter combination that flows a lot better than a stock air box. More airflow means more horsepower

and you can get one of these systems at CBS. Performance price will start about 100 and 40 bucks and add some tools and some time and you're done.

That's gonna do it for this week's truck gear. Here's a look at next week's show.

The Dodge RT already packs plenty of punch but the things we plan on doing with ours will blow your mind.

We'll get started with a performance suspension, wheels and tires.

The PT cruiser is the latest debate, but the Chevy Nomad got it all started in the fifties. We'll explain next week.

Show you how to save money by installing your own exhaust system.

That's all next week on trucks.

Well, that's gonna do it for this week's show. We appreciate you hanging out with us. Yeah, we got more trucks for you next week.

Your soccer going around. You can't even tell. That's

awesome.

Trucks is an RTM production.
Show Full Transcript