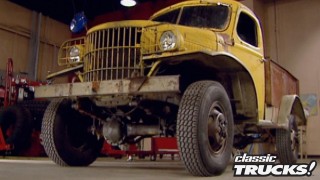
Classic Trucks! Builds

Video Transcript

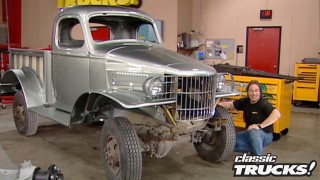
Today on trucks, the guys tear into the center section of the frame on their 34 international as project Hairy Hauler draws closer to completion.

Then it's time to check out the latest concept truck from GMC. They call it the Terra

Dyne. We call it awesome. Finally, we'll show the Sirius hauler how to get the most out of his truck for work or play with 1/5 wheel installation.

That's all today on trucks.

Hello, everybody and welcome to this week's show. Now, if you've been hanging around the truck shop for a while, you've seen us hang the front and rear suspension on the Hairy Hauler.

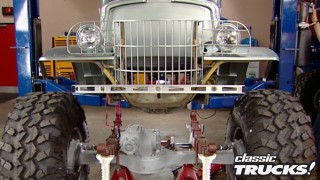
Now it's time to deal with the portion of the frame that sits under the cab itself.

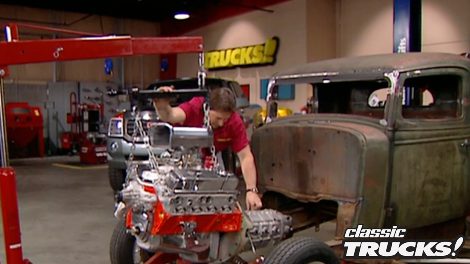
Now, I've just finished welded in these universal motor mounts that we got from speedway motors and they're really cool for a custom application

because all you have to do is cut them down to the size you need

and weld them in.

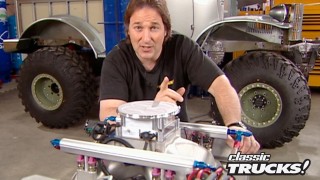
Now, for those of you that have been following the build up of the Hairy Hauler, well, you know, that's not the blown small block that's eventually gonna be in this thing, but

this is the Richmond six speed transmission. Now, the reason we're doing it this way is that the blown motor is too tall to fit underneath this engine leveler. We gotta have that to make sure everything lines up. Right.

All right. Mel, go ahead and push it into me.

There you go. Keep coming up

over. Right on.

One thing that's crucial to check is your engine clearance. We put our grill shell back in place, find out exactly how much clearance we're gonna have. Now, the radiator is gonna tuck inside the shell itself and the dry belt for our blower is gonna come as far forward as the water pump. So we have plenty of room up here to run either an electrical or mechanical fan.

You'll also wanna make sure that the engine is centered in the frame rails sitting level side to side

and generally

tilting to the rear about three degrees. Now, back here at the firewall, you can see we've tucked this baby back just about as tight as we can possibly go. Fortunately, it looks like we're not gonna have to do any cutting back here. Now, another area you need to be real careful is bottom clearance. You can see that our headers are sitting just below the frame rail. Now, you really don't want to go any lower than that

because you're gonna have trouble with speed bumps on the oil pan and headers.

Now, obviously, the best way to do any kind of framework is with everything off it. But before you begin your final disassembly,

there are a couple of things you need to do. Number one, make sure you've taken out all your mounting bolts from the bed as well as the cap then carefully mark your whole locations.

So you don't get confused later on.

Also, before you start pulling things off the frame itself, it's always a good idea to double check to make sure you didn't forget to pull any of your mounting bolts.

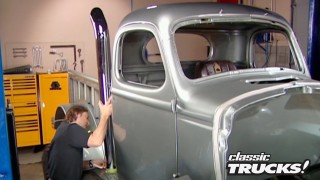
Now, you can see inside the body here and there's some changes that we're gonna have to make. First of all, these old motor mounts have got to go

this cross member and that old battery box need to go too. We'll take care of all that when we take the body off the frame.

And you can see we've also built a framework to support the floor and the sides and that's permanent.

We've also put in these temporary bars to support the cab

in through the doors.

It's very important to stress up a body like this properly before you try to pull it off the frame. Because if you don't,

you'll bend it all up and end up with a huge piece of junk.

Finally, we're ready to remove the bed,

followed by the engine and tranny. Now, once all that's taken care of, we can go ahead and get the hauler under the left right there

Now, if you're gonna use a lift like this to lift the body off, make sure that you don't run the straps of the window openings. And what that'll do is put all the weight on the doors and hinges

and it'll mess up all these nice lines that you spent so much time getting. Right.

Instead either take the door off completely or if you have enough room, run the strap over the top of the door. This will put all the weight on the body and not on the door. Now, once you get it, how you want it,

go ahead and lift it off.

That's good, man.

Now, as you can see, we still have a couple pieces that need to come off before we're all the way down to the frame. Specifically, these really cool side panels, of course, facing the elements for more than 60 years is rusted things out pretty good.

So we're gonna need a good penetrating loop to help knock things loose

with the frame stripped down. We can get started on those cross members and motor mounts. Now, there's a couple ways you can do this, take a grinder, grind off the head of the rivets and then drill them out

or you can take a plasma cutter and cut out the rivets. Now, either way you're gonna have some holes opened up in the frame that you have to weld up.

But if you can get a hold of a plasma cutter.

It definitely save yourself some time.

Now that Stacey is done playing around the plasma cutter, we need to clean up this frame because you can't do any welding or painting to a piece of metal that's collected 60 years of dirt and rust. Now, these three M abrasive pads we got from the Eastwood Company will help knock all that loose and get us down to the bare metal.

Also, don't forget to clean up the inside of the frame as well.

Finally, we can start welding up the holes in the frame. As you can see,

we've got a lot of holes to fill, which is exactly why we were careful to mark the mounting holes that we don't want to weld up.

Now, we also got from Eastwood, this neat little tool that's got a copper head on it

and use that as a backing when you welding up holes that keeps the metal from rolling down through the backside

on big holes like this. You want to use a filler piece like this thick washer instead of trying to fill everything up with weld.

Now, the mounting holes that we marked earlier need to have a nut welded inside the frame.

That's because when we box this frame in, we're not gonna be able to get inside here and put a nut on.

Now that we have the holes welded in our frame starting to take on that smooth look. Everybody likes to see but we're not done just yet as you probably already figured out. We got plenty of grinding to do here and there's a couple of different ways you can do it. You can get a big grinder with a hard wheel, but you could leave some gouges if you're not careful or if you go with a flap wheel that'll take off plenty of material. Give you some flexibility at the same time

for the rear cross member. We went to total cost involved and got one of their pro street style cross members with the drive shaft loop, which is always a good idea if you're running high horsepower

mandatory if you're racing.

Now, before you weld this thing into place, make sure you've got enough clearance for your drive shaft taken into account. There's no weight on the frame yet. Now that the center section of our frame is starting to come together, we need to take a break but don't go away. We'll finish things up right after this.

This thing is cool, man. Yeah, it's starting to look good.

Later in the show, we've got the latest concept truck from GMC to take a look at. But up first, we need to put the finishing touches on the frame of the Hairy Hauler.

Welcome back to trucks. Now, as you can see, we're right in the middle of modifying the frame of the Hairy Hauler. Now it's time to show you how we're gonna box this thing in now, for these side rails, we're gonna use one long piece on each side.

And since the frame is the same height all the way down, we had these pieces cut to fit when we went down and bought the metal, that'll save us a lot of time with the plasma cutter. However, we did need to come in here and make some cuts to clear the cross member.

Don't forget before you box the frame in to hit the inside of it with a good rust prohibitive paint. Give it a fighting chance against the elements.

Also,

don't forget to leave about a half inch line of bare metal so you can weld in your boxing plate later on.

Now that Merry has the inside of the frame and the boxing plates painted, we can go ahead and weld them on big tip here. Make one last check to make sure that you haven't forgotten to weld in any nuts for your mounting bolts

and you're not covering up something that you're gonna need to get to later on like the suspension bolts. If you do that,

you're gonna have to cut the holes when you're done.

Now, it is possible to warp this metal even though it's really thick. So instead of just buzzing it in with one long continuous bead,

put it in with a series of shorter beads, alternating top to bottom,

that'll spread out the heat,

we're definitely going to need a new cross member to hold the transmission in place. And for that, we also went to TCI and picked up this unit for a six inch drop that comes with all the hardware.

Now, for the transmission and engine mounts, we went to energy suspension and picked up these slick urethane pieces that not only look great but are also going to last and perform a whole lot better than any kind of rubber mount.

Now, we can get the mock up engine back in place

that's got it

with the new cross member bolted to the transmission and the transmission centered in the frame rails and the engines sitting at the right degree of pitch.

You can see this new cross member has weld on ends with holes that'll run through the frame rail. Now, what a lot of guys do is drill a hole, stick a bolt through and tighten it down. The

problem with that is that'll pull in the sides of the frame rail and the bolt will eventually fail. So the way to do it right

is to drill a little larger hole, insert, one of these tubes that comes with the kit and weld it in

basically you box in your bolt holes and then you can crank those down as tight as you need to.

Got it, man. Yeah.

Well, now that you're starting to see how everything is gonna go together, we need to address the pedal situation. Once again, TCI sent us their universal pedal mount that also comes with master cylinders for the clutch and brakes, as well as these matching pedal pads

to mount the pedals. You have to set the body back down on the frame. Here you go,

man. Thank you.

And then take the bracket,

set it against the frame rail, make sure it's tilted right

that it's centered under the steering column

and that you're not gonna have any interference with where your floor is gonna go.

And once you have it, how you want it, mark it and weld it in.

After we have the pedals welded in, we need to take off the body again,

grind and paint the frame and we'll be done. Unfortunately, we're also done with this project for today, but don't go away. We got more trucks for you right after this.

If Robocop needs a truck, the terraine

looks like the perfect choice. GM C's latest concept is up next.

Thanks for staying with us, everybody. Now, if you've ever wondered how the manufacturers come up with some of the design and styling cues that end up on your vehicle. The paradigm from GMC is a great place to start. A lot of times what you end up driving off, the lot comes directly from a concept vehicle and this one's loaded with all kinds of cool stuff. Put it this way, if the Terminator drove a new truck, this would be the one with its unique angled styling and almost indestructible look.

The first thing Gm C's design team did with this concept was to raise the cab two inches and move it forward. Seven, this opened up a lot more room inside the cab and speaking of opening things up, how about the sliding doors that make for easy entrance and exits in tight parking lots.

Once inside the extended cab, you have a long list of attention grabbers like two tone leather seats, very unique analog gauges,

a rear video monitoring system for hooking up a trailer or backing up a few workaholics. You got a personal computer built right into the dash.

But if all you really want to do is put it into gear. Well, Terraine

has a new slant on that too.

Once you have it in gear, this rig is motivated by GM C's brand new 6.6 L turbo diesel that pumps out 320 horse and a whopping 520 ft pounds of torque. But it's what controls those numbers. That's impressive.

Now, four wheel steering isn't a new concept, but the quadra steer on a GMC truck is and you definitely won't find this wheel entire combination at your local tire deal.

Now, for the cargo area, they're finally giving guys what they really need and that storage space,

it's got a 6.5 ft bed that telescopes into an eight footer

and that's just the beginning. It also has a side storage system that takes advantage of all that space that's normally wasted inside the rear side panels of the bed

and tucked inside are some power outlets that run from the generator under the hood

up in front. There's no mista in this truck's maker, but they've definitely drawn a new line in the sand from the wide open grill to the angular, almost evil looking headlights and check out the integrated winch that almost disappears behind a front bumper that looks like body armor.

Now, keep in mind the Teradyne is just a concept vehicle, but the big payoff for you GMC guys is gonna come in a couple of years when the Sierra full size pickup gets a styling makeover. That's right. Don't be surprised to see a whole bunch of the

Teradyne's features be adopted by the production Sierra.

You know, all this talk about concept vehicles reminds me of another concept and that's taking a break, stay with us. We'll be right back.

Just can't get enough of trucks, check us out online at trucks, tv.com.

Welcome back to trucks. Now, there's no doubt that a healthy aftermarket makes it possible to customize your truck and

heck, just about any way you can imagine. But we know that there's a lot of you guys that are into using your trucks for what they were intended for and that's hauling something behind it or hauling something in it.

So today we're gonna upgrade our F 250 with a serious towing package.

Now, when it comes to towing, there's only so much you can do with the standard hitch. And for you guys that are using a goose neck trailer for work or play, you know that 1/5 wheel is really the only way to go.

So we went to Reese and picked up this setup that's rated at 20,000 pounds and comes with all the hardware you'll need to install it.

Now, the secret of 1/5 wheel is that it centers all the way right over the rear axle as opposed to hanging it over the tail end of the frame like a standard hitch does.

So the first thing we need to do is take our measurements for our mounting brackets,

locate the cross member about 16 inches forward of the rear end,

then take a tape measure,

measure three quarters of an inch forward of that

and then take a metal punch

and hit that mark

up inside the bed. I can take this straight edge

and draw a line across the top of the marks that stays just punched out. Now, this is also the most accurate way

to transfer your measurements from bottom to top.

Now, with the base mounted to the mounting brackets, we need to set this thing in place and center it between the wheel wells. Now we'll line up the front bolt holes

with the line we drew across the bed earlier.

Are you sitting there? I've got about 13.5,

a little bit this wet

I should do it.

Now, once you have it centered and sitting exactly where you want it, go ahead and take a sharpie and mark your holes,

then you can drill them out

after that. Get the hitch back in place and drop in your carriage bolt.

Now, back underneath the bed, these brackets need to be mounted to the frame.

So we'll slide those onto the carriage bolts

and then clamp them in place so we can mark and drill the holes. Now, you have the option of welding these brackets on, but whichever one you do

make sure that you check for break and fuel lines before you weld or drill

with the mounting brackets bolted in place. We come to one of the best parts about this kit and that's the fact that it's removable, which means if you decide you want to use your bed to haul a load of topsoil or whatever you still can't.

Now, the base assembly goes right down on to the mounting brackets

and is held in place

with retaining pins.

Now, another neat thing about this fifth wheel is you can set the height to wherever you want it just by adjusting the side pieces. Now we're ready for the head assembly

now,

make sure that you grease up these pivot points really well, so you don't wear them out.

Now, if you've been thinking about using a gooseneck trailer, but the idea of a permanently mounted hitch in the bed of your truck has turned you off. Now, you can have the best of both worlds

when it comes to replacing old rusty bolts on your vehicle. Well, most people know that grade eight bolts are a heck of a lot stronger than standard grade fives. They're also a lot more expensive and they're not always needed.

Now, if your stock old bolt is a grade five,

then replacing it with a new grade five is all you need. Now, another big mistake that people make is that they spend the big bucks for the grade eight bolts, but then they get cheap and don't buy the nuts and the washers that go with them.

And remember if you use a grade eight bolt with grade five hardware, that's just like using all grade five hardware and the extra money you spent for this is wasted.

Ok. So you have your truck

and you have stuff to put in your truck, like camping gear, groceries or even the family dog. But what if it rains,

your stuff will get all wet

unless

you get an A re truck cab.

We've been rated a consumer digest best buy,

visit your A re dealer soon.

So you're not left out in the rain.

Check us out at www 0.4 A re.com

and now truck gear, parts, tools and equipment for pickups and sport utilities

for those of you that are running 24 barrels on a tunnel ram or a supercharger. Well, you're already showing a good bit of attitude, but if you really want to cap it off and you need to check out this shotgun injection scoop by Speedway Motors.

Now, of course, it comes with all the linkage air cleaners and hardware that you need.

But the real kicker to this is the fully polished housing

that looks like twin shotgun barrels and butterflies that open when you hit the throttle. So now you really can let them have it with both barrels for about 360 bucks.

You know, one of the hottest aftermarket items you can put on your truck is a hood and reflection. Automotive products has just come out with their brand new all steel cow

induction style hoods with applications for most late model Dodge, Ford and Chevy pickups.

It has a factory style undercarriage

that bolts right up to your stock hardware. So it only takes about 30 minutes to give your truck a complete facelift. This hood here from reflection goes for about 300

box that's gonna do it for truck gear. Here's a preview of next week's show.

Keep coming.

We'll bring a brand new F 250 into the shop and get our super duty ready for some heavy duty work with an under hood generator.

After that, we'll take a look at a 55 F 100 that extends itself as one of a kind.

Finally we'll slide into a project that helps you get the most out of your cargo space without pulling the cat ball.

That's all next week on trucks.

Well, that's gonna do it for this week's show. We appreciate you hanging out with us. Yeah, we got more trucks to roll at you next week. Hey, check this out.

That's cool,

man. Everything on this thing moves

trucks is an RTM production.
Show Full Transcript