Classic Trucks! Builds

Video Transcript

Today on trucks, the Harry hauler is back in the truck shop to get a custom built be

running boards, vendor and a whole lot more.

Then we'll take a close look at the 64 El Camino. That's one clean street machine.

After that, the guys have some more budget upgrades to show you that won't break the bank and can be done in your own driveway. That's all today on trucks.

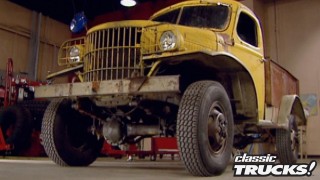
Welcome to this week's show everybody. If you were with us last week, then you saw the return of the Wicked Willies and don't worry in the weeks to come, we'll finish up our 55 wagon. But today we want to turn our attention back to the Harry Hall

and focus on the area that makes a truck, a truck and that's the bet.

Now, if this is the first time that you've seen our 34 international, we shame on you. You've missed a lot of good. How too?

Now, the first thing we did was put together a blown 383 Stroker motor that's kicking out about 650 horsepower.

We also brought the frame up to date with an independent front suspension, disc brakes and these really cool Gasser wheels and since gassers are real hot rods, you have to chop the top. So we took three inches out of the lid of the hairy Haller. Of course, we didn't neglect the rear end either. And since the hauler is gonna spend plenty of time on the street and the strip we put in a nine inch Ford with a four bar system. Oh, and the wheelie bars. That's for just in case.

Now, as you can see, the stock bed on our old truck was in pretty rough shape, but it did give us a good starting point on how we wanted the new bed to look. Now, we knew we wanted to shorten it a little bit so it centered over the wheels better

also made it a little bit taller because it look better with the chopped top. Now, also everything on the truck except the bed is all nice and rounded and smooth.

So we wanted to get rid of those square ends and all those angles

once we figured out exactly what we wanted and what the measurements would be. We gave pros pick out of Ontario Canada. A call these guys specialize in custom building beds for just about anything out there. Our bed has both sides, front and rear pieces, cross members, oak planks for the floor as well as stainless steel strips to set everything off.

The first thing we need to do is to lay out the bed and completely assemble it before we try to put it on.

Now, the sides bolt right up to the front and you can either use some fancy finishing screws

or come in here and weld up these holes and grind it down for a nice smooth look, which is what we'll do later on.

Now, you'll notice the sides have the rolled lip that we wanted

and everything's made out of 16 gauge steel that's plated. So it won't rust inside the steak pockets or anywhere else.

All right, sta

let's get some use out of those saw horses. Yeah, they've been kind of lonely lately

with the bed up on horses for easier access. It's time for the cross members. Now, we carefully measured these so they'd fit exactly where the originals went. Now, you will notice this one's a lot shorter than the other

to compensate for the arts in the frame.

Another cool thing about this kid is there's a lip on the bottom of the bed so you can't see the cross members from the outside.

Now it's time for the wood.

Now, you may have noticed that this end piece is cut a little bit different here on the outer edge. That's because it gets its own special piece of trim.

Now, pro's p custom cuts all these pieces according to your measurements and your calculations.

So, if you've done your homework, they all ought to slide right in a place like ours are doing.

Of course, between each of those boards, you have the stainless seal strips, that seat right into the shoulder of the wood and bolt down to the cross member using the stainless polished bolts that are supplied with the kit

man. That thing is a lot heavier than you thought it would be. Got some weight,

man.

Well, like we said, pros pick, specializes in custom built beds and you can see they're awesome. Now, the original bed had these wood pieces

that went in between the cab and the bed to fill up this gap.

We use these as a pattern to make some new ones

with the bed squared and centered on the frame.

All we have to do to bolt it down is mark and drill the holes in the cross members.

Now, since we are smoothing down our old classic, the tailgate is gonna follow the same theme. It's super smooth outside and in

and already has a location for the latches built right into it.

So we'll go ahead and assemble those

once that's all done,

we can bolt on the tailgate

and I'm gonna lined up over here

now with the latches and the latch retainers in place. We need to have some way to support the tailgate when it's down. And for that, we're gonna use these nylon straps that come with the kit.

Now, we've got the tailgate open and support it on some wood to make sure it's level.

Then all we have to do

is bolt the straps to the holes that are already in the tailgate for us

up here on the top, make sure the strap is tight

and then mark your holes,

drill,

tap in your threaded insert

and finally put on the strap.

The Harry Hall is gonna have fenders all the way around it, which creates some major challenges when it comes to the running boards. Now, in the past, you could either hammer out your original or you could go with fiberglass. But since we didn't really want to bother with either one of those options, we move it to smoothie fabrications where they can custom build a set for you out of steel

now to mock everything in place and see how it's gonna look. Well, first of all, you need to put on your front fenders. Here's one of those boards, man. All right.

Now, these boards come with these braces that sit right on top of the factory mounting bracket.

That way you can center everything up

and look at these lines. These are perfect. Now, unlike the running boards, we are gonna go with fiberglass on the rear fenders. We got these 3537 Ford fenders from Bebop Glass work because they were the closest thing we could find

for the fenders that came on our 34 international. Now, one of the main reasons that we're going with fiberglass is we are gonna have to do some modifications to them. First of all, we're gonna drop them down close to the tire,

then we're gonna rotate it forward. So the back of the fender sits just a little bit below the back of the bed.

That'll give us a look that we're after. Then we'll clamp it in place, step back and take a look at it.

Now, you'll notice that our tires sticking outside of our fender just a little bit. Well, that's because that was part of the look of the gassers back before wheel tubs and narrowed axles became available. Now, if we ever get tired of that, look, all we have to do is put on a narrower tire, it'll tuck up inside there. Now, once we get everything fit and how we want it,

we want to come down here and trim the bottom of this fender. So it blends in real well with that running board.

Now that the hauler is starting to look like a truck again,

we need to truck into a break. Don't go away. We'll be right back

straight ahead on. Trust. We'll continue to put all the pieces together on the Harry hauler.

Then we'll show you some more budget upgrades.

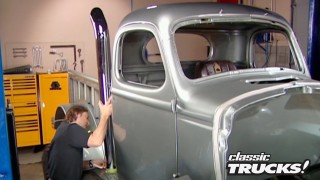
Welcome back to trucks. Now, we've already put a custom bed running boards and rear fenders on the Harry hauler, but we're just getting started. Now, we're gonna lay out the exhaust system. Of course, we can't run just any old system on the Harry hauler. That's where these tips and mufflers from power effects come in. Now, the mufflers have these adjustable knobs so you can open for flow and sound

and these really slick looking tips bolt right up to the mufflers.

Now, you're probably wondering why we're talking about the exhaust system when heck, we don't even have the motor in yet. Well, that's because we need to decide where these tips and mufflers are gonna hang.

So we make sure we got enough room for the pipes to run to them. Now, as you can see, we don't have a whole lot of room up over this axle. We're either gonna need to mount to the inside or the outside of this wheelie bar

and we think

mountain to the outside, not only looks the best, but it'll give us the most room.

Well, now that we put on a short bed and Stacey is in the process of hanging those big old exhaust tips on the Haller, you're probably also wondering where we're gonna put the gas tank since we're not gonna have any room under the bed. Now. Well, how about this legendary set up? We got from Moon Eyes, their 14 gallon street roaster tank will fit perfect into the dimensions of our bed.

Now that we know where our tips are gonna hang, we can mount them to the cross members. Now, another unique thing about this kid is you can get these flange mounts that are strong enough to hold these mufflers in place. After that, all you have to do is Mark, drill your holes, mount them up.

Now, keep in mind anytime you do an exhaust system, whether it's custom or not, it needs to be rubber mounted so it can move around. This is just for mock up.

You also need to make sure you have plenty of clearance around your shocks and your rear end also don't forget parts that aren't installed yet like the pattern bar and brake lines. Now, we got plenty of room.

Now with the truck back on the ground, we can mount our tank. It comes with these aluminum mounting brackets that are held in place with a rubber gasket.

Once we have the tank positioned exactly where we want it,

we can drill our mounting holes through the wood

while we're at it. We also need to drill a hole for the fuel line to run through.

Once all that's taken care of, we can slide our tank into place to make sure all the holes line up, but we're not gonna bolt it down until all the wood's been sealed.

Now, the tail end of the hauler is really starting to come together, but there is one thing that's still missing,

that's the tail lights. Now, we knew we wanted something classic to match the style of the truck. So we went to Hunter's custom automotive and got a set of these elliptical tail lights that's made by billet specialties. Now, we're gonna start by measuring out exactly where we want these things to go.

Now, keep in mind any time you're doing any kind of custom work like this, your measurements have got to be precise because

crooked just ain't gonna get it here.

Now, we can drill the holes for the stud,

then we'll draw an outline around the taillight lens,

then cut it out. We found for a nice clean cut. A jigsaw works the best.

Finally, all we have left to do is get our bracket in place

and then slide the lens through.

Notice how clean and smooth these fit up against the body. These are cool.

Those lights were the perfect choice, man. Those tips, those are awesome looking. These are great. How you doing on the front? Matter of fact, I'm almost done. I just need your help with the hood.

Of course, this here is the tricky part.

Let's not mess it up and we would never find another one that's for sure.

All right, perfect.

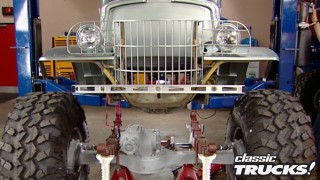
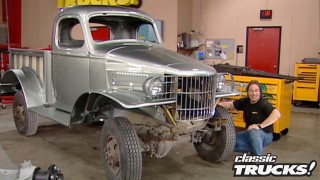
Now, the reason we mocked everything up for you is to show you how everything's gonna work together from the hood and the grill to that three inch chop we did to the lid of the hauler all the way through to the custom built bed. Now, I know it seems like everything is coming together real easy on.

Yes. But don't kid yourself. To do a project like this, right.

There's a lot of design and fitting that you gotta take the time to do if you want the parts to work together like this. Yeah. Now that we know everything is gonna work just right. We need to take a break. Don't go away. We got more trucks to roll at you right after this.

Up. Next on trucks, we've got that 64 El Camino to show you that's bringing a whole new meaning to clean and mean.

Welcome back everybody.

What we have to show you today is a 1964 El Camino, but not just any El Camino. Mind you. What we have here is a prime example of how things can get way out of hand when you start building a truck. Now, when Jerry fag from Green Brier, Tennessee started building this vehicle. Well, he just wanted a street driver with a small block and air conditioning and things like that.

He'd even gone as far as to completely do the chassis

and some of his car buddies started putting wild ideas in his head. So we started over and went pro street.

First thing we wanna do is get this bow tie up in the air so we can take a look at what makes a pro street vehicle. First of all, you have to have huge tires, tub fenders and a narrowed rear end is a must.

Now to do this, they cut off the back of the frame grafted on a new rear sub frame and held it all in place with a ladder bar suspension.

Now, the power that gets those big old meats rolling is a 454 punched out to a 468

gets its fuel through 24 barrel carburetors

and has all the go fast goodies like roller cam and rockers high flowing heads and a set of headers.

Now, the pro street class is primarily for street, not the strip, but

don't think for a second that this thing wouldn't hold its own on the quarter mile if we could ever pry it out of Jerry's fingers,

shave, door handles aren't something you see every day on a 64 El Camino and the interior.

Well, let's just say that's pushing the envelope as well. It's got a tilt steering column and Philip wheel, but that's pretty sedate compared to the bright yellow and purple upholstery that covers the dash, a pair of bucket seats as well as the door panels.

Now, the metal work on this key is so good. It's easy to miss some of the tricks that were done like back here on the tailgate

it and the roll pan were welded in and completely smooth.

The wheel tubs and the bed floor were all handmade a piece at a time with every line and seam flowing perfectly together.

The craftsmanship didn't stop in the business end either. All the body seems on this Chevy have been filled drip rails removed. And of course, all the chrome has been shaved,

the cow

induction hood is all steel and once again, handmade heck about the only thing left on this truck that's still original is the grill and bumper that's been shot with the same Viper red that covers the entire vehicle.

Of course, a street truck with this kind of attention to detail has got to have the right stance and this one definitely does

from the drop, front end to the fat tires in the rear. This thing definitely has all the right stuff

and although Jerry didn't build it for racing, if you pull up along beside him at a stoplight, you better mind your manners or you just might get spanked by this big old bow tie.

Just can't get enough of trucks, check us out online at trucks, tv.com.

Thanks for staying with us. Now, a few weeks ago, we did a segment on the best upgrades that you can do in your driveway that don't cost an arm and a leg and are also street legal. We had such a great response from that. We decided to show you some more. Now for you guys that missed that segment a couple of weeks ago, we've already covered mufflers and tail pipes, headers, air induction, as well as computers. And today we have a whole bunch more to show you that's also gonna include some ballpark numbers that you can expect to gain.

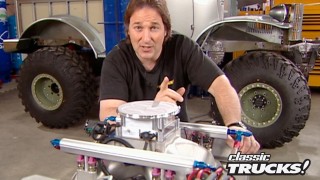
Now, an intake manifold is where you can pick up some nice gains. Now, these direct the air fuel mixture from the carburetor

down

into the heads. Now, the best thing to remember about an intake upgrade is you've got to get one that matches the cam and lifters and the motor. Also for most street and off road applications, you're gonna want a dual plane intake. That's because these give you the best low end torque and they'll also wind to about 5000 R PM.

Now keep in mind a big monster like this looks really cool, but they don't develop their horsepower till around 3000 R PM, which is not good at a stoplight or climbing up a mountain,

but it is good at a drag strip or a mud bog and generally speaking,

upgrading your intake, pick you up around 10 to 15 horsepower.

Now, this one might come as a surprise to you, but replacing your mechanical fan with an electric one reduces some of the drag on your motor. Now, the belt still turns the water pump of course. But because it doesn't have to turn the fan, your engine has more power to send to the wheels.

There are a couple of things to keep in mind though, when looking for an electric fan. Number one, make sure they pull enough air so you don't overheat. And if you plan on doing any deep water crossings off road. It's always a good idea to add a manual switch so you can turn it off. By the way, an electric fan is good for an extra 5 to 10 horsepower.

Now, I know a lot of you guys out there running carburetors and here's a couple of tips that might help

and going to a larger performance carb will definitely give you more air and fuel. But remember, a carb is only part of the induction system. It works best if it's combined with a performance intake and C A, you do not want to over carbo the engine.

Now, for you injected guys putting on a larger throttle body is the equivalent of putting on a bigger carb on the other system that allows you to suck in more air. Now, since the fuel delivery on an EF I is controlled by the computer,

the way to get the maximum benefit out of a throttle body upgrade is to upgrade the computer

and probably the fuel injectors. Now, if you just put on a throttle body or a carburetor expect 10 to 15 horsepower. Finally, all the upgrades we've shown you today are pretty straightforward, but keep in mind every application is different and all the horsepower numbers we've given you are based on our own Dino testing. So you can only use them as ballpark figures

and now truck gear, parts, tools and equipment for pickups and sport utilities.

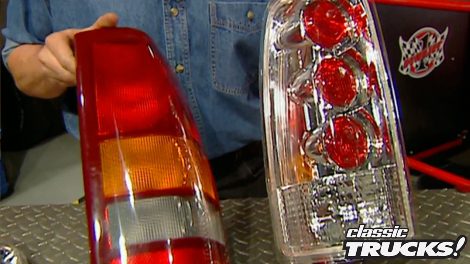
Now, one of the coolest and most inexpensive ways to improve the look of your sport truck is to upgrade your tail lights. Now, a PC just came out with this brand new style that really pops especially when you compare them to the Stockers. Now, behind the clear lens, you have a fully chromed housing with three retro looking lights that will really set off the tail end of your full size GM truck. Another really cool thing about these tail lights is they're dot approved. We got ours from Car parts.com for about 210 bucks a pair.

Now, for those of you that have ever done any modifications to a Jeep, you probably know that when you take off your stock spare tire carrier,

well, you open up some pretty nasty holes in the back. This is where steel horse can smooth things out and give you some protection in an area that's prone to damage.

Now, these pieces are made out of diamond plate aluminum and they're formed to fit the back tub of the Jeep perfectly installation is as easy as putting in some pop rivets

and they're only about 60 bucks a pair.

You know, it's easy when building a vehicle to focus on the axles and springs and forget all about the part that holds everything to the frame.

That's the shackles

Kfor's been building shackles for years because they understand how important they really are. These things are made of thick gauge steel with a crossbar to keep them from bending and you can also get them with urethane bushings and greaser bolts. Ker

makes these things for just about any make or model out there and for everything you see here you're talking about 100 and 20 bucks that's gonna do it for truck gear. Here's a preview of next week's show,

but guys have already given project wicked willies the attitude it had to have on the exterior. Now they're ready to dive into the interior of their classic wagon. So everything will work together inside and out. After they take the fear factor out of custom interior work, they'll show you a concept vehicle that Chevy just might put into production.

That's all next week on trucks.

Well, that's gonna do it for this week's show. We appreciate you hanging out with us. Yeah, we got more trucks for you next week. Well, guess what we get to do now,

you're gonna tell me bad news. You gotta take it all apart,

strip it down, refinish the wood

trucks is an RT M production.
Show Full Transcript